Search
Search

Cherry Jam Greeting Card Set Tutorial

 
Hello G45ers!

Are you looking for creative inspiration for your next card-making project? Look no further than this blog, where we’ll delve into the world of card-making with the help of Larissa Fyodorovna‘s expert guidance. Using the gorgeous Life’s a Bowl of Cherries paper collection, Larissa will guide you through the creation of a stunning Jam Jar Greeting Card Set that will leave your recipients in awe. But that’s not all; she’ll also share four invaluable tips that will help you elevate your card-making skills, and introduce you to a unique card-shape video tutorial that will make your cards truly stand out. Whether you’re a seasoned card-maker or just starting, this blog is the perfect resource to help you create heartfelt and personalized cards that are sure to make your loved ones feel special. So grab your crafting supplies and let’s get started!


Cherry Jam Jar Greeting Cards

By Larissa Fyodorovna


“Hello everyone!

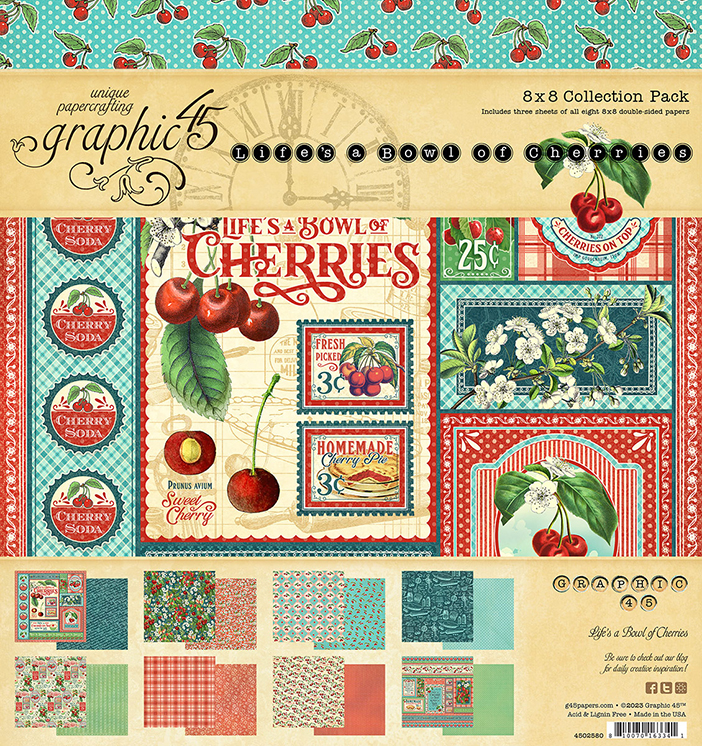
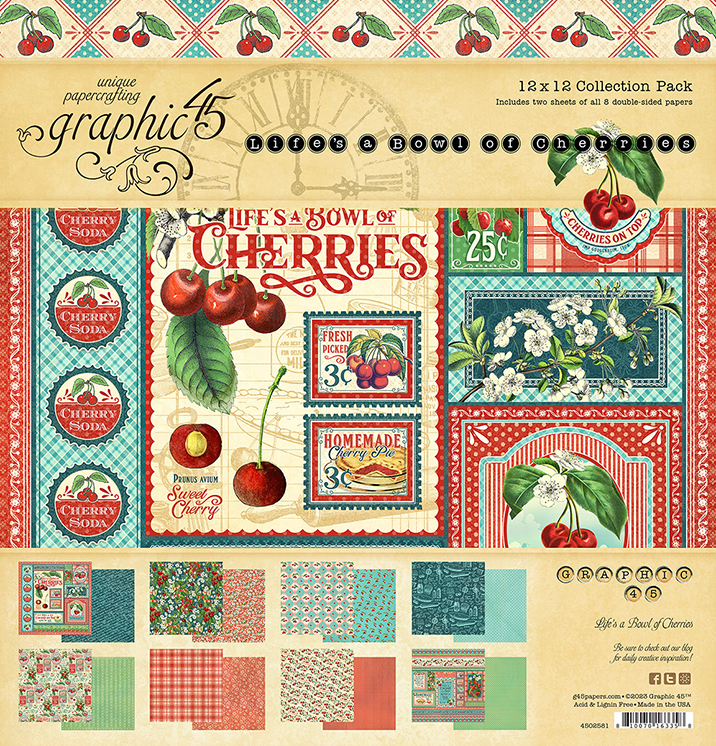
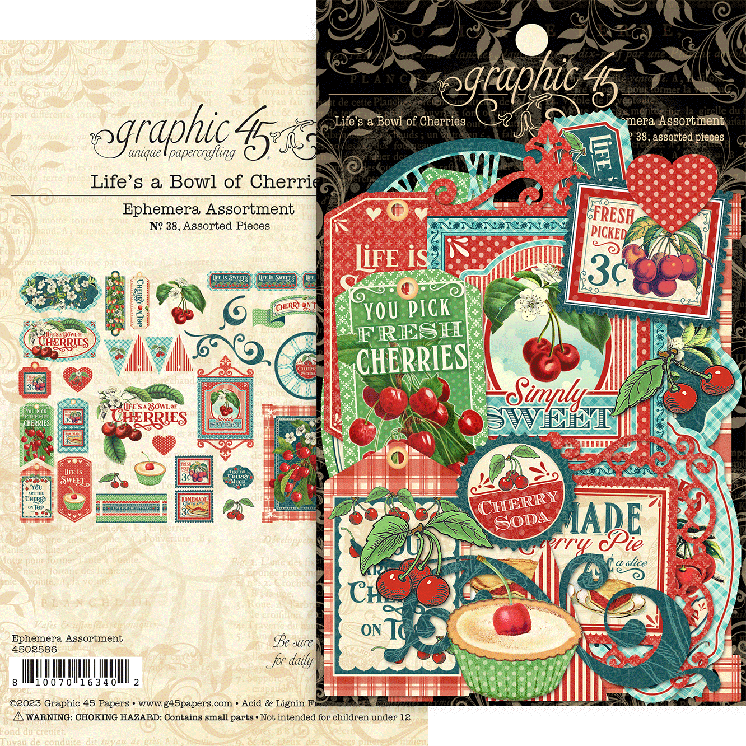
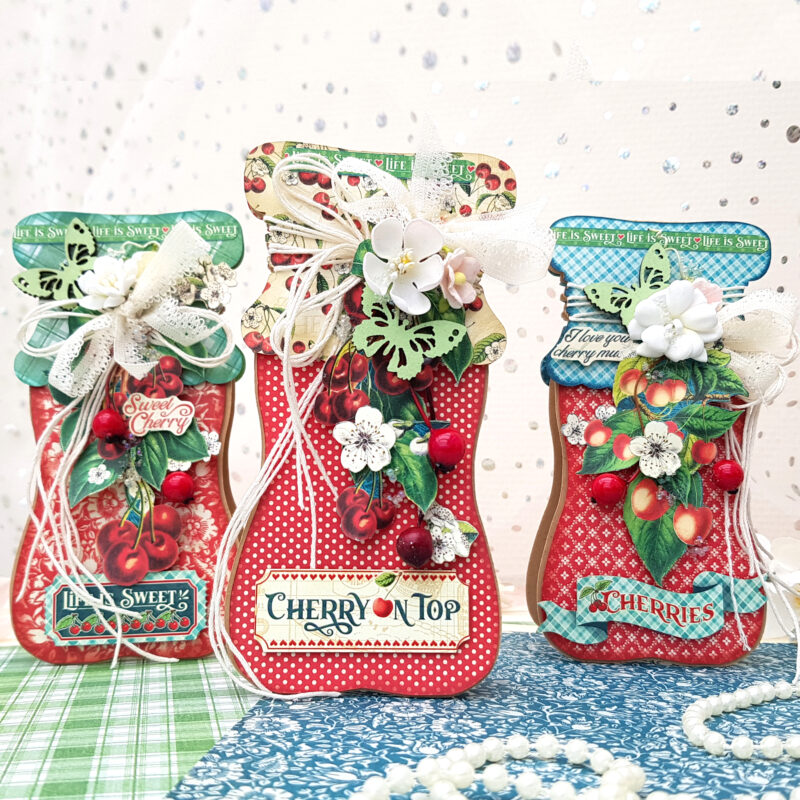
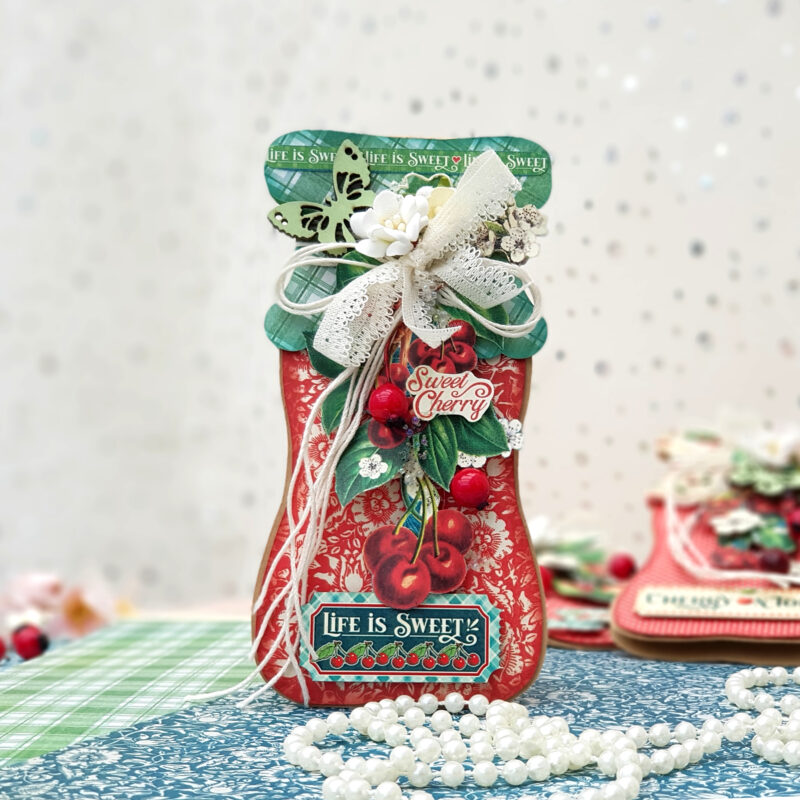
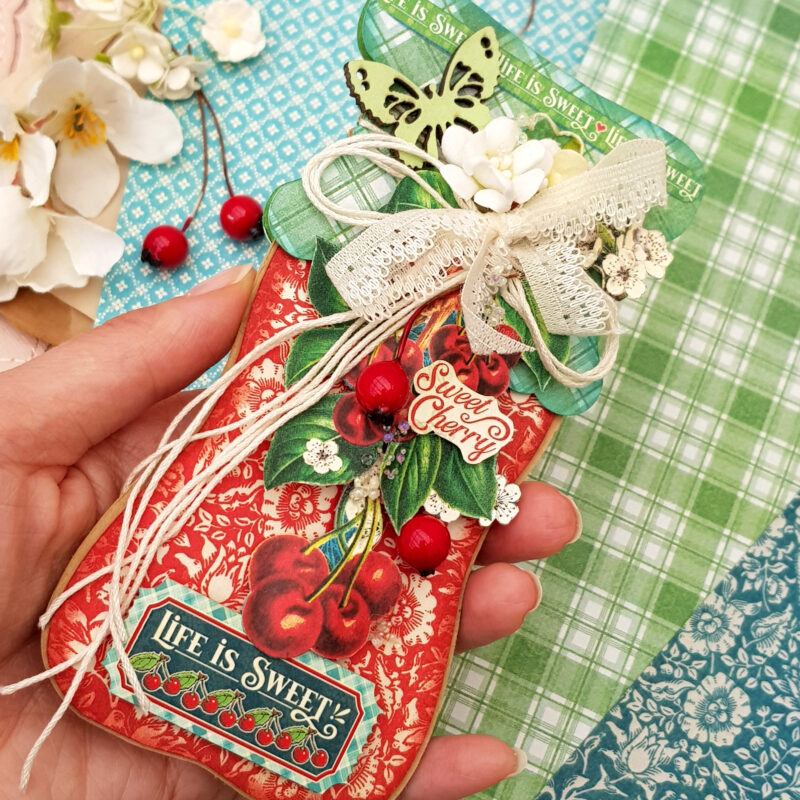
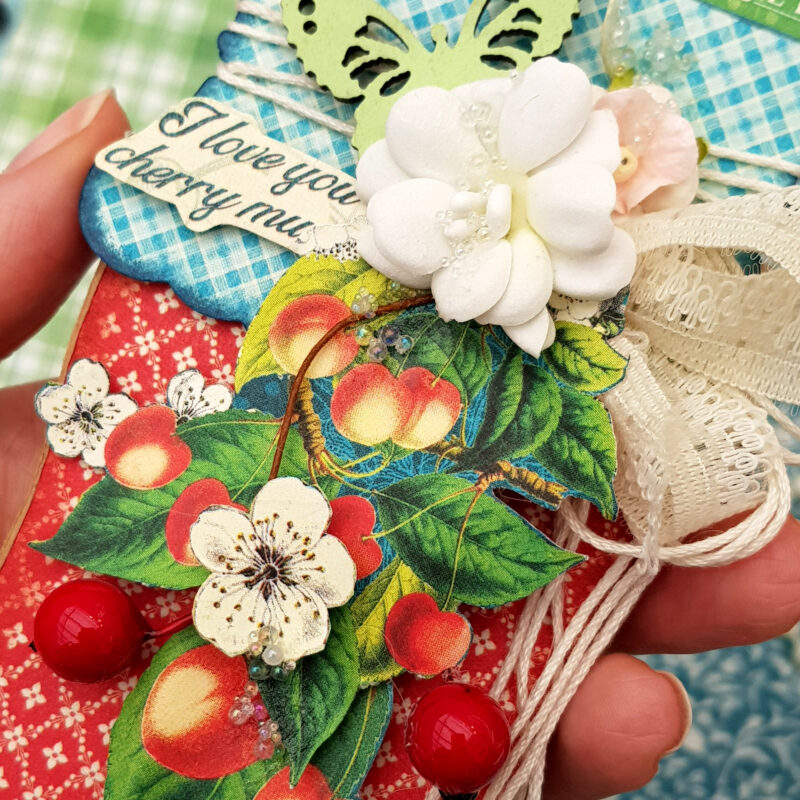
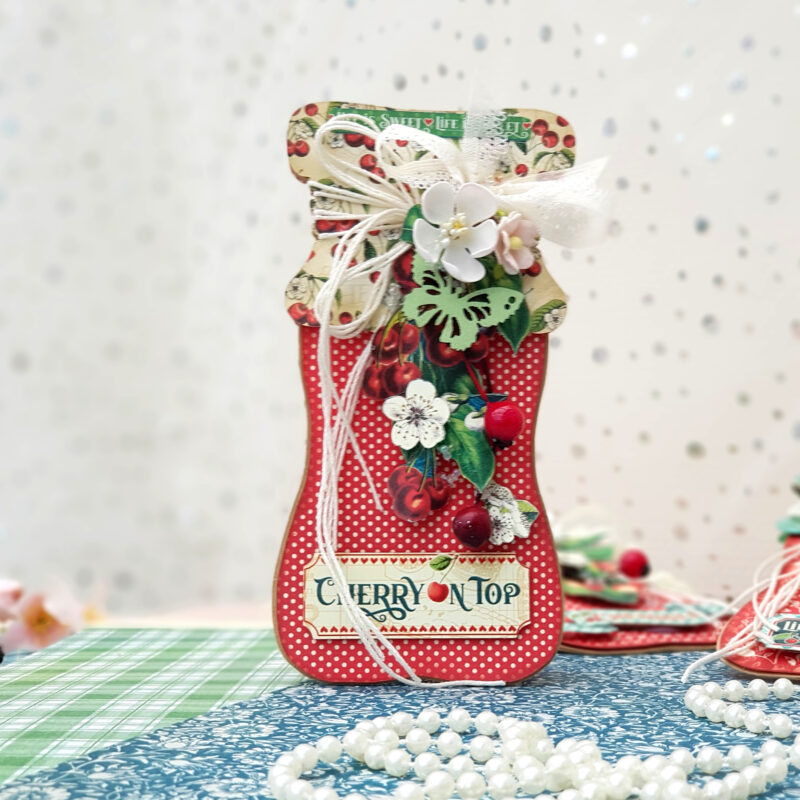
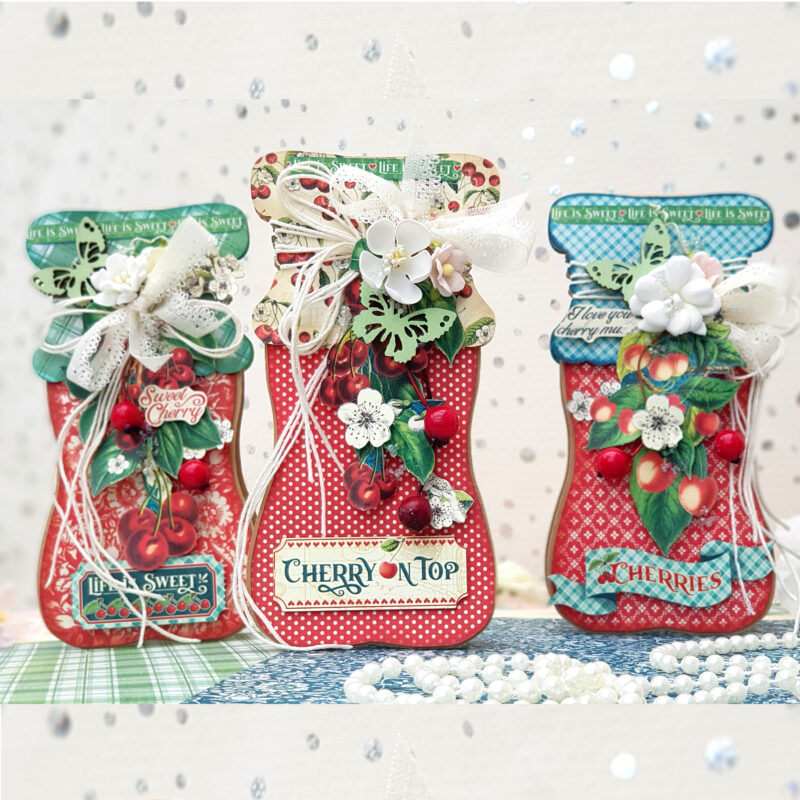
Today I present to you greeting cards in an unusual form – cherry jam jars. The beautiful and delicious collection called Life’s a Bowl of Cherries has served as inspiration for me. I created the jam jar as a base myself, and only half of it is needed. It’s very easy to flip the half to the side and join it to create a jar. Flipping it upwards again creates a base for the greeting card.

Please watch the video to see how I did it. Maybe you’ll be inspired to create your own greeting cards too.

I hope you like it.


-Video Tutorial-

Jam Jar Card Tutorial – Life’s a Bowl of Cherries – by Larissa Fyodorovna


-Tips- 

  • For the bottom half of the jam jar, I recommend selecting design papers with a red pattern. For the top piece, which is the lid, I suggest choosing designs with a different color and pattern to create a beautiful contrast.
  • For creating the central composition and focal point, I recommend fussy cutting some elements from the collection to use as embellishments
  • To give the composition a special touch, you can incorporate various elements made from different materials, such as fabric, thread, beads, chipboard, and more.
  • To give the paper elements a more organic and natural feel, you can use a bone folder or wooden stylus to create a wavy shape. To enhance the three-dimensional effect, you can layer pieces of cardboard between the layers


– Supply list –  

  • Life’s a Bowl of Cherries 12×12 Collection Pack 
  • Life’s a Bowl of Cherries 8×8 Collection Pack 
  • Life’s a Bowl of Cherries 12×12 Patterns & Solids Pack 
  • Life’s a Bowl of Cherries Ephemera Assortment
  • Inkpads: Marine Blue, Brick Red, Natural Linen
  • Stamping ink in matching colour
  • Glue and glue medium
  • Kraft paper approx. 220 g/m² 
  • Microbeads
  • 3D Gloss Gel
  • A piece of thread
  • A piece of lace ribbon
  • Artificial red berries (cherries or similar)
  • Small artificial flowers.”


Looking for more Life’s a Bowl of Cherries projects?


Happy Papercrafting!  


Want even more Graphic 45? Sign up for our newsletter here! 


Related Products

Leave a Reply