Hello, G45ers!
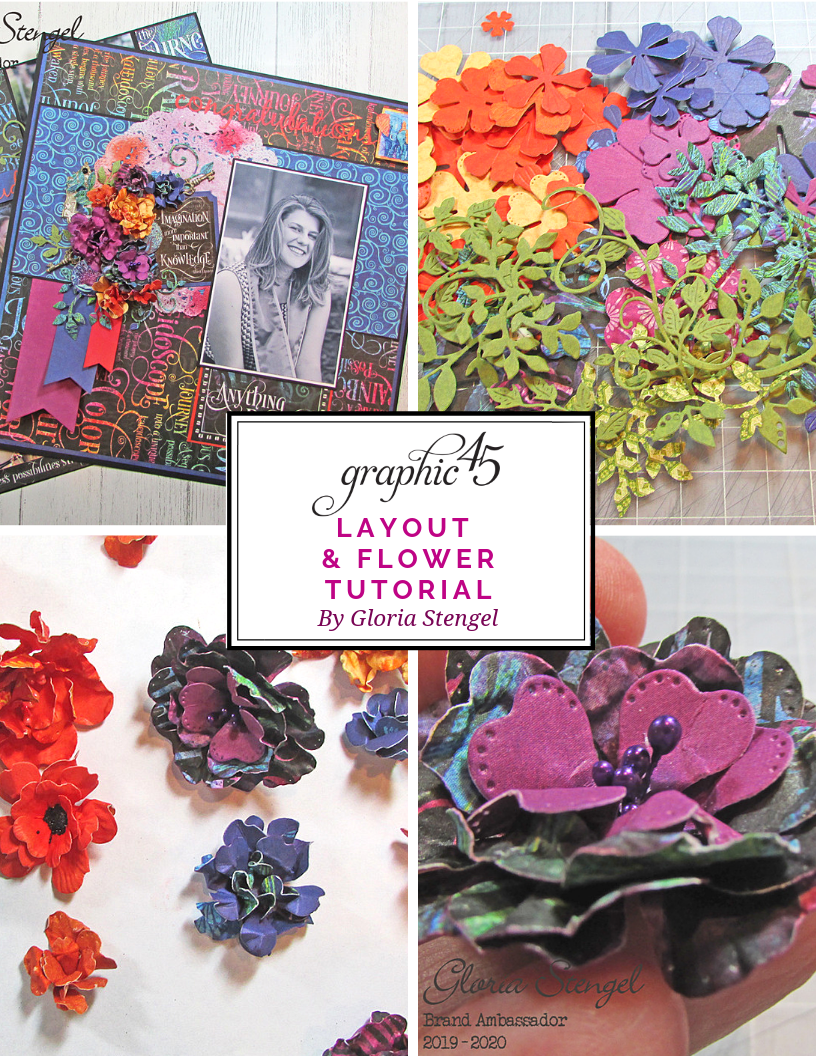
Your requests for more scrapbook layout inspiration has been heard and Brand Ambassador, Gloria Stengel is here to deliver a with a double-page Graduation Layout tutorial. Gloria has selected our bright and bold paper collection, Kaleidoscope (back in stock!) to create this celebratory event and it turned out beautifully! To go along with this scrapbook page, Gloria also shares a step by step paper flower tutorial starring our Flower Metal Dies. So print out your pictures and let's put those memories down on the page for generations to enjoy for years to come!
#G45Technique
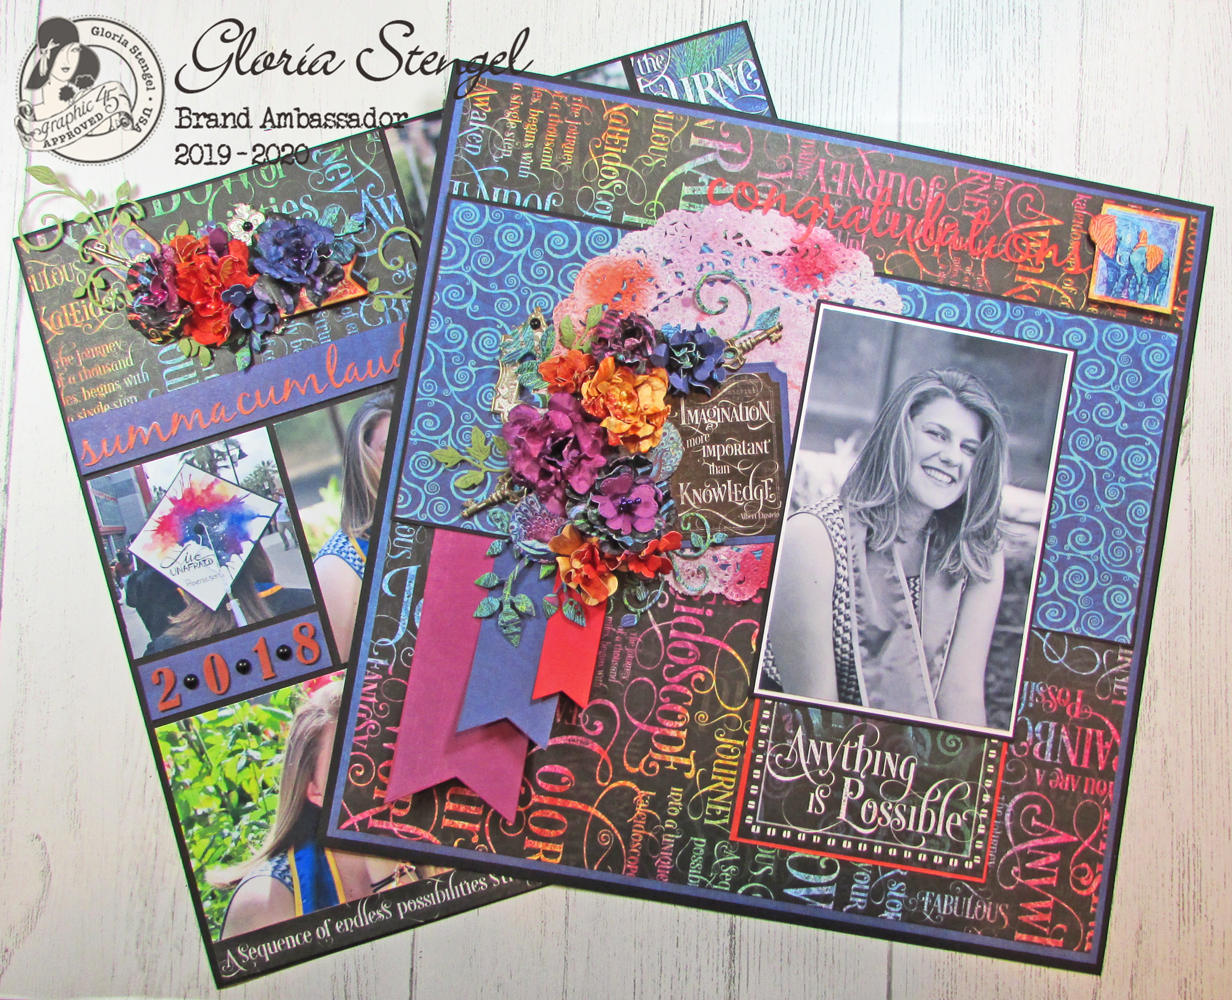
Double-Page Layout Tutorial with Kaleidoscope
"Hello, Graphic 45 Fans! I have ambled off the beaten path to bring you not only a layout tutorial, and not only a double-page layout tutorial, but a multi-photo layout tutorial! One of the most frequent things that Graphic 45 Fans ask for is LAYOUT IDEAS! So, here goes…
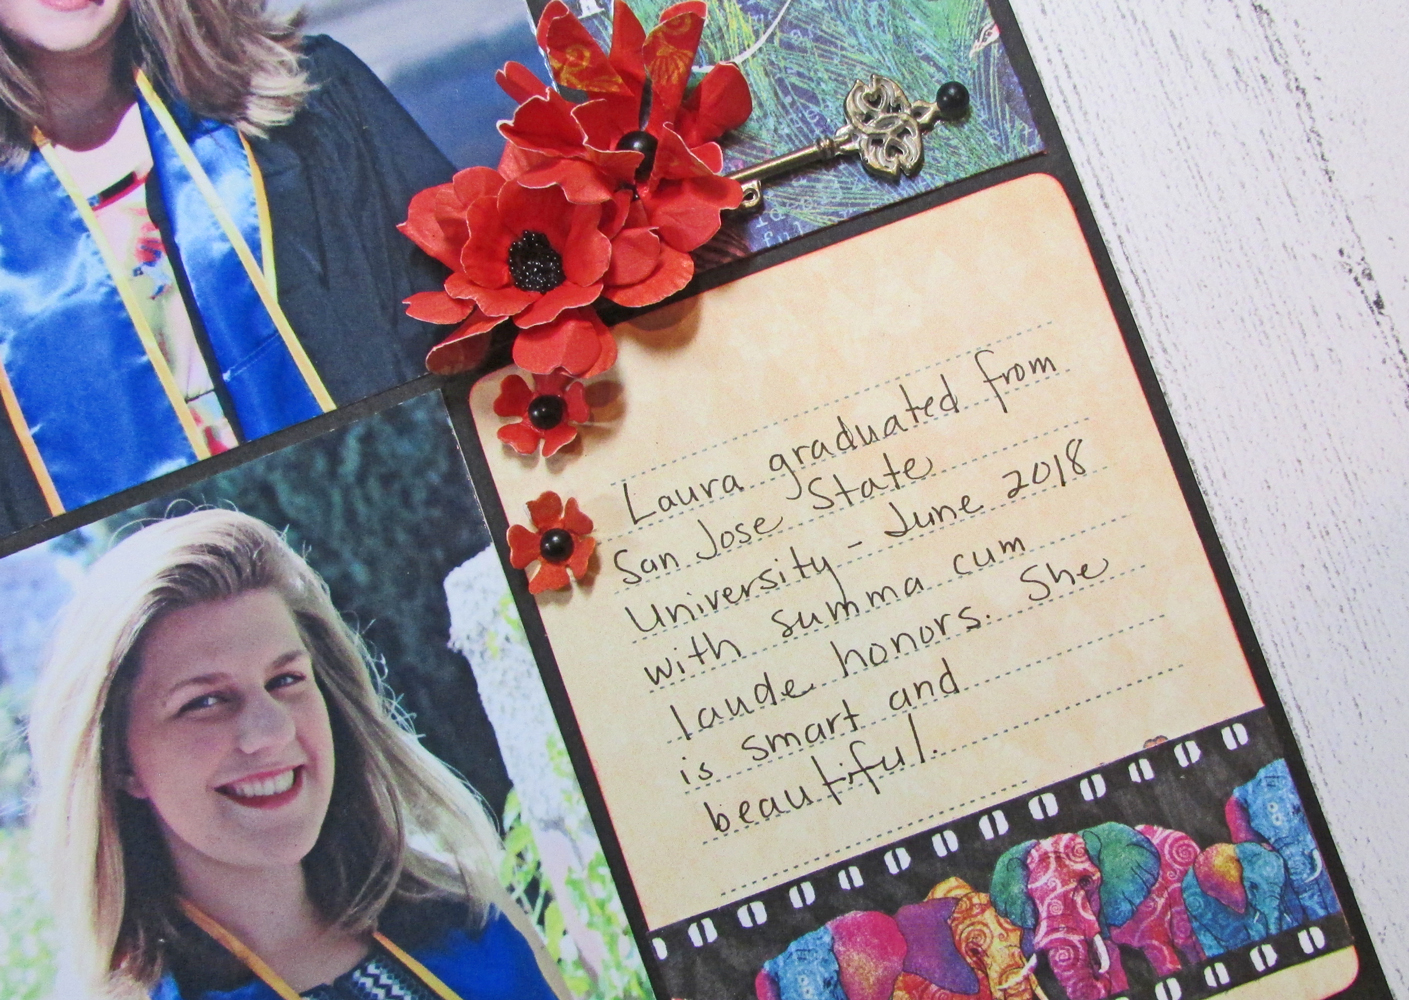
I admit that I do not scrapbook many 12×12 Layouts any more, and if I do it is for a gift, or for wall decor, or something of that nature. But, when my daughter graduated from university last June (2018), her friend took so many wonderful photos of Laura that I wanted to scrap some of them.
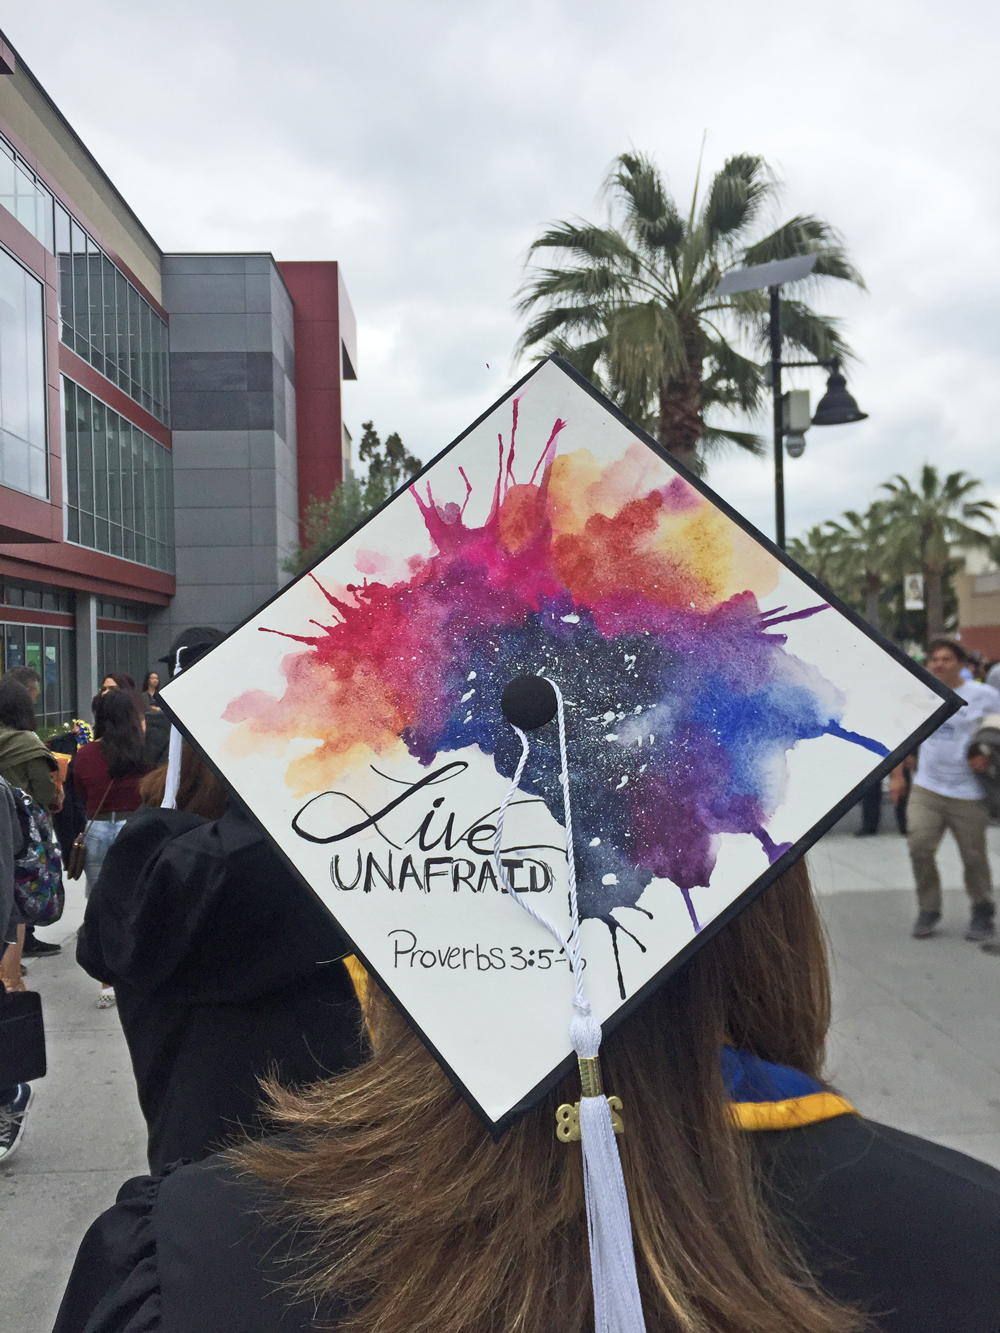
My inspiration for the layouts was my daughter’s graduation cap! It seems all the rage these days to decorate one’s cap!.
My daughter is an artist, and she did a wonderful job adding a watercolor canvas to her cap. I love the colors, and since they match the Kaleidoscope Collection perfectly, I went with two layouts that are a riot of color.
Below find a tutorial for creating a double-page spread, plus a tutorial for creating the hand-made flowers.
Step by Step Tutorial:
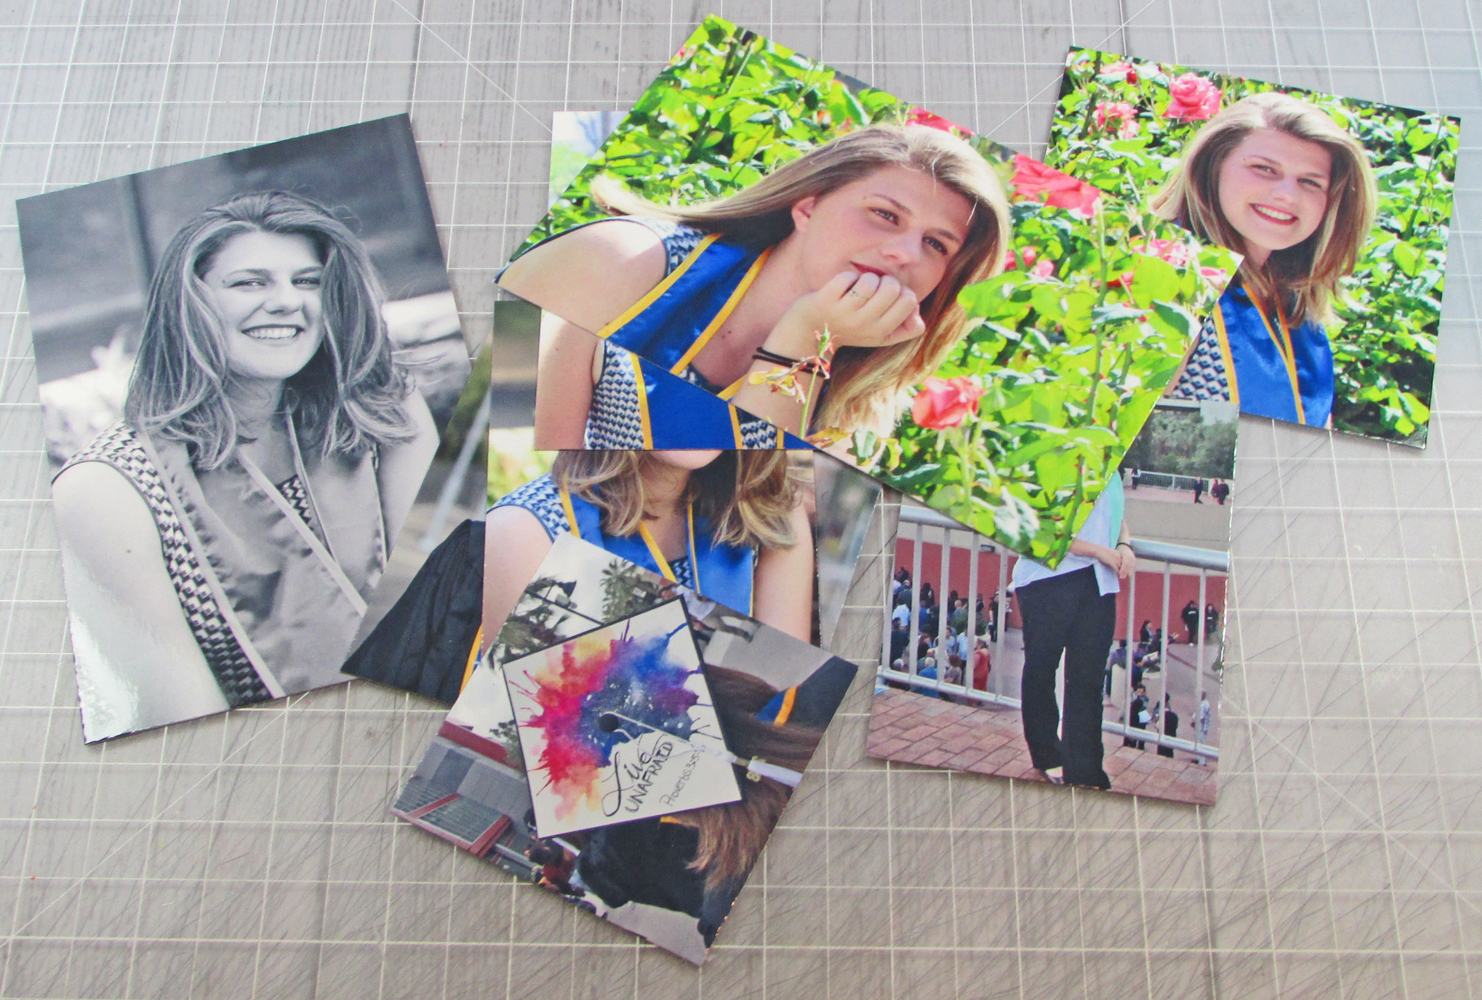
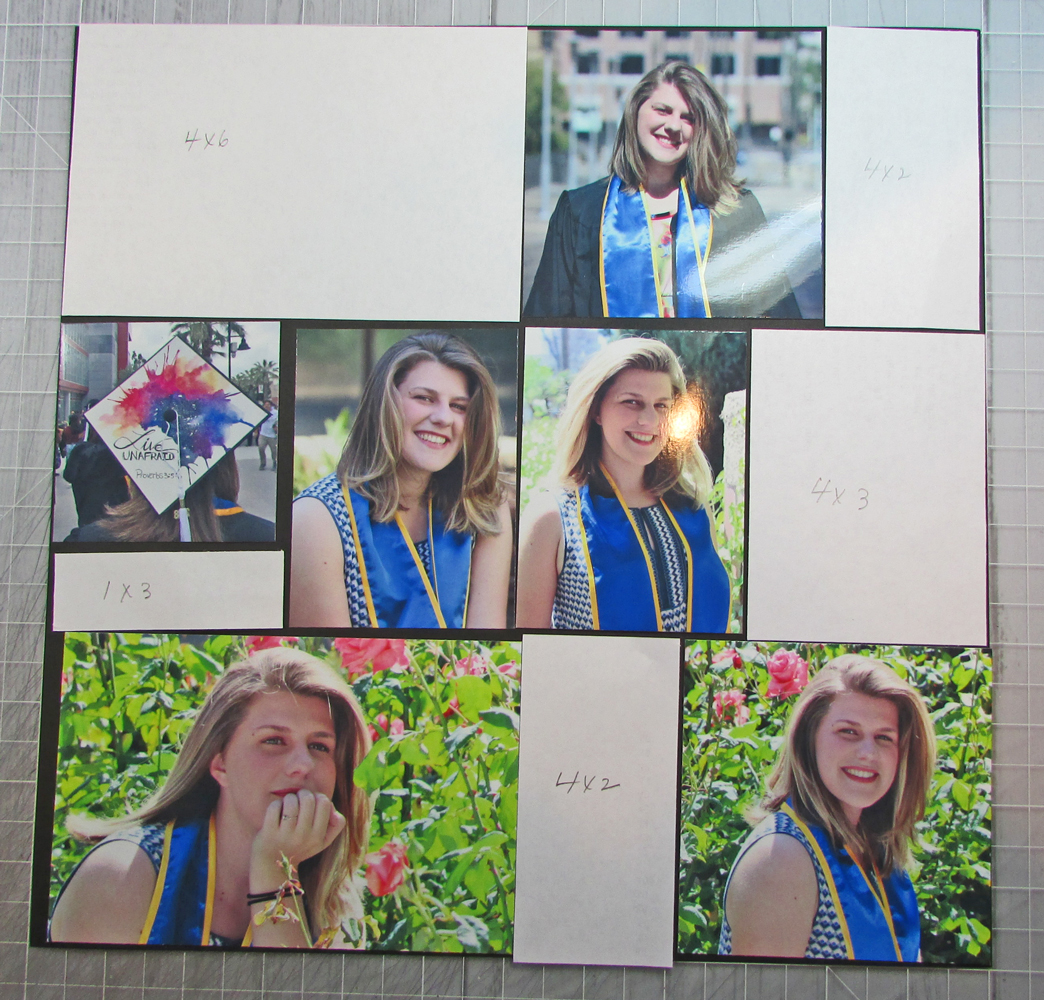
The first thing I do when I am planning a layout is to sort through my photos and choose a theme or set of photos from a specific event. Often, I will only choose one, really good photo, but there are times when I want to scrapbook a special event and wish to use multiple photos.
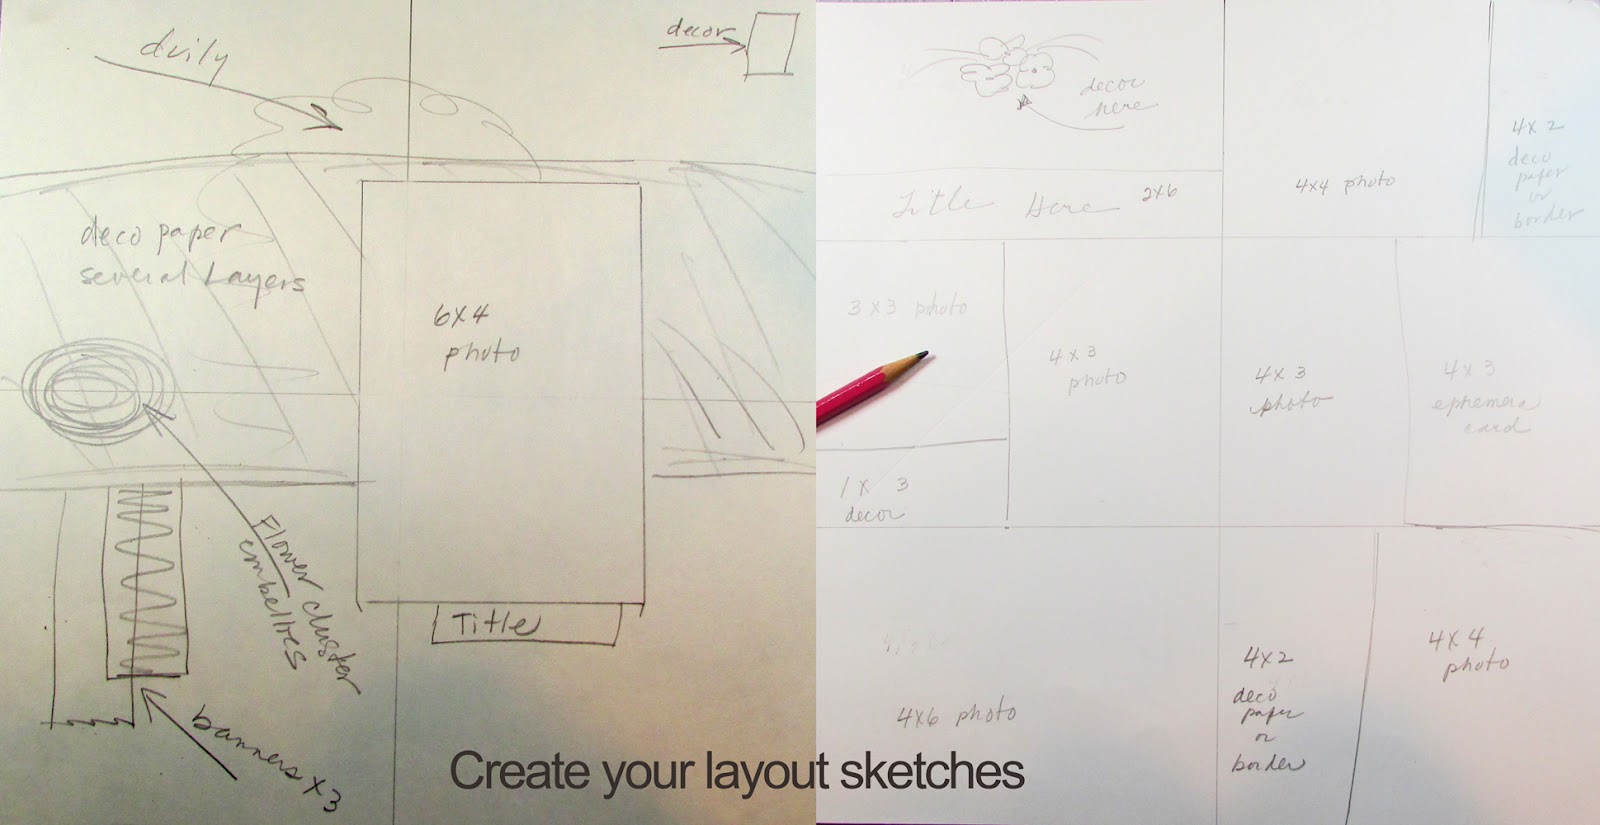
Once I have a nice selection of photos, I use some scrap 12” x 12” paper to sketch out my layouts. (This is pretty rough since I am not an artist.) I label sizes of photos that may work, placement of embellishments, and so forth. I give myself lots of notes to follow.
Once I have my plan in place, I decide on what size and how many photos I need. I print my photos at home, so I print the photos on the appropriate paper and then crop them as needed. For my layouts today, I wanted one 6” x 4” photo in black and white, and then a selection of color photos in various sizes as determined by my sketch (two 4” x 4”, two 4” x 3”, one 3” x 3”, and one 4” x 6”). I usually print more photos than I need, just in case!
Once I have all my photos cropped and ready, I choose my papers and embellishments. Sometimes I may cut titles with die cut templates or with my electronic cutting machine. Other times I use premade chipboard elements. If anything needs to be inked or painted, I do that ahead of time to give it time to dry before assembling my layouts.
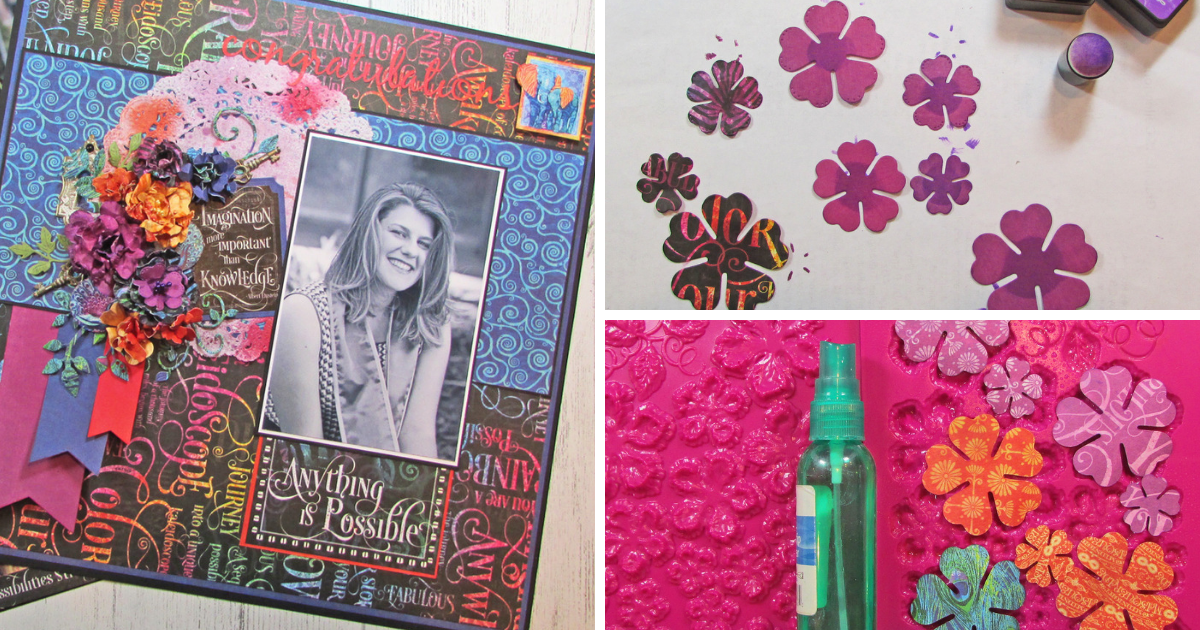
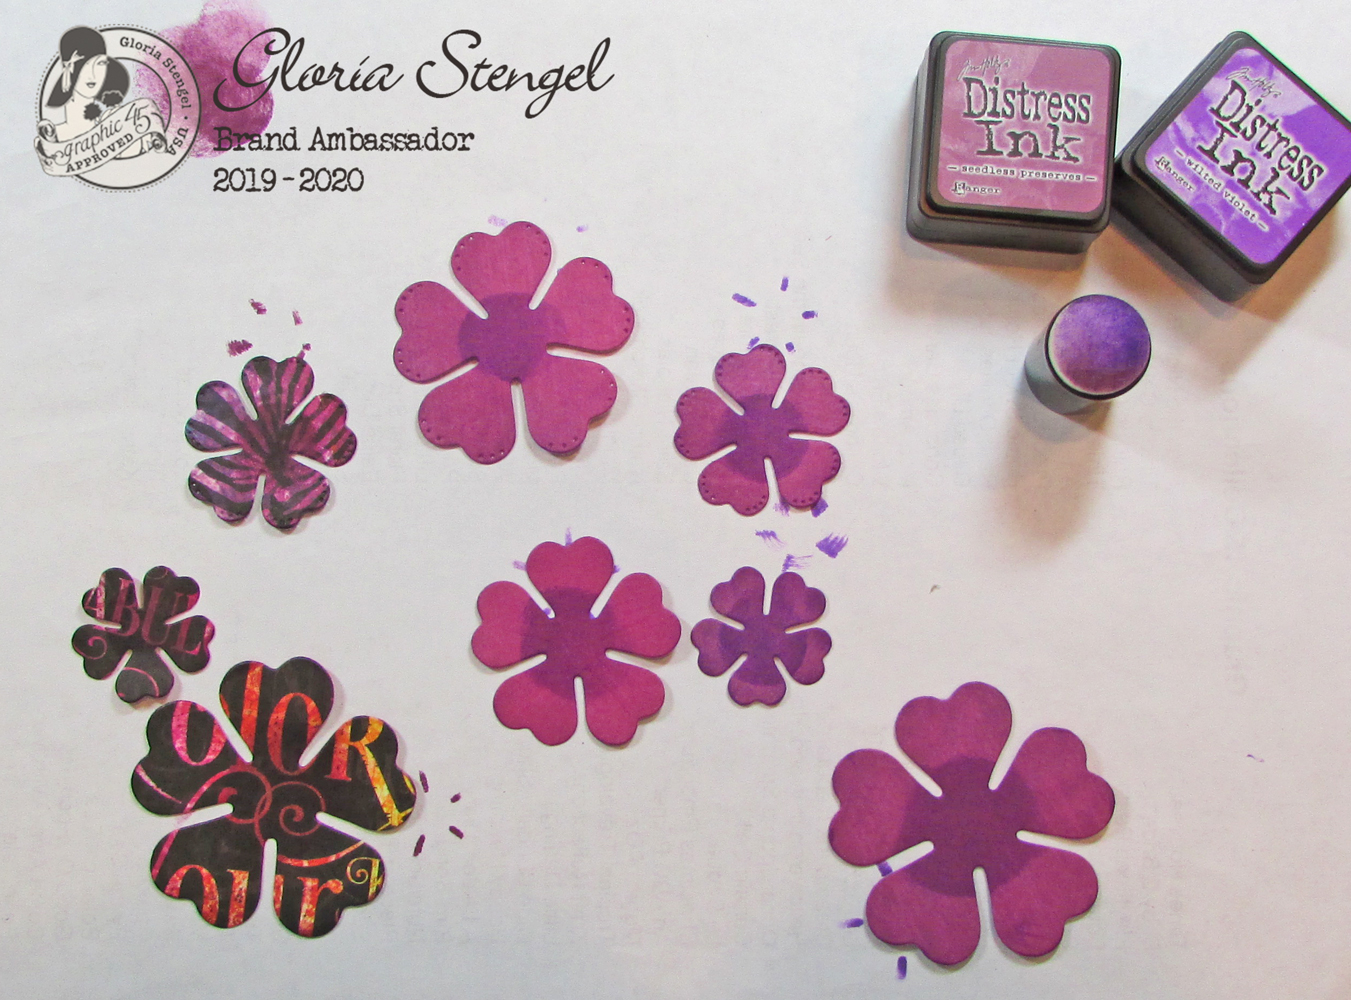
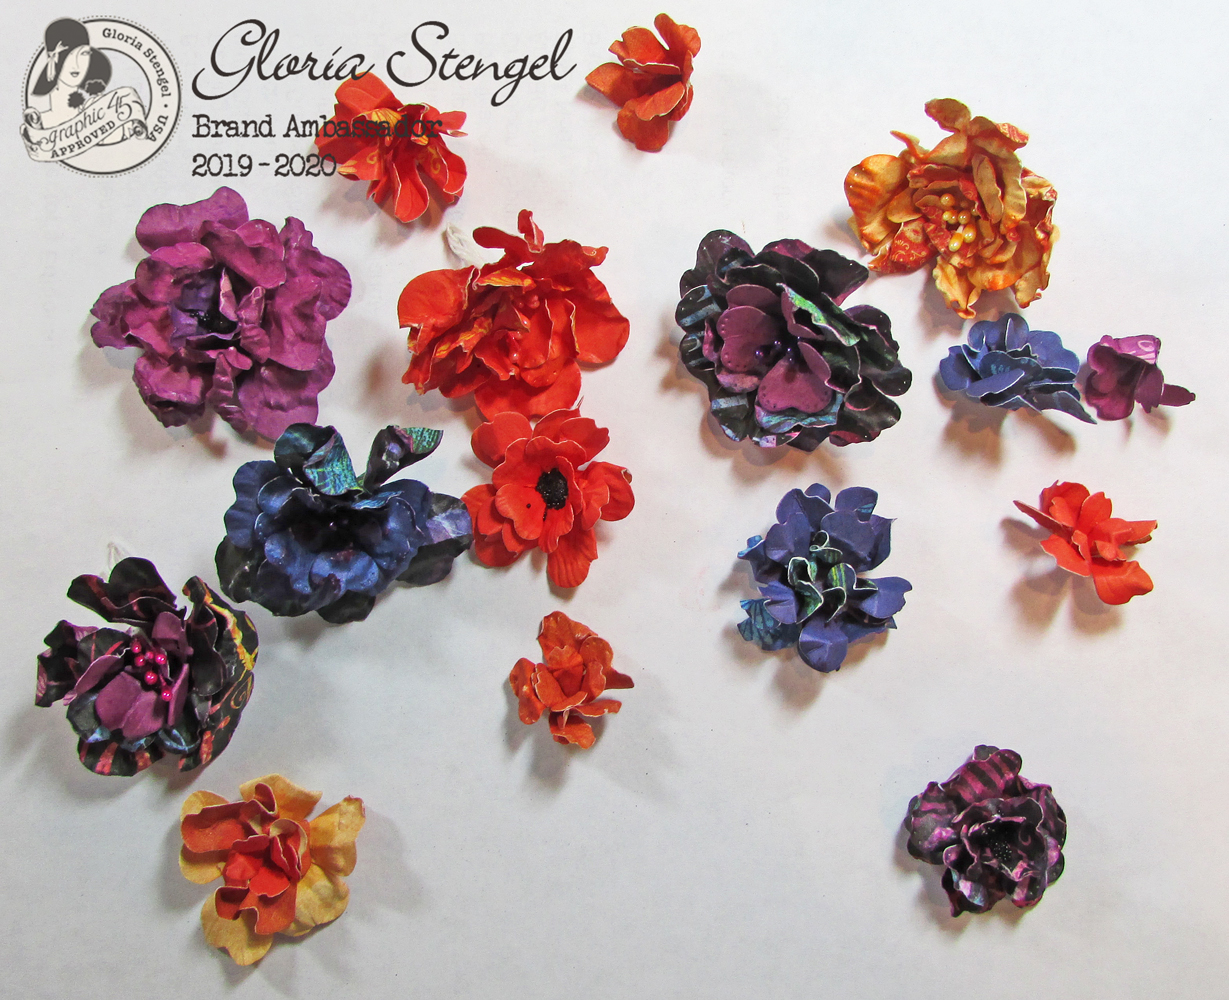
For this project, I decided to make my flowers. Using the Kaleidoscope Collection and the Kaleidoscope Patterns and Solids papers, I die cut various flowers and leaves. I also used a bit of Nature Sketchbook Patterns and Solids green paper to die cut leaves.
I used various Distress Inks to add some color and shading to my flowers.
There are several ways I shape my paper flowers. I sometimes use a flower mold. Place the flowers face down into one half of the plastic mold, spray lightly with water. Top with the other half of the mold and run the mold through a die cutting machine. (Most standard die cutting machines can handle the molds.) Take the flowers out of the mold, shape by hand if necessary, and then set them aside to dry.
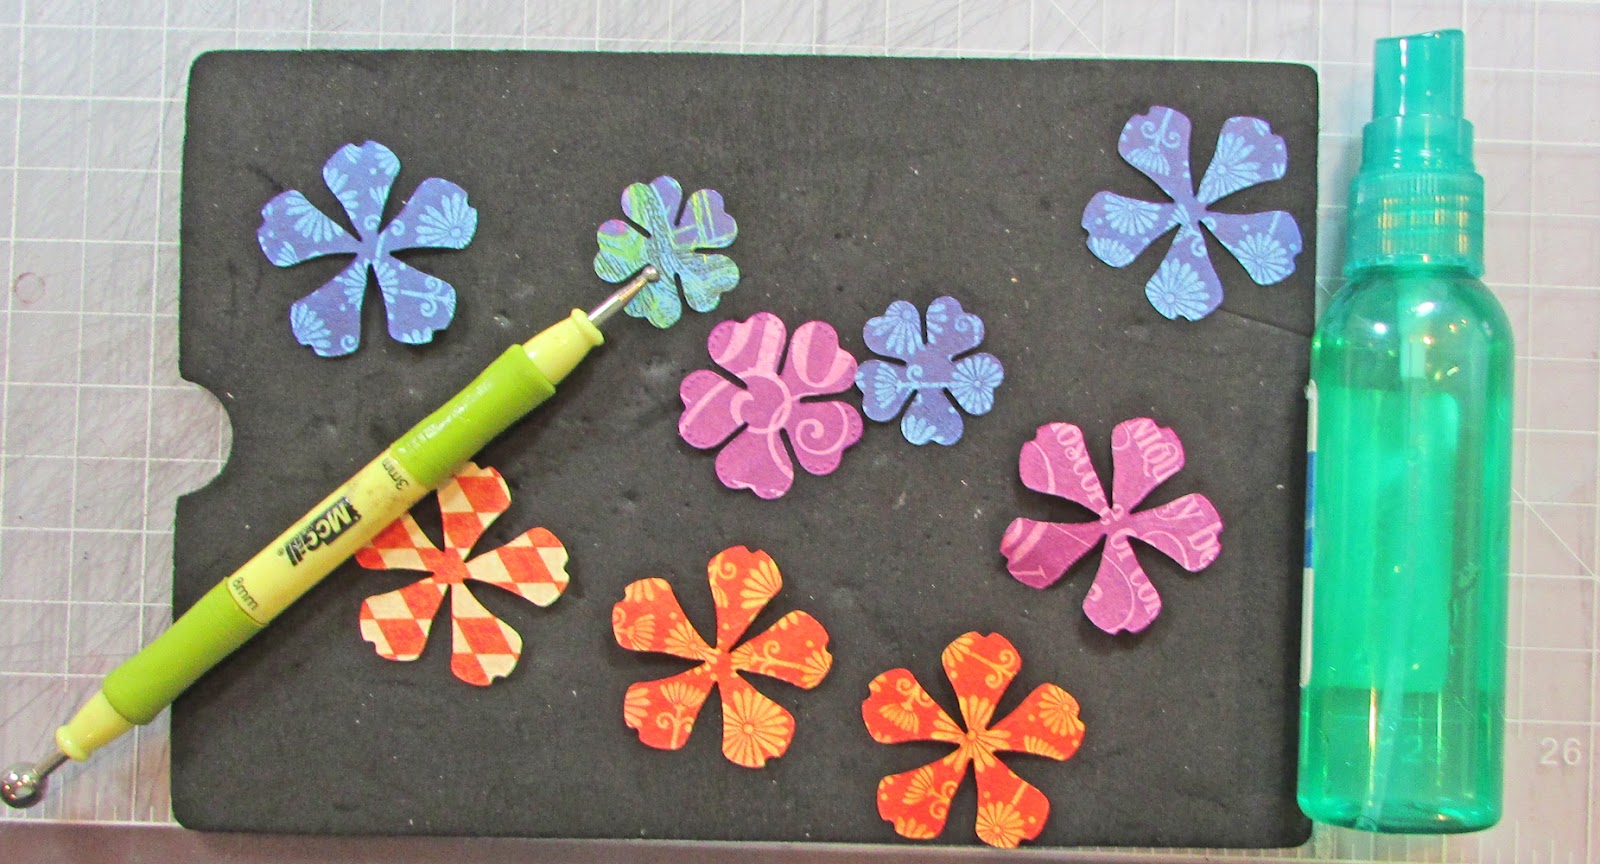
The other way to shape flowers is by placing them face down onto a rubber mat, spraying them lightly with water, and then shaping them with a ball stylus and tweezers. This is the method I use most often because I find that the flower mold can tear the paper, especially if the paper is too wet or too thin.
Tip: The easiest way (and cheapest way!) to shape the flowers is to spray them with water, crumple them into a ball, and then allow them to air dry. Once the flowers are dry, gently open them and shape them with your fingers while gluing the layers together.
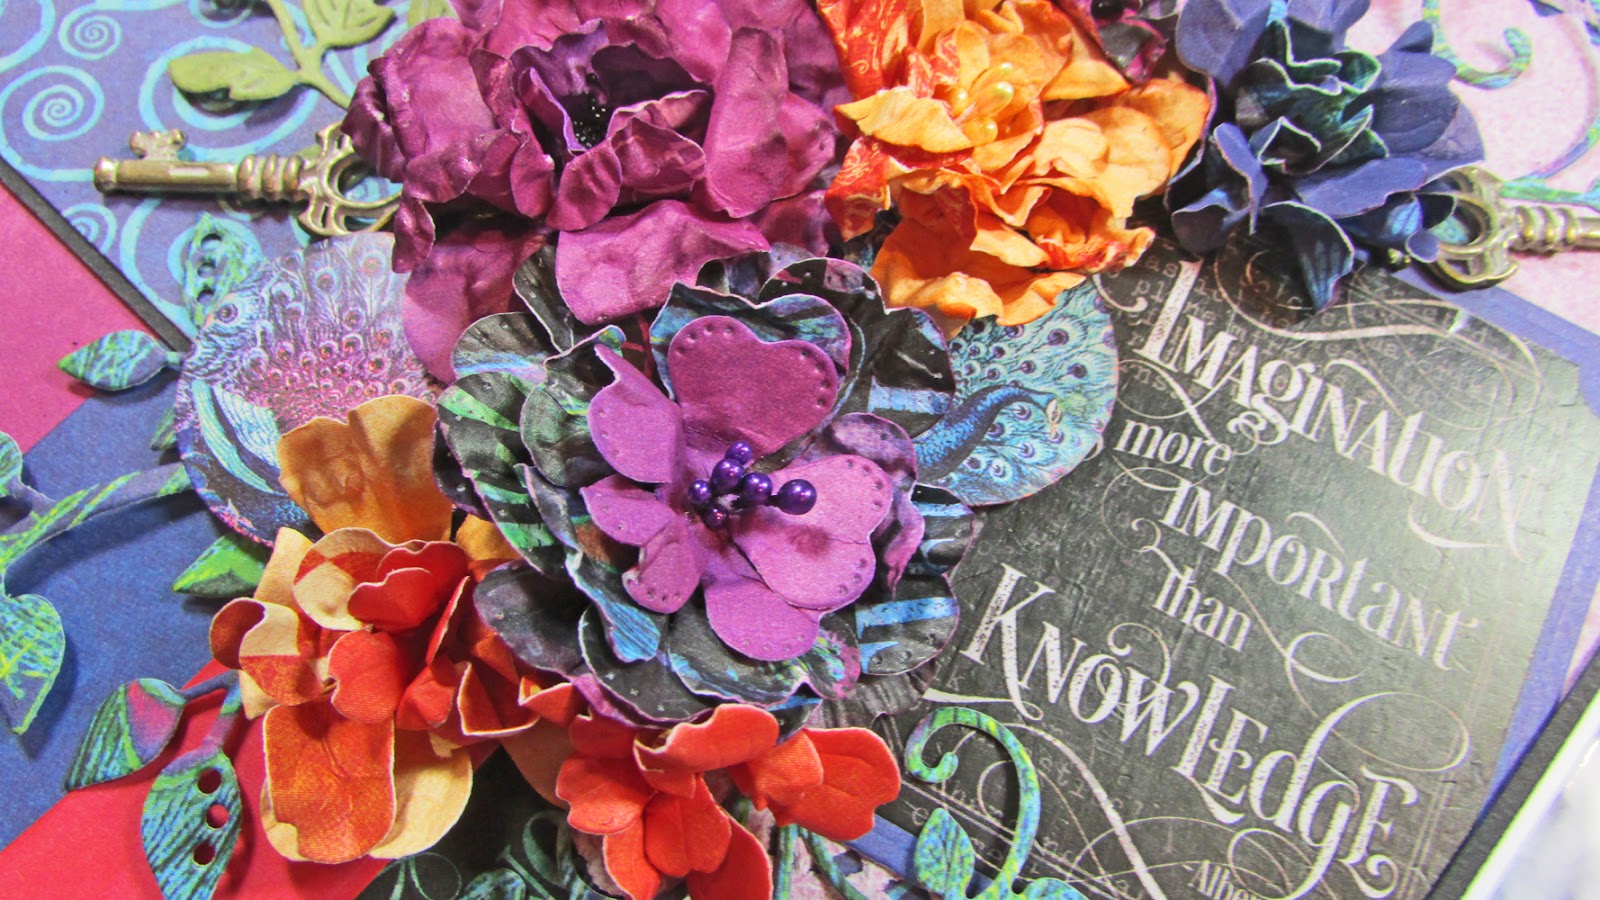
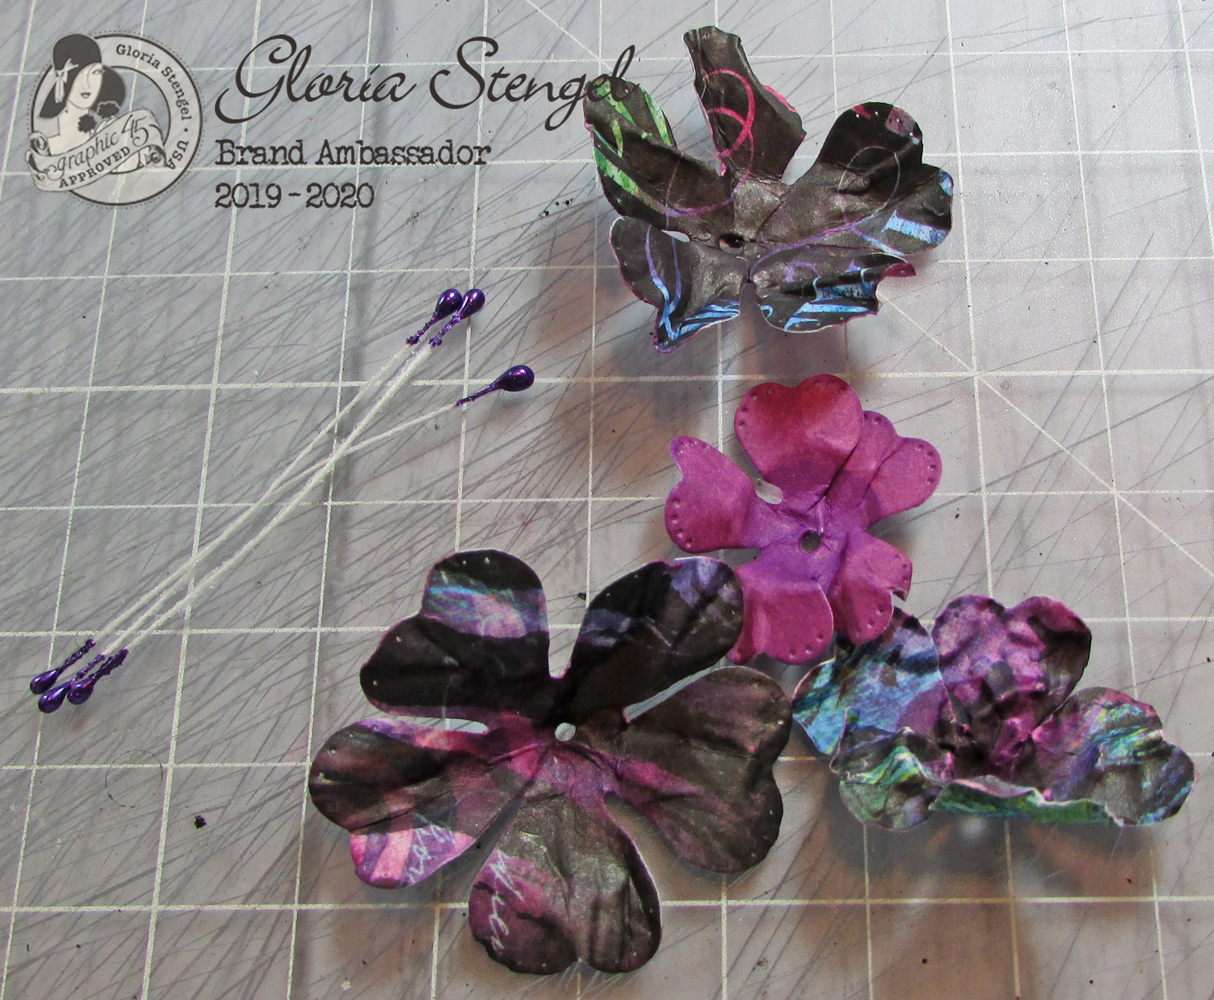
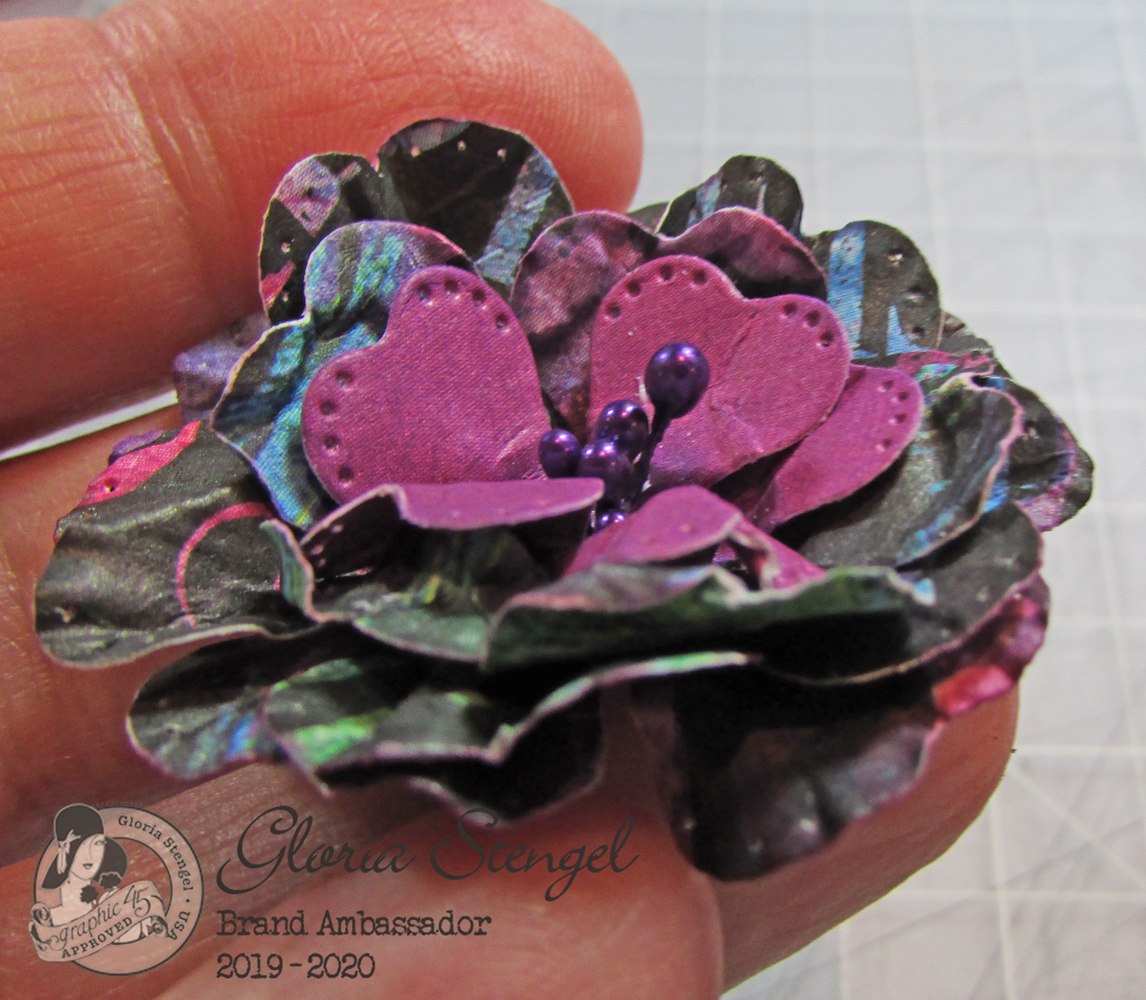
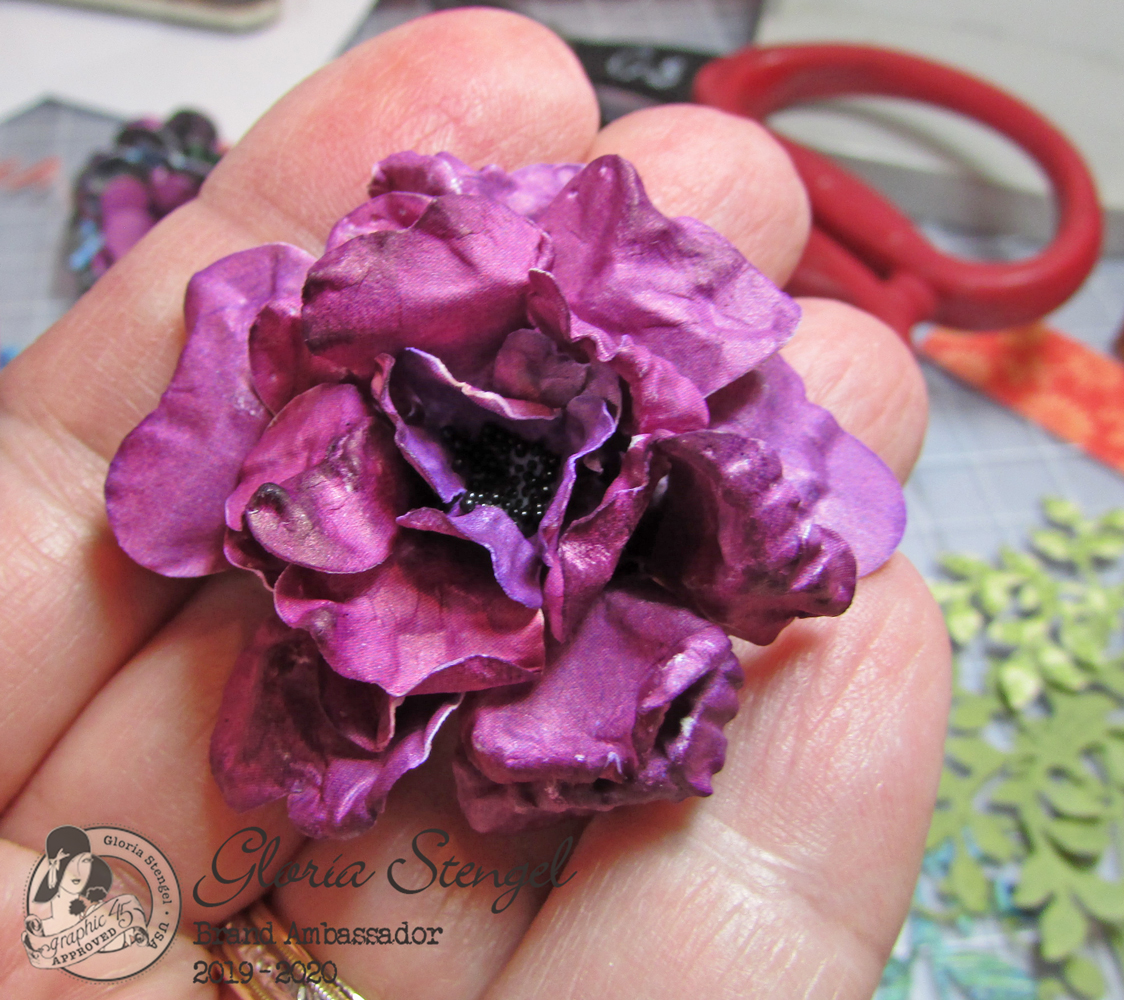
Once your flowers have dried fully, you can glue the various sizes together. I make a hole in the center and add stamens to some of my flowers. I use a strong, white glue to assemble the flowers.
Here is a finished flower. The Graphic 45 papers dry stiff and hold their shape, making them perfect for this project! The flower dies in the Graphic 45 Large Tag, ATC Tag, and Flower Die Set are wonderful for cutting out the flowers, too!
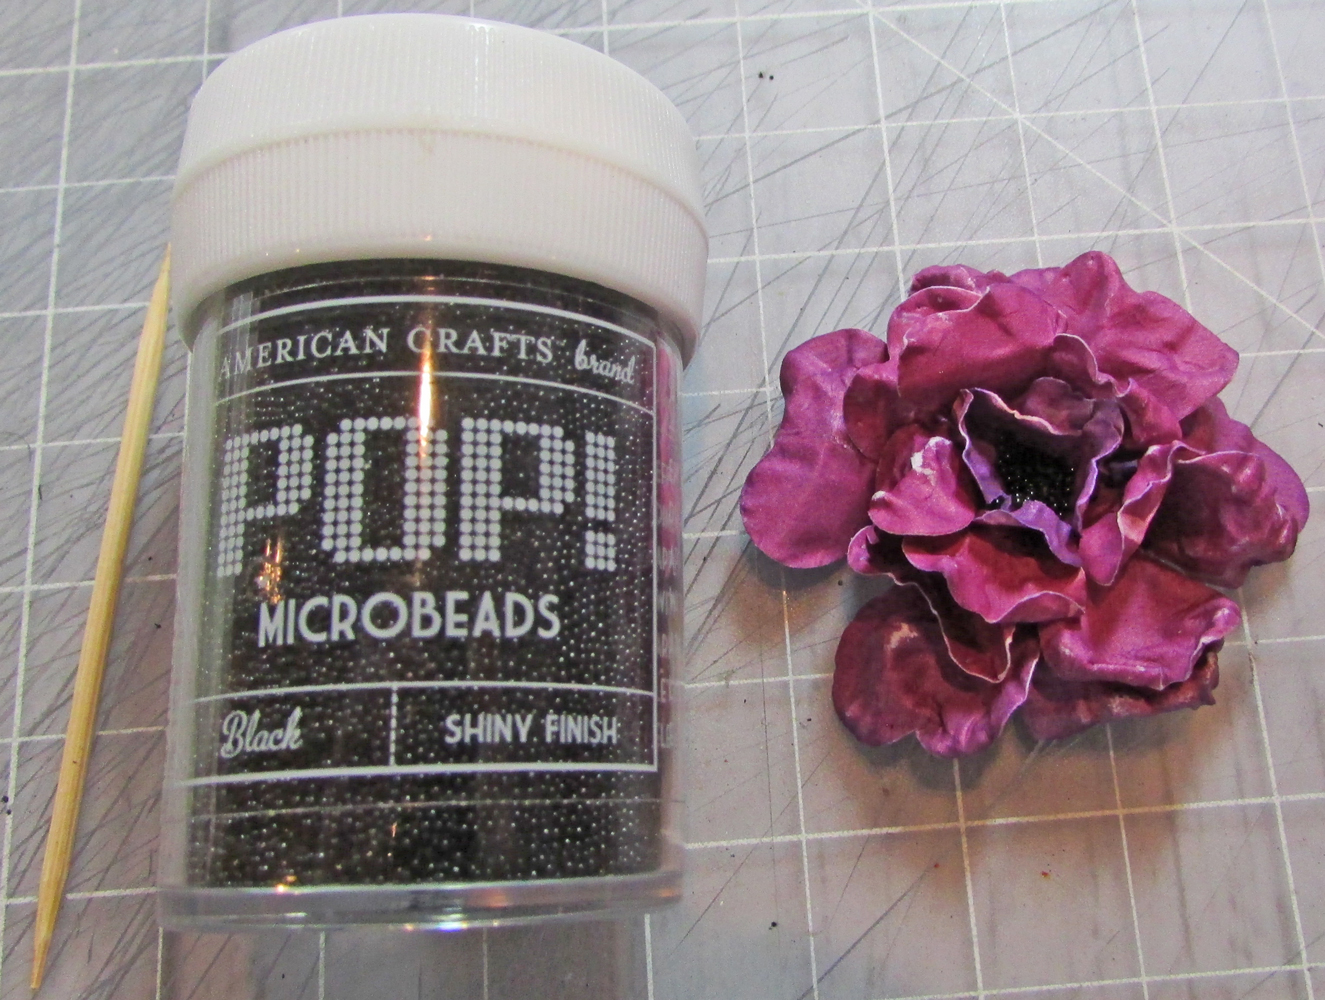
For some flowers, I add a dab of glue to the center and sprinkle on some microbeads.
Isn’t it lovely?!? By dabbing a bit of ink on some of the “worn” places, the flowers take on a nice, vintage look.
Create as many flowers as you think you will need for your project. This is a great way to use up scraps, and it’s a fun project to do while watching your favorite shows!
Now that we have our embellishments all ready, let’s work on the single-page layout first.
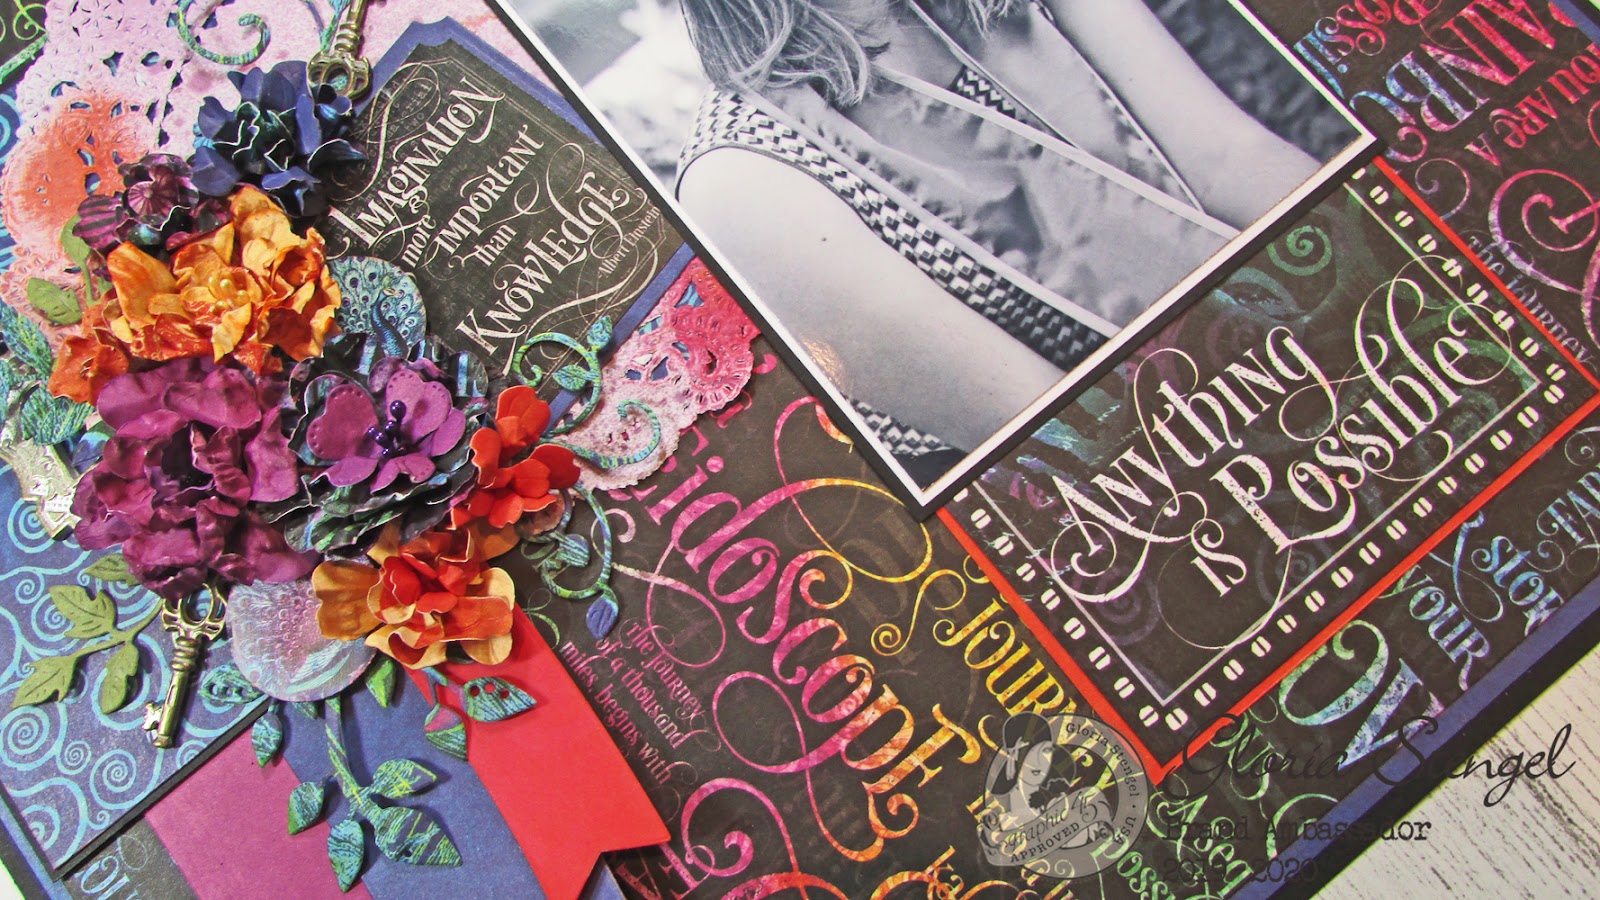
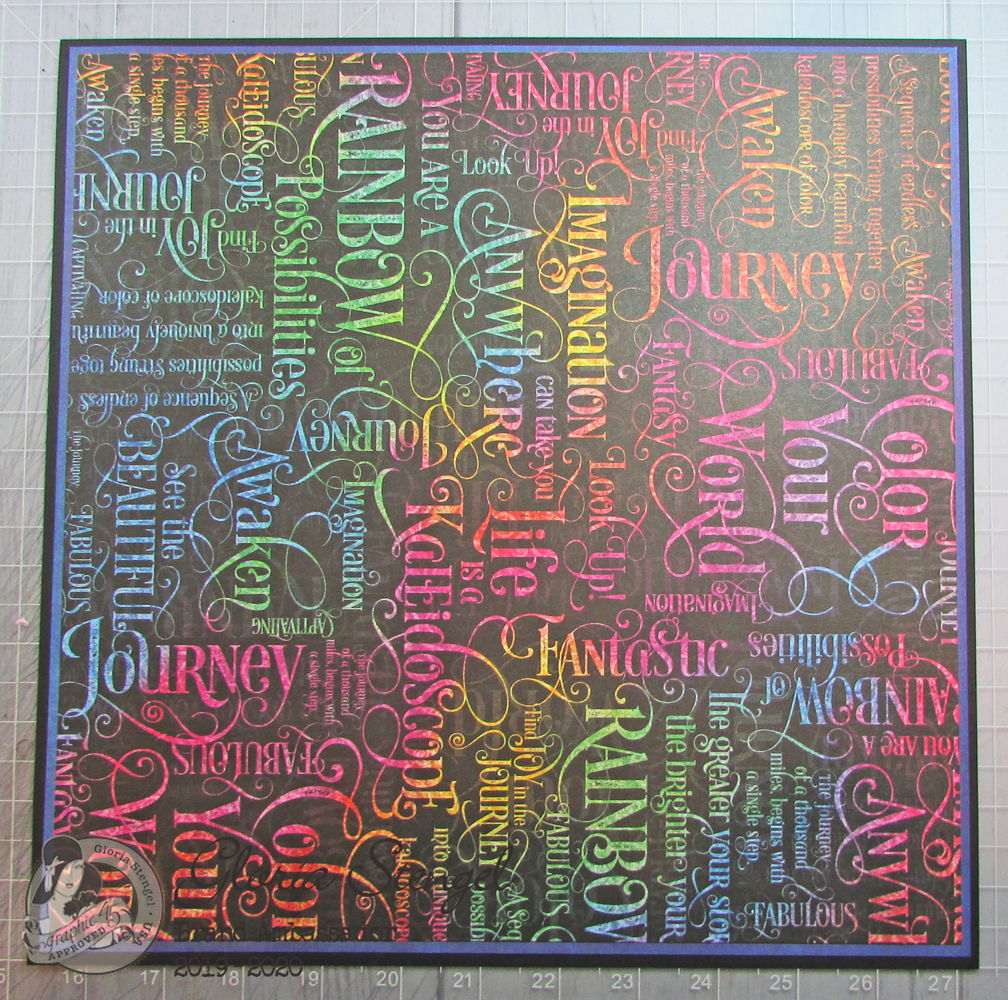
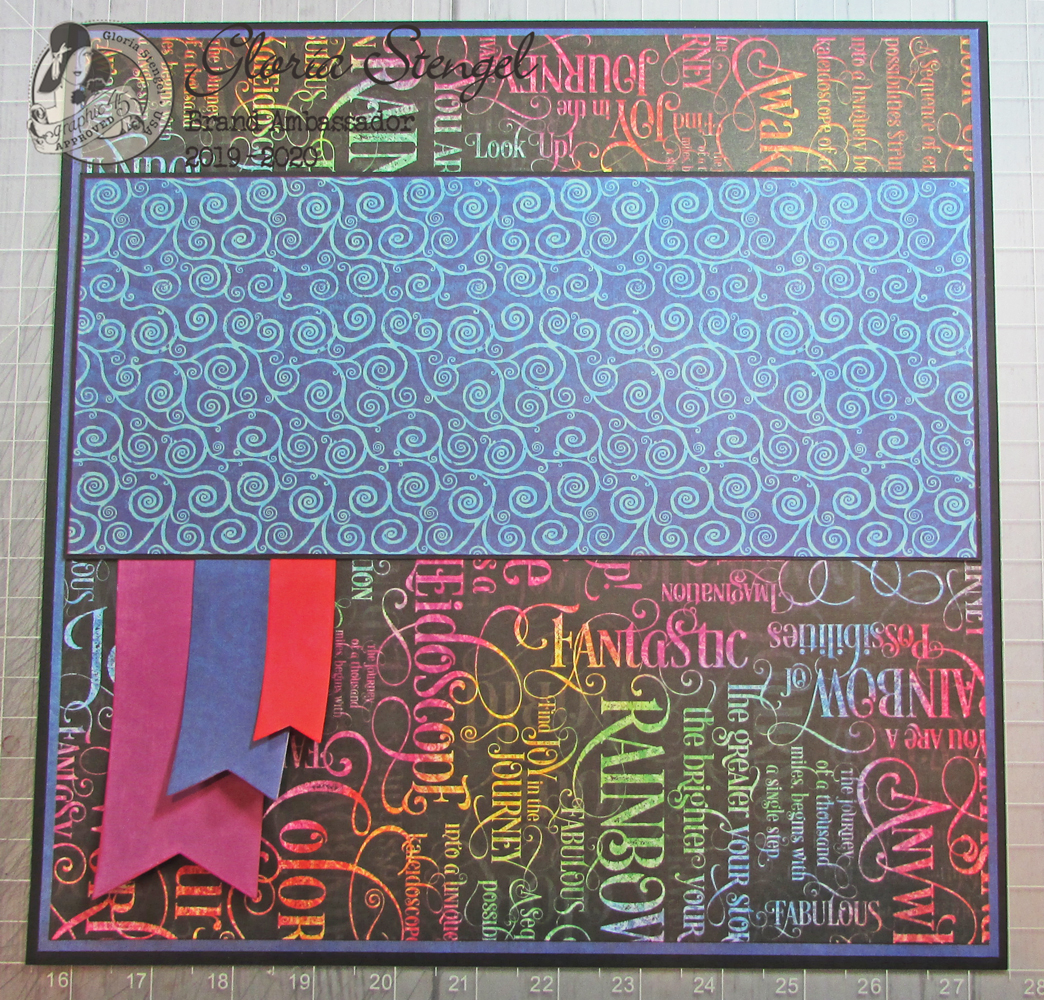
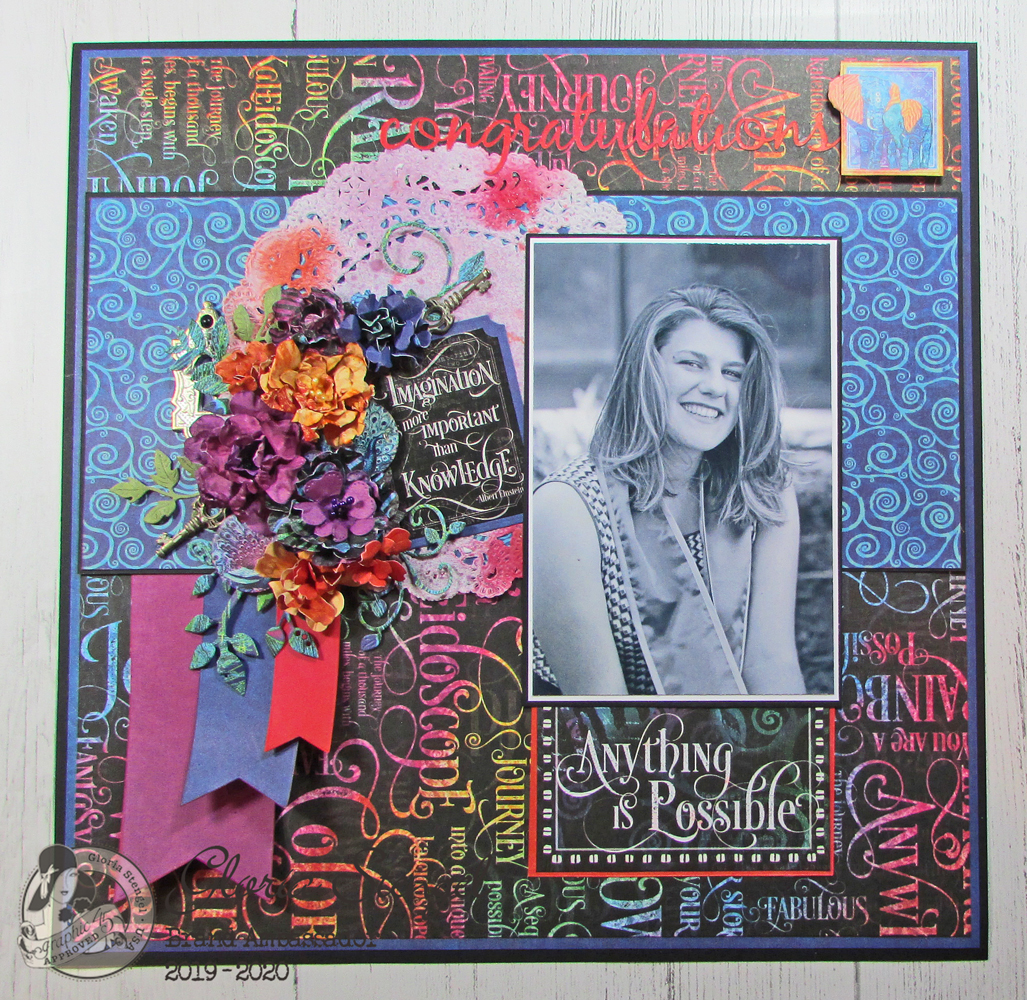
For your layout base, use 12” x 12” black, heavyweight cardstock. You need to use a heavier weight (80# or above) because we will be gluing metal and lots of flowers to this page. Next, trim blue Kaleidoscope Patterns and Solids paper to 11 ¾” x 11 ¾” and attach it to the center of the black cardstock. Then trim a sheet of Kaleidoscope Fantastic Fantasy paper to 11 ½” x 11 ½” and add it to the center of the layout.
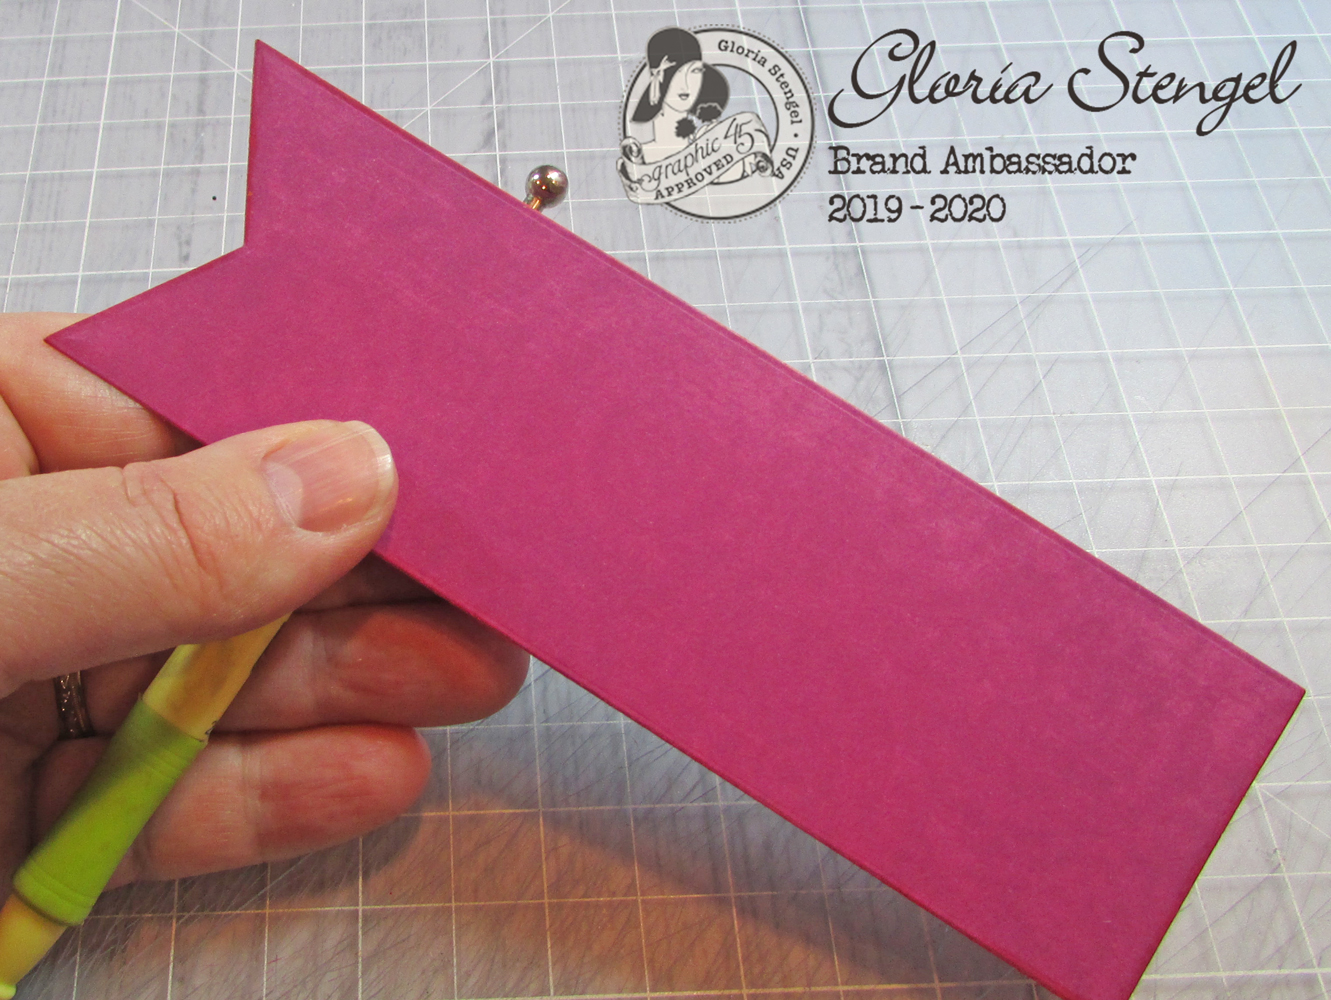
Next, trim three banner shapes from Kaleidoscope Patterns and Solids paper. Trim three different sizes, one from purple paper, one from blue, and one from orange. Using a stylus or a pencil, gently roll the paper on the flag end.
Tip: I used a die template to trim my banners, but if you don’t have one, just trim the purple paper to 4” x 2”, the blue paper to 3” x 1 ⅜, and the orange paper to 2 ¼” x ¾”. Use scissors to trim the banner tail on one end of each paper strip.
Arrange the flags as shown, on the left side of the layout. Allow the fag ends to curl up slightly.
Trim black cardstock to 5” x 11 ½” and place the panel approximately 2” from the top edge, centered left to right. Trim a piece of Kaleidoscope Boldly Bright paper to 4 ⅞” x 11 ⅜” and place it centered over the black panel.
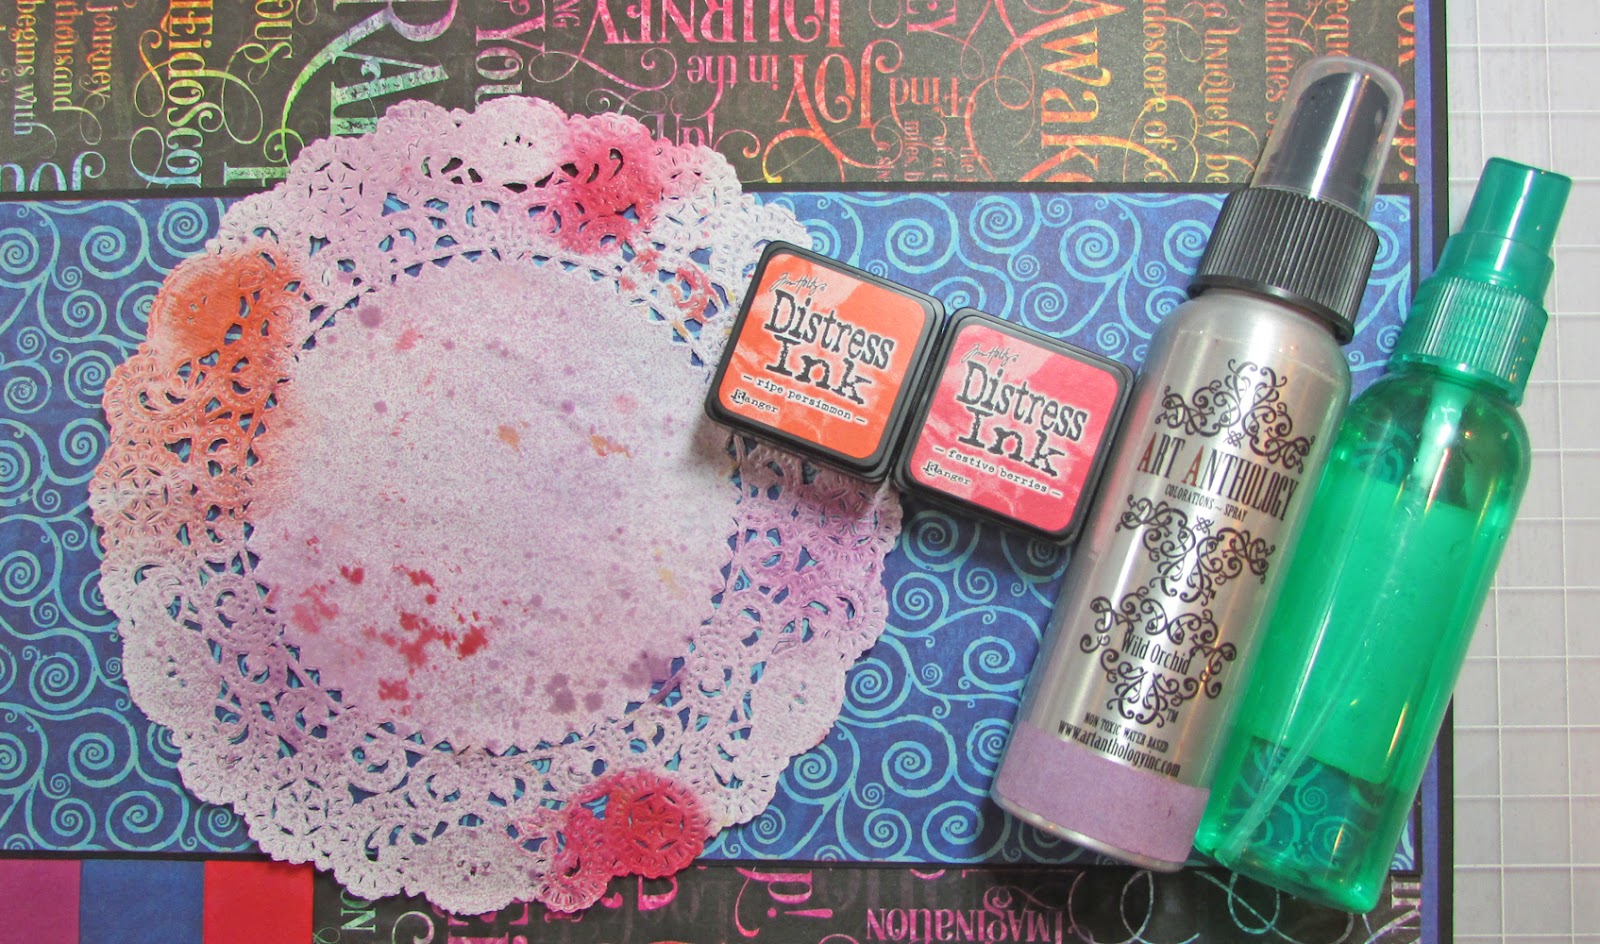
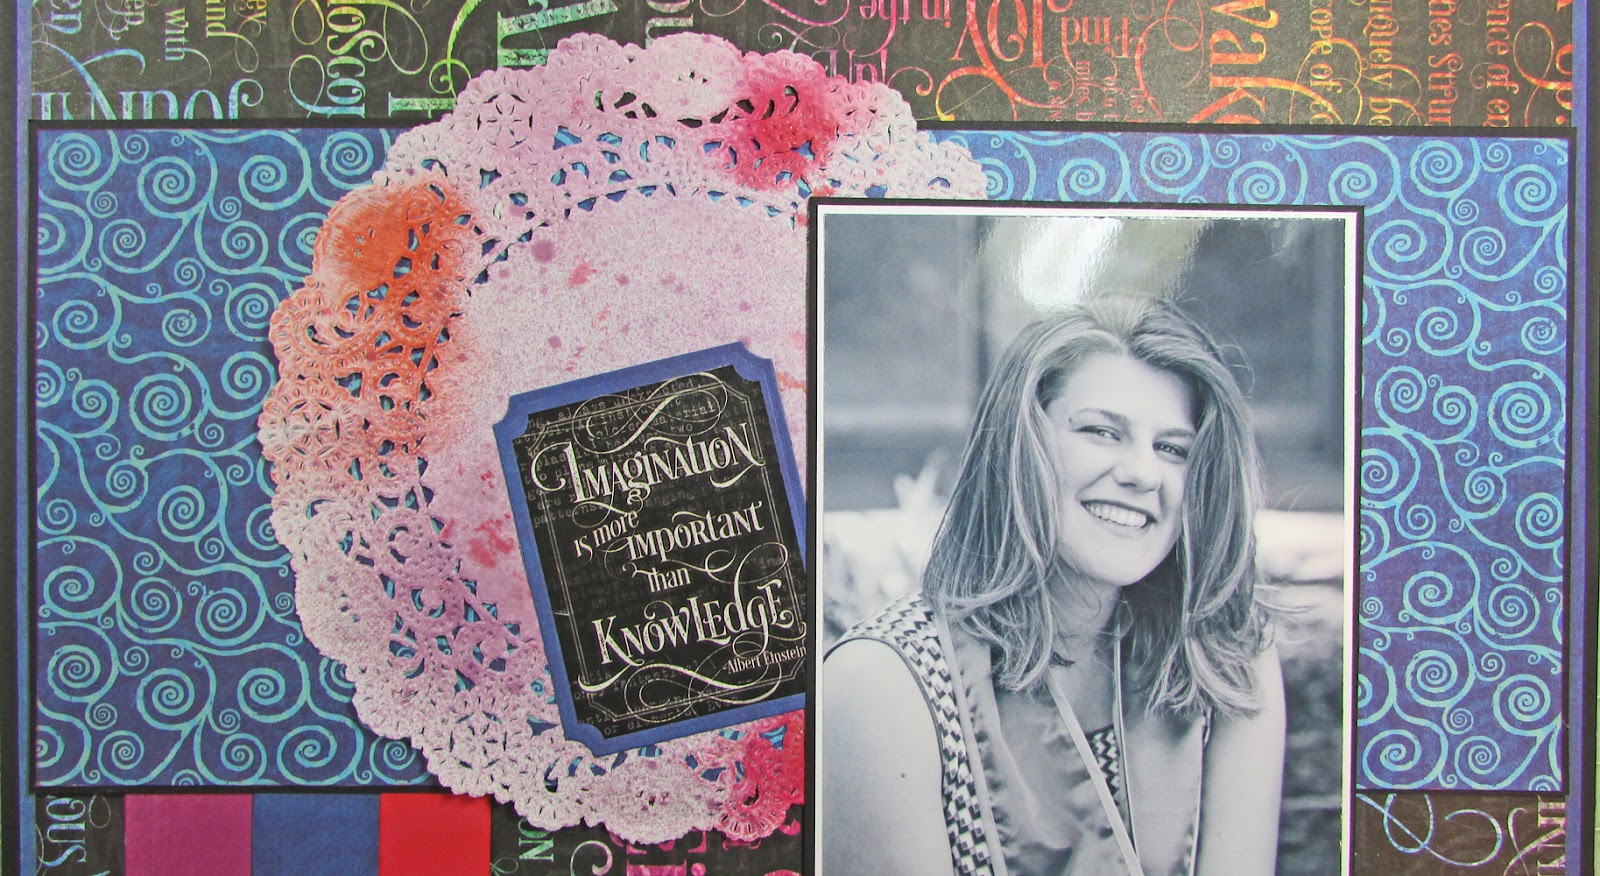
Dab a 6” round doily (available from most craft supply stores) with Distress Ink (Ripe Persimmon and Festive Berries), then spray with water to make the ink bleed. Then spray with purple color spray. Allow to dry fully, and then attach the doily to the layout as shown.
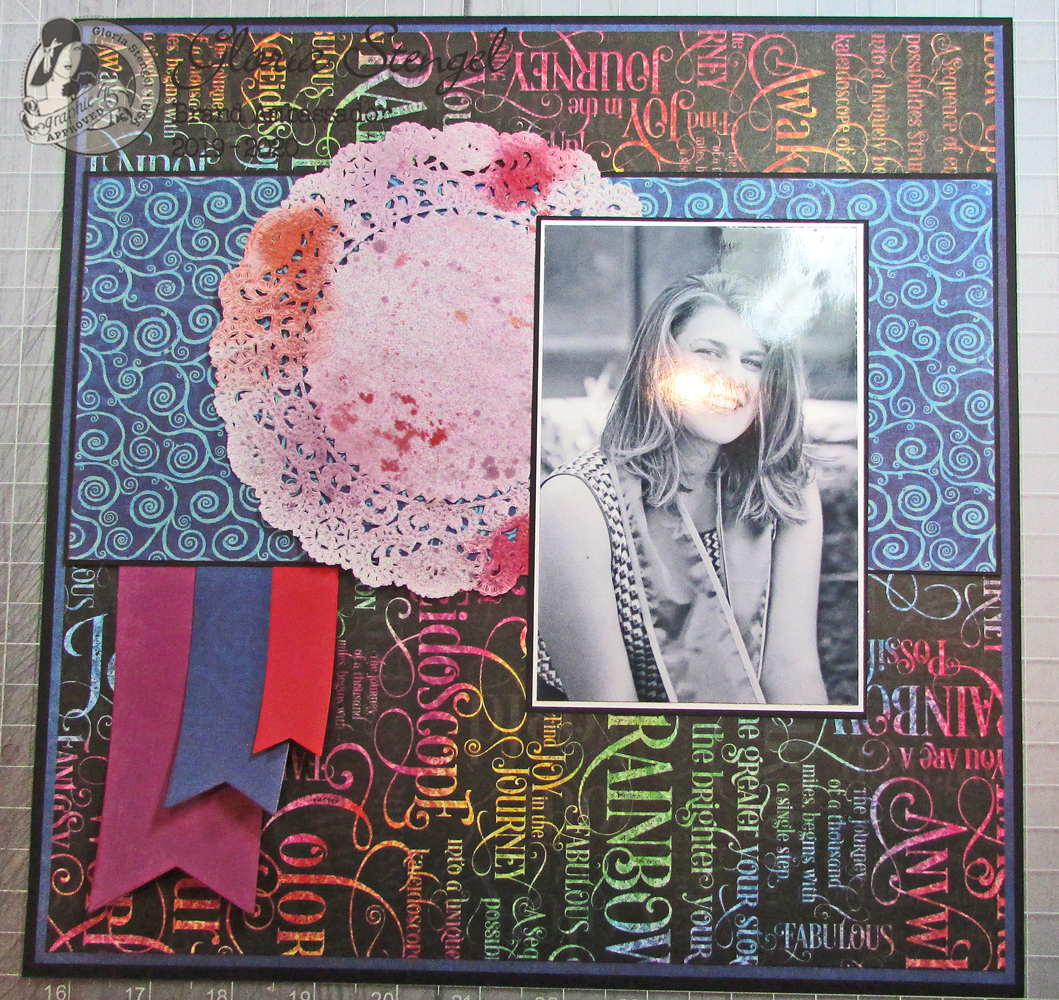
Double-matte the black and white photo (6” x 4”) with white and then black cardstock, then attach it to the layout.
Attach the Kaleidoscope sticker to a piece of the blue Patterns and Solids paper. Attach it to the left of the photo, as shown.
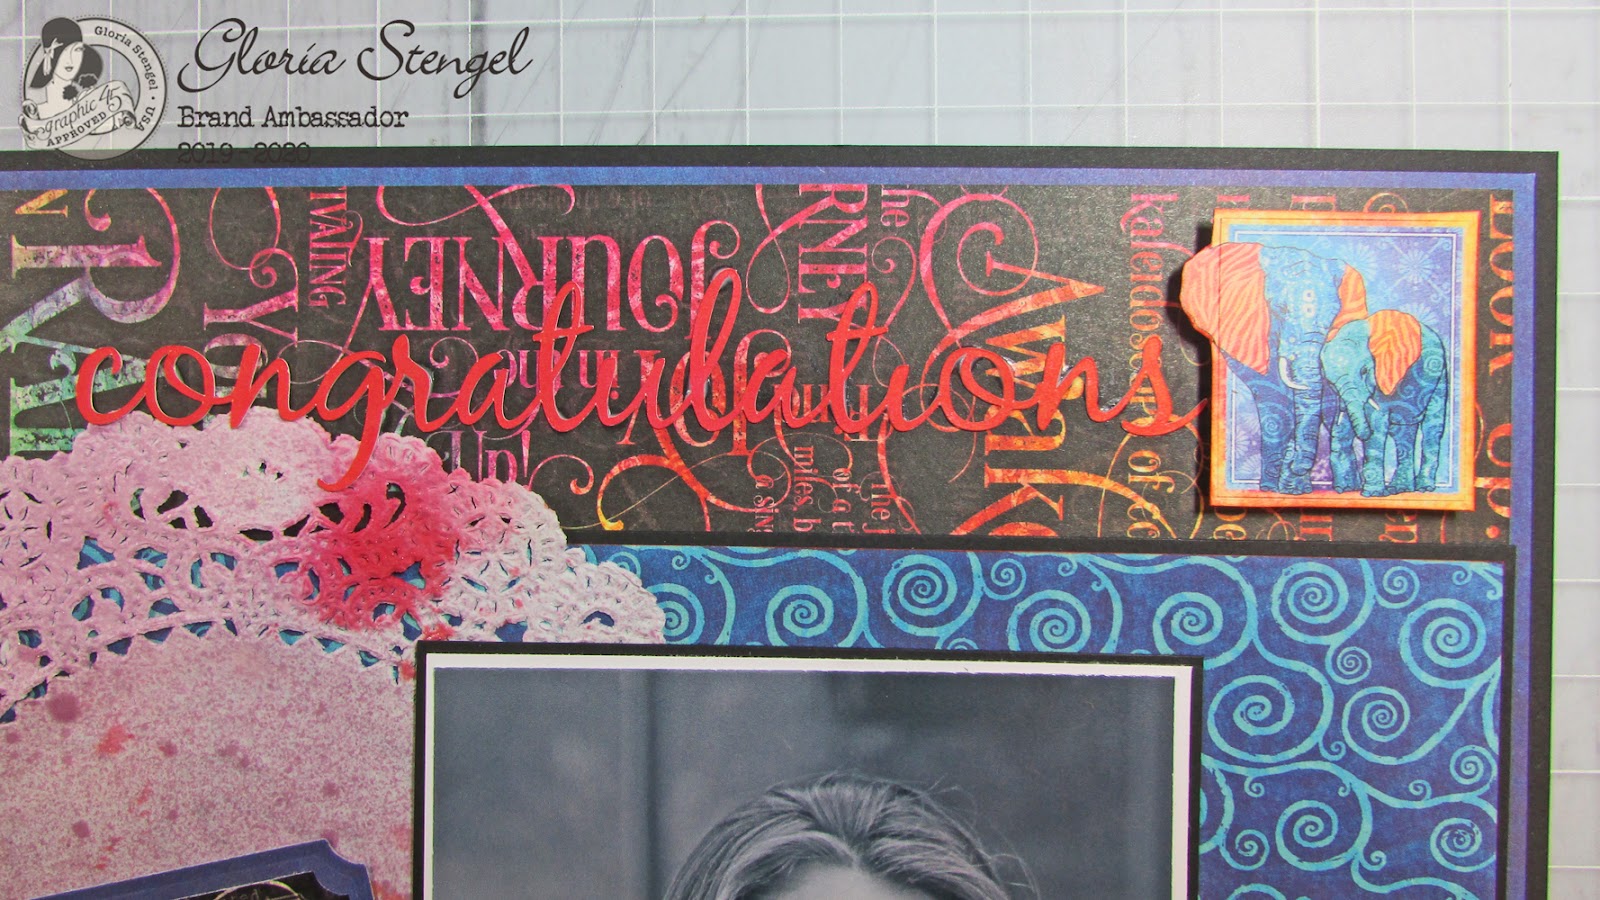
Die cut “congratulations” from orange Patterns and Solids paper and attach to the top right of the layout. Attach the elephant sticker from the sticker sheet to a scrap of cardstock, and then fussy cut around the edge. Glue the image to several layers of scrap chipboard, attaching the embellishment to the top right corner of the layout.
Trim the “Anything is Possible” ephemera card from Kaleidoscope Awaken to Adventure paper and mat it with orange Patterns and Solids paper. Tuck the card under the bottom edge of the photo.
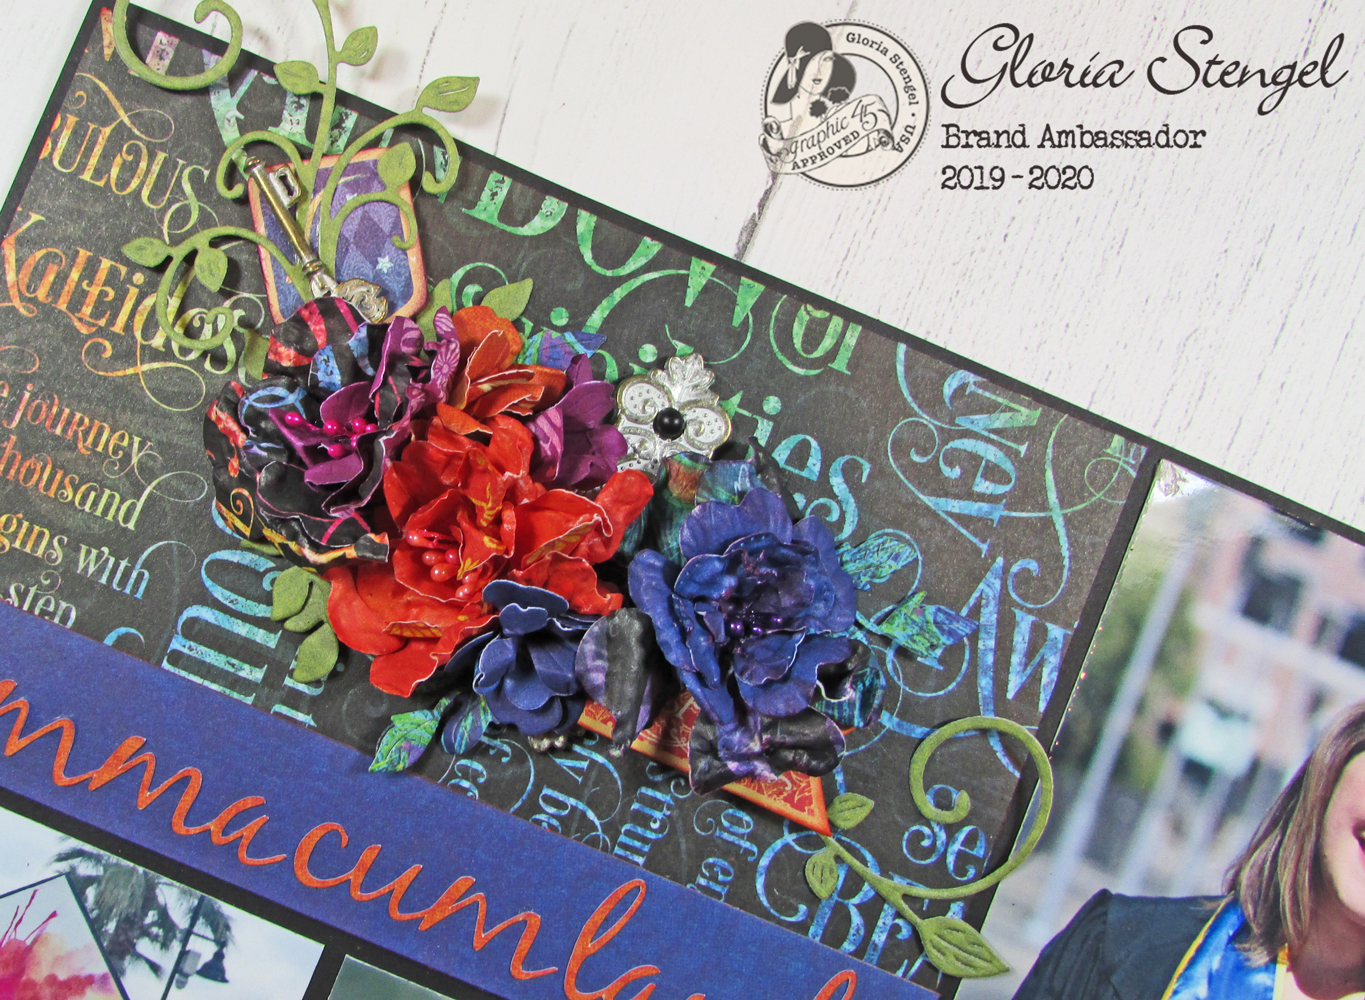
Choose your flowers and create a flower cluster, as shown.
Arrange the flowers, plus some sticker elements, and two Shabby Chic Ornate Metal Keys, and one Shabby Chic Ornate Metal Key Hole to make your cluster.
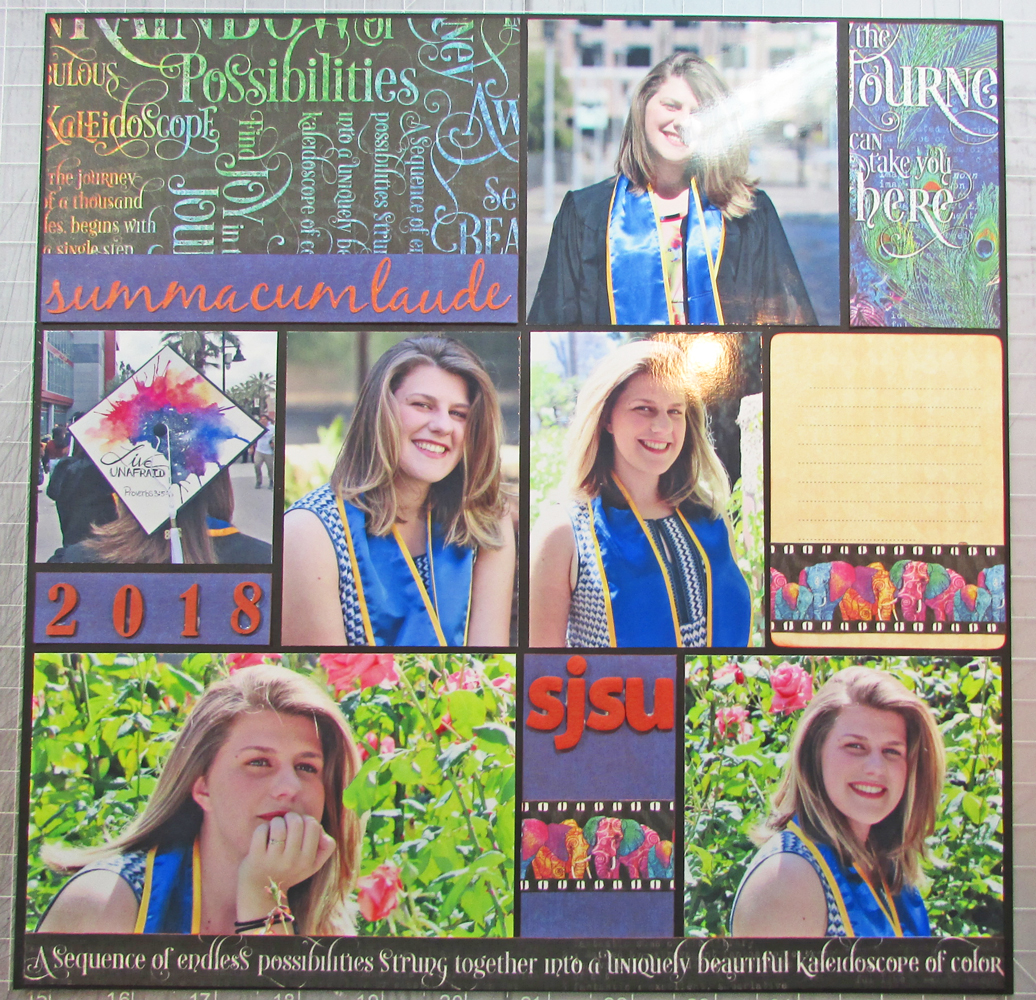
Now, let’s work on the multi-page layout. Start with a 12” x 12” piece of black cardstock.
Lay the photos out in a grid pattern, as desired. Use pieces of scrap paper to decide where you wish to add decor to the page. I label all my scraps with what size I need to trim the decorative paper. The best way to make a grid-style layout is to trim up some scraps of computer paper into various sizes and lay them out onto your cardstock base.
If you wish a bit of black border around everything, like I have, trim your photos and paper slightly smaller than the sizes shown. I also trimmed each photo down a bit once I had everything all arranged.
For row one, trim a piece of Kaleidoscope Fantastic Fantasy paper to 3 ⅞” x 5 ⅞” and attach it to the upper left. Then, trim a strip of the blue Patterns and Solids paper to 1” x 5 ⅞” and attach it to the bottom of the Fantastic Fantasy panel. Glue your title to the blue strip. I cut my words with an electronic cutting machine, using the Black Jack font. Next, you will need to use a 4” x 4” photo, trimmed to 3 ⅞” x 3 ⅞”. The last panel in row one is a 3 ⅞” x 1 ⅞” piece of Joy in the Journey.
For row two, you first need a 3” x 3” photo trimmed to 2 ⅞” x 2 ⅞” and a strip of the blue Patterns and Solids paper cut to ⅞” x 2 ⅞”. Add your embellishments to the blue strip. I added chipboard numbers which I colored with Distress Ink. Next, you will need two 4” x 3” photos trimmed to 3 ⅞” x 2 ⅞”. For the last panel in this row, use an ephemera card for a journaling block. I did not have any of the Kaleidoscope cards, so I used one from Midnight Masquerade, trimmed down to 3 ⅞” x 2 ⅞”. I added a border strip cut from Kaleidoscope Rainbow of Color paper.
For the last row, trim a 4” x 6” photo to 3 ⅞” x 5 ⅞”. Next, trim blue Patterns and Solids paper to 3 ⅞” x 1 ⅞” and attach a bit of the same border you used on the journaling card, then add your embellishments. I used chipboard letters colored with Distress Ink. The last photo is 4” x 4” trimmed to 3 ⅞” x 3 ⅞”. I also added a border strip to the bottom of the page.
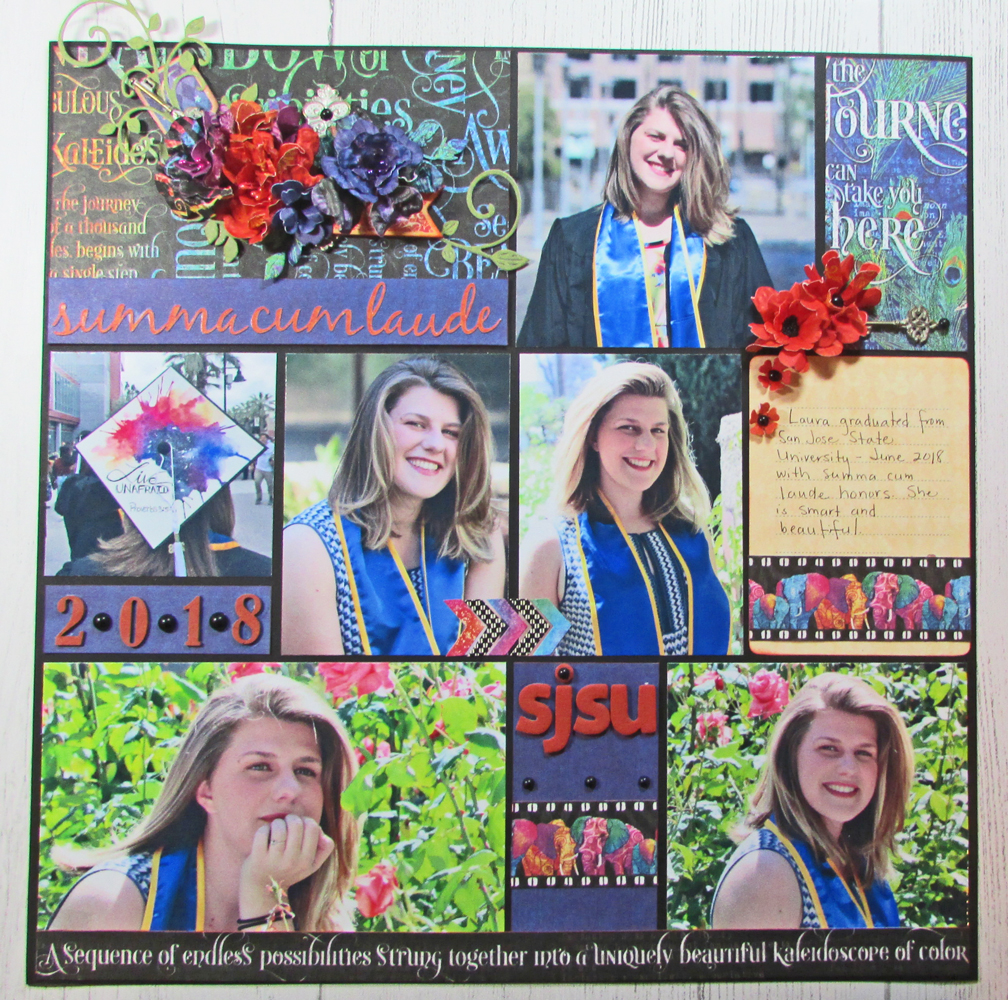
Add your flower cluster to the top left panel. I also added some Matte Pearl Gems here and there.
I also added a Shabby Chic Ornate Metal Key Hole, a Matte Pearl Gem, and some chipboard pieces from the Midnight Masquerade Collection to my flower cluster.
I also placed some flowers onto the area above the journaling spot, along with a Shabby Chic Ornate Metal Key. (I was actually covering up a “splotch” of ink!)
I hope you have some new ideas for creating layouts! If you have any questions, please add them to the comments below and I will come back an answer as soon as I can!
Thanks for joining me today!"
~ Gloria
Graphic 45 Supply List:
|
|
|
|
|
Other Supplies:
Congratulations to Gloria's daughter and to Gloria for creating such a masterpiece. We want to thank you for stopping by for your G45 fix and hope you have been inspired to get those pictures out and adhered to the page. Have a wonderful day, and as always…
Happy Papercrafting!