Hello, G45ers!
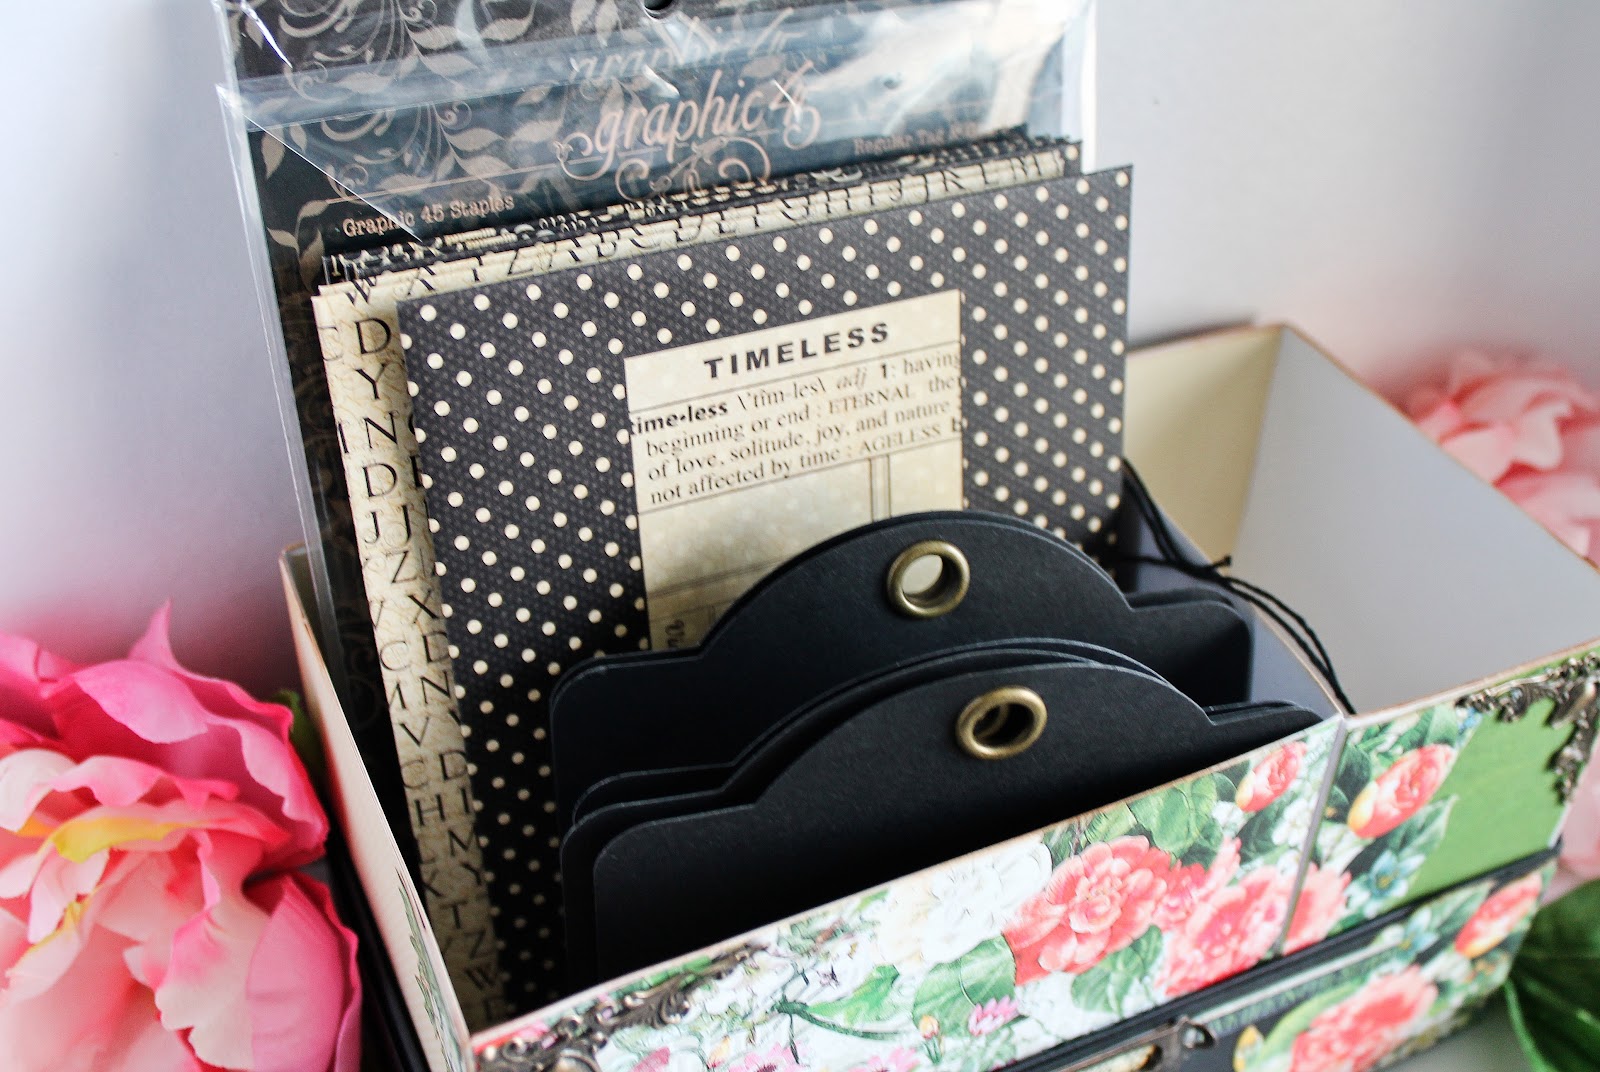
Are you looking to get organized for 2019? Maybe just looking for a fun 'off the page' project? Well, we have a fantastic blog post for you, featuring a #SimplyG45 – Flutter Desktop Organizer by the wonderful and talented, Glenys Vidal. Glenys has repurposed some cardboard and scraps and turned them into a beautiful and functional storage piece, all decorated with our Flutter paper collection. This piece is perfect for storing all your Crafting Staples and tools.
#SimplyG45 – Flutter Desktop Organizer
By Glenys Vidal
“Hello, G45ers and Happy New Year! I am so happy to share with you my first project for 2019. Right away, I knew without a doubt that it had to be a project using the new G45 Flutter collection. This project is a #SimplyG45 project that can be completed using just free materials, cardstock and two or three papers from any collection you want to use.
It has been a kind of tradition of mine to start the new year by decluttering. That means decluttering my craft room, putting away all of my home’s holiday decor, and unpacking new items for the next season. It’s hard work, but getting this done at the beginning of the year gives me so much inspiration to start working on new projects again!
At the same time unpacking new products means new needs for storage, and to me they have to be pretty to look at! Today I am sharing with you a very easy and almost free desktop organizer for your crafty goodies.
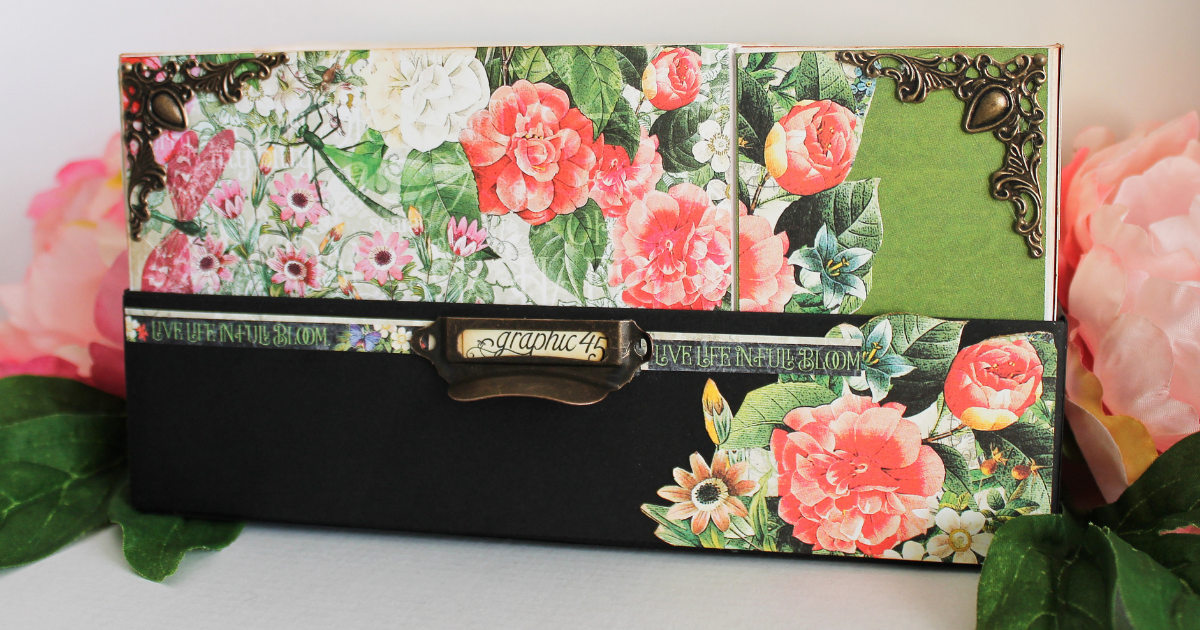
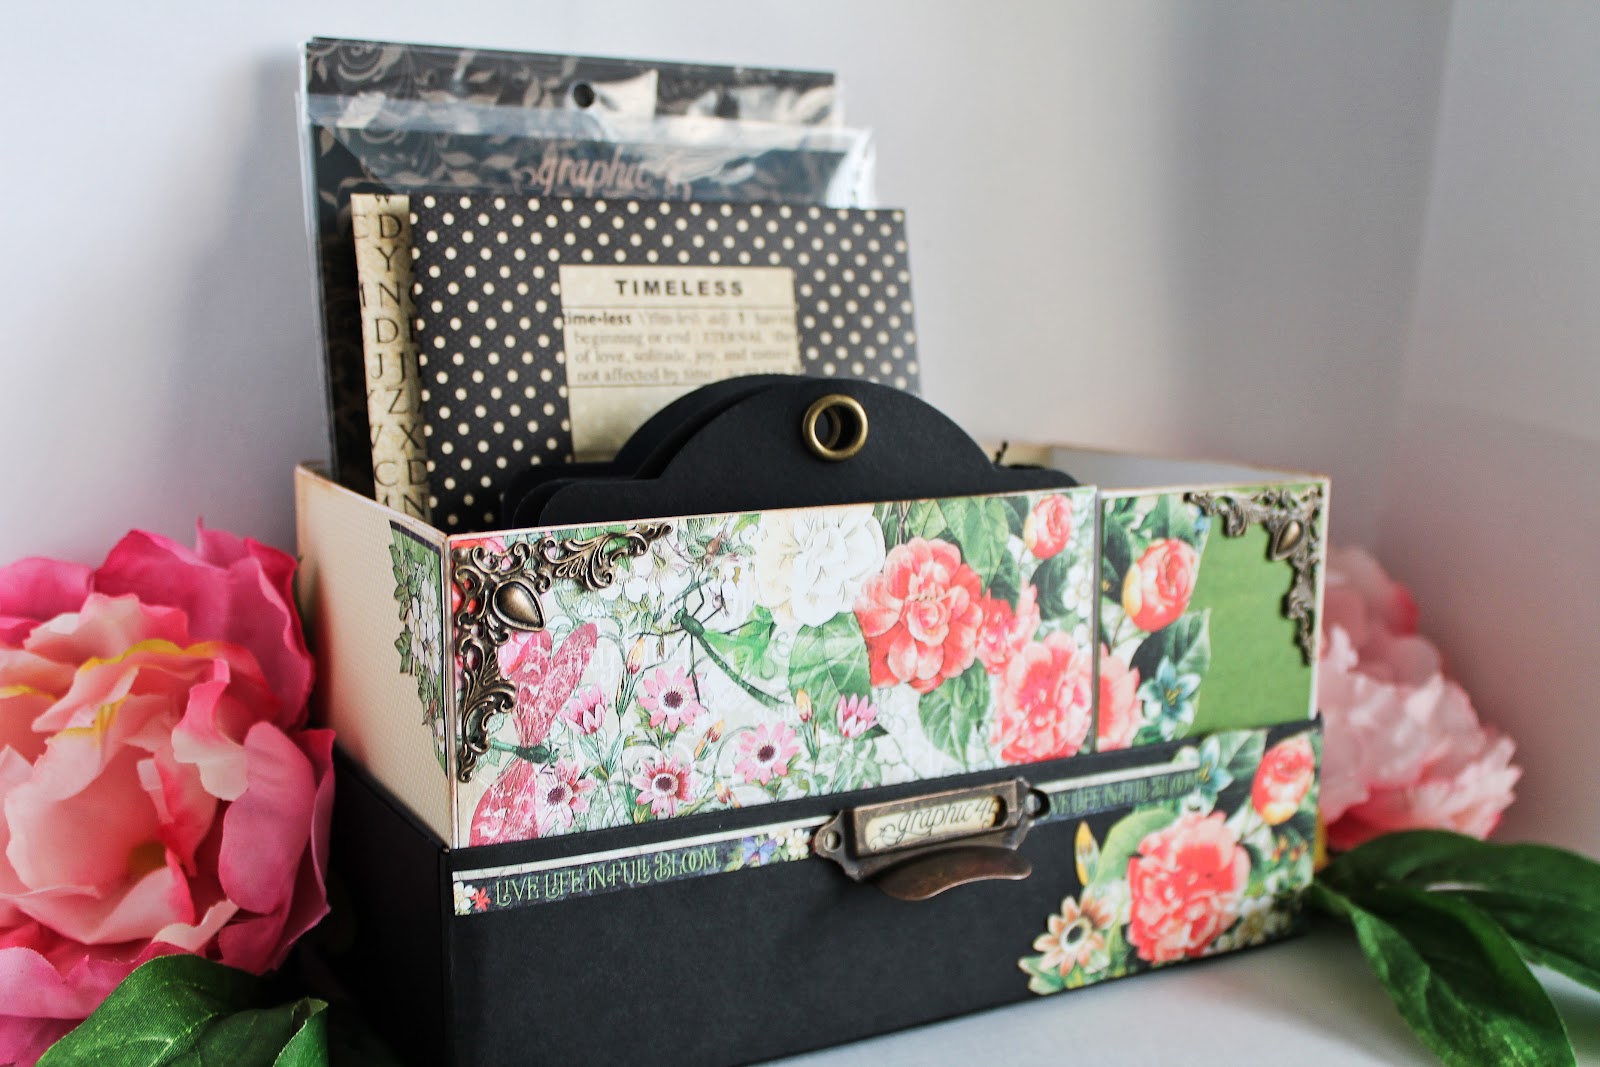
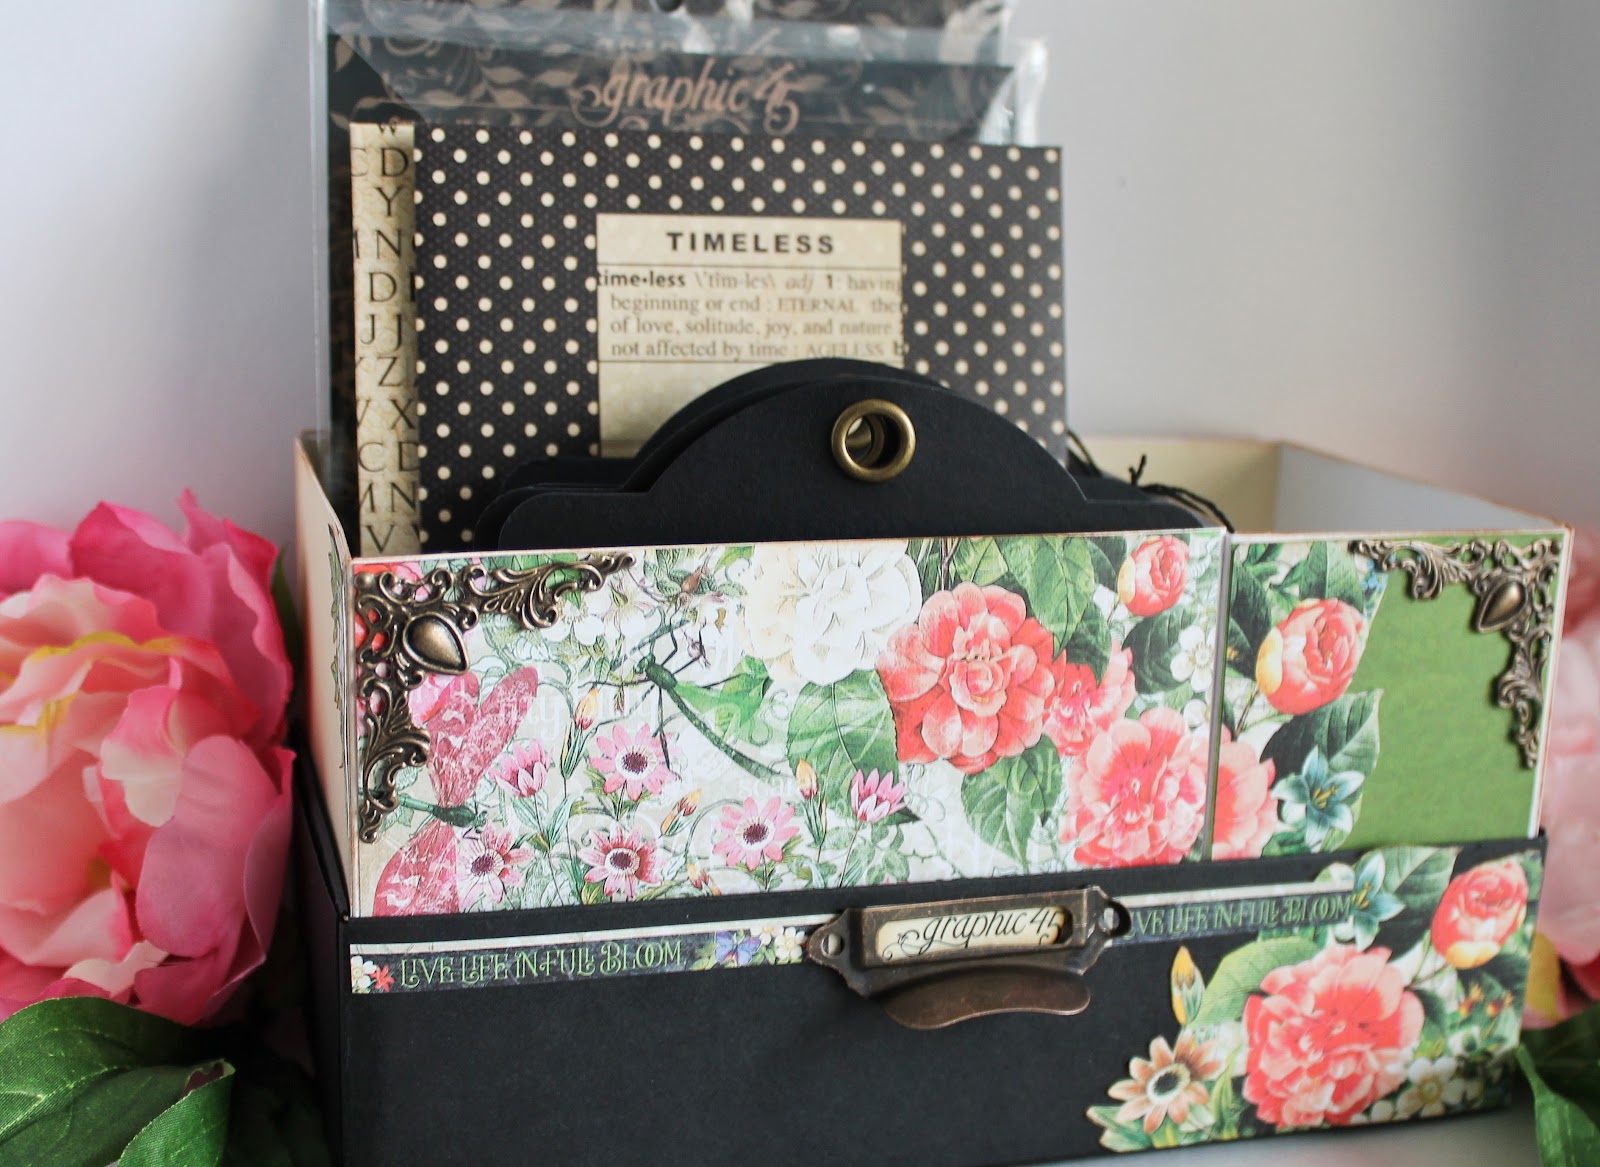
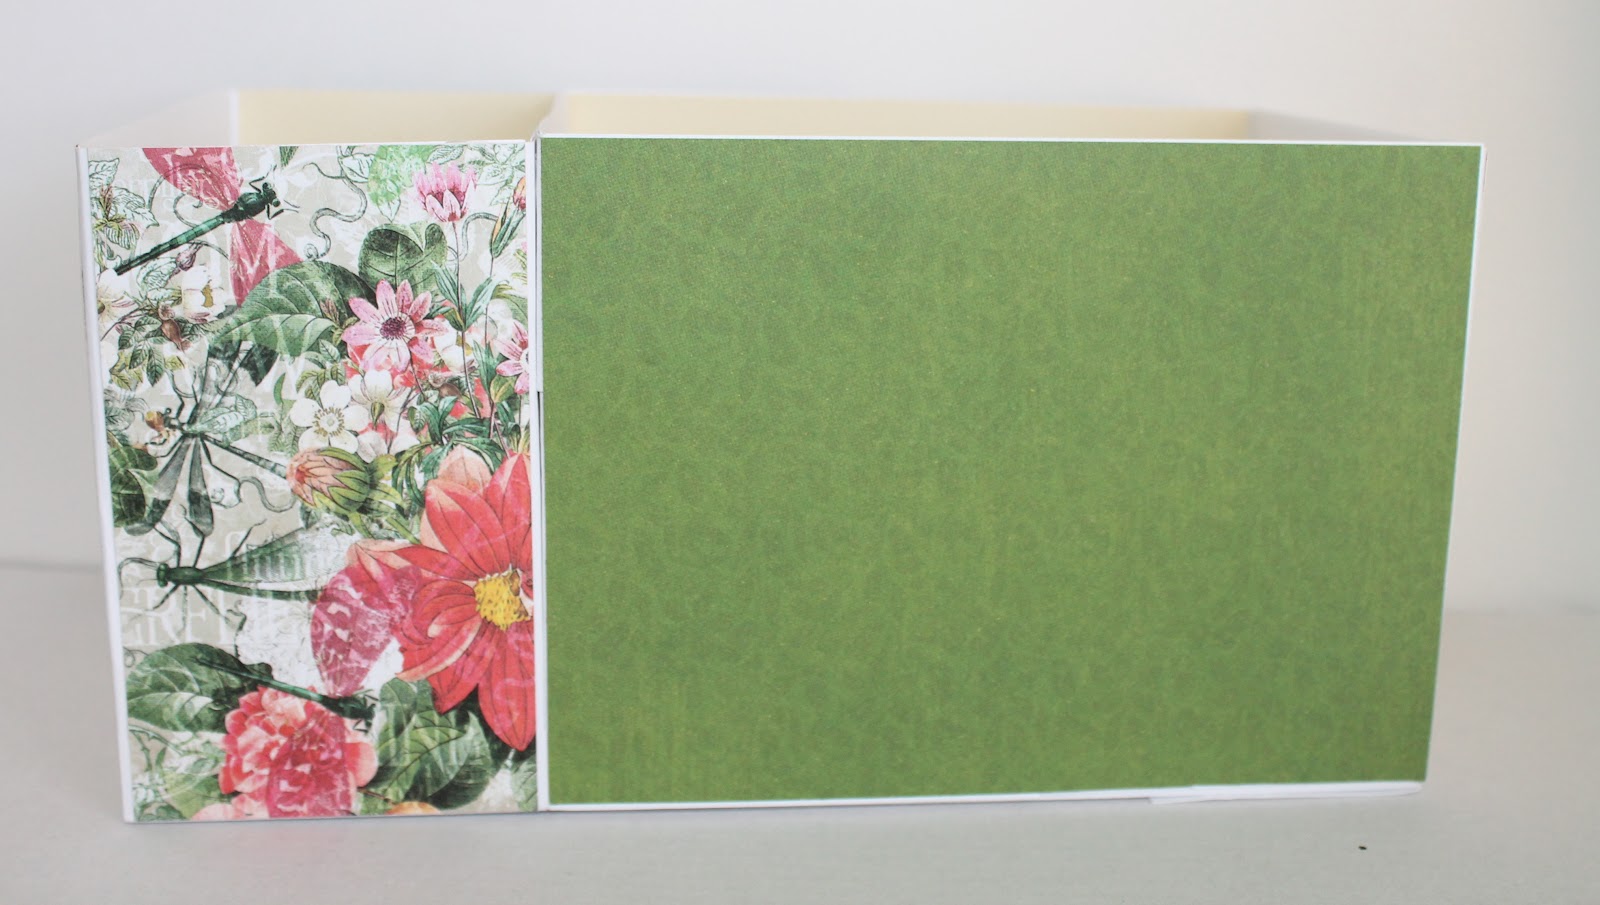
I wanted to have an organizer that I can use to hold all my fabulous Graphic 45 products on hand as I am working on projects. This organizer holds most of them. The larger compartment holds tags, dies, stamps sets, and policy envelopes. In the second compartment it holds scissors, inks and stamp blocks. Talk about having everything on hand!
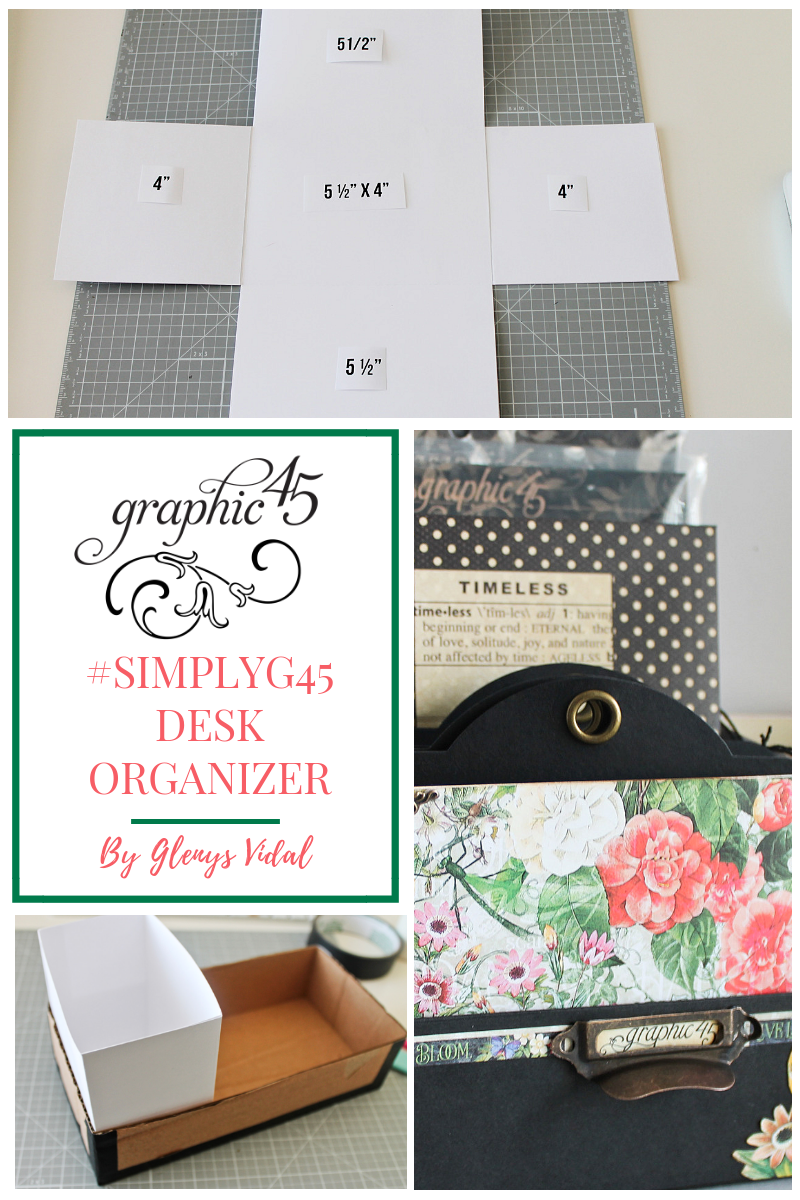
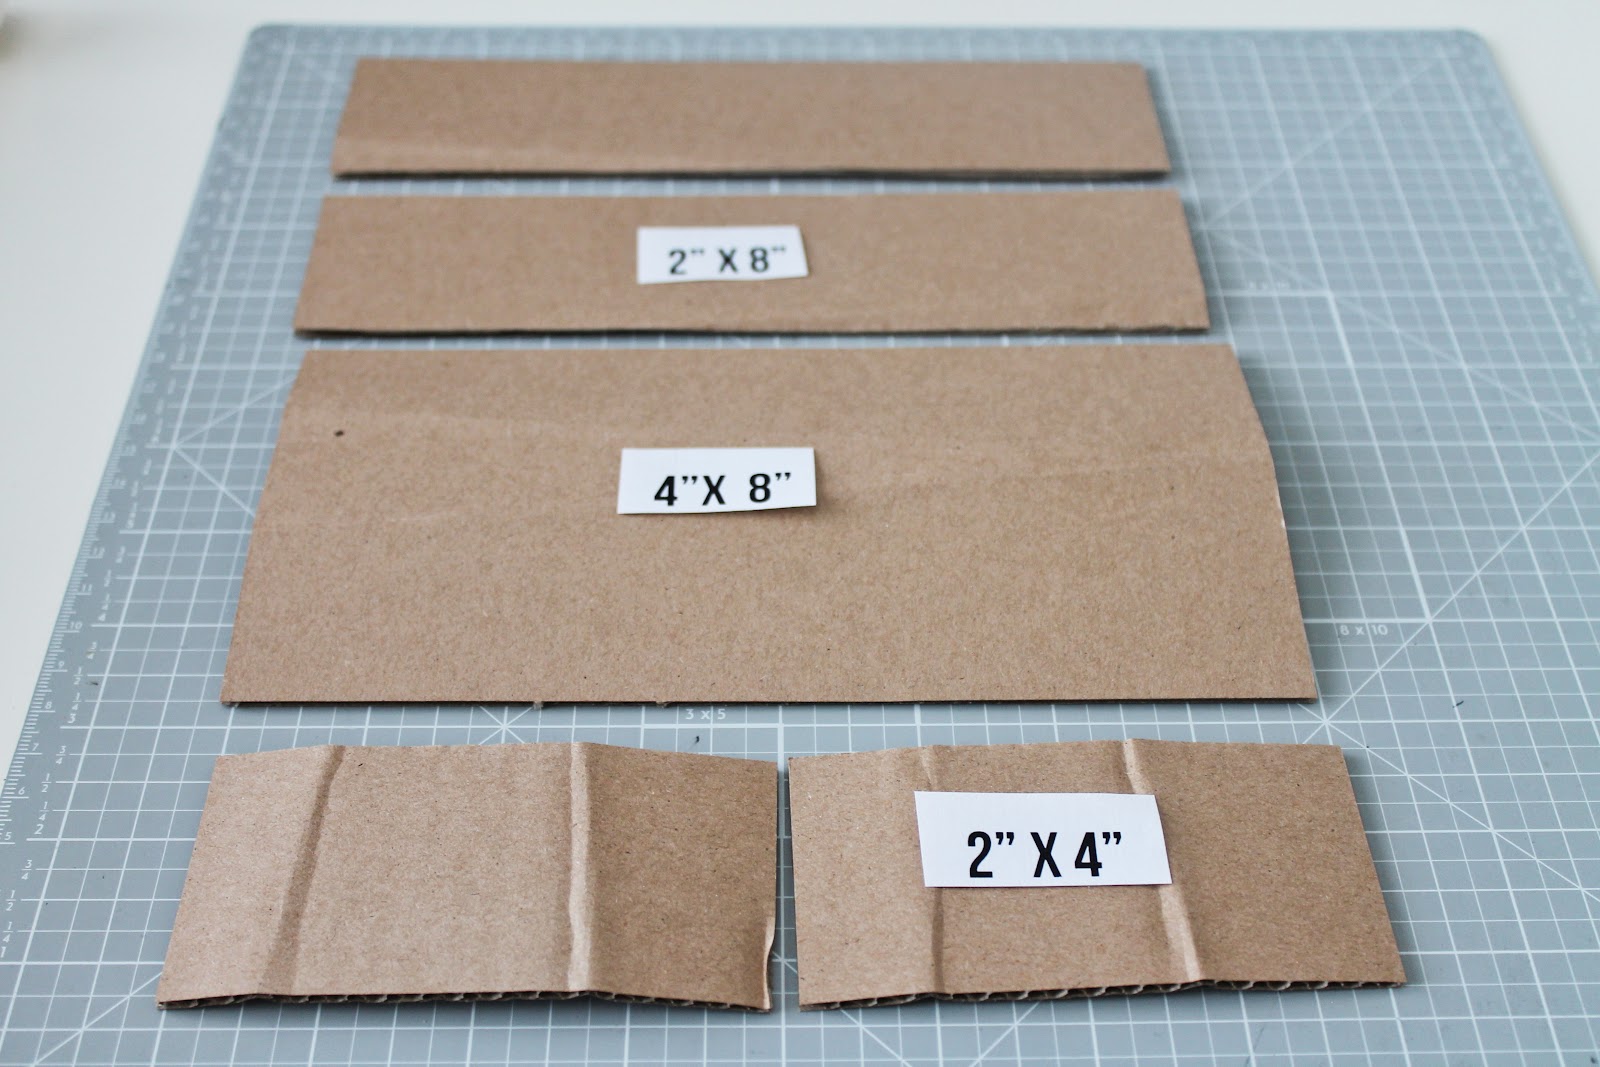
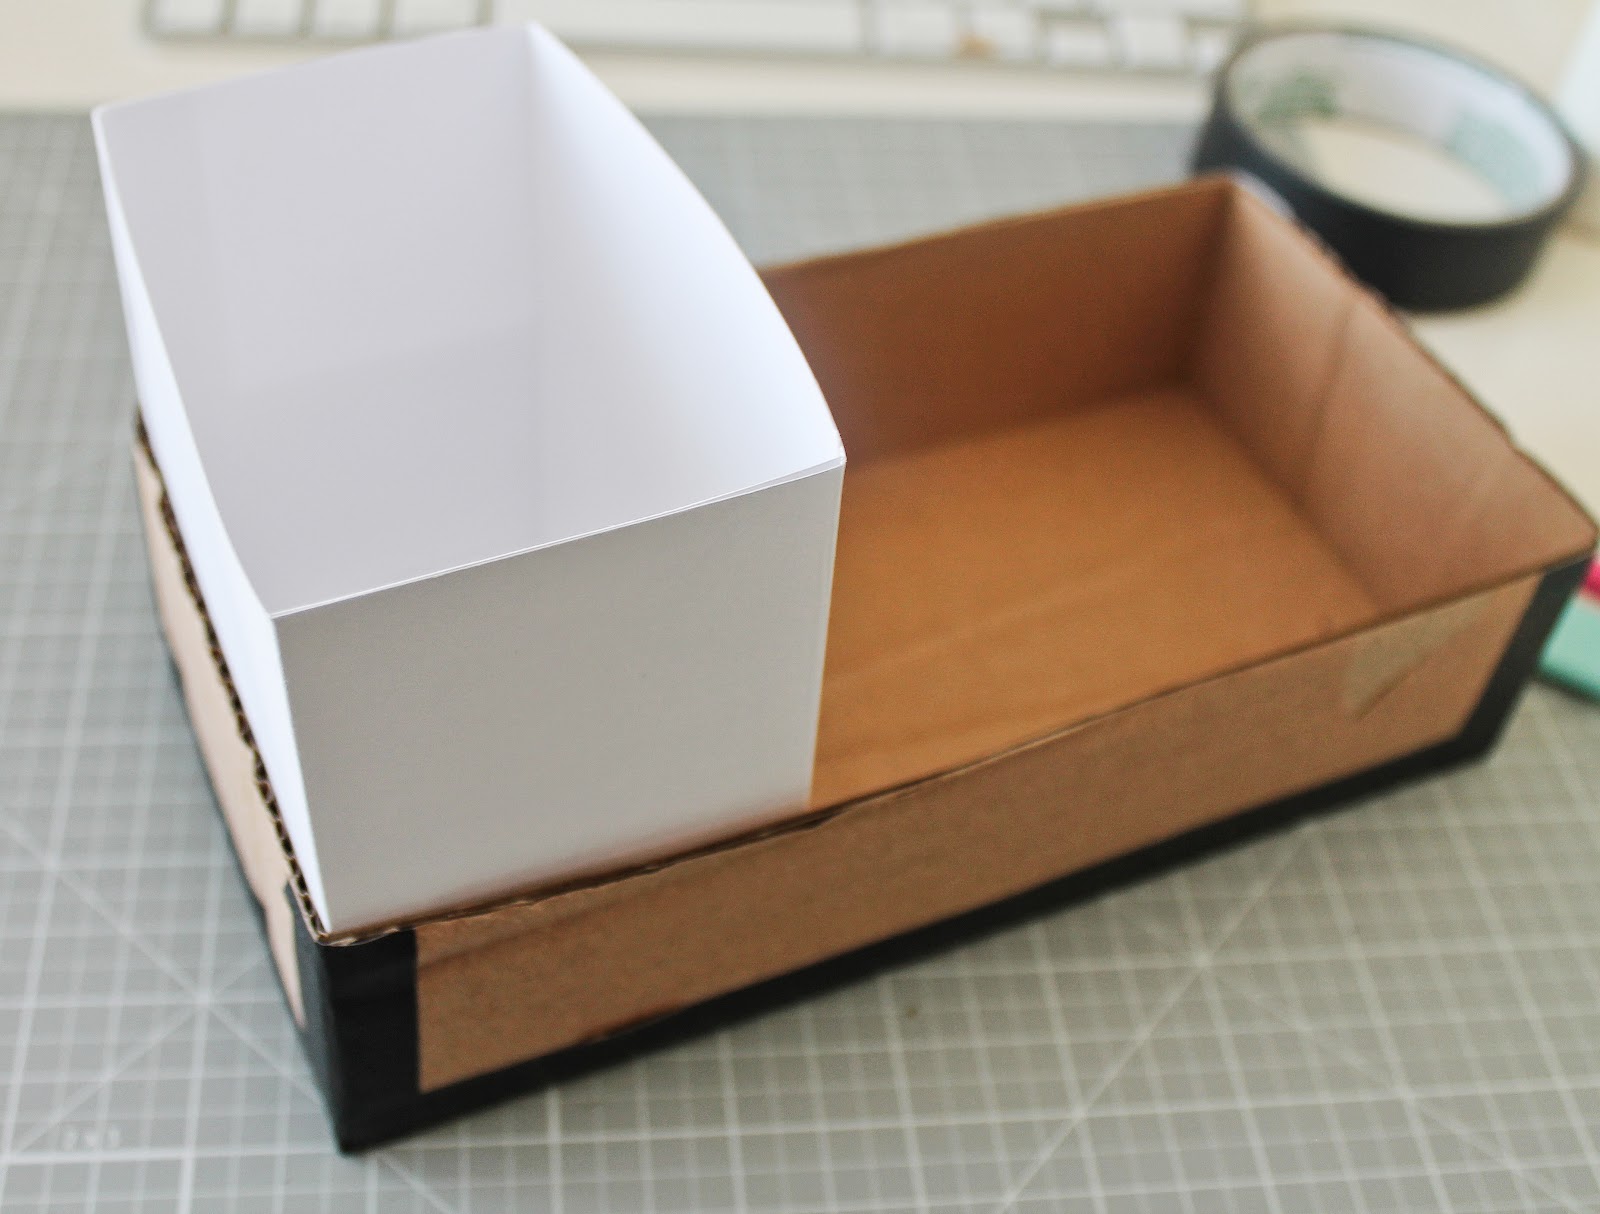
The organizer is made out of an old box (free) and has a size of 2” X 8” x 4”. To make your own, you will need to cut a total of six pieces from the box or use chipboard instead (one in 4”x 8”, two in 2”x 8” and two in 2”x 4”.
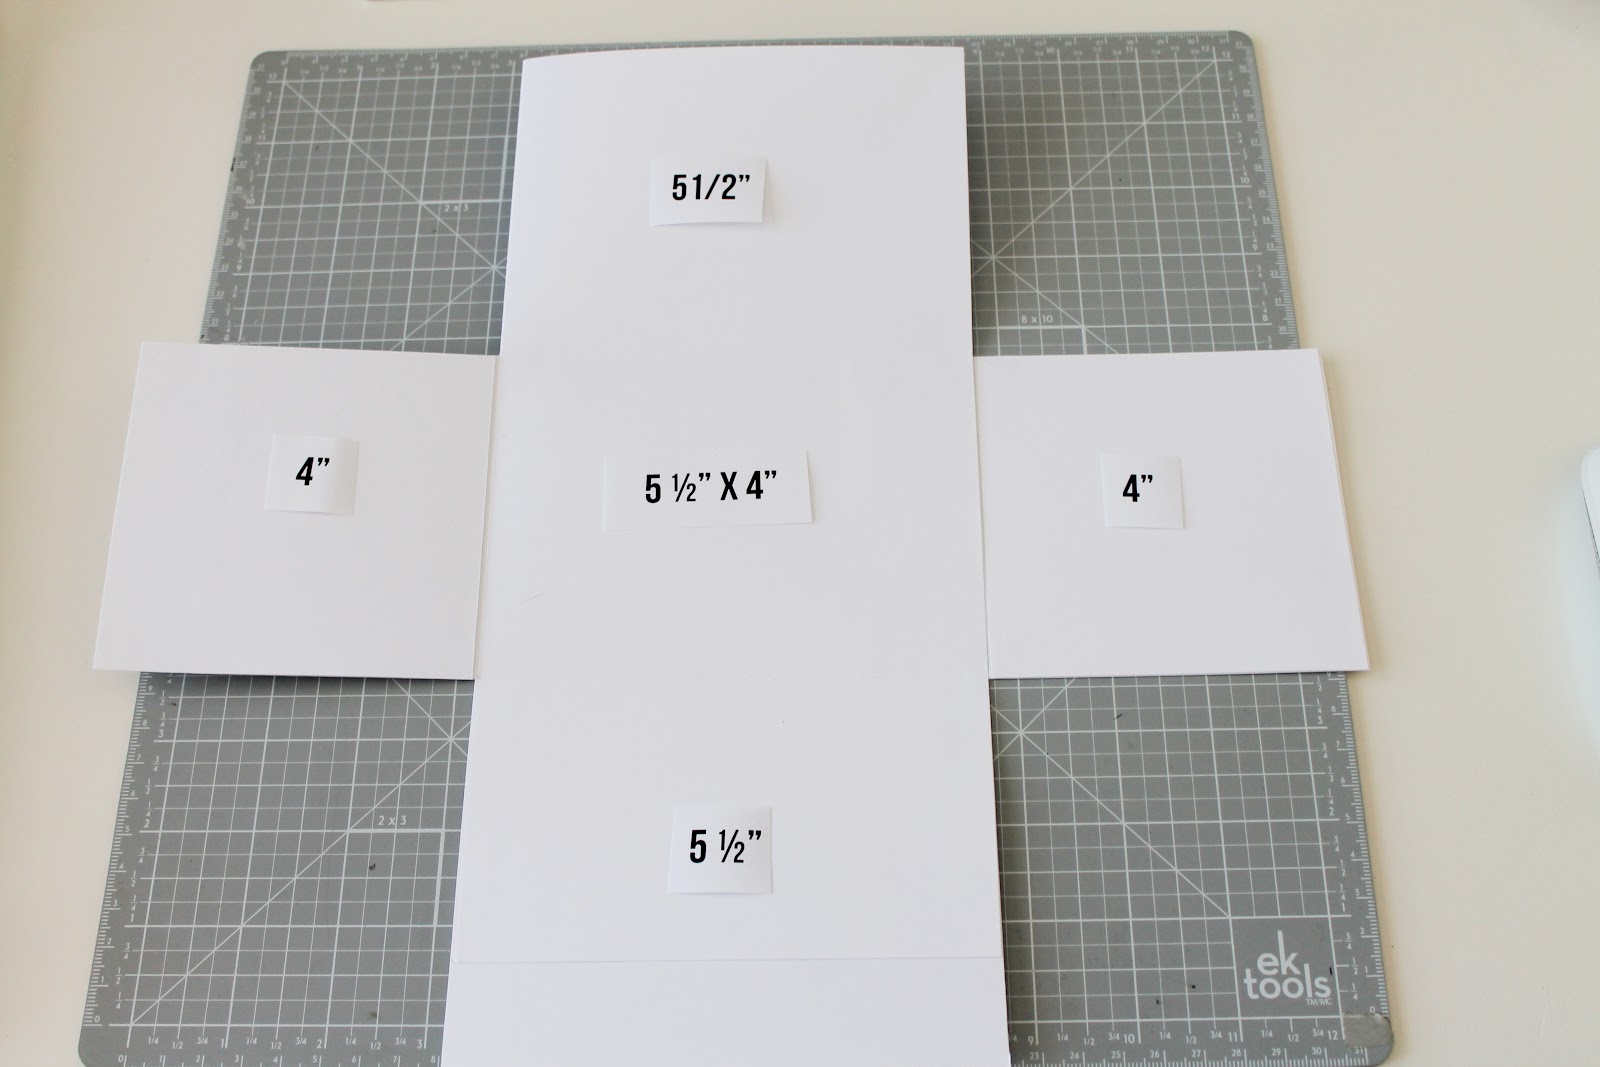
I used black Scotch tape to hold the pieces together and then proceeded to make two dividers for my box. I used heavy cardstock for these dividers. There’s no need to use chipboard as they will be attached later on to the heavier base.
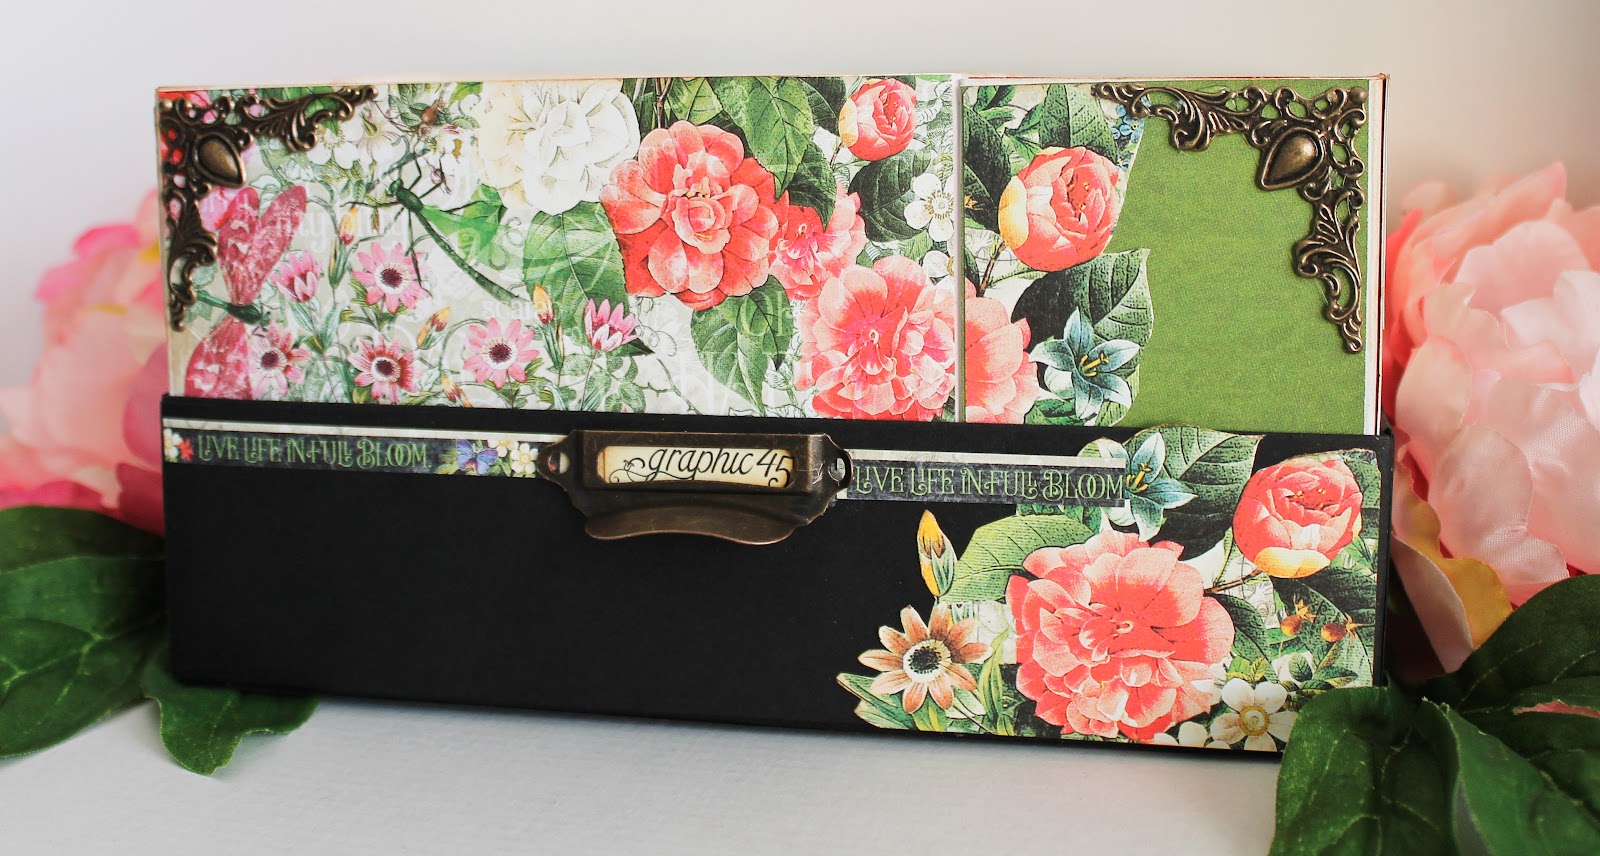
And then the fun begins – decorating my box! I loved using all the floral papers from this collection and then mixing them with coordinating papers from the pattern and solids paper pad.
I used a few metal embellishments I had from previous projects to decorate my box. I also used a Tim Holtz metal pull and a Graphic 45 label from one of the papers.
I am really happy with the result and can’t wait to start using my box while working on my upcoming projects.
Thank you so much for reading!”
Graphic 45 Products:
|
|
|
Just amazing what you can do with scraps and odds and ends from around the house. We hope we have encouraged you to look at your recycling with a second glance and turn it into something beautiful and functional. Big thanks to Glenys for sharing this tutorial, and to you for joining us here on the blog. Be sure to leave your love in the comments below, and as always…
Happy Papercrafting!


One Response
You can find the best wooden desk organiser for yourself on: https://www.wood-presents.com/desk-organizers/