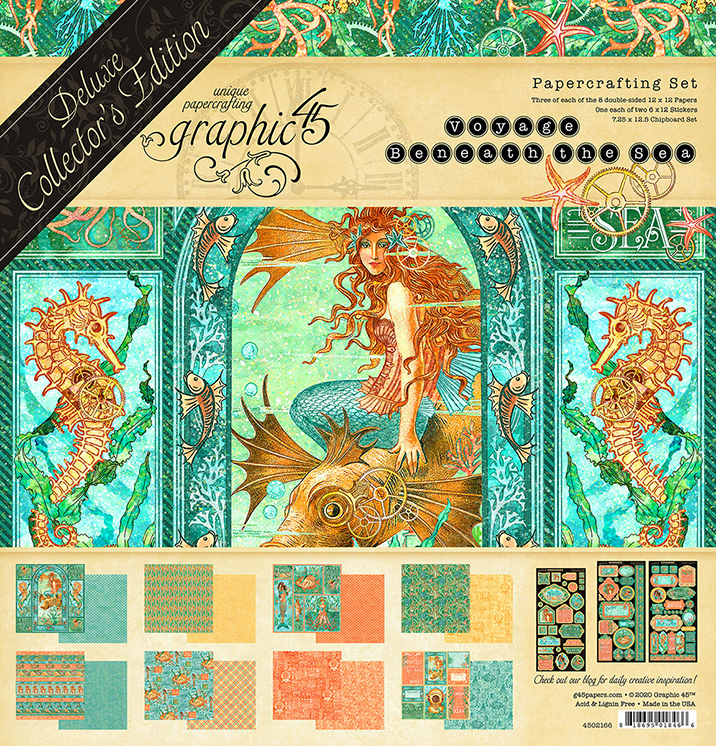
Mix things up this month with our #G45mixedmedia- March Challenge. To plant some seeds of inspiration Graphic 45 Brand Ambassador, Boule de Scrap is sharing a step by step tutorial on how to create your own Altered Canvas featuring our Voyage Beneath the Sea – Deluxe Collector’s Edition. This tutorial is filled with glorious techniques including how to create faux wood panels using chipboard and paint, and how to create your own rustic frame.
“Hello friends, today I come to present my new project to you.
This one is made for the challenge of the month, #G45mixedmedia.
This is an altered canvas made with the sublime collection Voyage Beneath the Sea.
In this tutorial, I will teach you how to create a faux wood background with cardboard.
And create a rusty metal frame.
Voyage Beneath the Sea Deluxe Collector’s Edition
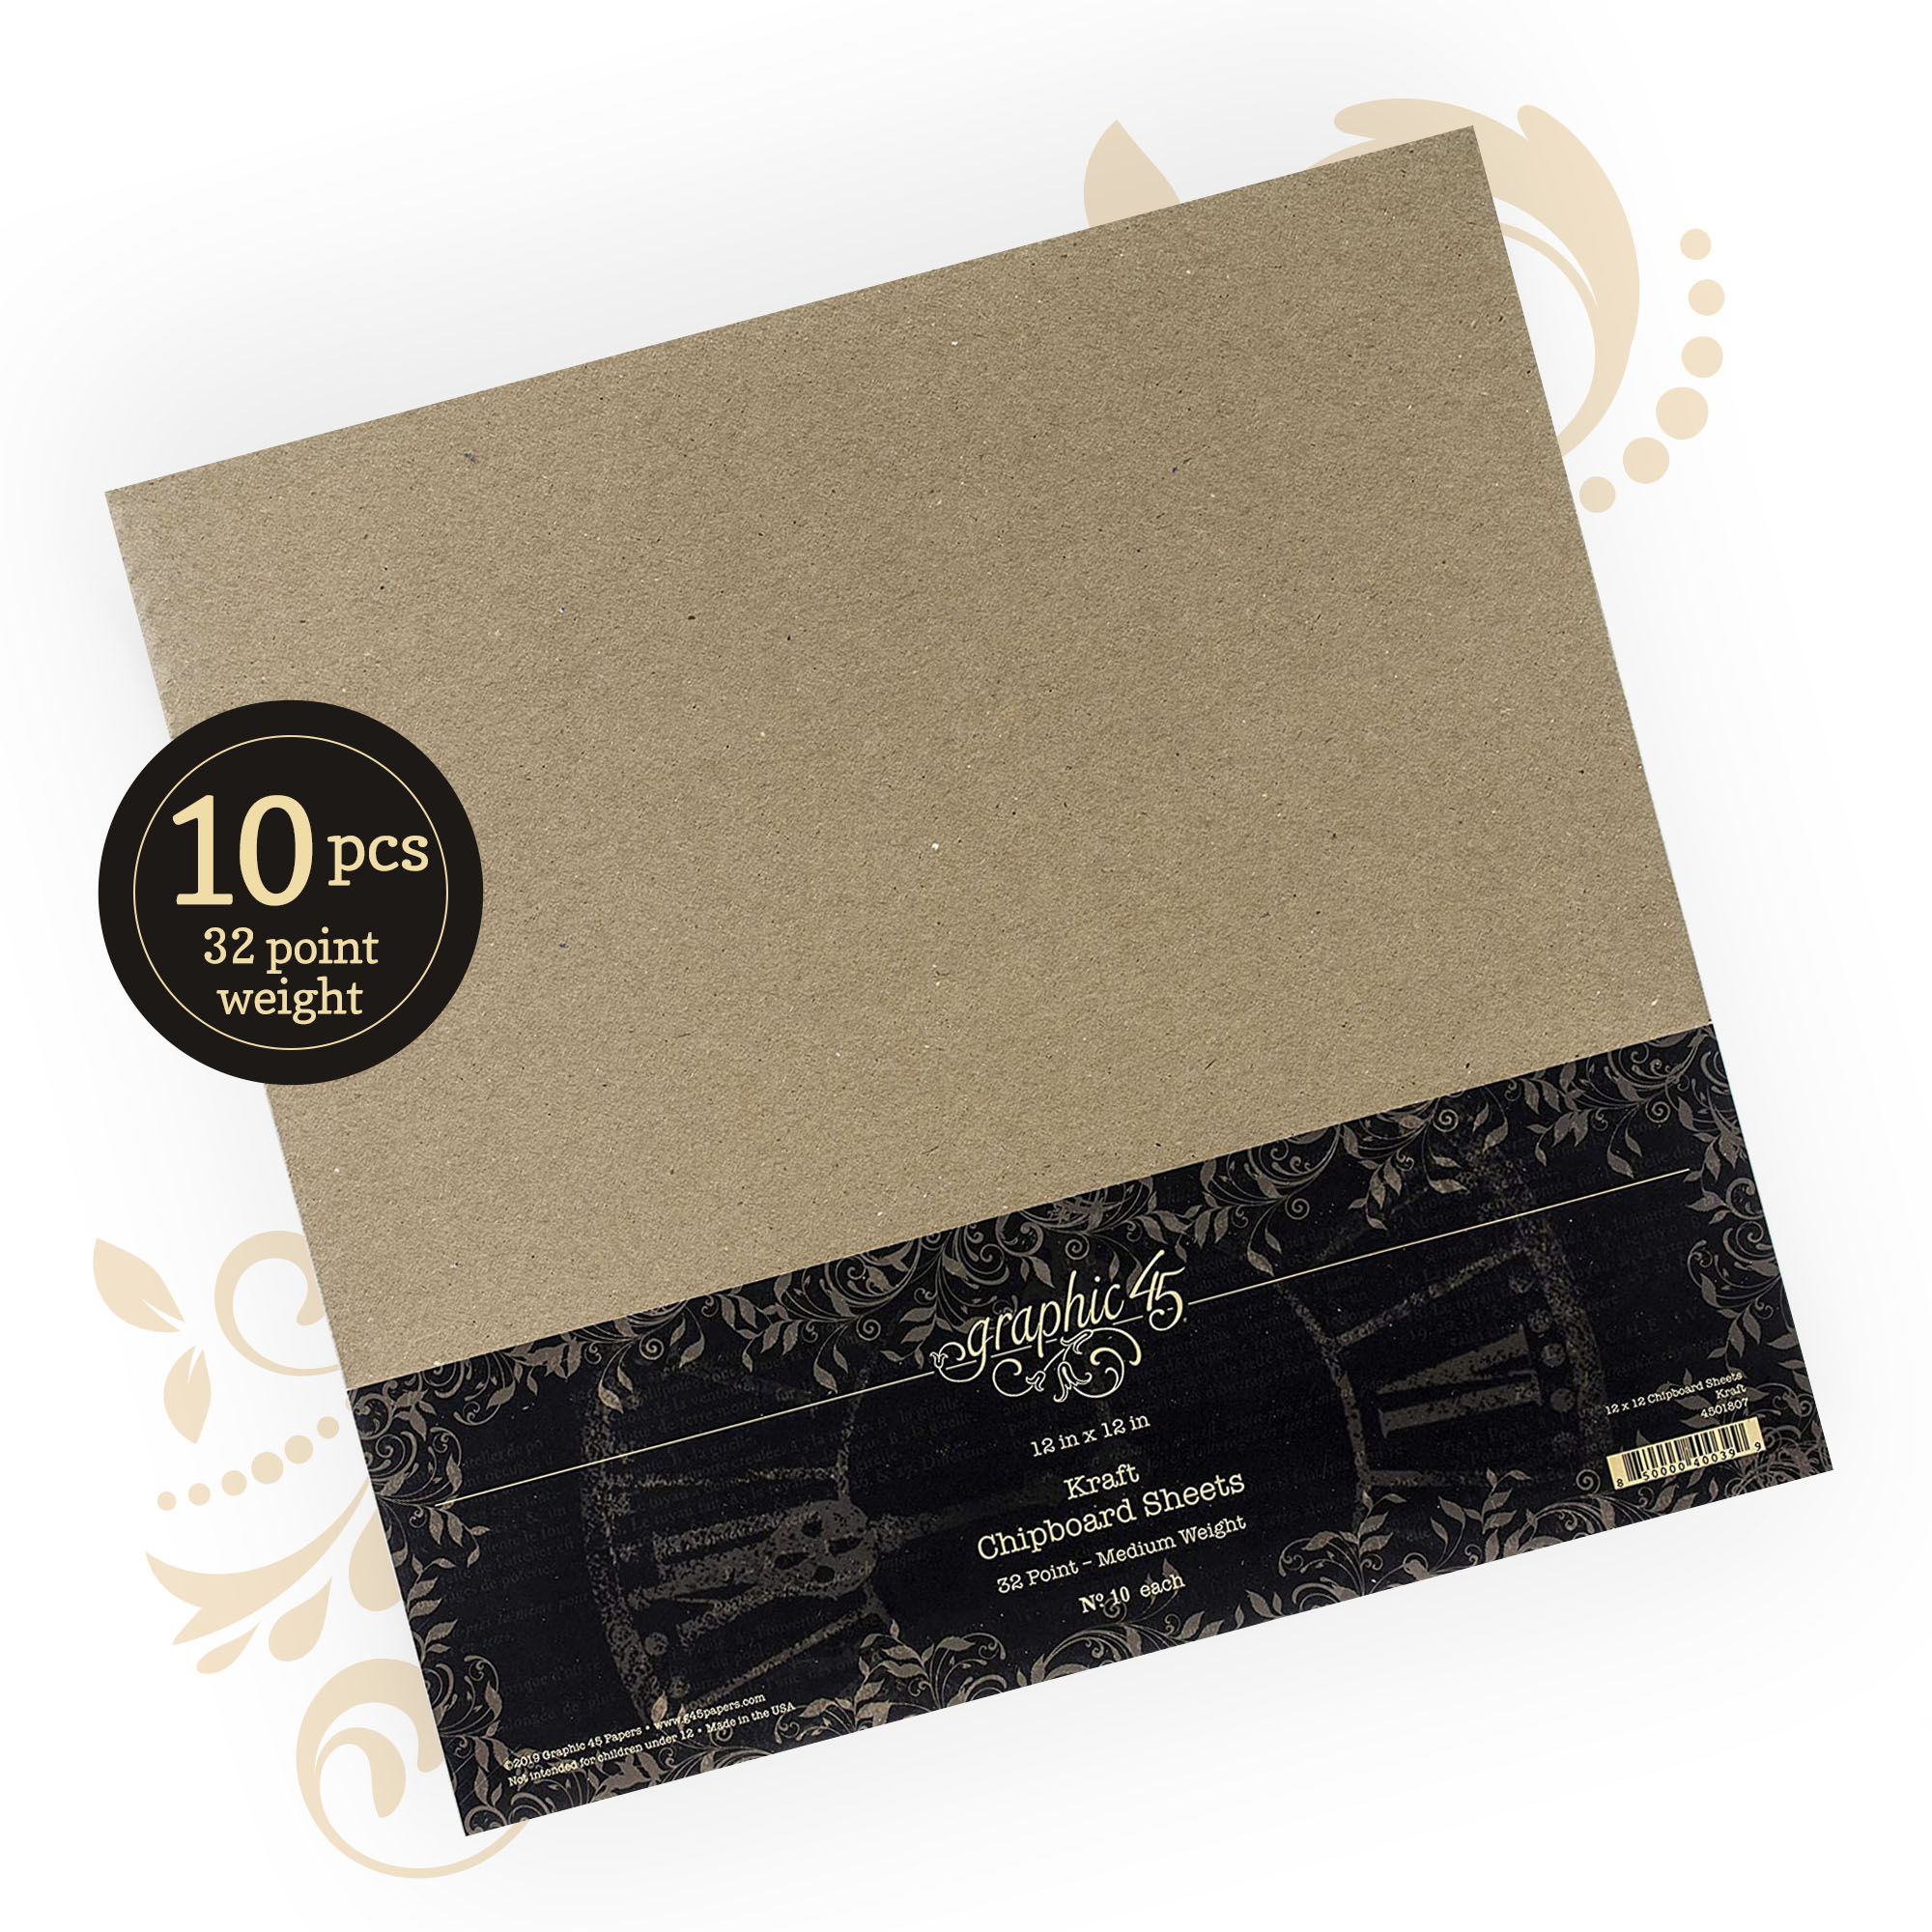
Kraft 12″ x 12″ Chipboard Sheets
Glue
Black gesso
White gesso
Embossing powder (black, brick, bronze, gold) / heat gun
Embellishments
Cardboard
Vintage distress
Spray ink ( blue and gold)
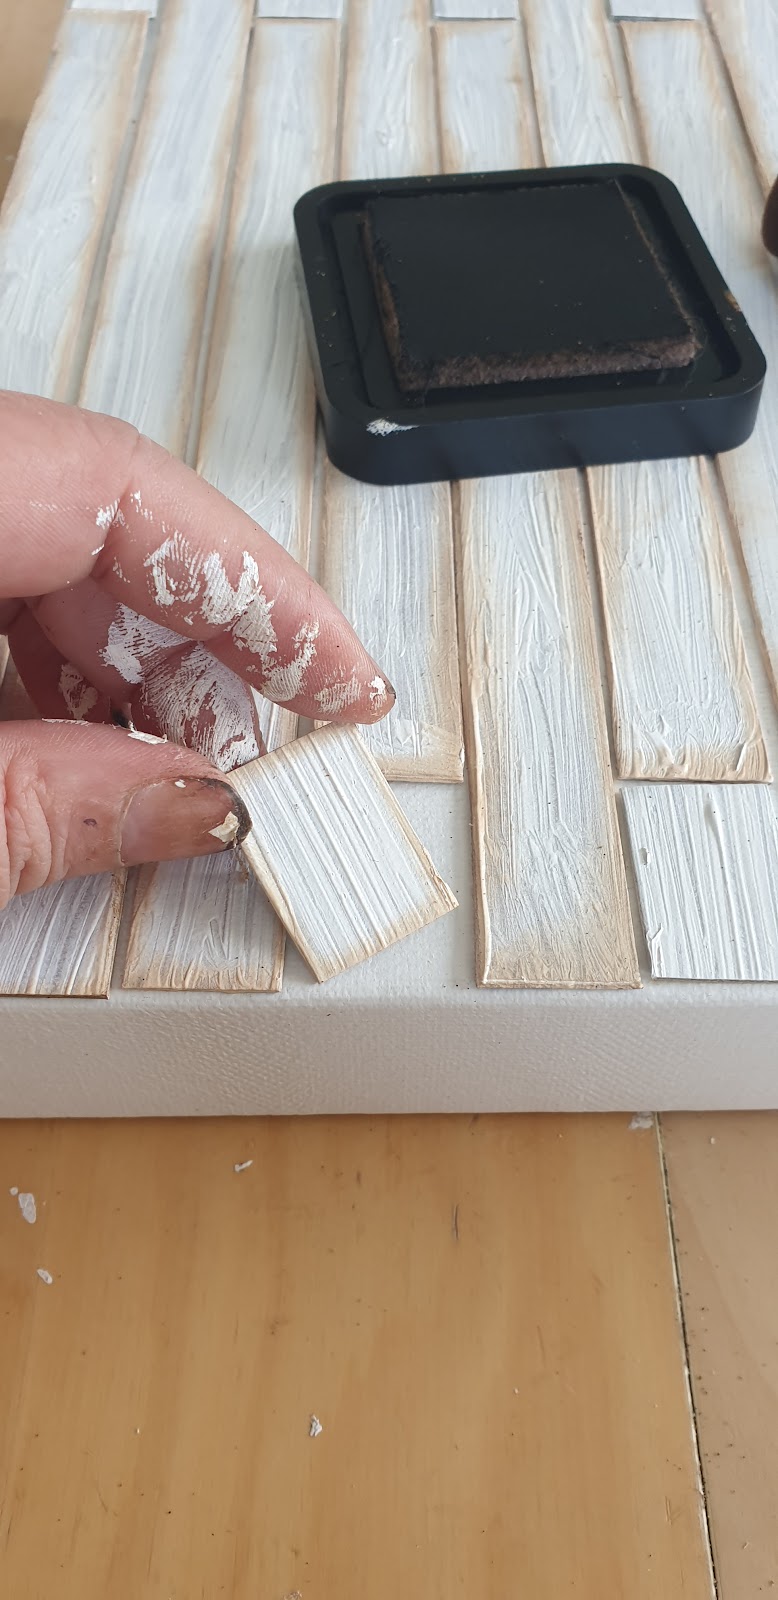
In a cardboard, cut 20 strips 2 cm wide by 25 cm.
0.79 inch x 9.80 inch
Then paint each strip of cardboard. Paint with a large brush and apply a lot of paint for texture. This will give a grooved wood effect.
Once the drying is complete, come and ink the edges.
We will then stick our cardboard strips on our support. We leave a gap between each strip
We glue these as in the photo, alternating, a strip at the top, and then, a strip at the bottom. Fill in the voids with pieces of strips.
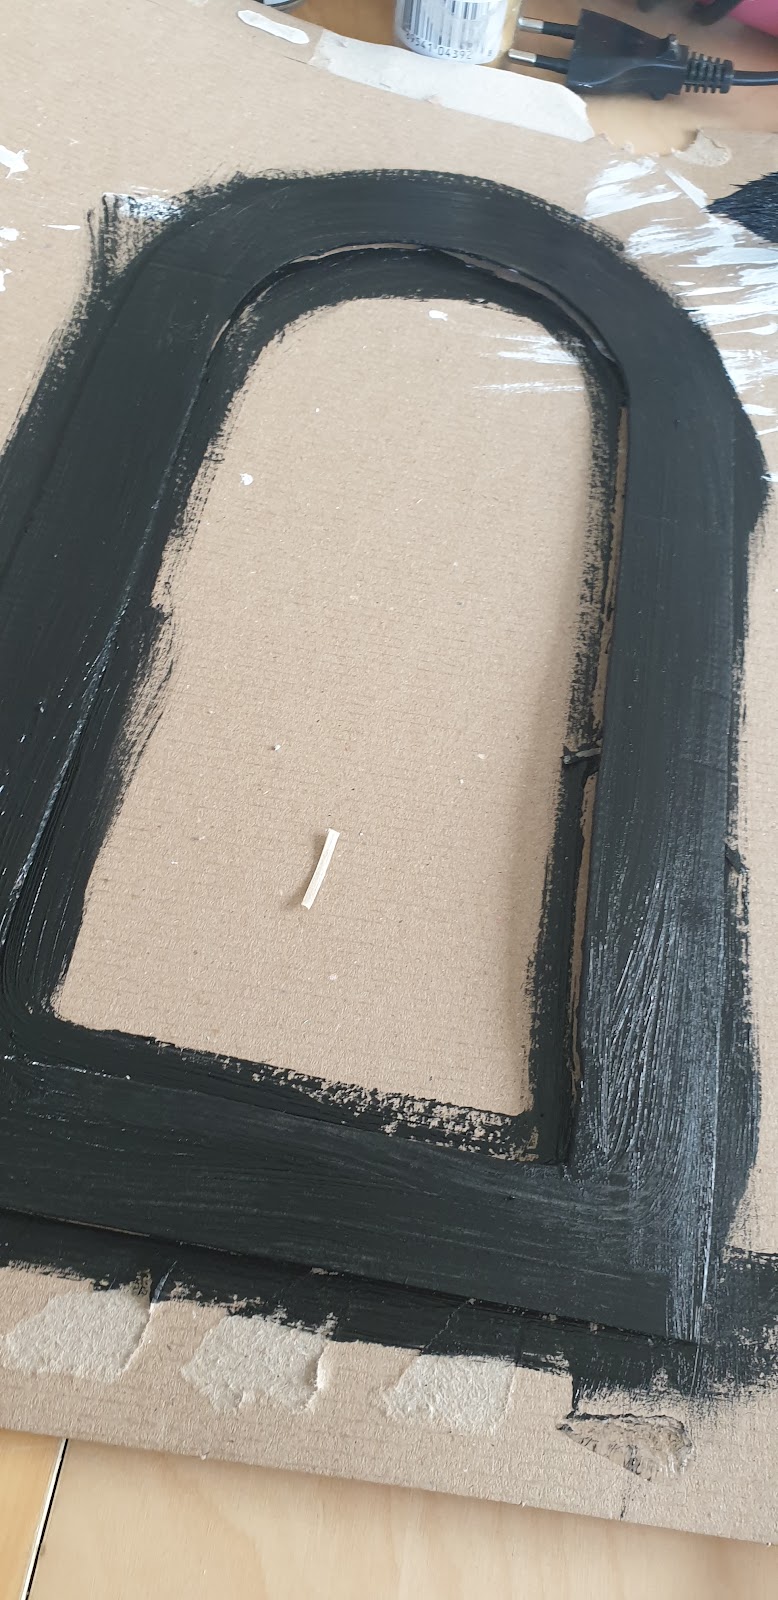
Leave to dry. In the meantime, we will move on to creating the faux metal frame, which will be at the center of our project.
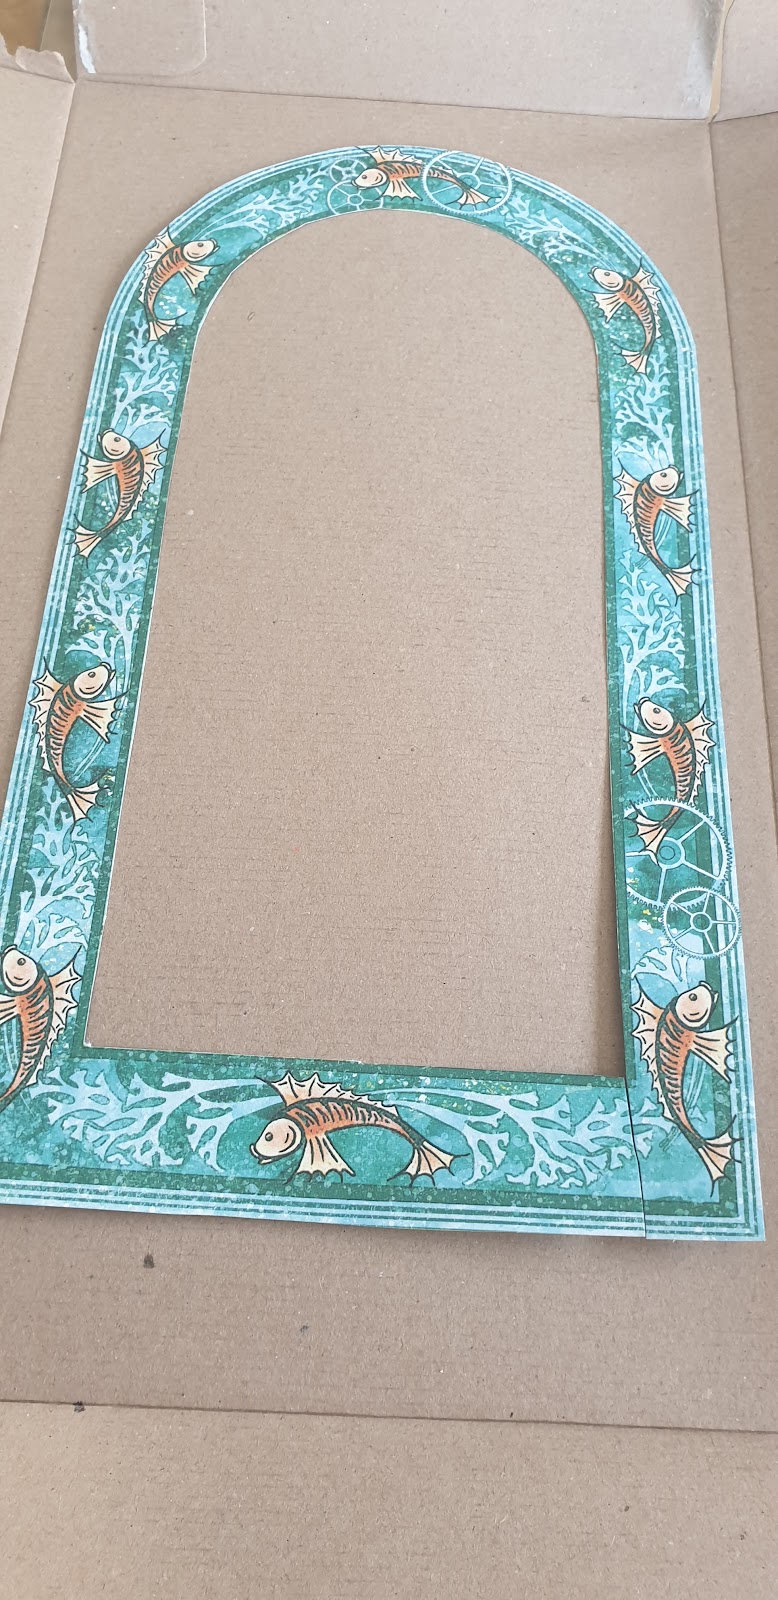
We will reproduce on cardboard, the frame available on our paper. So we are going to cut it and use it as a template.
We are now going to paint our frame black. Once dry, we will emboss our support by mixing different embossing powders. For a rusty metal look, you will need brick red, bronze, gold and black.
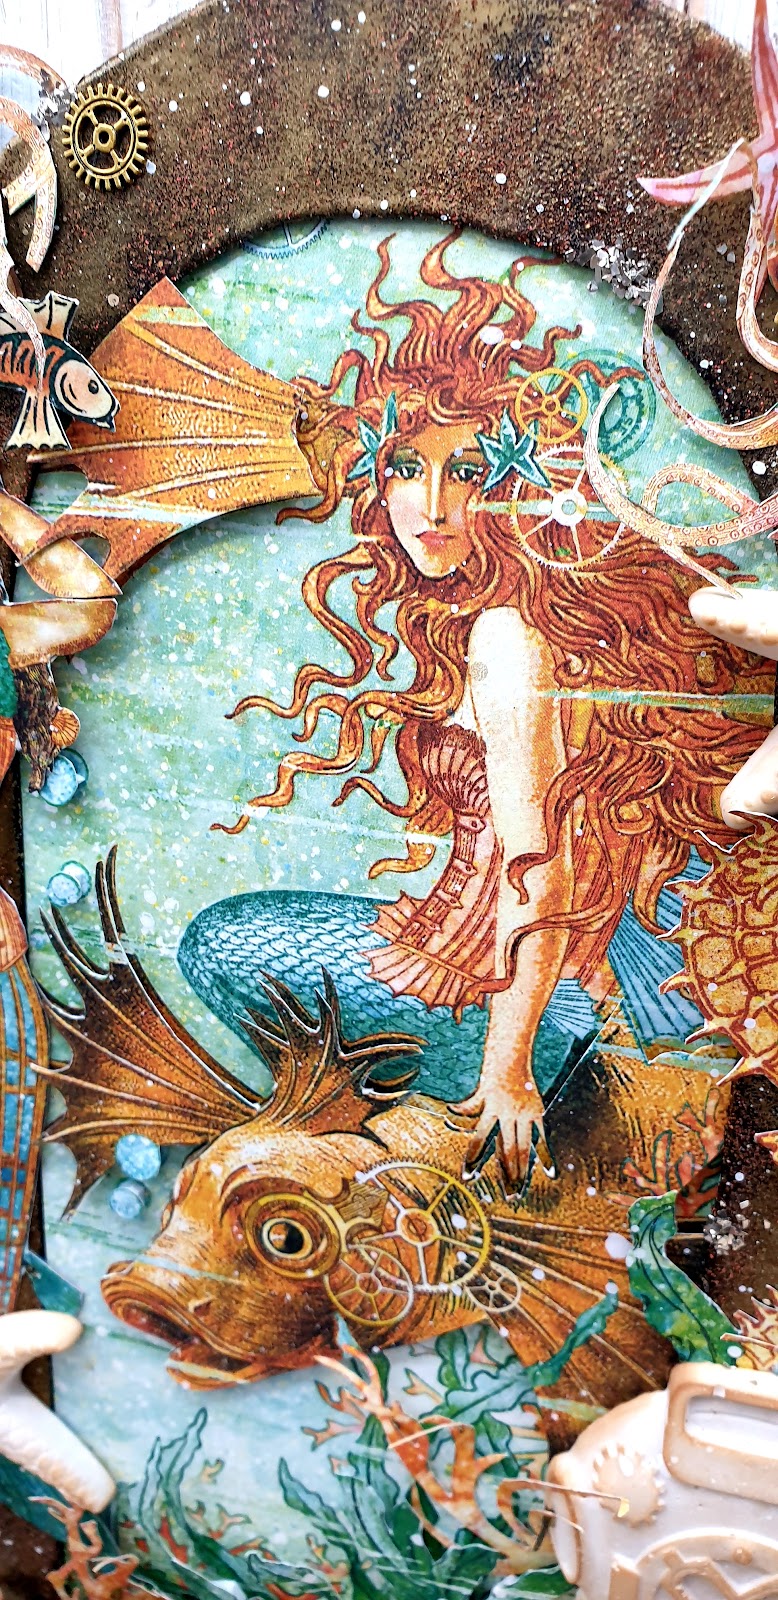
Our support, and our framework are ready. We are now going to put our central image in our frame. We use that of our paper. To create relief, we are going to cut shapes from the same paper and superimpose them, we glue with 3d cubes.
We are going to glue our paper in the center of our board using 3d cub.
Then we come to glue our frame, to give more relief, we glue the cardboard scraps below.
Now we are going to decorate the towers of our frame. For this, we will cut as many drawings as possible from our papers. Algae, fish, starfish, … We are going to glue them, also in relief, at different heights.
We can add embellishments in wood and plaster on the maritime theme.
To recall the steampunk side, I add gears.
Once our composition is finished, I will add touches of spray inks. This will bring shine to the project. As well as touches of white paint, to bring contrast.
Once our composition is finished, I will add touches of spray inks. This will bring shine to the project. As well as touches of white paint, to bring contrast.” ~Boule de Scrap
Want even more Graphic 45? Sign up for our newsletter here!


One Response
Fabulous, thanks for tutorial. My tutorial about mixed media art is late…