Hello, G45ers!
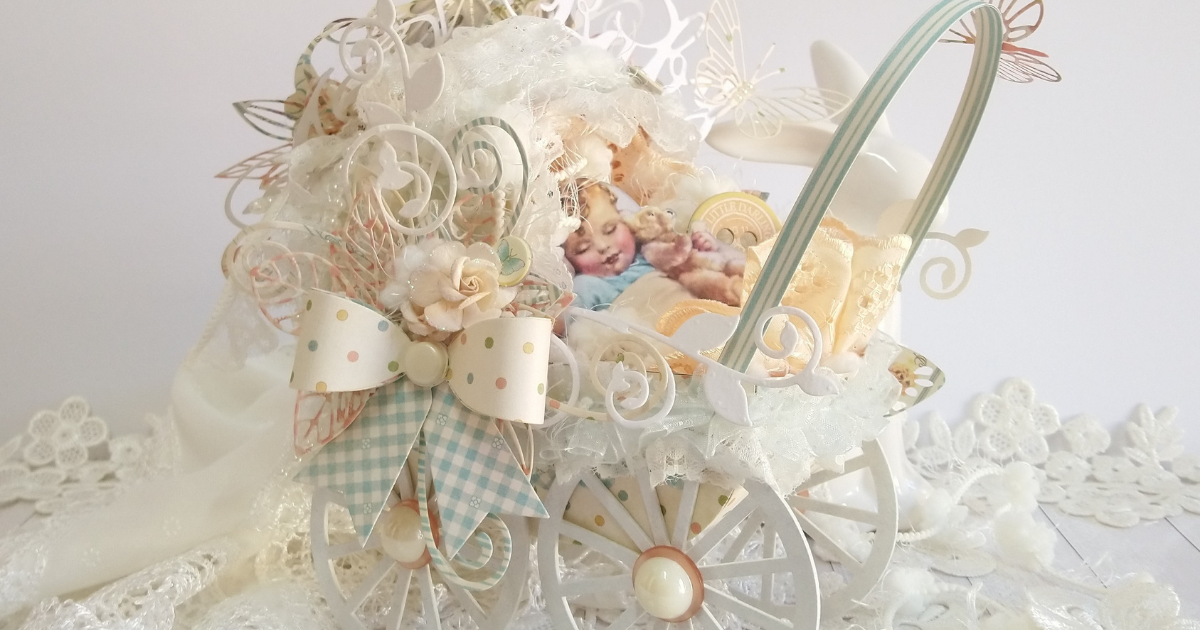
Today we have a precious handmade Paper Baby Carriage inspired by our #G45LightSide – May Challenge. This off the page project and step by step directions have been created by Brand Ambassador and the Queen of Layering, Tanya Cloete. Tanya has used our Little Darlings – Deluxe Collector’s Edition and her die cutting machine to make this project come alive. So grab your pastel papers and create along with us!
#G45LightSide – Little Darlings Baby Carriage
By Tanya Cloete
“Hello, dear G45ers! Happy to share with you my #G45LightSide project this month featuring the sweet Little Darlings Deluxe Collector's Edition. This Graphic 45 collection is just so ADORABLE and I was thrilled to see it back as a DCE! I have decided to create this super cute Baby Carriage with my Silhouette. I have also used lots of die-cuts, fussy-cut pieces, lace, wool, flowers, and pretty bows to put it all together.
Here with the Supplies and Instructions, you may use to recreate such a project:
Graphic 45 Supplies:
Other Supplies:
Cut a baby carriage (2 sets) from the pattern sheets in the collection using the cut file from the Silhouette.
Pink Carriage:
– Remove the tabs and the handle.
– Separate the carriage, cut off the sides on the perforated lines, you should have 3 pieces.
Tip: The pieces of the pink carriage will be adhered to the inside of the polka dot carriage after assembling. This will cover up the tabs showing on the inside and will also make it sturdy enough to support the weight of the wheels.
Polka Dot Carriage:
– Remove the handle.
– Adhere the tabs with red double-sided tape.
– Assemble accordingly.
Tip: Using red double sided tape will make assembly easier and will also prevent the box from falling apart.
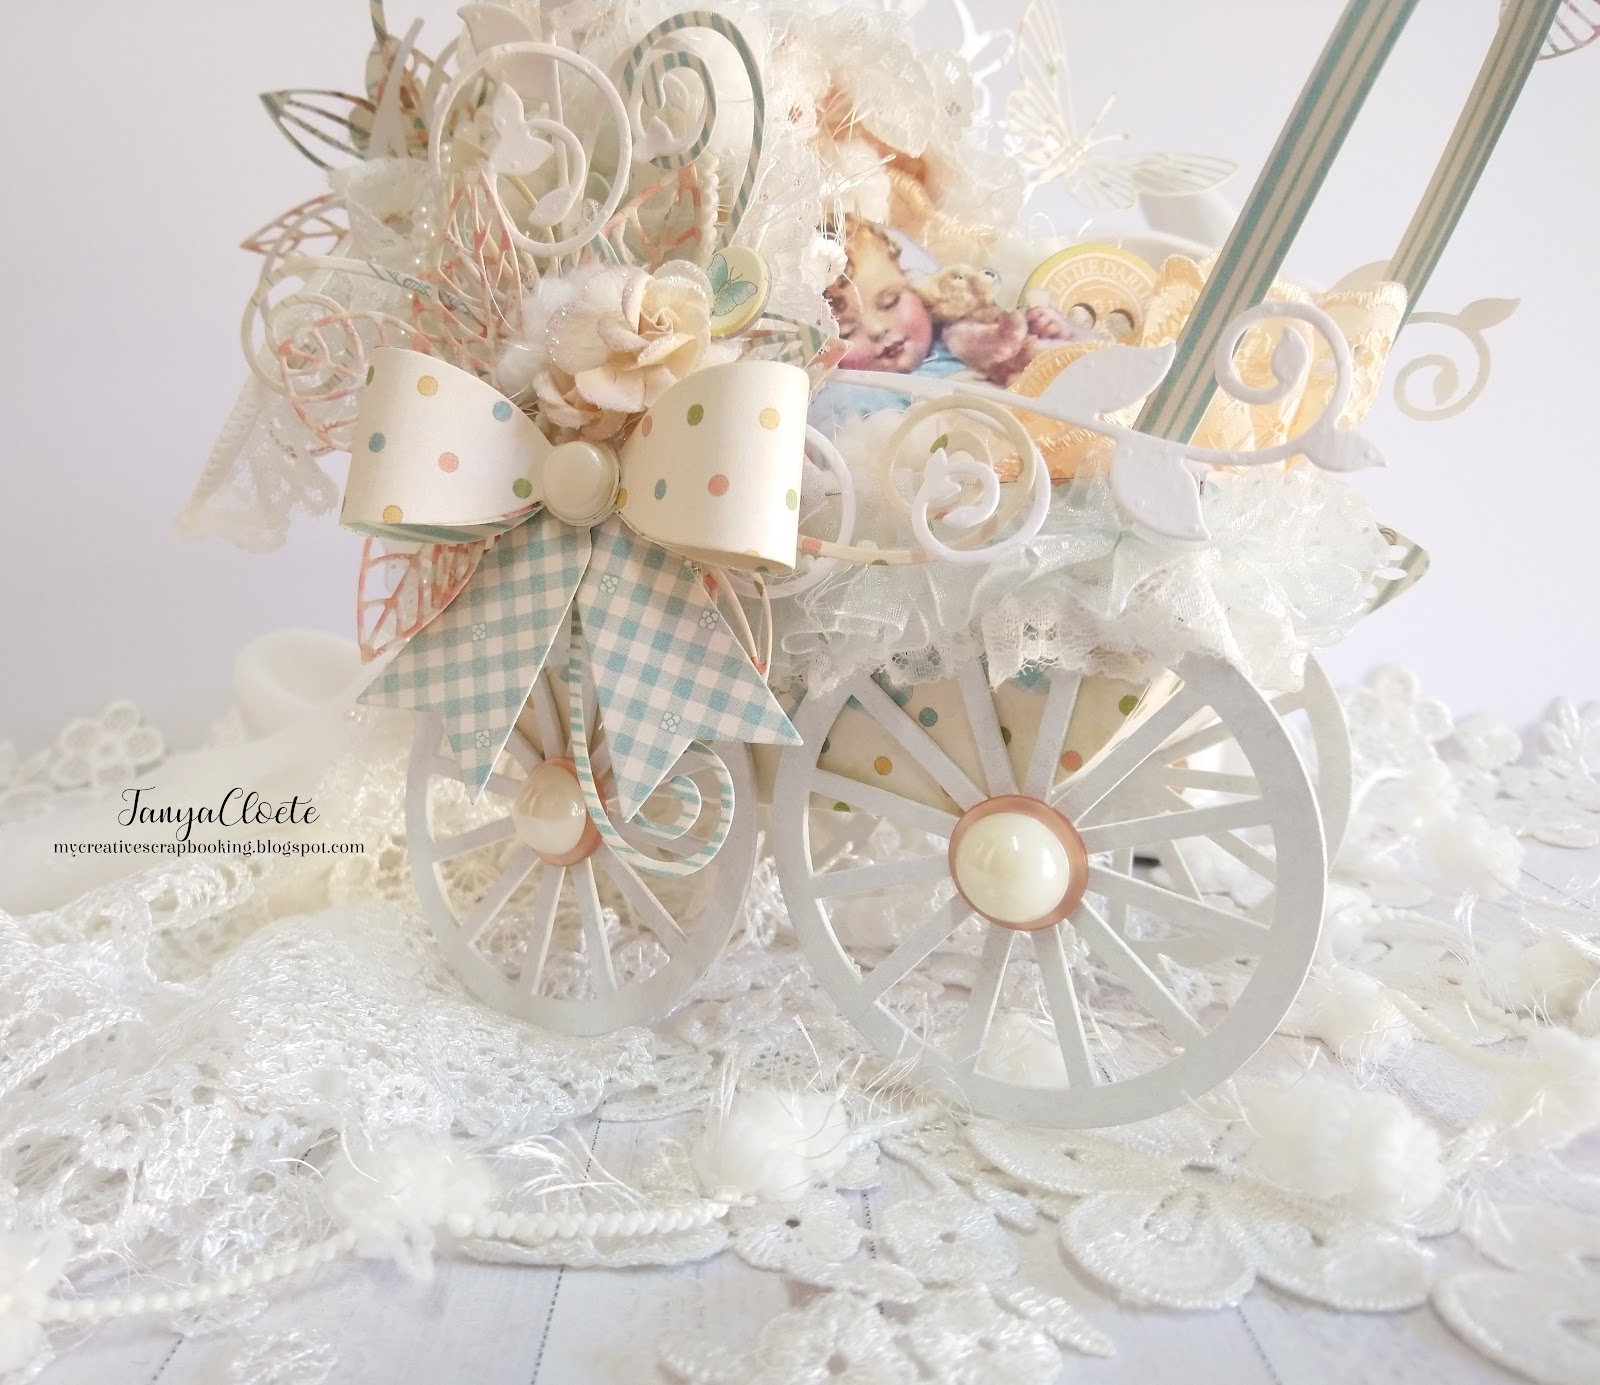
Cut a few die-cut leaves, butterflies, flowers, swirl shapes, borders and a heart for decoration.
Cut one baby picture from the collection with a square stitched die and a circle from watercolor paper. Add the sticker from the collection on top of the circle die-cut shape.
Cut a few bows from the pattern sheets. Fasten with a brad.
Tip: Curl two bow strips forming a curve using the back end of a pencil or similar object. This makes folding the end pieces together a little easier.
Fussy-cut some of the baby pictures from the pattern sheets. I cut a few because I was not sure which one of these would fit best in the carriage.
Tip: You can use the extra pieces on another project. It is always nice to have some extra fussy-cut pictures from a collection on hand.
I had the wheels laser cut from wood and chipboard. The chipboard wheels I heat embossed with white embossing powder and adhered them to the wooden wheels.
I was not happy with the wheels and it did not match the colours of my project so I did not use them in the end. I used some extra chipboard wheels instead and these I painted with white paint. I also used the same size instead of one big and on small wheel.
I played around with lots of lace that I had in my stash that I wanted to use on my carriage. Making sure I chose the right colours to match the colours of my project.
Make a new handle for the carriage by cutting two strips from the pattern sheets. Adhere the two pieces together making sure the pattern shows in opposite directions.
Tip: You want the handle to look the same on the inside as on the outside.
Add some pom pom yarn/wool and lace to the inside of the carriage (do not glue) and then place one of the fussy-cut baby pictures on top.
Tip: You want this to look real, so play with the lace around the fussy-cut picture making sure it looks like the 'baby' is tucked in the 'blankets.'
Add the pretty bows on the sides and on the back of the carriage. Add a button and flat back pearl to the center of the wheels.
Tip: Adding a button and then a flat back pearl will give some colour to the wheel. Make sure you can still see a bit of the button.
Add a flower on top of the bow and tuck a pom pom yarn/wool piece behind it. Add a chipboard circle from the collection to the flower. These chipboard pieces from the collection are so darling and make pretty neat embellishments.
Add an eyelet to the chipboard piece and cover the circle sticker with a resin heart embellishment. Tuck in some more fussy-cut pictures and a button chipboard embellishment behind the frame.
Add the square die-cut piece to the other side of the carriage, tuck it in behind the bow.
Add flat back pearls to the center of the butterflies.
Thanks for stopping by!
Happy Papercrafting!”
So many great tips that would be helpful on any unique papercrafting project! Help us thank Tanya for sharing this beautiful baby buggy by leaving a comment below. We want to thank you as well for making our community so wonderful and inspiring! Have a wonderful day, and as always…
Happy Papercrafting!