Hello, G45ers!
Add some festive fun to your holiday home decor. Today on the blog, Graphic 45 Brand Ambassador, Carla La Vera shares a step by step tutorial on how to create your own Christmas Explosion Boxes. These boxes can be done with any paper collection you have at home and a few sheets of cardstock. Just grab your fussy cutting scissors and let’s have some fun.
Christmas Explosion Boxes
“This month I must do a seasonal project, and I was so excited because Christmas is coming soon, and work with this new Christmas collection made it even more exciting.
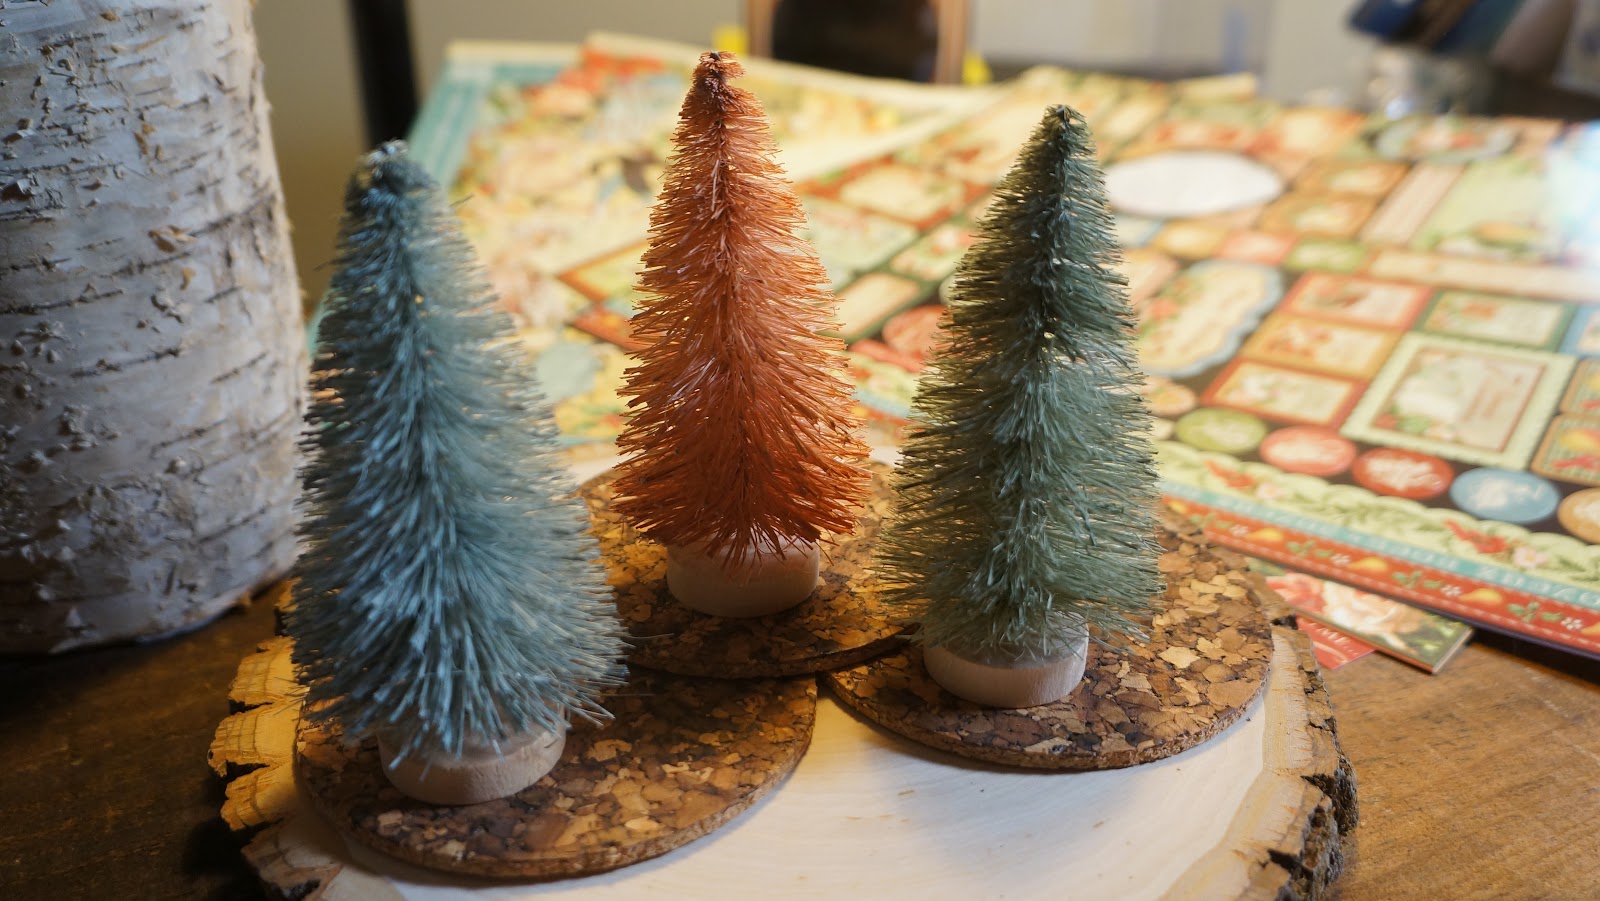
Almost a week ago, I was looking for something different for Christmas and I found these small trees with beautiful colors, then, three collections coming to my mind. Christmas Time obviously; Twelve Days of Christmas and Joy to the world.
Finally, I decided to do my project with Christmas Time, but I was tempted to do another option, only to show you that you may do with the same idea many options.
Take a piece of black cardstock (8 ⅜” x 8 ⅜”) and score a line at 15/16” from each edge, then, score another line at 1” from the first score line of each side. Finally, we got a square with 4 ½” x 4 ½”. fo
Trim this piece as shown, fold the score sections under the score lines and add parts a and b to the top 1” score section and the parts c and d to the bottom 1” score section, then, fold and add the 15/16” score sections inside the box’s lid.
Tip: If you want to do boxes with different measures, be sure to make the box’s lid ⅛” bigger by side than the measures of the box.
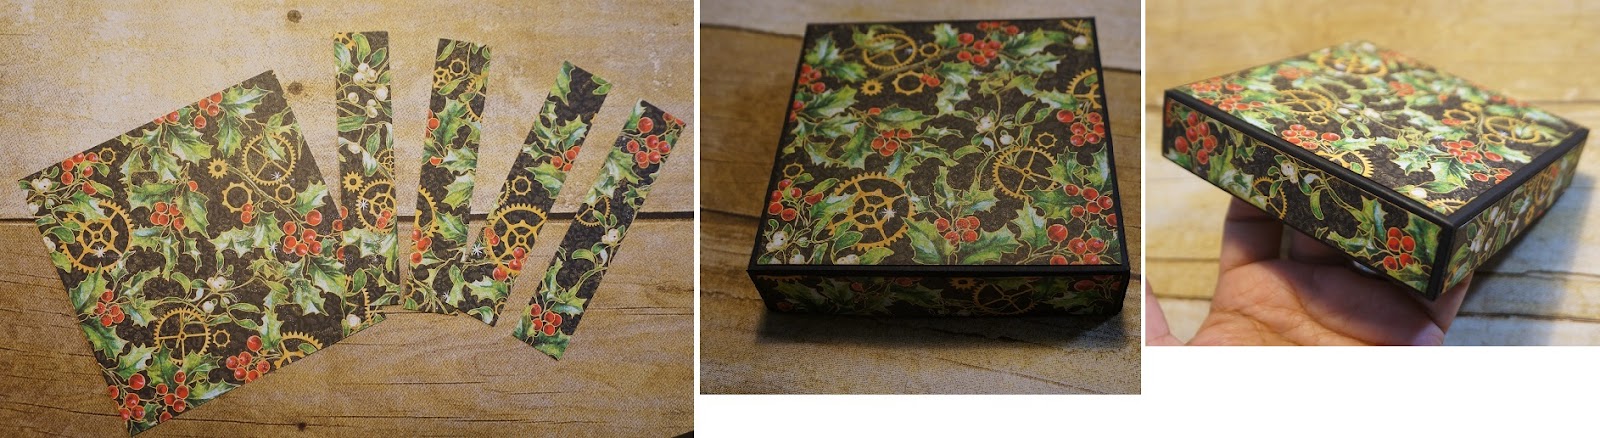
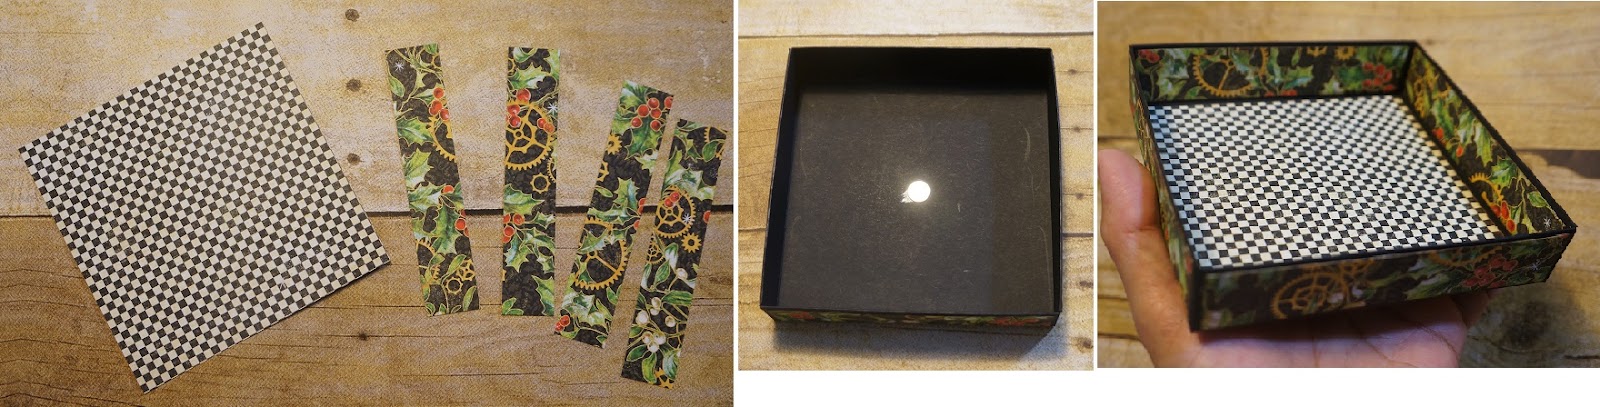
Take Holly and Mistletoe paper 8 x 8 and trim 1 square piece (4 ⅜” x 4 ⅜”) and 4 pieces (⅞” x 4 ⅜”), then, ink the edges and adhere these pieces to the top and lateral sections of the lid.
Take a Christmas Time Paper 8 x 8 and trim 1 square piece (4 ⅜” x 4 ⅜”) and trim 4 pieces (⅞” x 4 ⅜”) of Holly and Mistletoe Paper 8×8. Flip over the lid and place a magnet disc attached to the center, then, ink the edges and adhere these pieces to the inside of the lid.
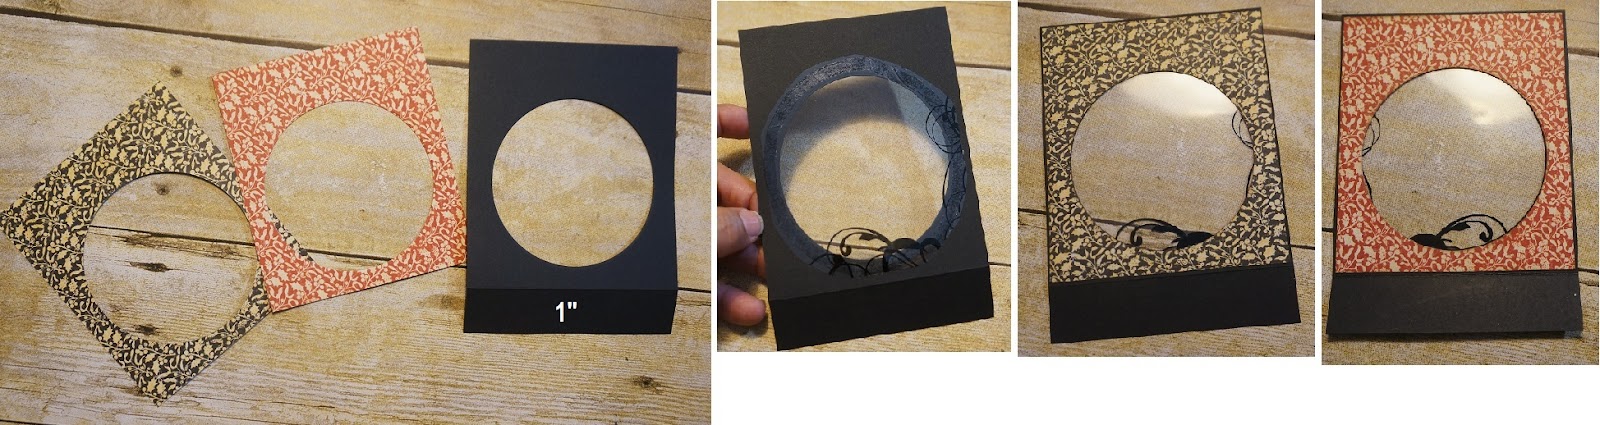
Trim a piece of Black Cardstock (4 ⅜” x 6”) and score a line at 1” from the bottom edge. Fold the score section under the scoreline. This side is going to be outside. Punch a circle with diameter= 3 ⅜” or less. Take care to center it between the lateral edges and leaving 1” from the top edge.
Take the Pattern and Solid papers shown and trim one Piece 4 ¼” x 4 ⅞” of each, then, punch a circle as shown in the picture above. We have to add these pieces to the black cardstock piece, take care to trim the circle in the right position. Save the round pieces because we will use them ahead.
Add a piece of acetate to the black piece, then, add the black pattern piece outside and the red one inside.
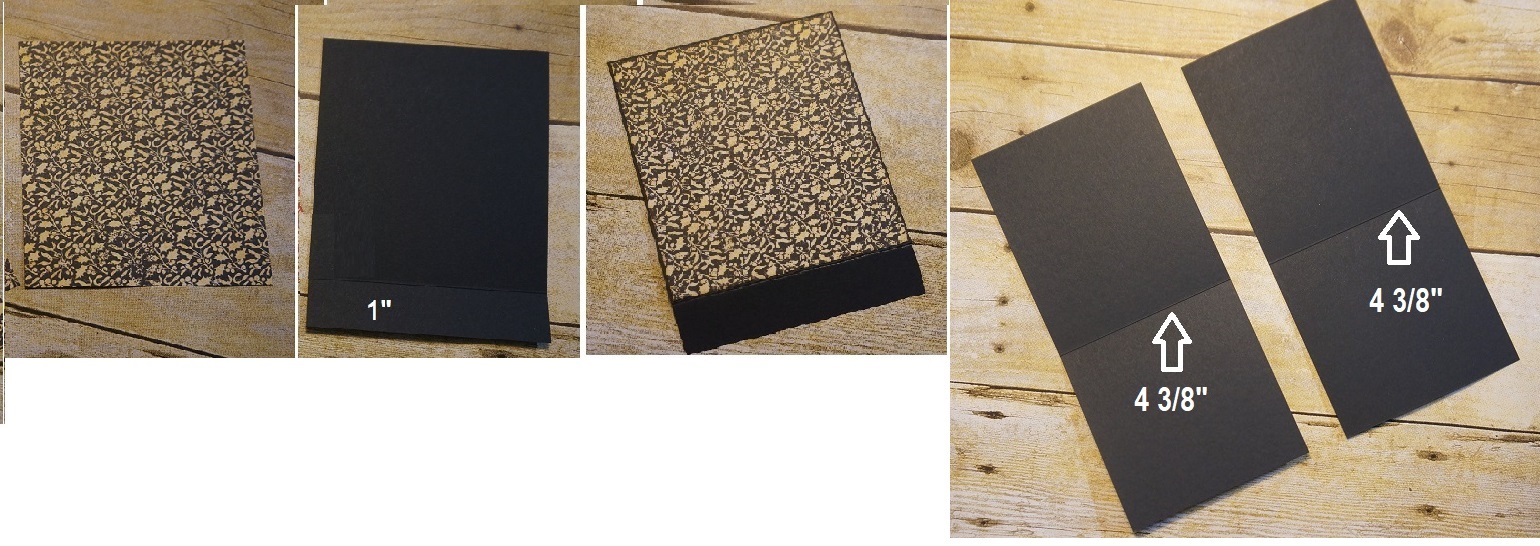
Trim a piece of black cardstock ( 4 ⅜” x 5”) and score a line at 1” from the bottom edge and fold the score section under the scoreline.
Trim a piece of the black pattern and solid paper (4 ¼” x 4 ⅞”), ink the edges, and adhere it to the black cardstock piece.
Trim a couple of pieces of black cardstock (4 ⅜” x 9 ⅜”) and score a line at 4 ⅜” from the bottom edge. Fold the score section under the scoreline.
Trim two pieces of the black pattern and solid paper (4 ¼” x 4 ⅞”), ink the edges, and adhere them to the black cardstock pieces as shown in the picture above. We are going to name these pieces section c and section d.
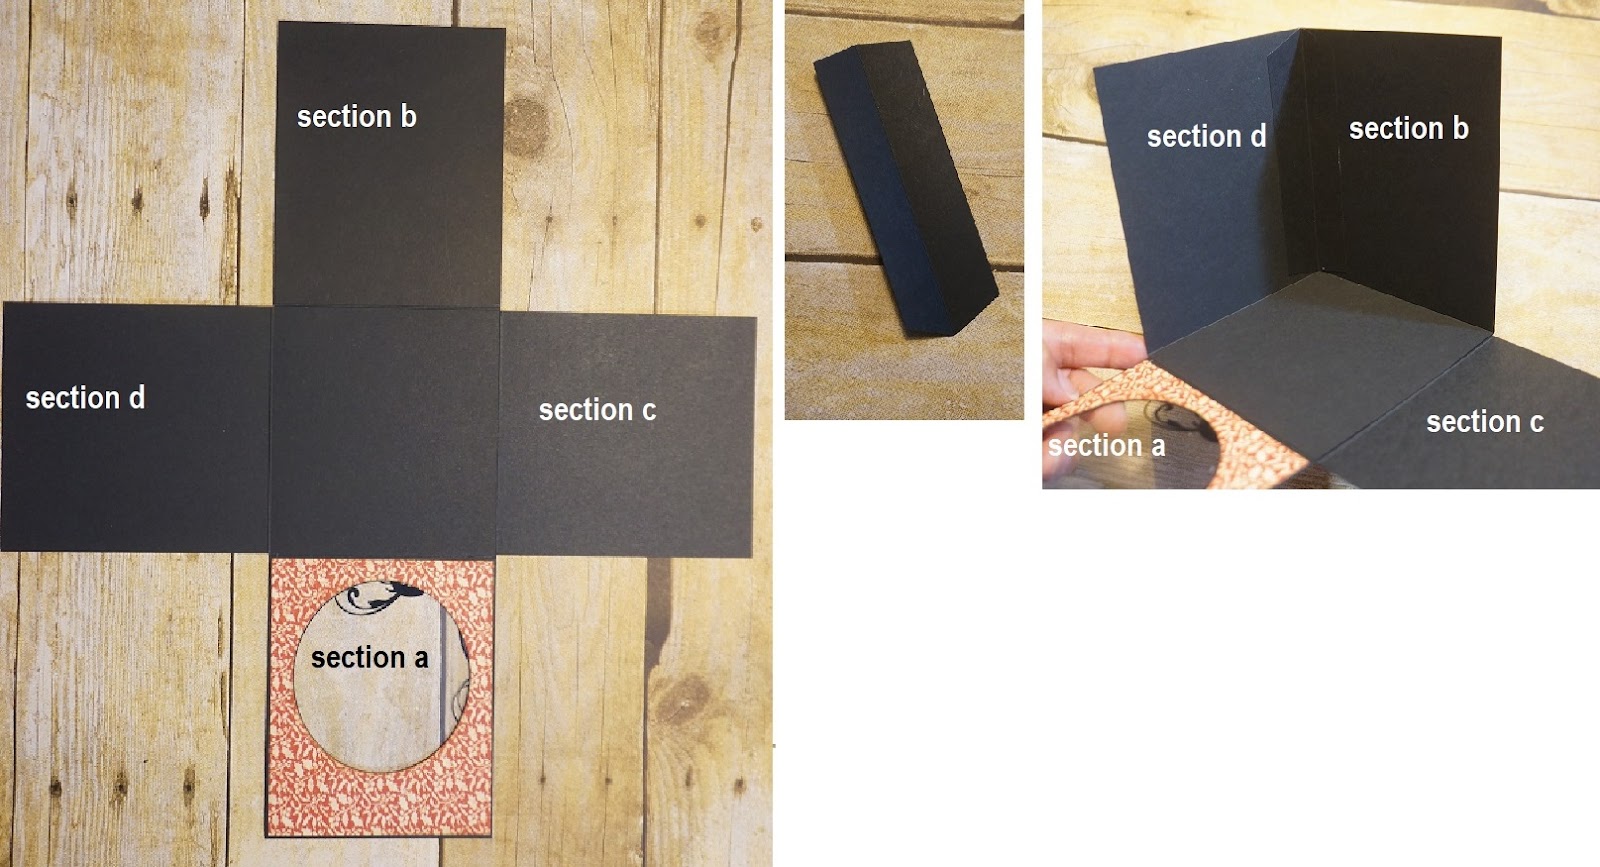
Flip over the section c and adhere the score section of the sections a and b to the square part of the Section c (this square part is the box’s base), as you can see in the picture above.
Take the section d and add the square part to the base of the box. This is the inside of the box.
Trim a piece of black cardstock (1 ½” x 5”), fold it by the middle (width), and trim the extremes and add it between the sections d and b as shown.
Trim a piece of red pattern and solid paper (4 ¼” x 4 ⅞”), ink the edges, and adhere it to the section c.
Trim two pieces of red pattern and solid paper (4 ¼” x 3 ¼”) and two pieces of beige pattern and solid paper (4 ¼’ x 1 ⅜”).
Add the red pieces to the top side of the sections de and b and the beige pieces to the bottom side of the sections b and d.
Trim four pieces of beige pattern and solid paper (2” x 1 1/2”) and four pieces of beige pattern and solid paper (1 ½”’ x 1 1/4”). Ink the edges and add the small pieces to the big pieces, then, add the big pieces to the sections b and d as shown.
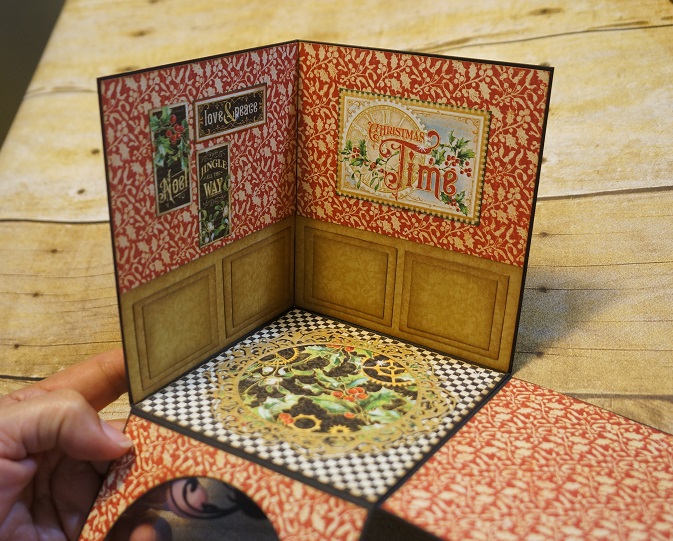
Trim these pieces of Jingle all the Way, ink the edges and add them to the “walls” as shown in the picture above.
Trim a piece of Christmas Time 8×8 paper (4 ¼” x 4 ¼”) and add it to the base of the box.
Die cut a round border with a beige Pattern and Solid Paper(Graphic 45 Die Cuts) and add it to the base. Center it.
Trim a circle of Holly and Mistletoe (diameter = 3 3/8”) and add it to the base of the box centered with the die cut border.
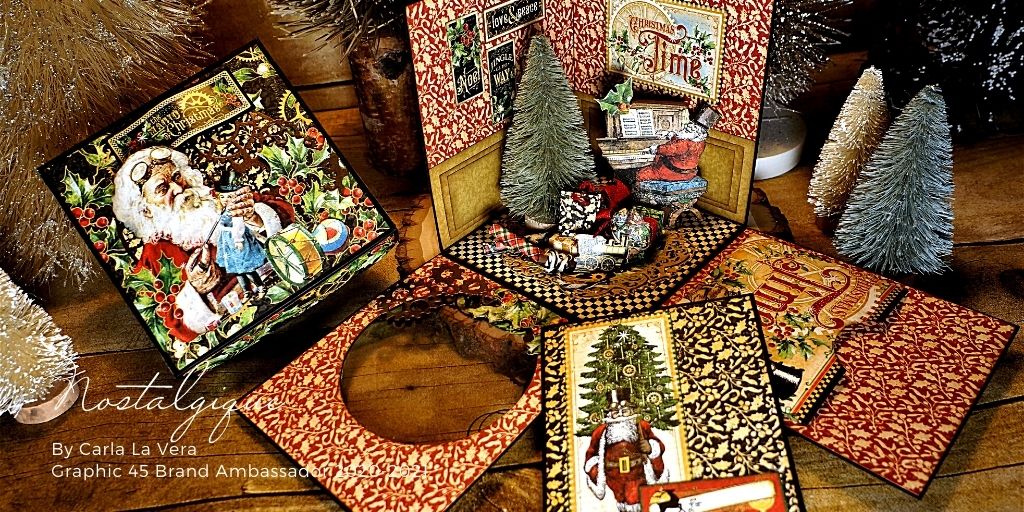
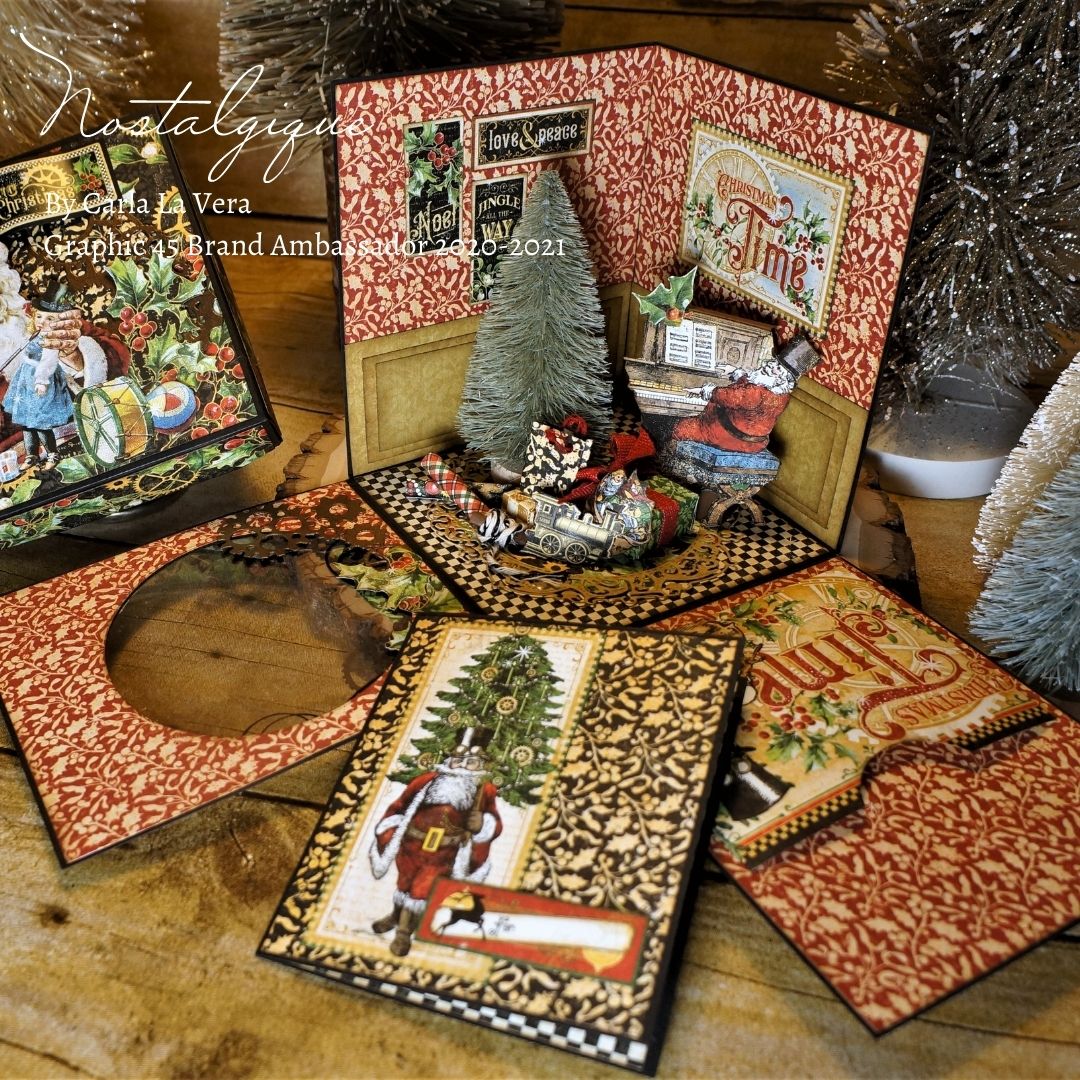
You can see how cozy this corner looks.
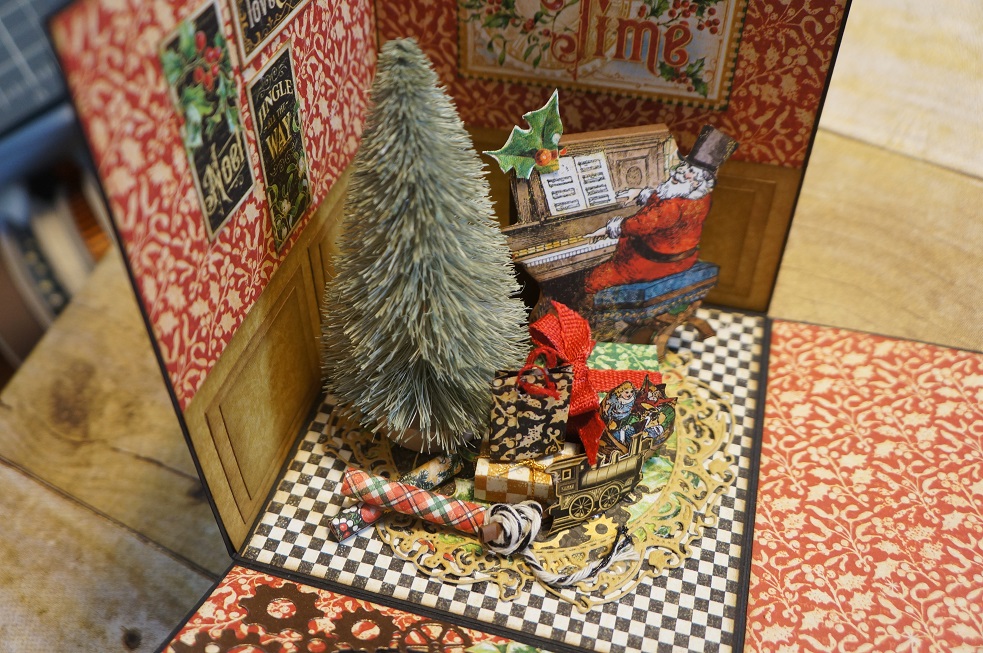
Fussy cut a Santa and toys bag shown (Here Comes Santa Claus Paper 8 x 8).
Trim a piece of brown cardstock (½” x 5 ⅛”) and score 4 lines as shown in the picture above, add the Santa Fussy cut to the 2 ½” section and add the ½” section to the ¾” section and add it to the base of the square
Add a small tree and some little details like gift boxes, the bag with toys, make a little gift paper rolls and a ribbon, you may add your own details.
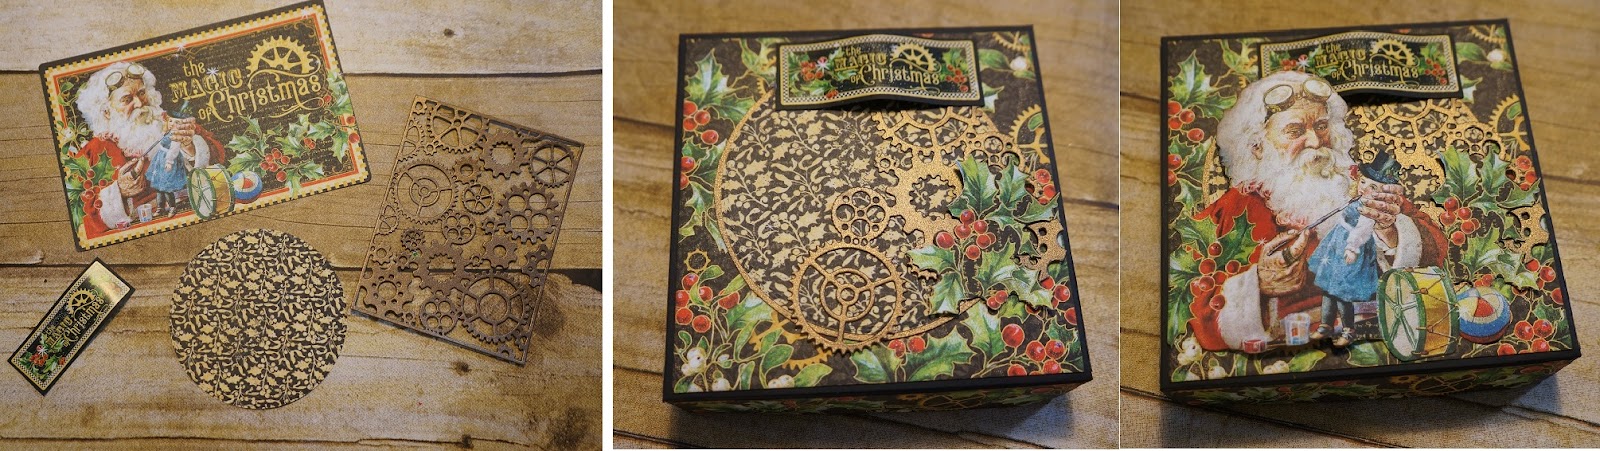
Now we need an Ephemera card, Sticker shown, a gear die cut and the round piece that we saved before.
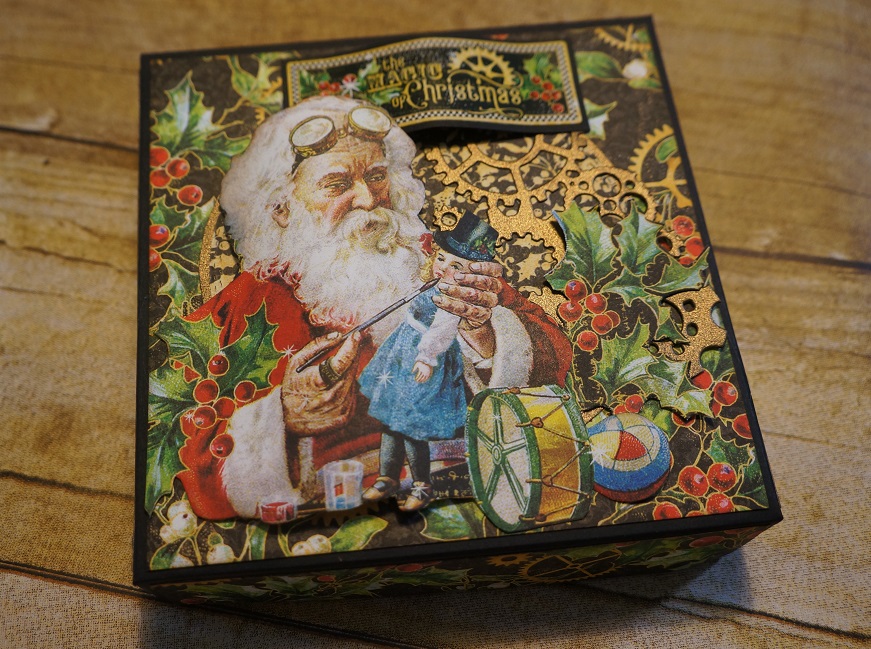
Add the round piece to the lid, center it. Trim some gears and add them to the right side of the lid, then, fussy cut the Santa and leaves and adhere it to the lid, as shown in the picture above, as well the sticker too.
You can see here the details of the box’s lid.
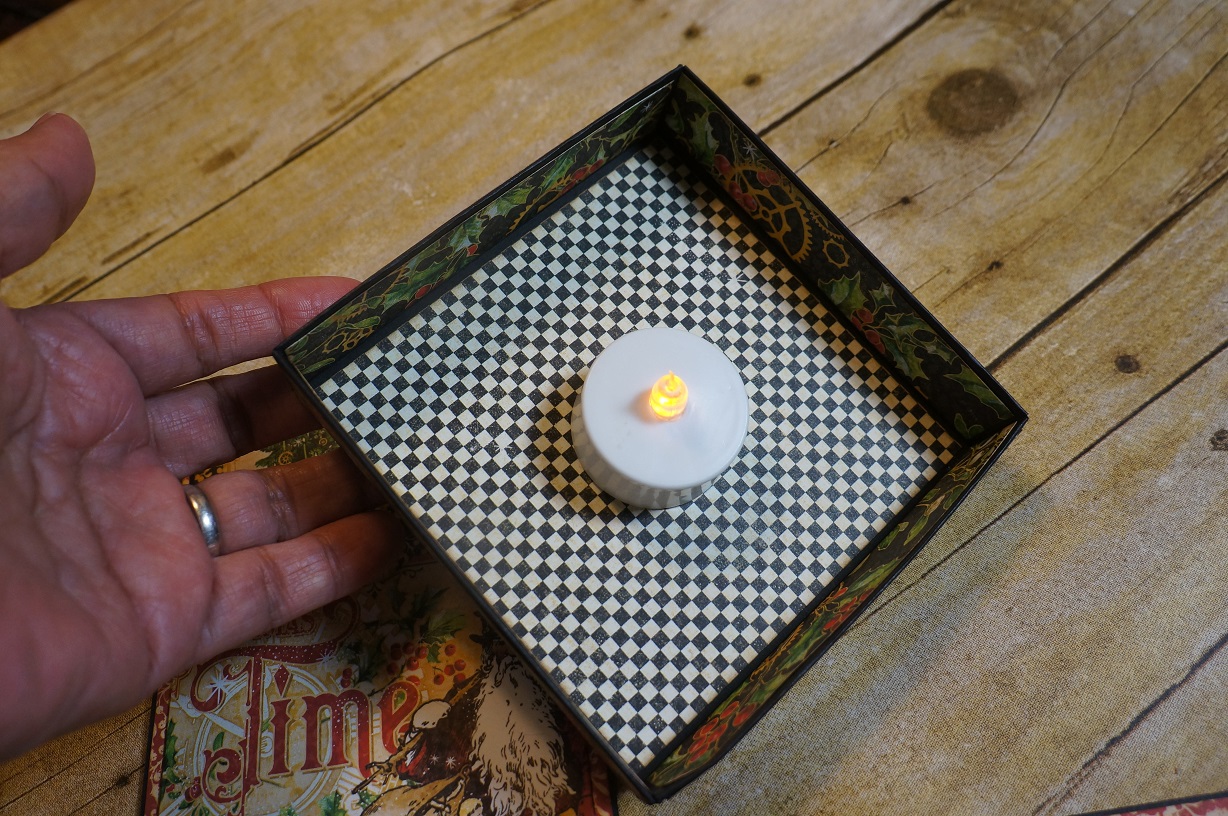
I added the opposing magnet disc of the lid to a little light (I found this light on the Dollar Tree Store).
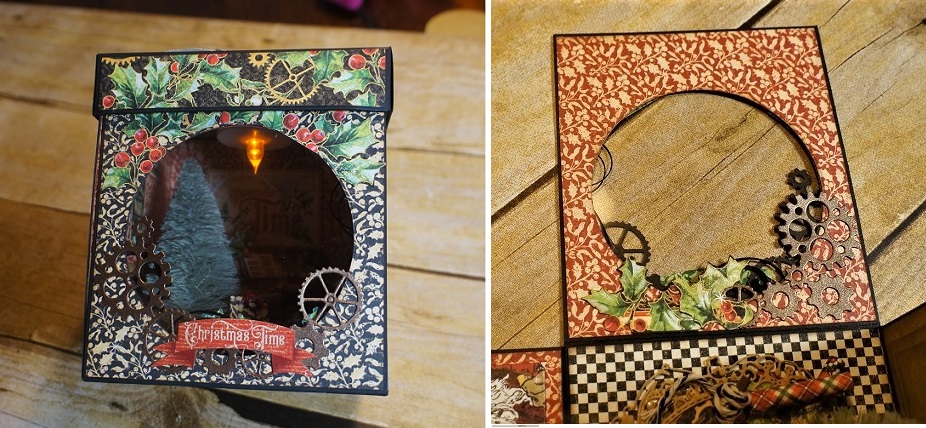
Add some gears and fussy cuts to the section with the window (both sides).
Tip: When you add decoration to the section with a window, take care to cover the same area for both sides, remember that you can see everything by the opposite side.
I did a pocket with a little file inside, but you are free to do a pocket for a gift card or a beautiful Christmas message.
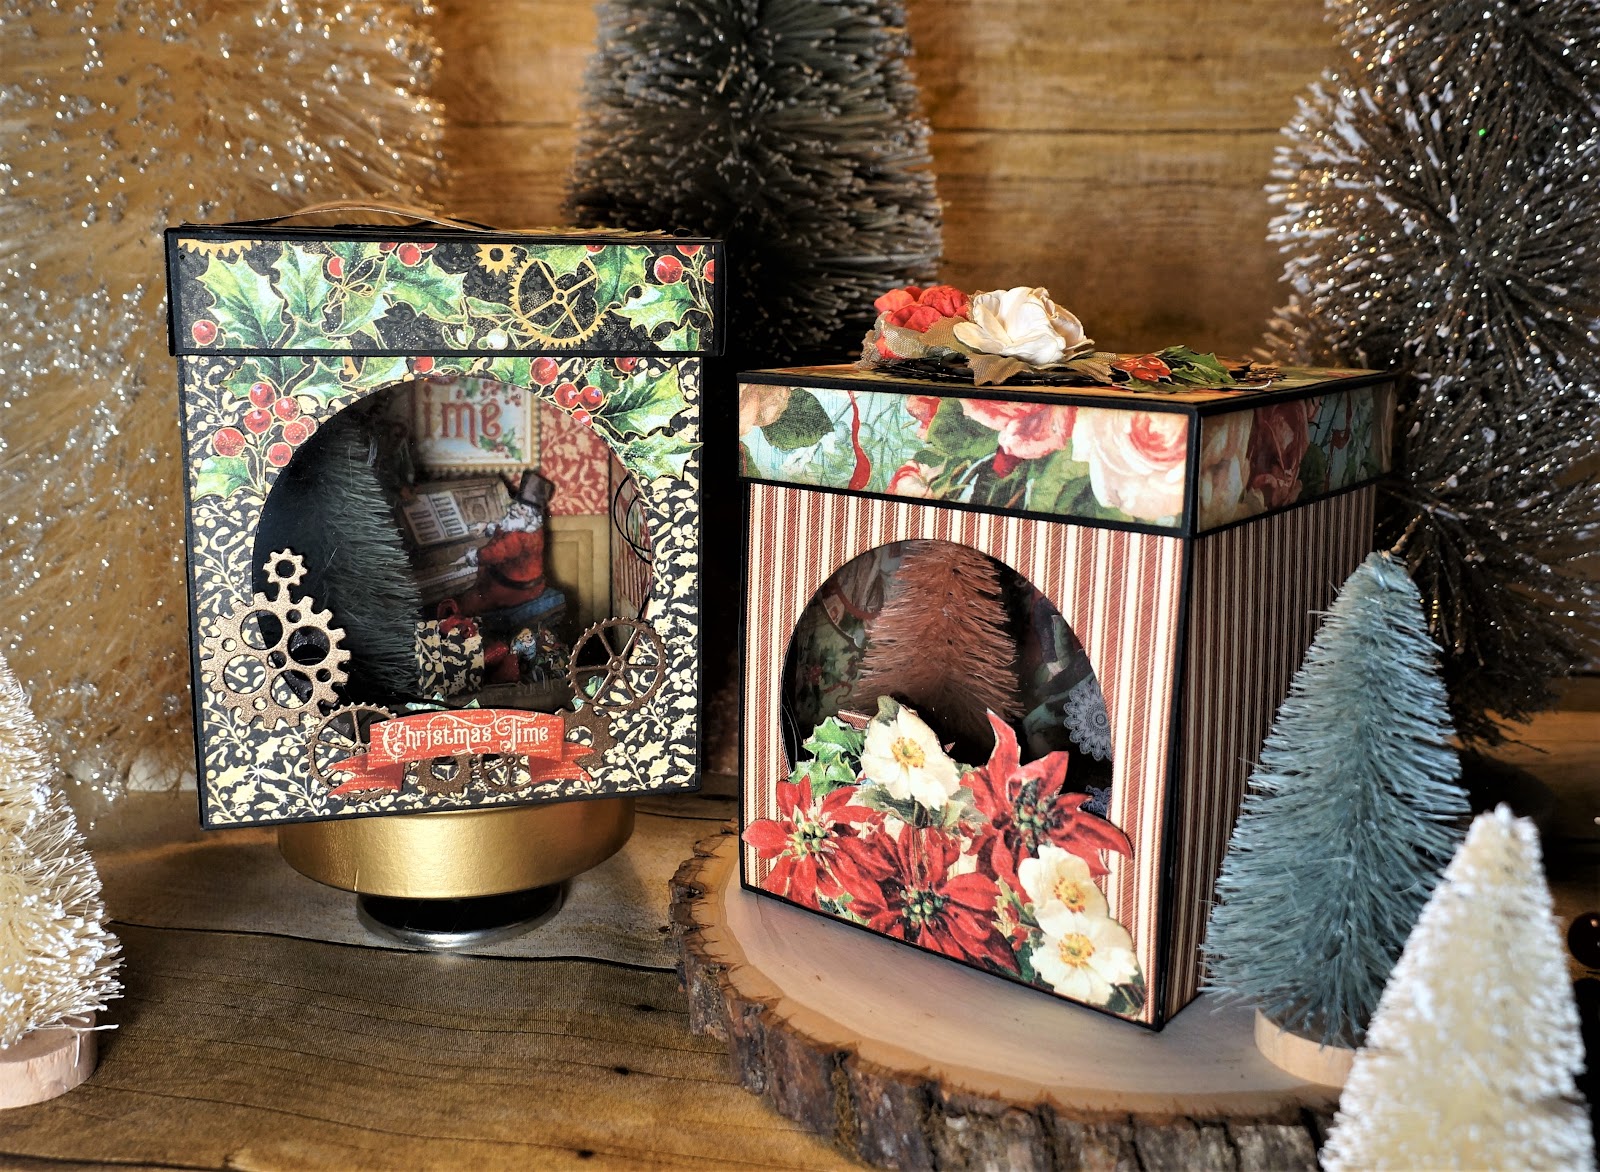
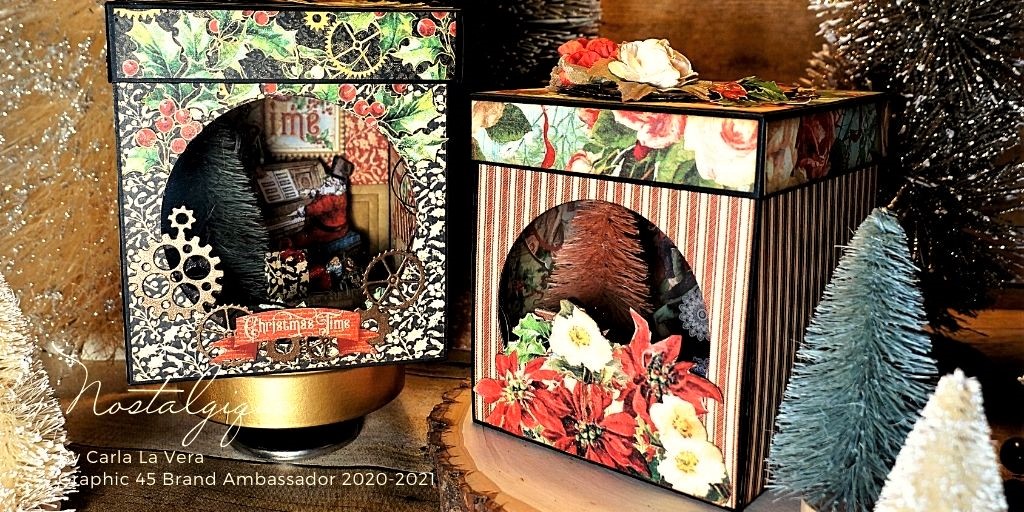
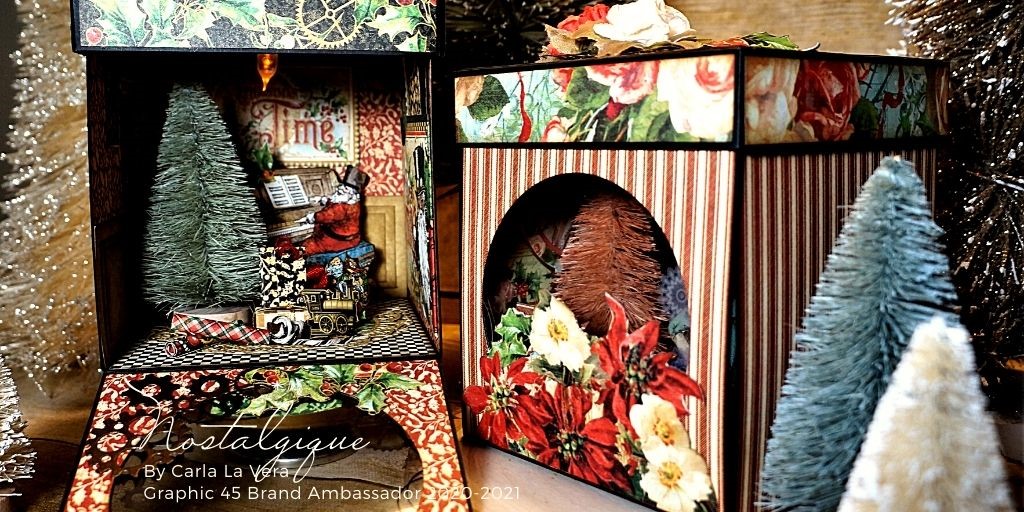
Here is the box ready and also, I did another box with the lovely collection “12 days of Christmas”. The good thing is that both collections are available now.
Hope you like this project and enjoy doing it. Try with other collections, it will be funny.” ~Carla
Graphic 45 Supply List:
Others Supplies:
Black Cardstock
Golden Cardstock
Acetate
Small Tree – 4” tall
Thin ribbon
Small light
Looking for more explosion box inspiration? Check out our video tutorial on how to create an explosion box with a hidden mini album.
Explosion Box with Hidden Mini Album Tutorial
Happy Papercrafting!
Want even more Graphic 45? Sign up for our newsletter here!