
Step into the creative realm with Graphic 45 Brand Ambassador, Karan Gerber! Join us on an inspiring Craft Studio Tour as Karan shares her artistic expertise, giving you a glimpse into her colorful world. Don’t miss the video walkthrough filled with tips and tricks to ignite your creativity!

“Hello G45er’s!
Today I’m thrilled to show you my craft studio. For those of you who may not know, in 2018, my husband and I purchased retirement property, 8 hours north of our home of 25 years.
3 years later with interruptions with Covid, we have completed the build and made the move north in 2021, with a few minor projects to complete at that time. We love our home on the shores Of Lake Huron, in Northern Ontario, Canada.
I am very fortunate to have a huge room in our basement that measures 15 feet x 30 feet. We have a walk out basement so the 10 foot ceiling height allows me to have lots of natural light with large oversized windows. I have three large windows that allow all the natural light to enhance my space. Our basement floors have radiant heat in the floors so it is always warm here when we have cool winter winds and temperatures which is very typical of the Northern Ontario Winters.
Recently my husband and I installed a 4 x 8 sheet of slatwall. I have been wanting to do this since I finished my studio space. We finally got that completed last week in time for me to do the tour. The reason I wanted the slat wall, is, I am a visual person, although I would like to consider myself somewhat organized (I know I think all crafters say we are organized, haha) I do like to see what I have in my stock at arms reach.
Craft Studio Tour with Karan Gerber: A Peek into the Artistic World
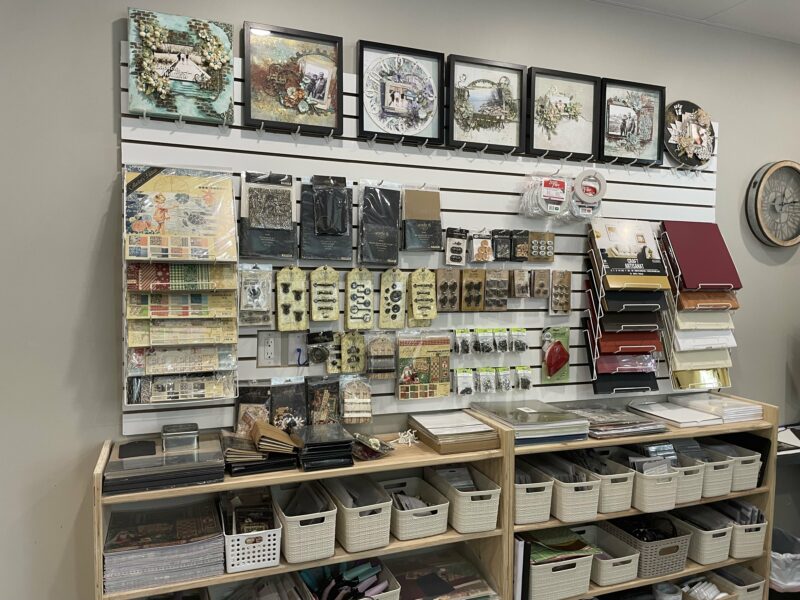
At the very top of the slat wall, which is a bit high for me, I wanted to store some of my most favorite 12 x 12 layouts I have completed this past year of my family and I have them there for inspiration. And seriously, who doesn’t like to be reminded of how important family is.
This is where my main focus has been. I work with two brands, both of which are at arms reach for me. Graphic 45 papers are held in an accordion paper rack. ( As is my Cardstock at the opposite end of the Slatwall) This rack allows me to store 6 paper collections. I have the 8×8 on the front, with the 12 x 12 patterns and solids followed by the paper collections.
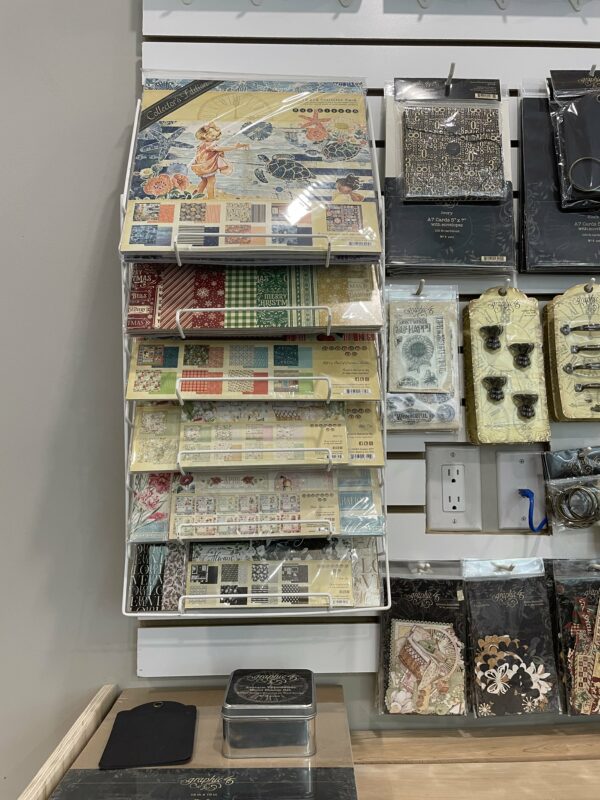
Also on the Slat wall storage, I have hooks that store all my Graphic 45 hardware, stamps, Ephemera, as well as ribbon and you can see in the video I have the new Graphic 45 Cards ( for an upcoming class.
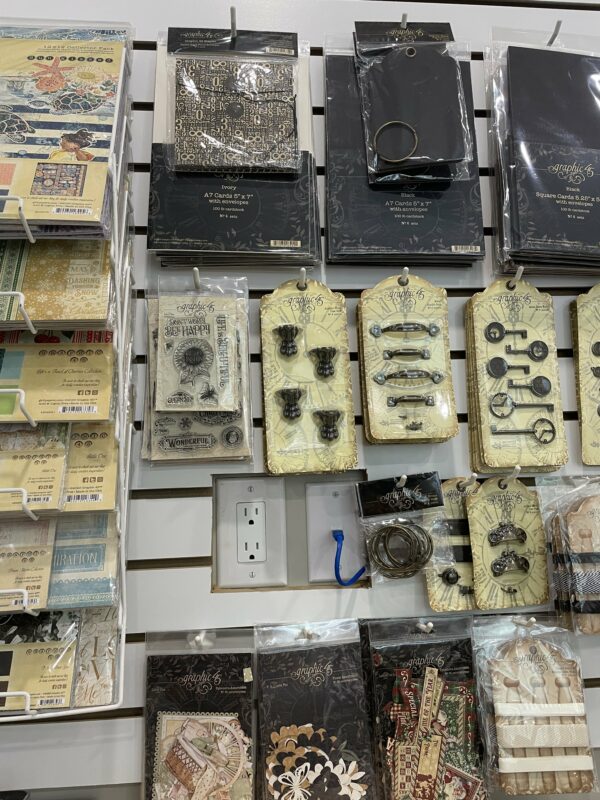
That blue cord you see, is my connection to our Starlink Internet System that runs to my computer. But it’s surrounded by all those gorgeous hardware pieces I love to work with from Graphic 45. You can also see a older Graphic 45 Envelope, that I have saved, and afraid to use but I keep it on hand 😀
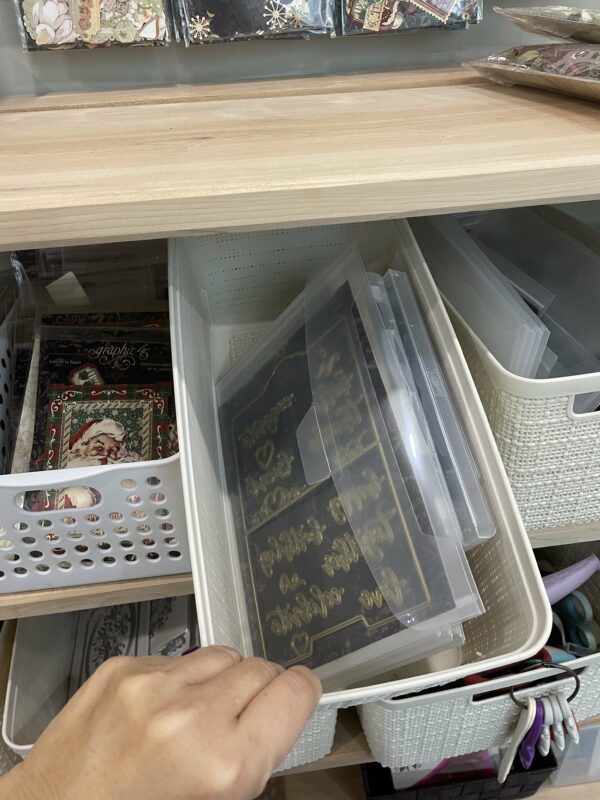
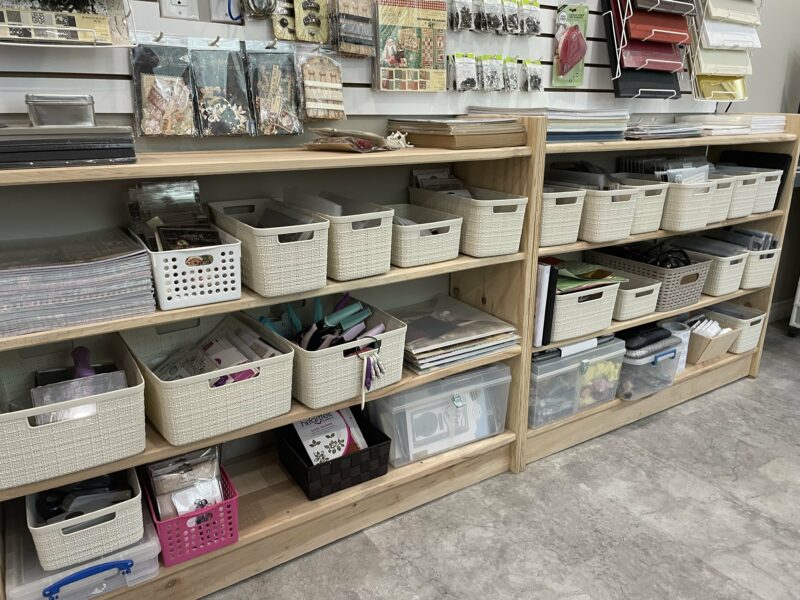
Right below the slat wall are two very heavy and sturdy shelf units my husband built for me, using trees that we took down to clear our lot for our home. They are made from maple. I have all my dies from the various brands I like to use in my projects, (mostly Elizabeth Craft Designs, some Spellbinders, Some Heartfelt and other various brands) and I store all these in Curver Containers ( Jute texture on the outside) I have all my Graphic 45 dies in one of these containers right below my Graphic 45 stock.
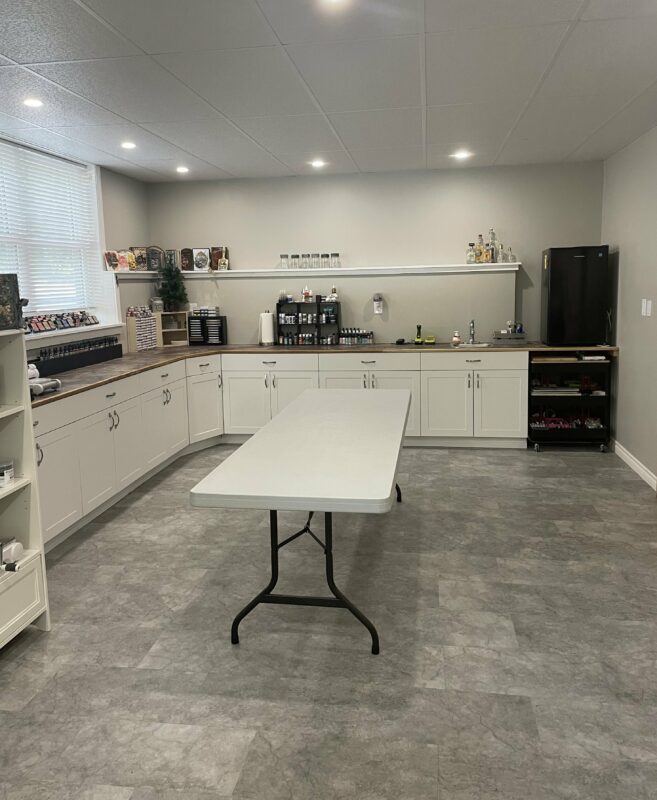
In the middle of my Studio is a large table, which I use for kitting my class kits, right now it’s clean ( you might not see that table that clean for the rest of the year so I am really glad I was able to capture a photo ( tee hee)
Often when I’m preparing for classes, under that table will be boxes of stock which hold all my class materials. But it is clean for now as I am all caught up. I have a mini refrigerator in the far right corner, a mini sink and a lot of counter space on that end of my studio.
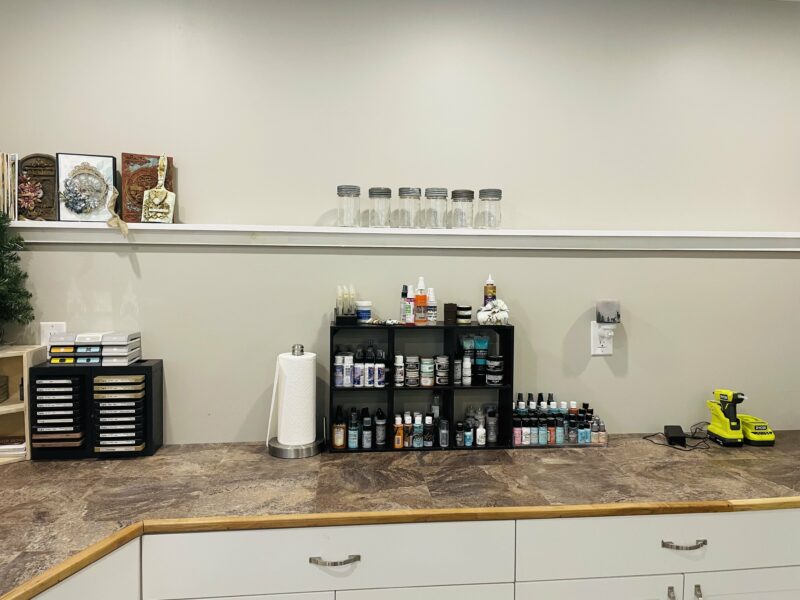
I have a small counter shelf that I have all my mixed media paints and mists installed. To the left are two Bigz Die containers of some of my Bigz Dies from Sizzix. I like the look of those older canning jars, the ones with the glass lids and the rubber bands. I have a few of them stored there as I love the look of them.
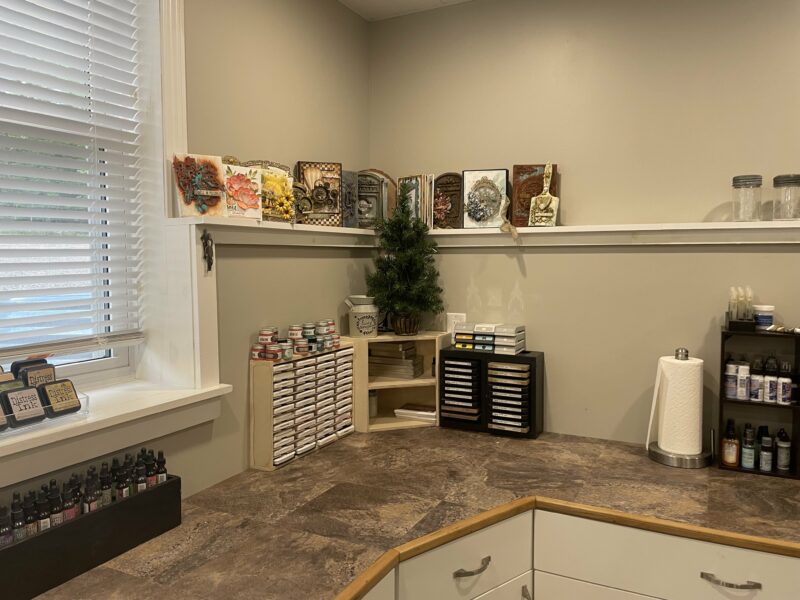
In the corner I have my archival ink. Our foundation is built with ICF Block. That Block allowed me to create a shelf on all the outside walls of my Studio. Which is on three walls. On top of that shelf are some of my favorite projects from teams and classes I have created over the years. I just cleaned that up a bit so I have lots of space and made room for new projects coming.
I wanted to keep this space affordable so although we did invest money on the cabinets, the counter top is a sheet of plywood and we covered it with peel and stick floor tile. My husband created an edge from our maple that I stained a color to match the room. The paint color in my room is currently called Simplicity by Benjamin Moore. It’s a cross between a mid taupe with gray undertones. I may decide one day to add more color, but I do love my earth tones.

To the left of the corner where I store my Archival ink, I have my Distress Inks and re-inkers. The Distress Inks are in containers made for Nail Polish, these I bought from Amazon and each unit stores 16 Distress Inks. These are stored on my large window sill and I have four units there. These Inks I have used the most over the years and I can’t say I have all the colors, but I do have a few. My husband built me a stand to store all my re-inkers that sits below. Here you can get a peek at that peel and stick flooring I used for my countertop.
Seriously, if you are looking for a budget friendly countertop, this works great, it’s a heavy vinyl, and is easy to install and cut. I installed it on my own with a bit of assistance from my hubby.
On the other side of the room, is where I create all my projects and classes. I have a desk that sits along the entire back wall of 15 feet and runs along part of the wall in front of one of the larger windows, and runs about 2 and a half feet before the slatwall. It truly is a dream space for me and I am so thrilled that I have a husband who supports my hobby is very handy with tools to have assisted me in building my Studio.
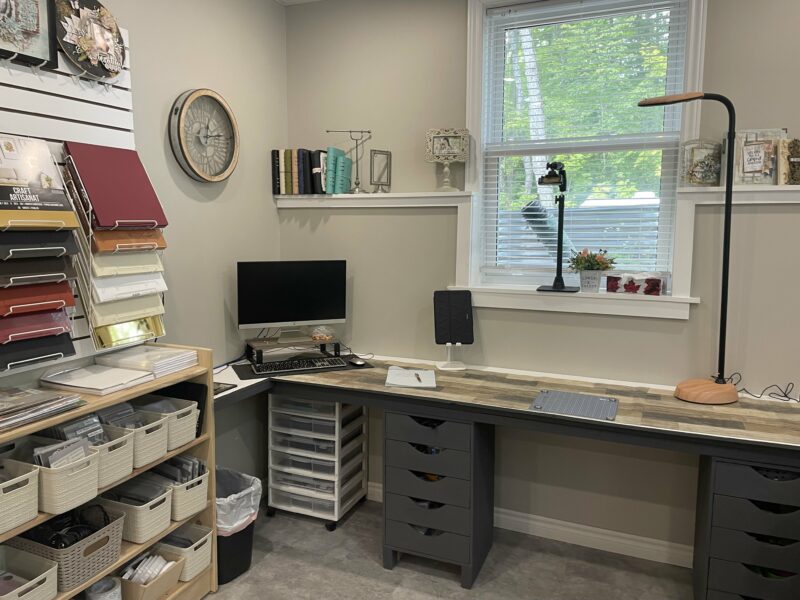
You can see from where my computer sits, how close I am to my slatwall and all the beautiful products stored there. I have paper holders for cardstock. The white pull out under my desk stores extra cardstock ( mainly black and white) which I tend to use the most of. That large window is right over my main work space and also where i do my facebook lives and online classes.
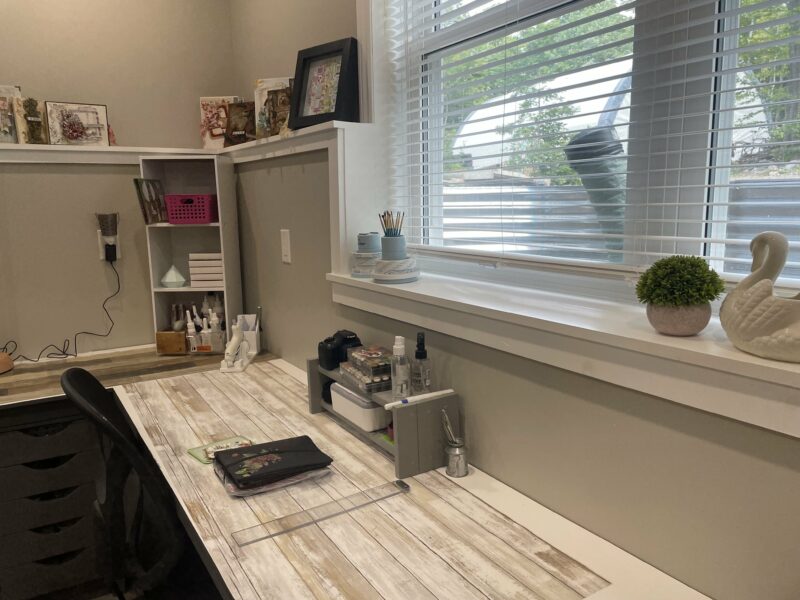
The opposite of the slatwall is the rest of my table space. I have it covered in peel and stick wallpaper, but I don’t actually have it stuck down. It protects my work surface a bit. My table top is actually plastic coated plywood. It is very durable and cleans well, but not friendly to archival inks and over the years I have learned to protect the surface.
So friends, that is my Studio Tour, it works for me and I hope I have given you some storage tips and ideas for your Creative Space. Below i have a video showcasing my Studio, thank you for joining me.” ~Karan
Happy Papercrafting!
One Response
that is a wonderful tour of your craft studio. I have a large studio but not quite the size of yours; I wish I had seen your layout with the counters, slat wall, and around the room trim before I set mine up 10 years ago. I’m still dealing with putting the ultimate organization to it. thanks so much for sharing your creative space and how it works, and compliment to your husband for all of his support of you and accompanying handiwork!