Unwrap the joy of the season by creating handmade tags! Join Graphic 45 Brand Ambassador Katelyn Spencer in a whimsical Christmas Gift Tags Tutorial, starring the enchanting Letters to Santa paper collection. Watch the #G45Reel and follow along with the step-by-step tutorial, then bring your creativity to life and enter your tag in our November #G45Tag Challenge. Let the holiday crafting adventures begin!
Tutorial by Katelyn Spencer
“Hey Everyone!
I’m thrilled to be back on the blog this month sharing a set of Christmas Gift Tags. Halloween is over and there’s just over a month and a half left until Winter arrives, but that also means that creating Christmas projects is in full swing.
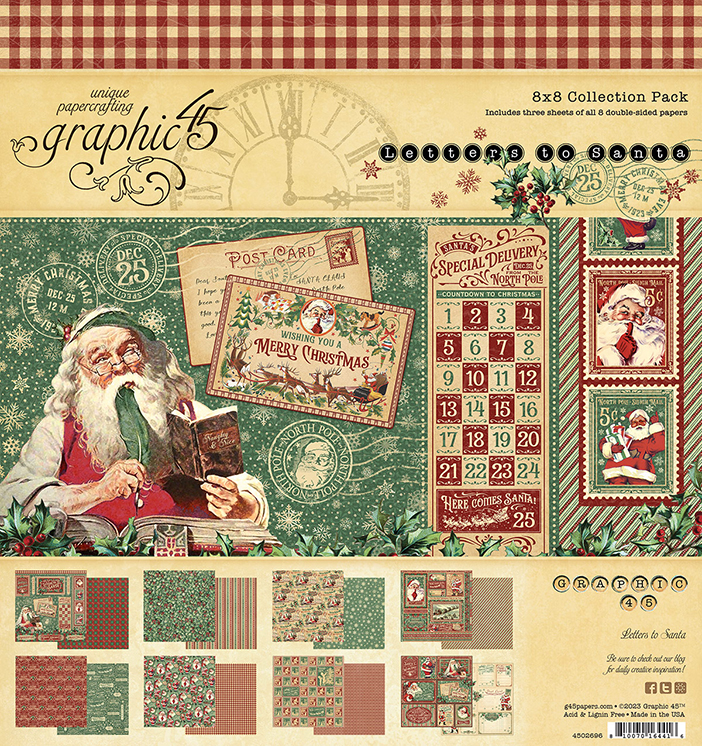
To create these amazing vintage Christmas Gift Tags I used the Letters to Santa Collection which I’m loving as the colours and imagery in this collection. You’ll want to grab a cup of your favourite Christmasl beverage and learn how to create these gift tags at home.
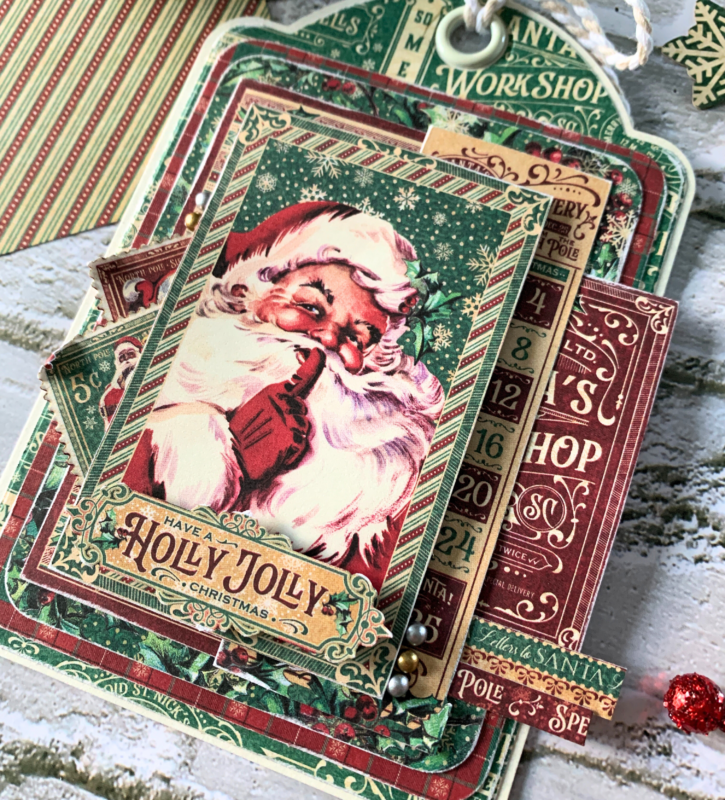
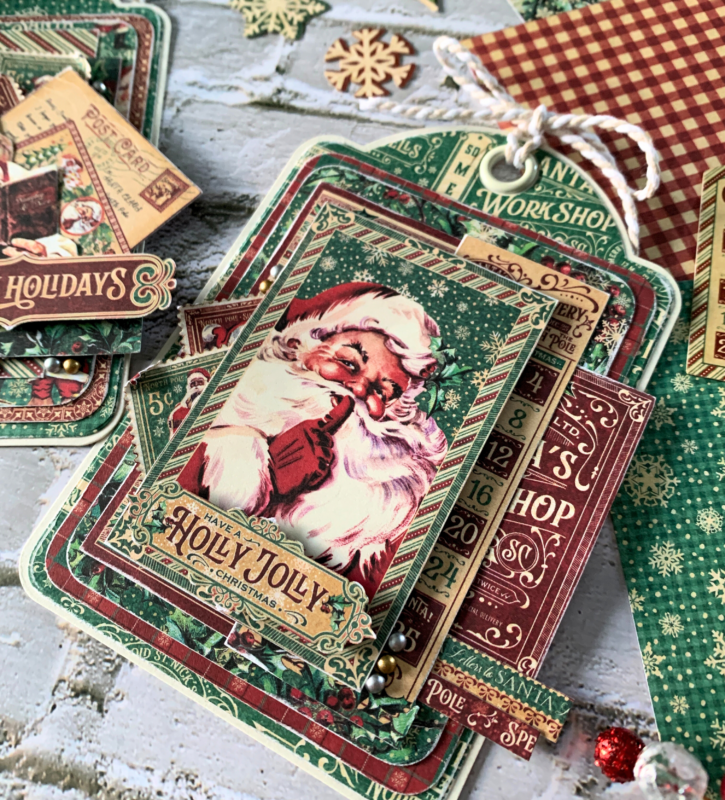
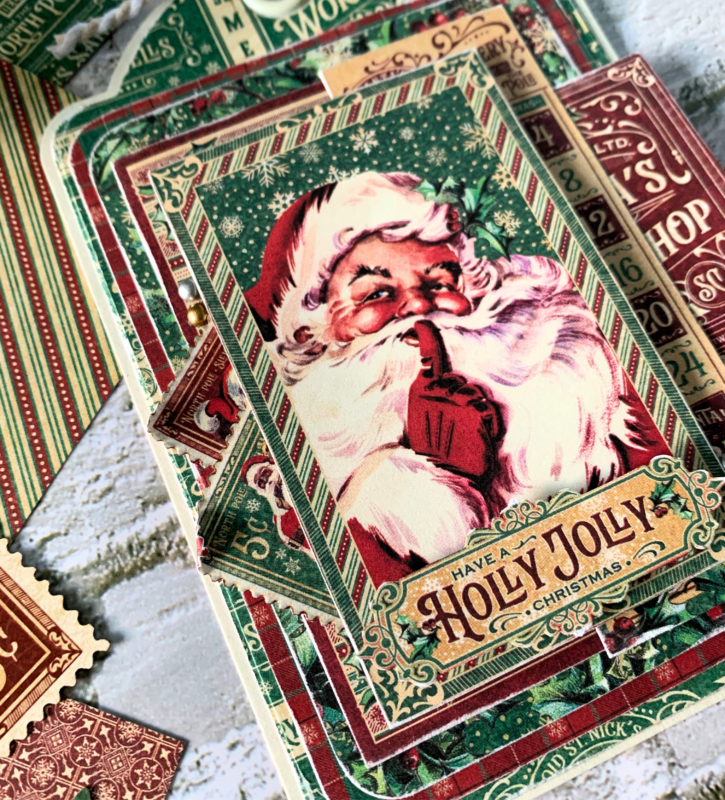
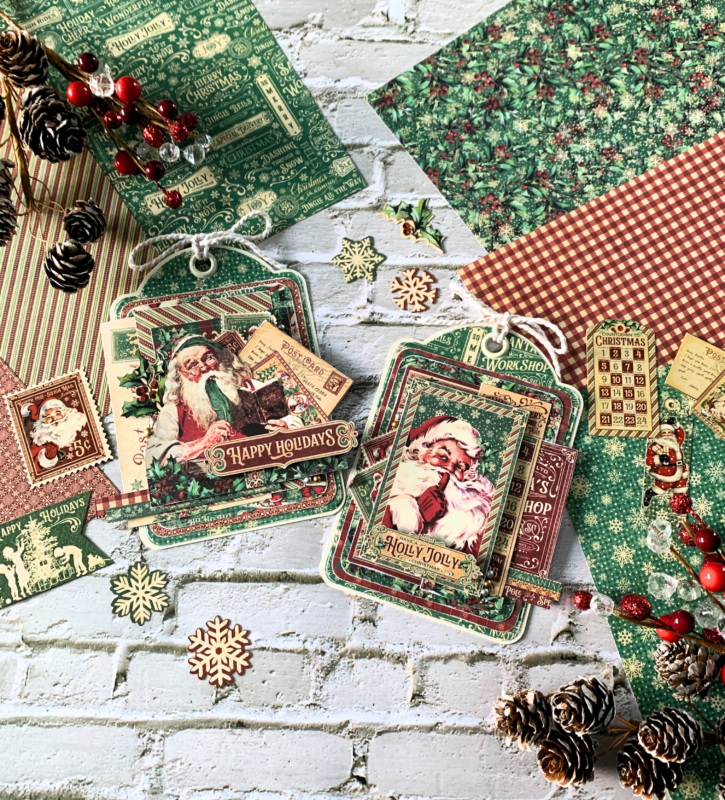
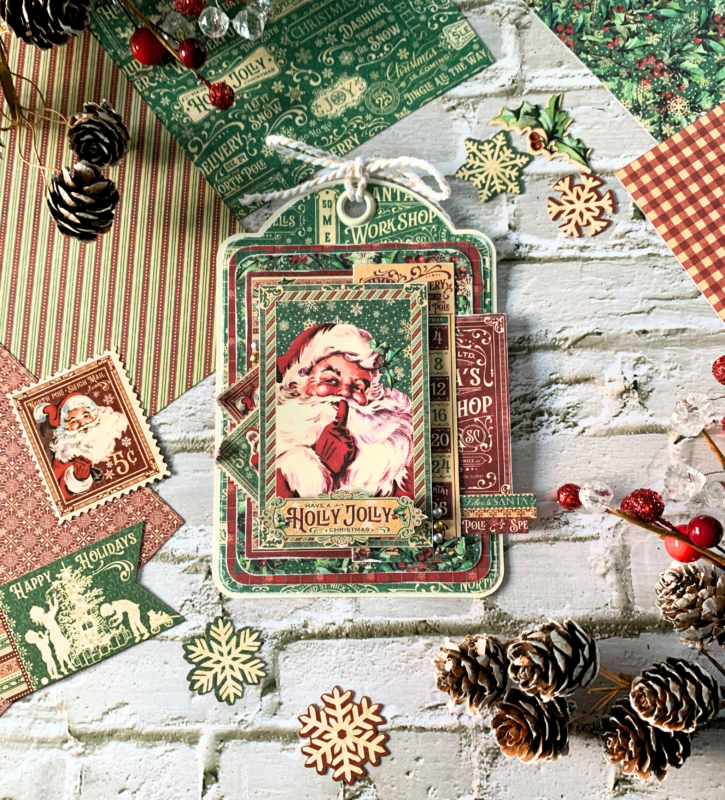
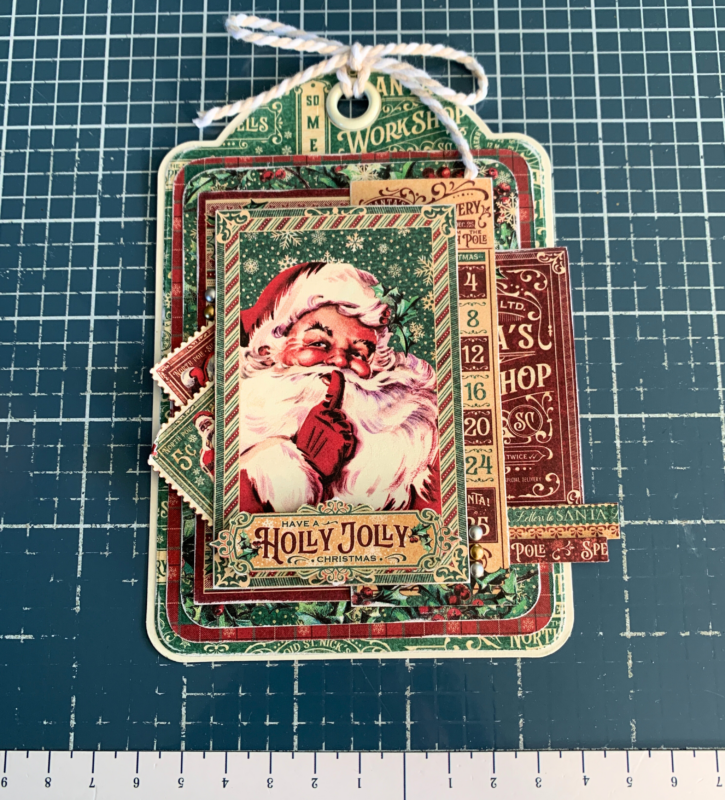
The first tag we will create is the Holly Jolly Gift Tag.
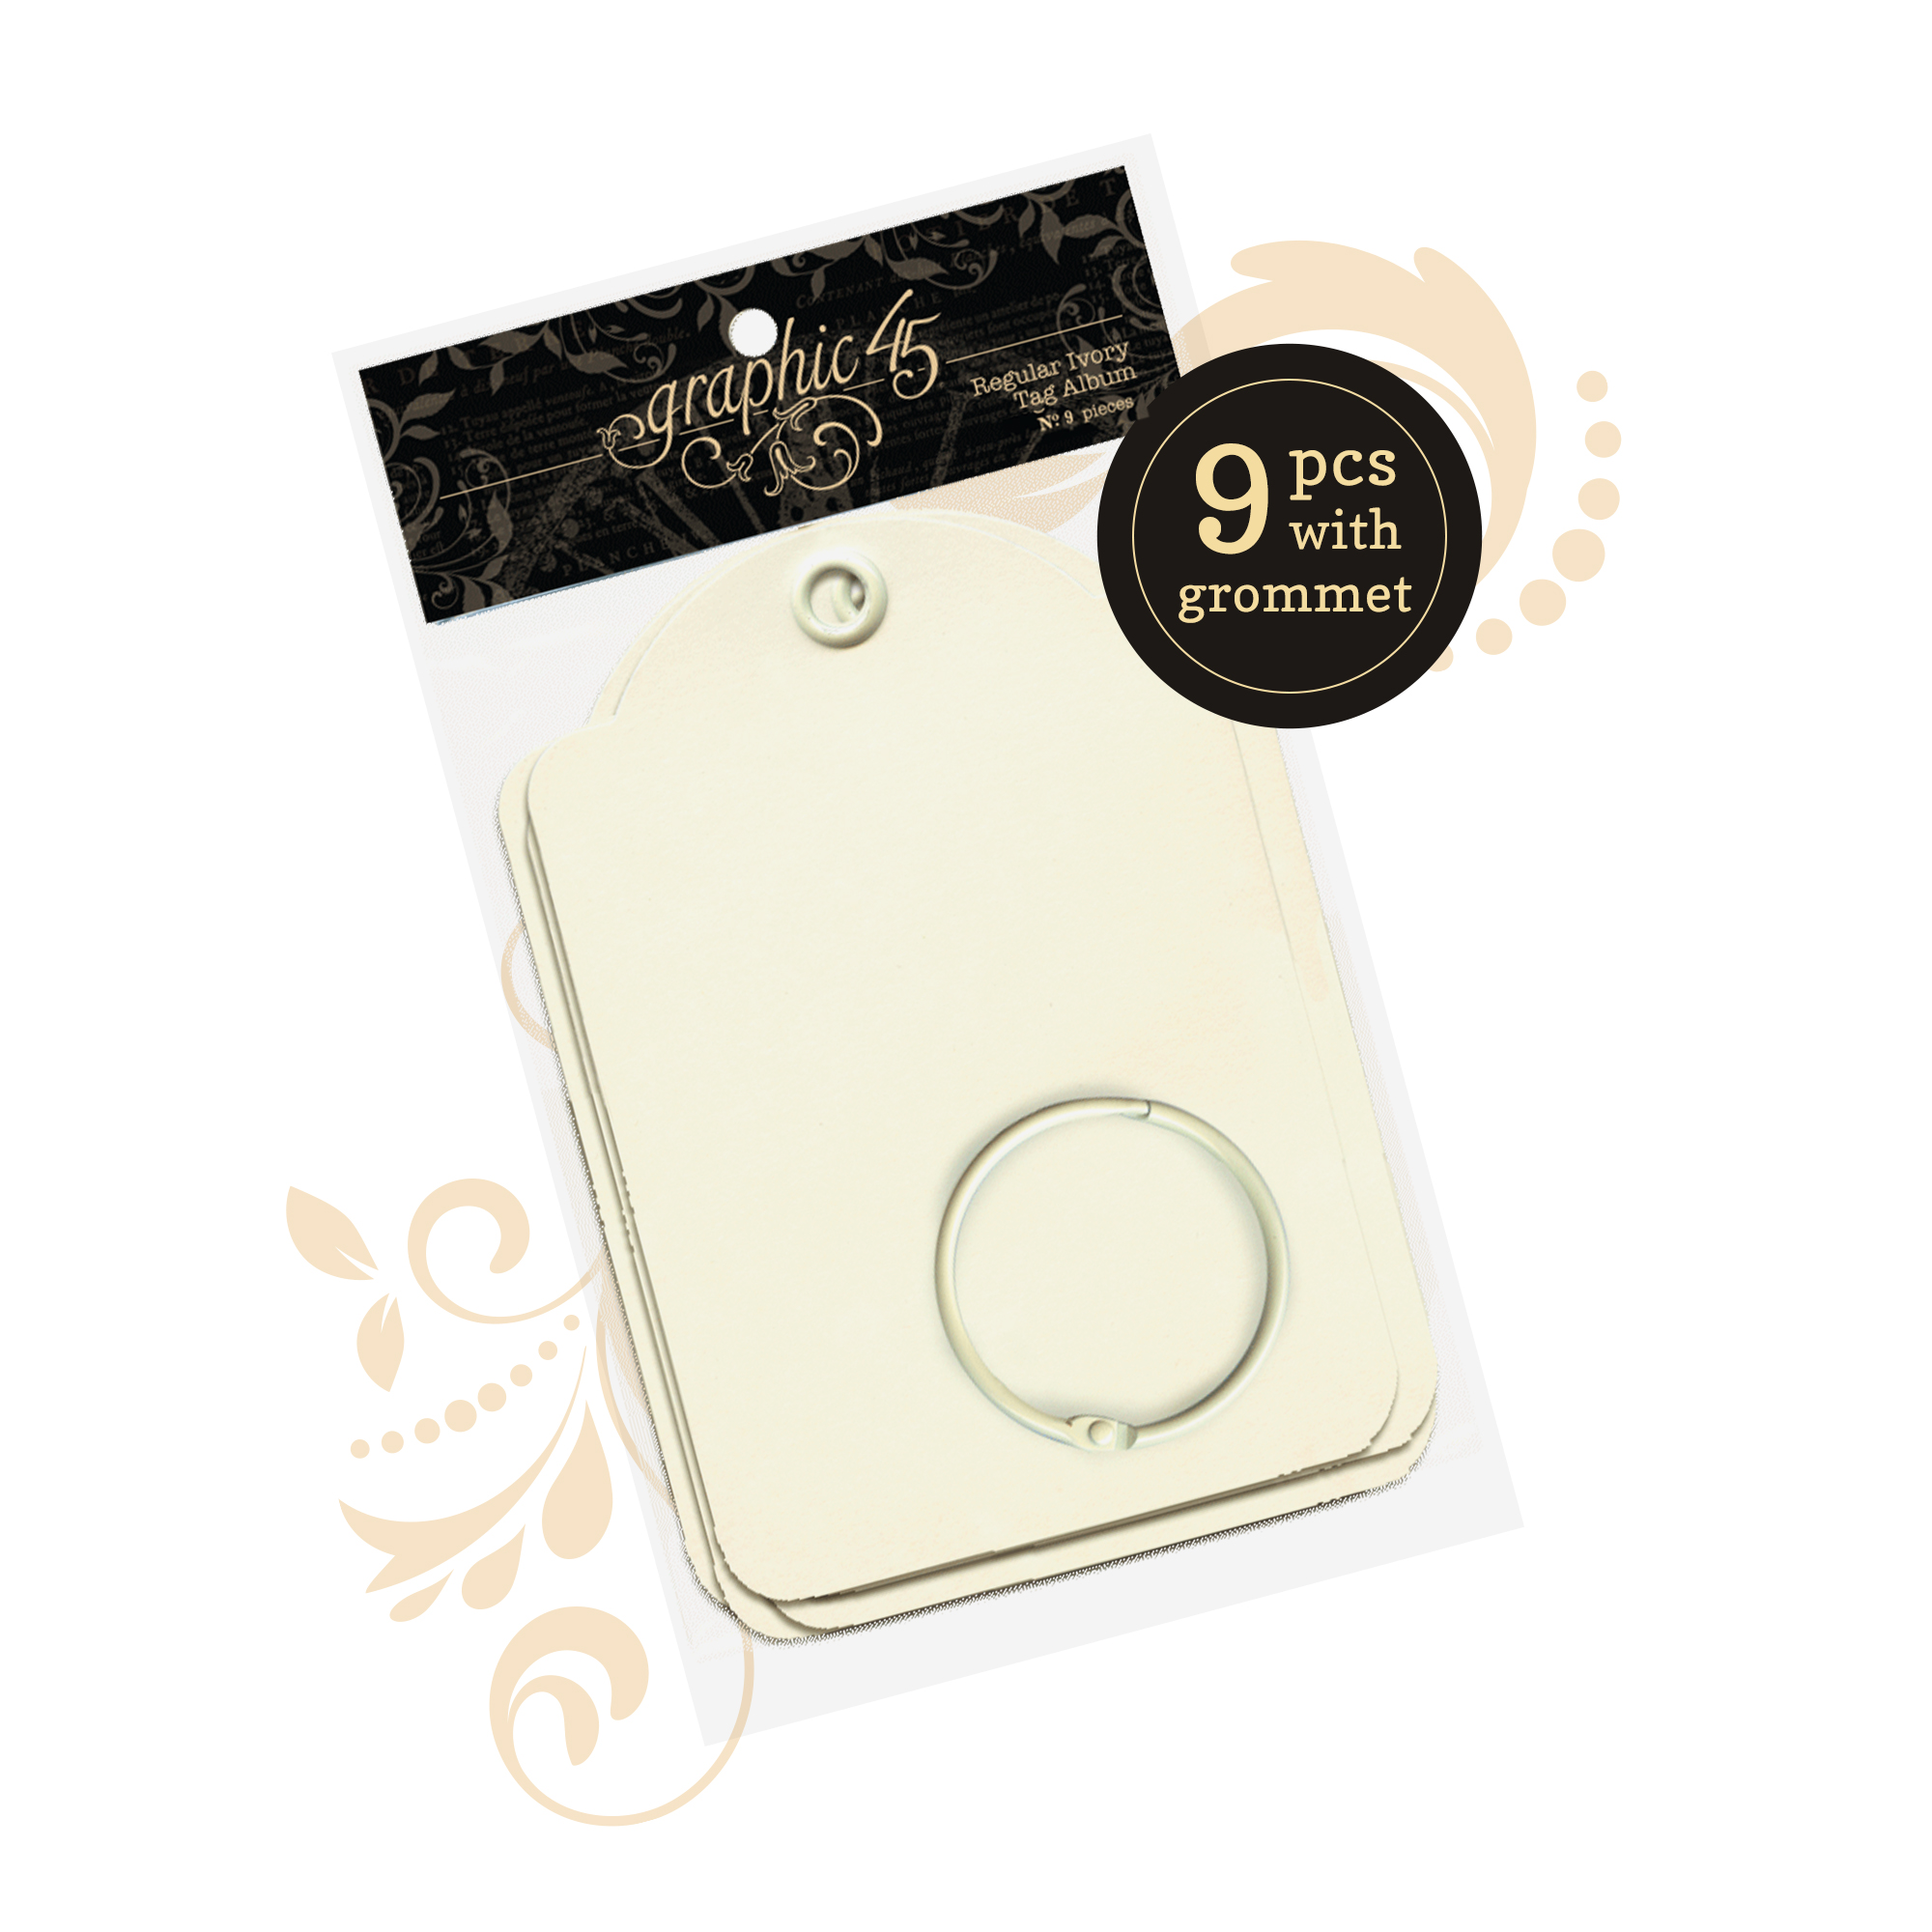
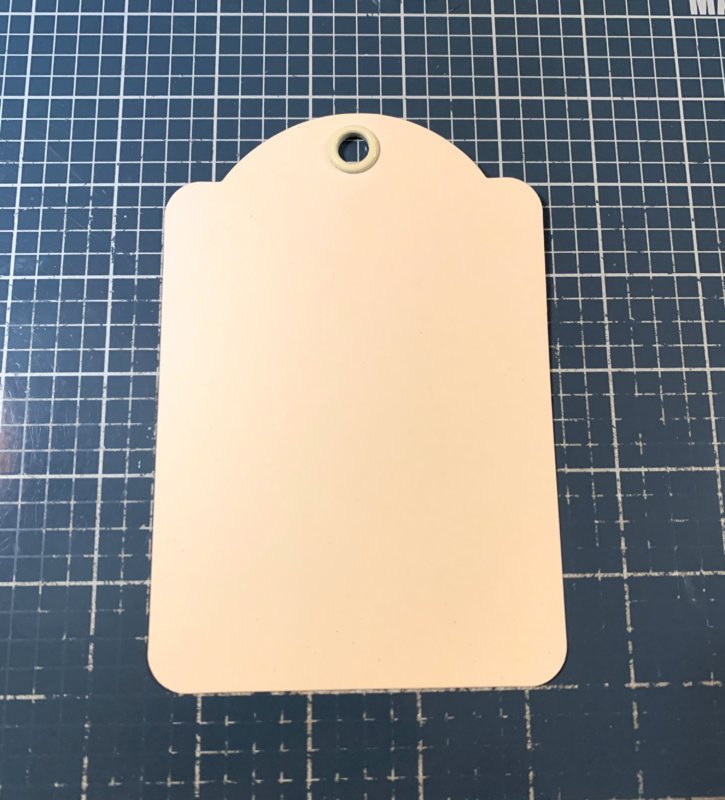
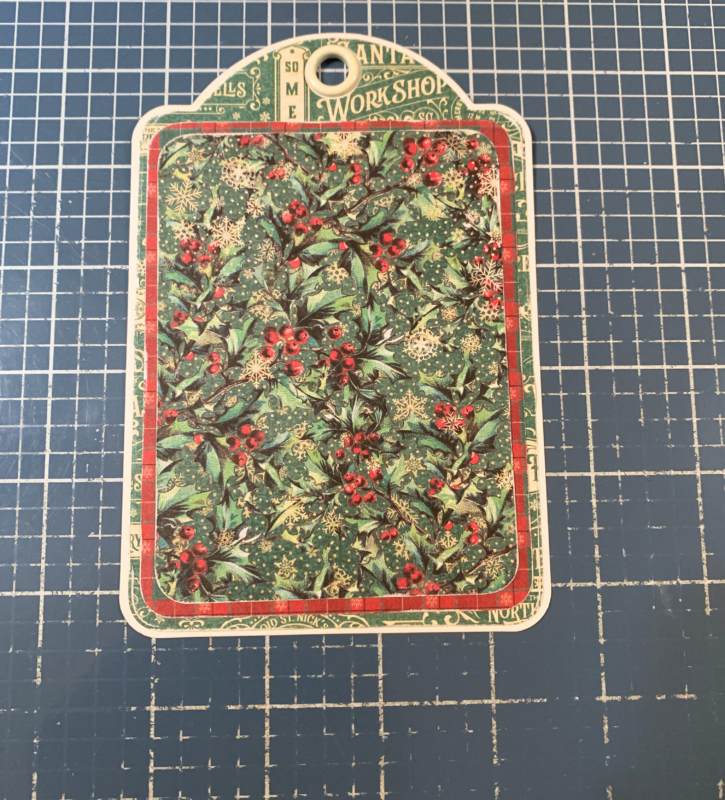
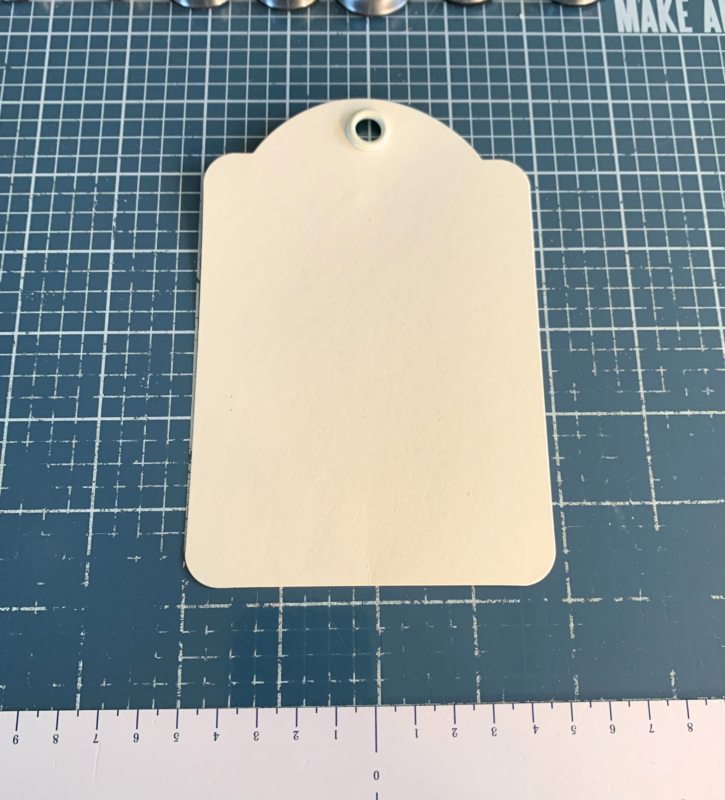
Step One. Take out a Regular Ivory Tag.
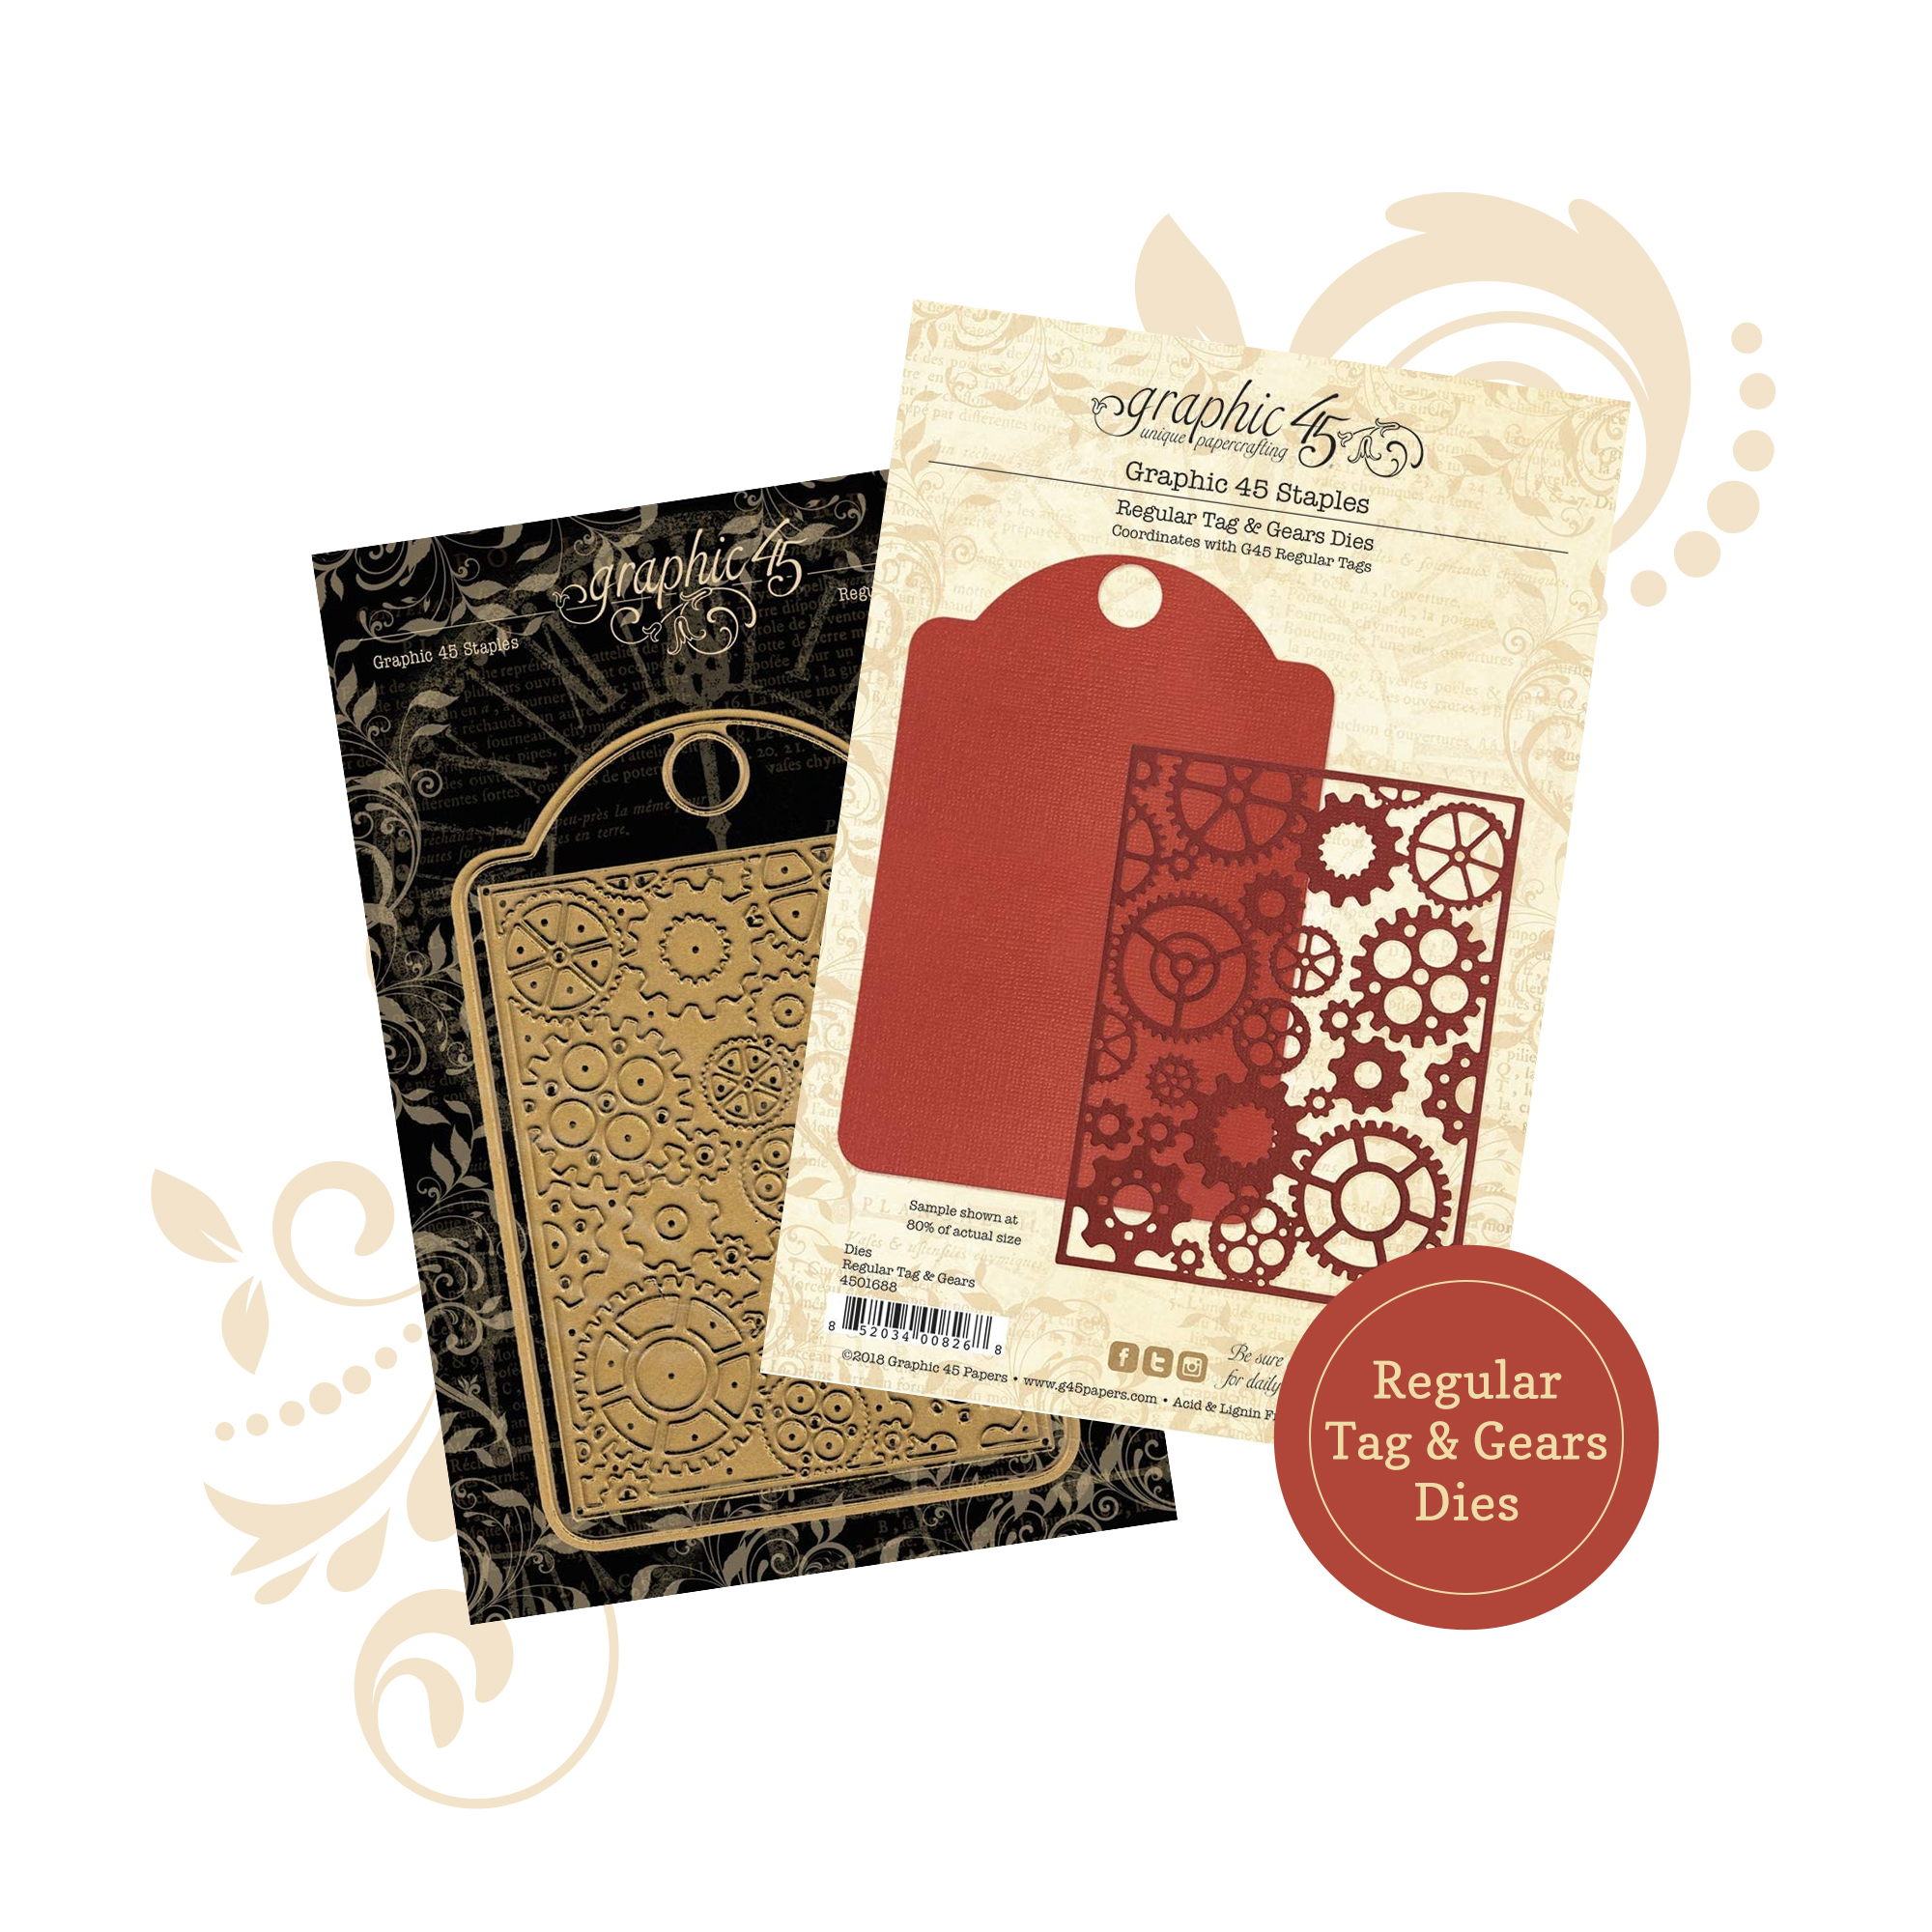
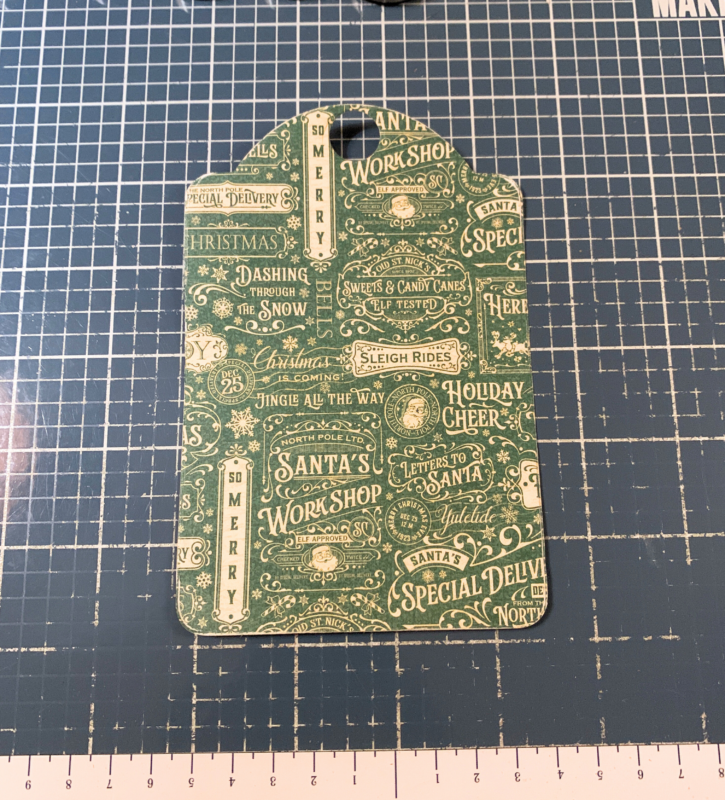
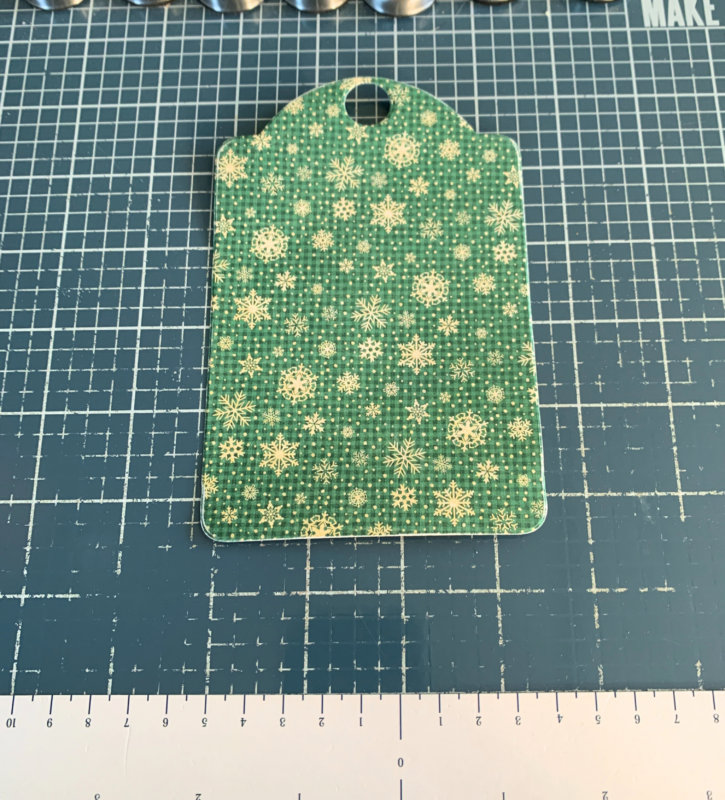
Step Two. Die cut the Regular Tag from the Regular Tag & Gears Metal Die out of the word side of the Season’s Greeting Paper from the Letters To Santa 8×8 Collection Pack. Sand the edges of the patterned paper tag.
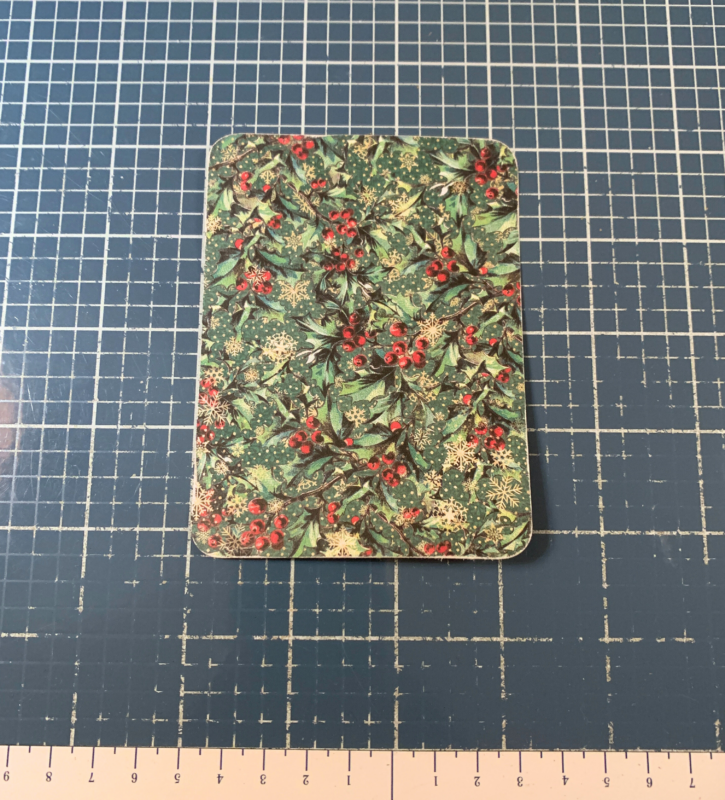
Step Three. Cut a piece from the Holly side of the Holiday Cheer patterned paper that measures 3 ¼” x 4 ⅜”. Round the four corners. Sand the edges of the patterned paper.
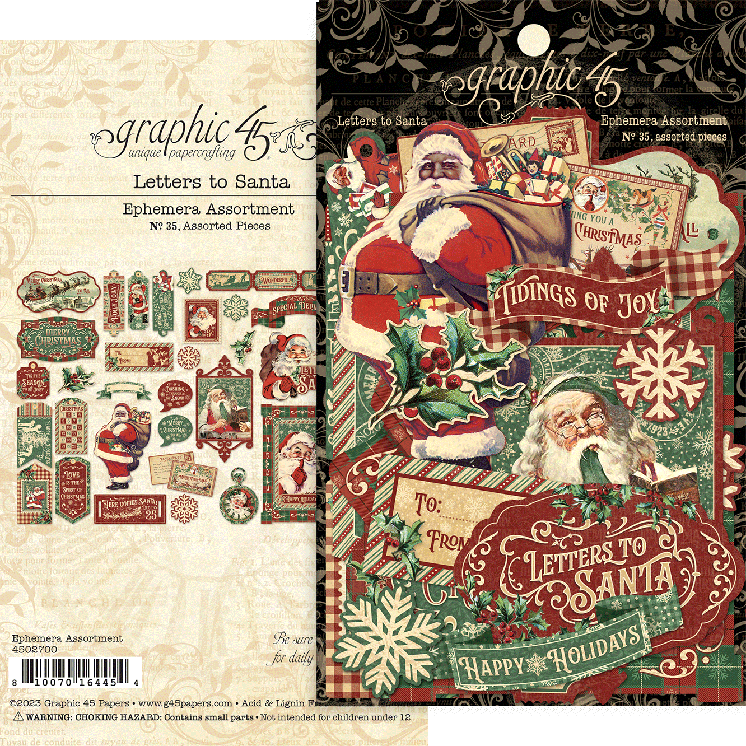
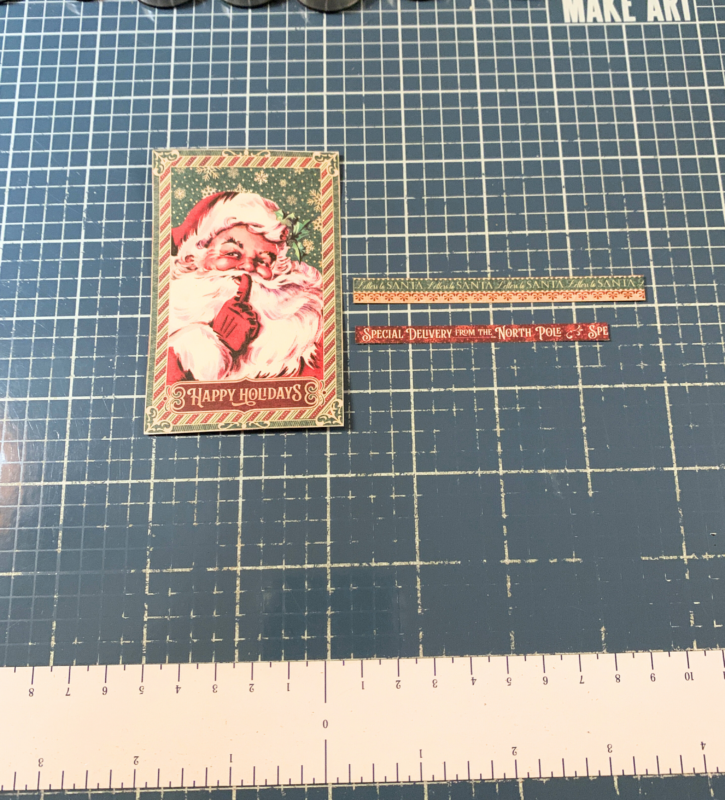
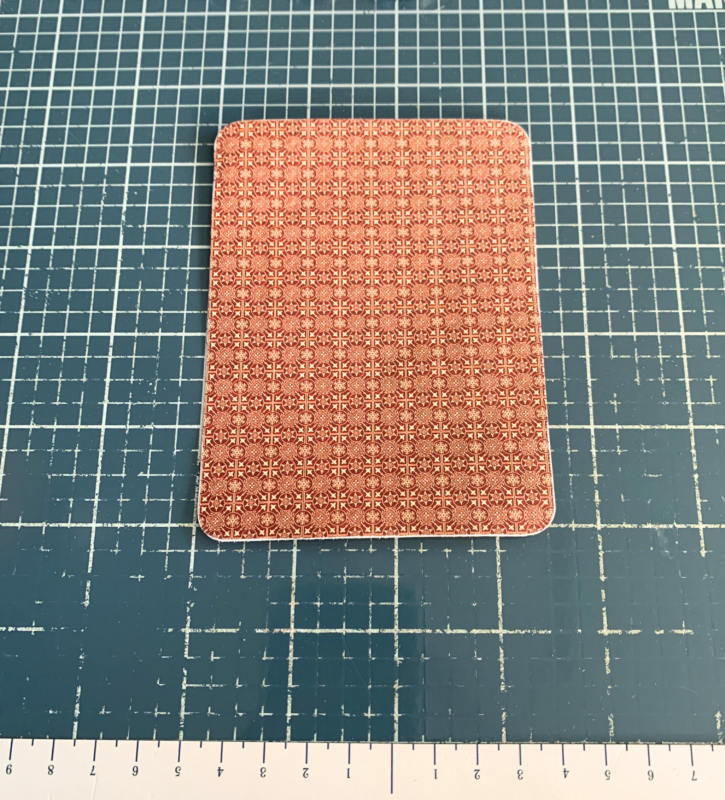
Step Four. From the Letters to Santa patterned paper, fussy cut two stamps, the special delivery image and holly jolly sentiment. Flip the paper over and cut a piece that measures 3 ½” x 4 ⅝”. Round all four corners of the patterned paper. Sand the edges of all of the pieces.
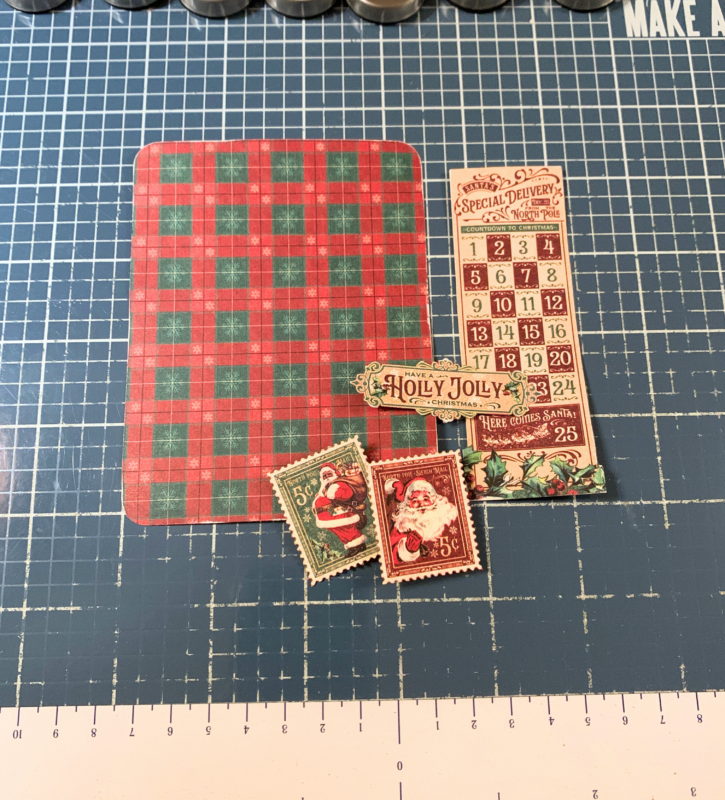
Step Five. From the Holly Jolly Express paper you’ll need to cut out the santa image and two border strips. Cut one border strip down to 3 ⅜”. Cut the other border strip down to 3”. Sand the edges of the santa image.
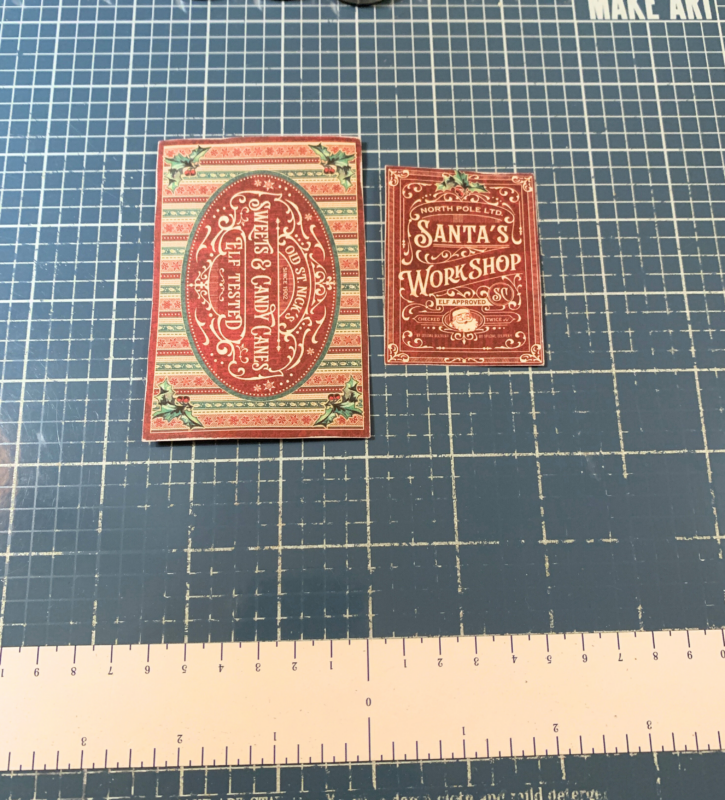
Step Six. From the Sweets & Treats patterned paper, you’ll need to cut out the santa’s workshop and sweets & candy canes images. Sand the edges of the images.
Step Seven. Adhere the patterned paper tag to the ivory tag. Adhere the red plaid paper to the patterned paper tag. Adhere the holly paper to the red plaid paper.
Step Eight. Adhere the santa’s workshop image 1 ¾” from the right of the sweets & candy image. Adhere the sweets & candy image ⅛” from the left and ¼” from the top of the holly paper. Adhere the green/gold border strip ¾” over the right side and ⅝” from the bottom of the holly paper. Adhere the red word border strip ⅝” over the right side and ⅝” from the bottom of the holly paper.
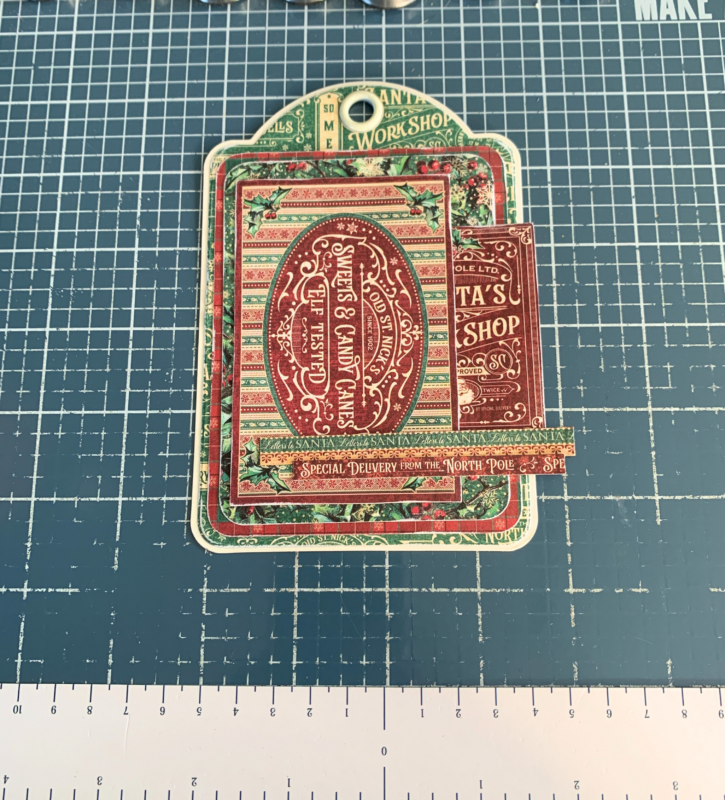
Step Nine. Adhere the special delivery sign ¼” from the right and ⅛” from the top of the holly paper. Adhere the two stamps to the middle left of the santa image as desired. Foam square the santa image ⅜” from the left and ½” from the top of the holly paper. Roll one corner down on each of the stamps. Foam square the Holly Jolly sentiment to the bottom of the santa.
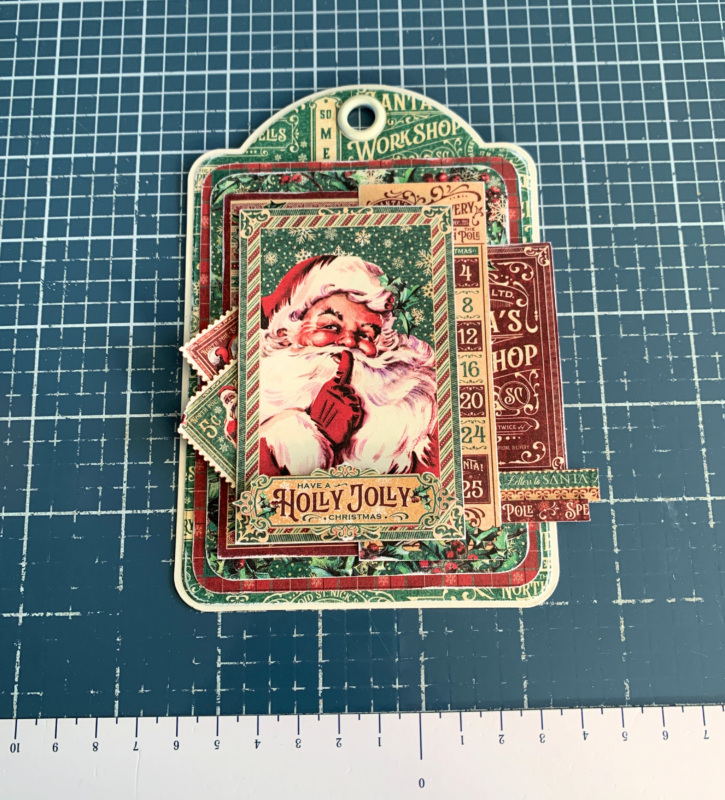
Step Ten. Add five Matte Pearl Gems to the tag as desired. Add a piece of twine through the hole at the top of the tag.
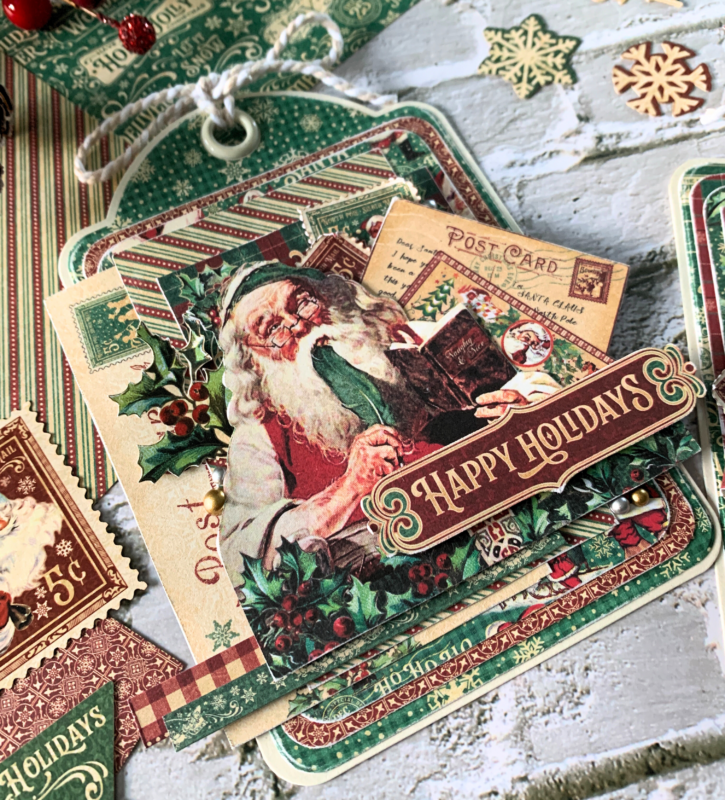
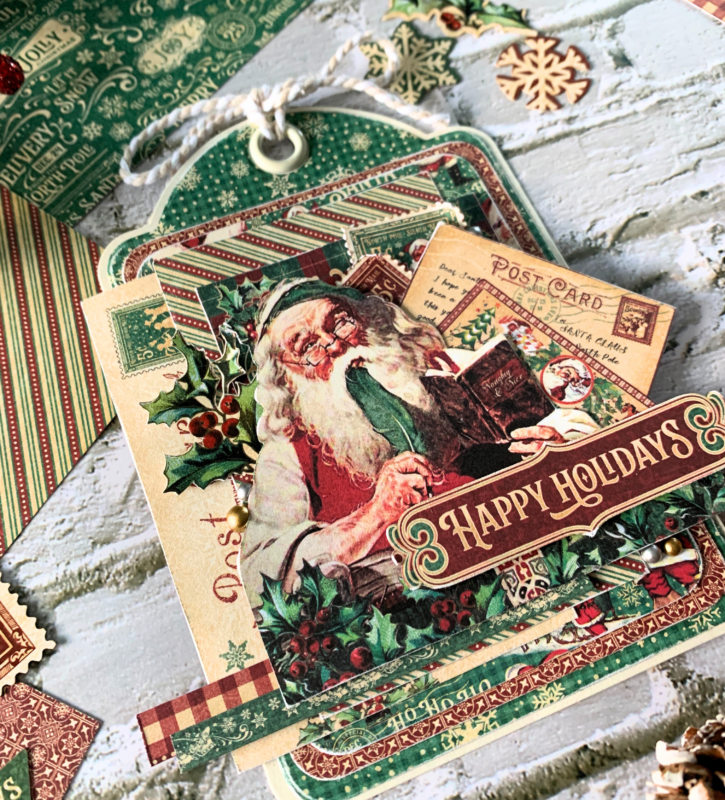
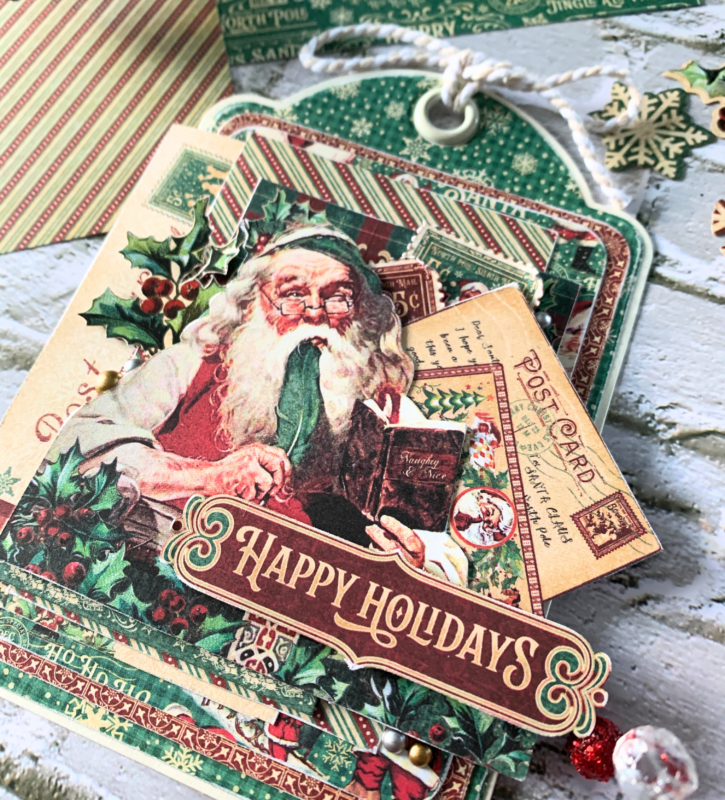
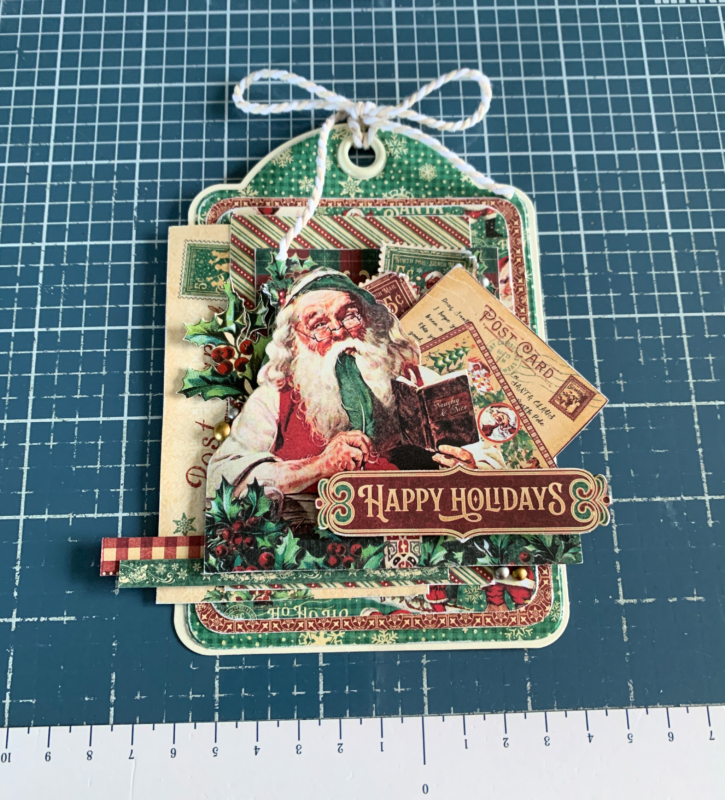
The second tag we will create is the Happy Holidays Gift Tag.

Step One. Take out a Regular Ivory Tag.
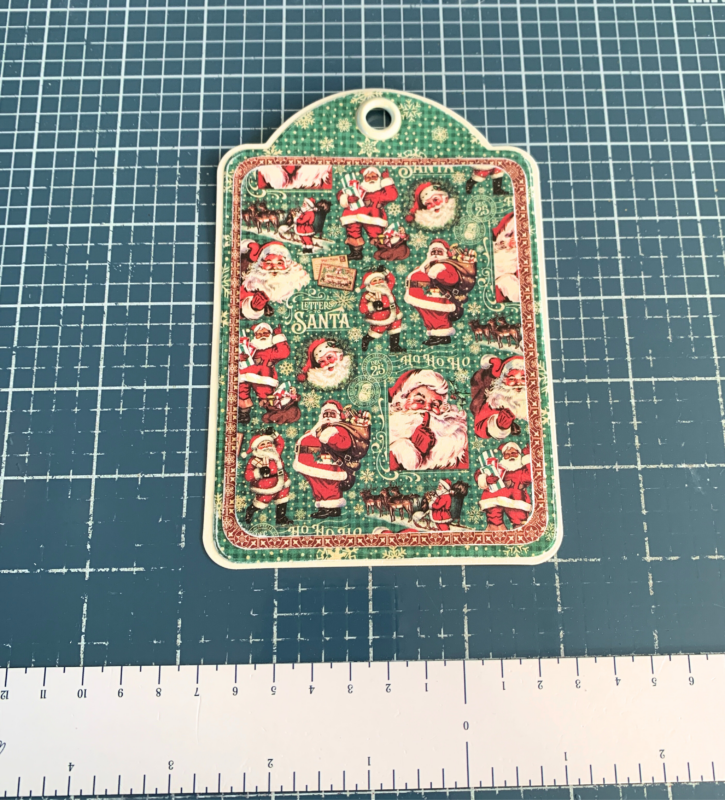
Step Two. Die cut the Regular Tag from the Regular Tag & Gears Metal Die out of the snowflake side of the Naughty or Nice Paper from the Letters To Santa 8×8 Collection Pack. Sand the edges of the patterned paper tag.
Step Three. Cut a piece from the red side of the North Pole Postage patterned paper that measures 3 ¼” x 4 ⅜”. Round the four corners. Sand the edges of the patterned paper.
Step Four. Cut a piece from the santa side of the Dear Old Santa patterned paper that measures 3 ¼” x 4 ⅜”. Round the four corners. Sand the edges of the patterned paper.

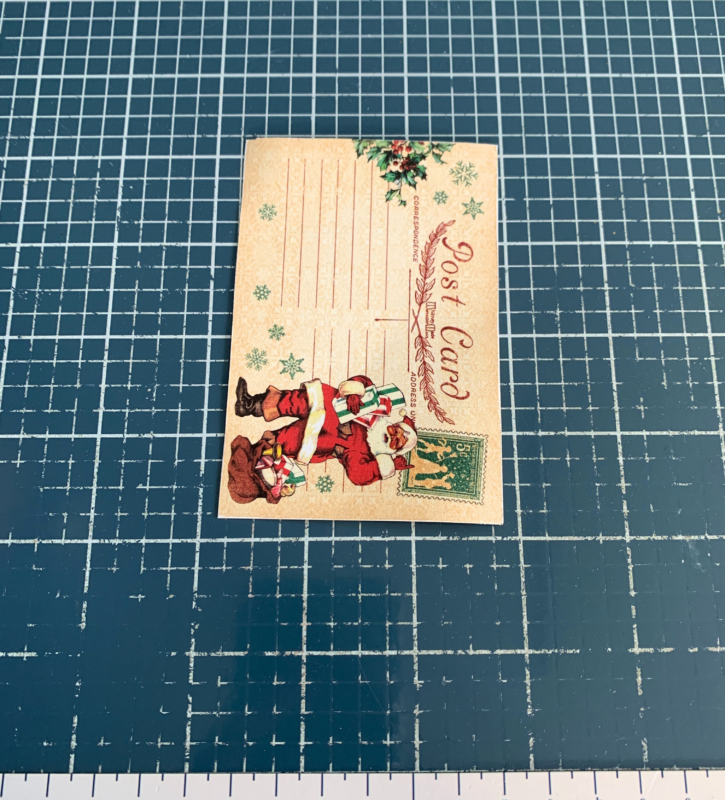
Step Four. You’ll need to fussy cut the santa postcard out of the postcard side of the Sweets & Treats patterned paper. Sand the edges of the postcard.
Step Five. Cut out the Merry Christmas image and the green sleigh border from the Holly Jolly Express Paper. Cut the border strip down to 3 ¼”. Flip the paper over and cut a piece that measures 2 ⅝” x 4”. Sand the edges of the paper and image.
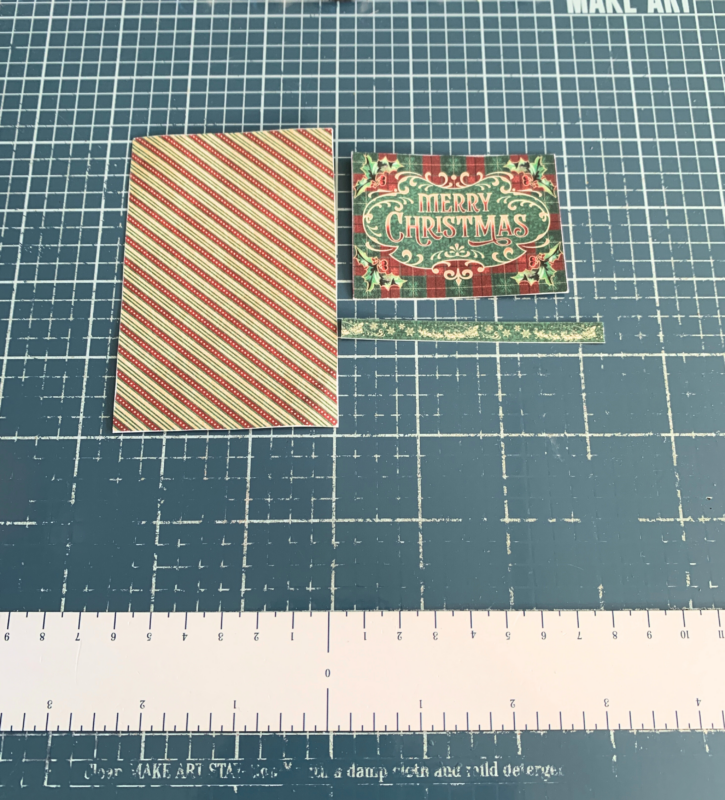
Step Six. Fussy cut the Santa, postcards, two stamps and happy holidays sentiment. Cut the red plaid border strip to 3 ½”. Sand the edges of all of the images and sentiment.
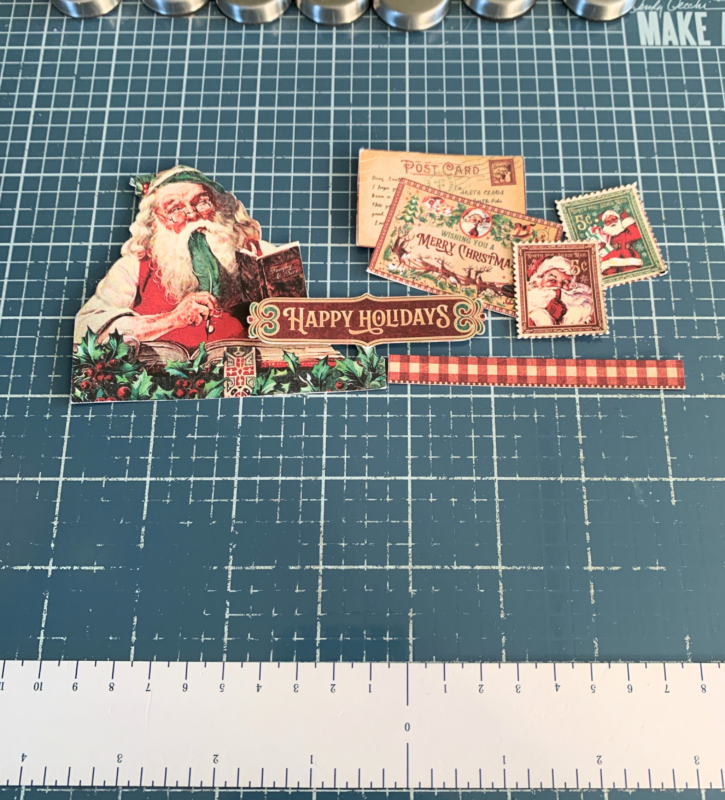
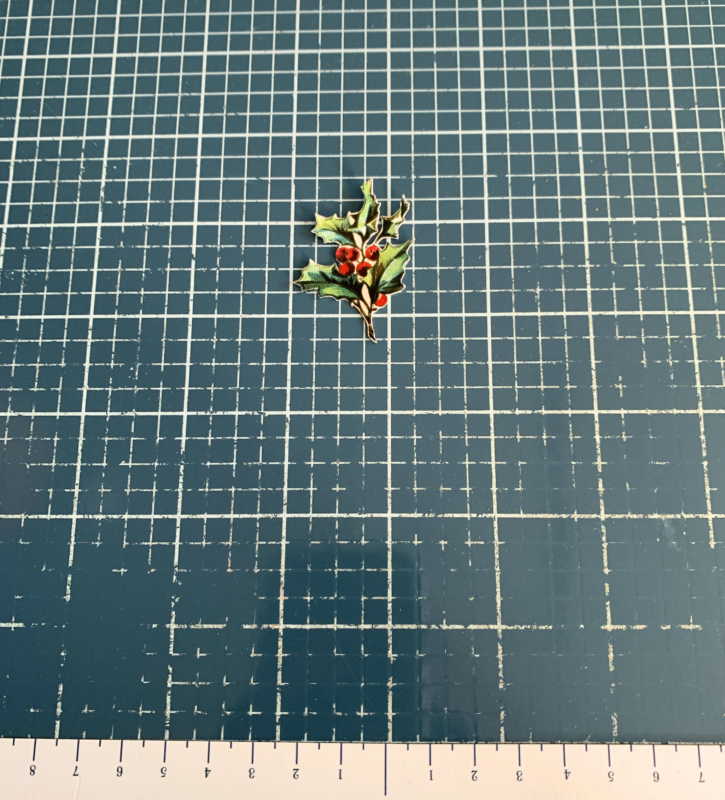
Step Seven. Fussy cut around the holly branch out of the Letters to Santa Ephemera.
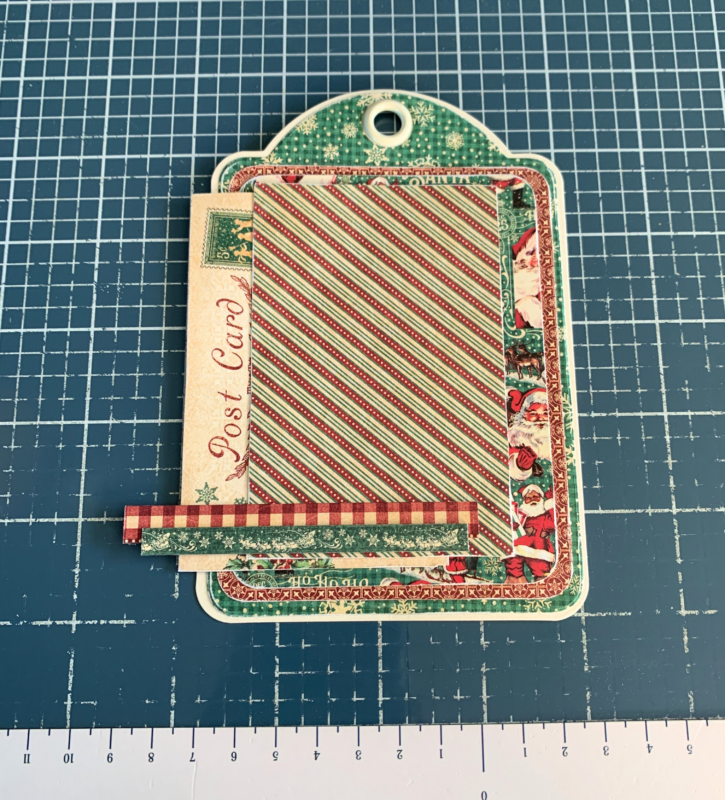
Step Eight. Adhere the patterned paper tag to the ivory tag. Adhere the red patterned paper to the patterned paper tag. Adhere the santa paper to the red patterned paper.
Step Nine. Adhere the postcard ½” over the left side and ¼” from the top of the santa paper. Adhere the striped paper ¼” from the left and ⅛” from the top of the santa paper. Adhere the red plaid border strip ½” from the bottom and 1 ⅛” over the left side of the santa paper. Adhere the green border strip ⅜” from the bottom and ⅞” over the left side of the santa paper.
Step Ten. Adhere the Merry Christmas image ⅛” from the right and ½” from the top of the santa paper. Adhere the two stamps to the top portion of the postcards. Foam square the post cards ¾” from the top and ¾” over the right side of the santa paper. Roll one of the corners down on each of the stamps.
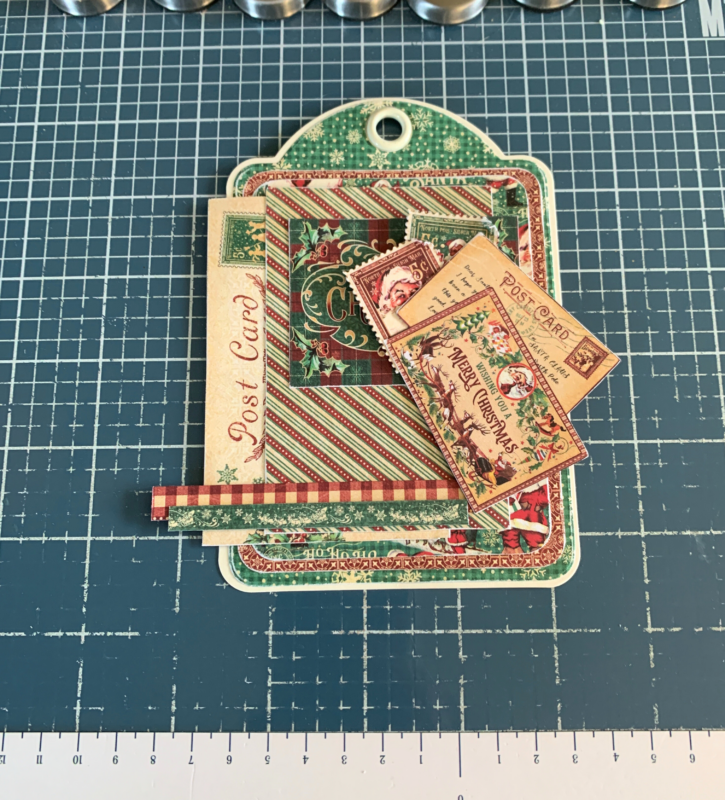
Step Eleven. Use adhesive and foam squares to adhere the santa image to the left of the postcards as desired. Adhere the holly branch to the left of the santa as desired. Foam square the Happy Holidays sentiment to the bottom of the santa image as desired.
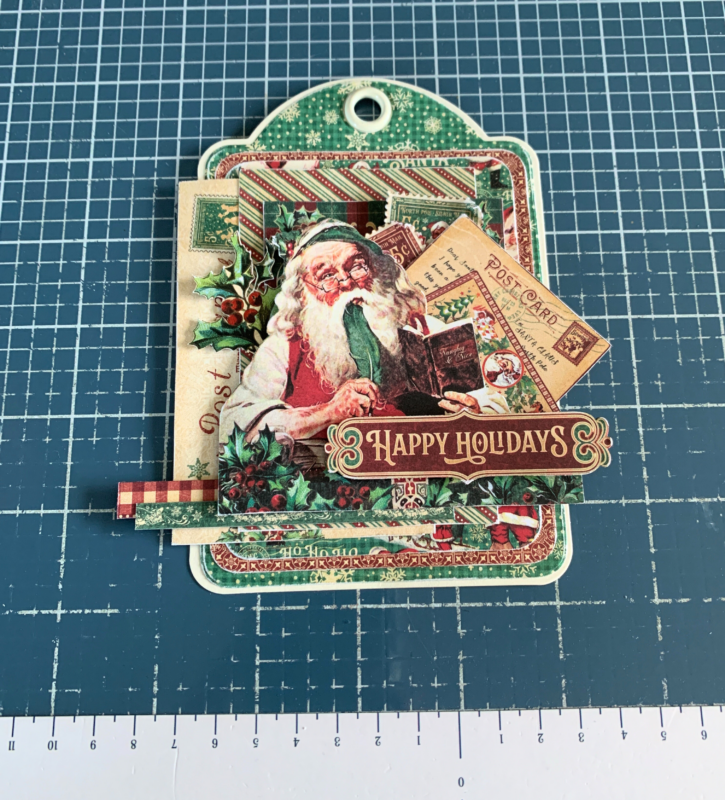
Step Twelve. Stick five Matte Pearl Gems to the tag as desired. To finish the tag, add twine through the hole.
Letters To Santa 8×8 Collection Pack
Letters To Santa Ephemera Assortment
Regular Tag & Gears Metal Dies
Tan/White Twine
Thank you so much for joining me today and I hope that my Christmas Gift Tags have inspired you to create your own.”