Introducing a gorgeous 2024 DIY Desktop Calendar, showcasing our Life is Abundant paper collection. Crafted by Graphic 45 Brand Ambassador, Katelyn Spencer, this project is part of the #G45LeveledUp series. The series where we ask our Brand Ambassadors to take one of our project sheets, follow along, but add their twist. Grab your papers and scissors and unleash your creativity with our brilliant Step-by-Step Tutorial.
“Hey Everyone!
I’m thrilled to be back on the blog this month sharing this beautiful 2024 Desktop Calendar that is based off of the 2023 Vol 1 Flower Market – A Frame Monthly Calendar and features the Life Is Abundant Collection.
Read below as I share with you how I modified the calendar based off of the Volume 1 Flower Market – A Frame Monthly Calendar.

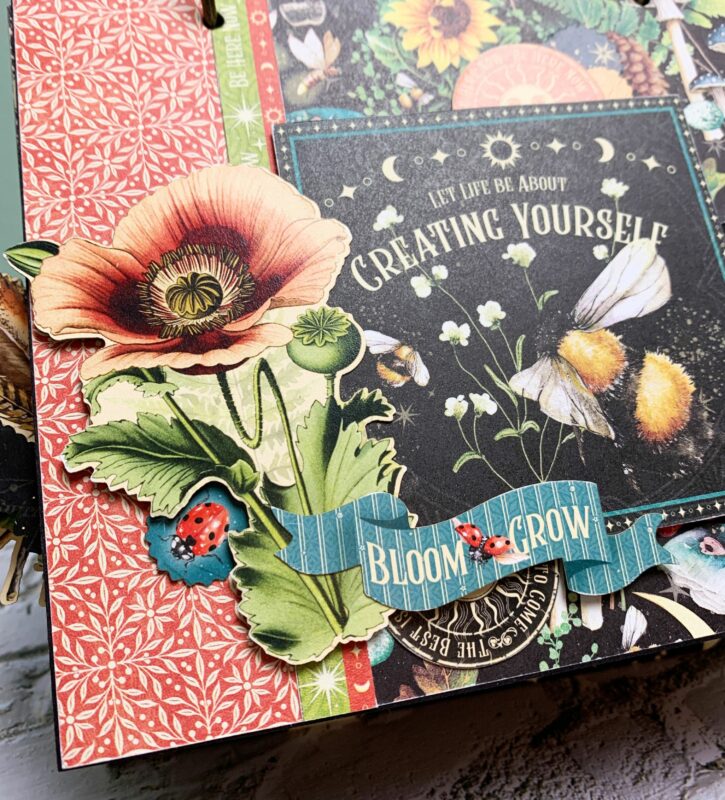
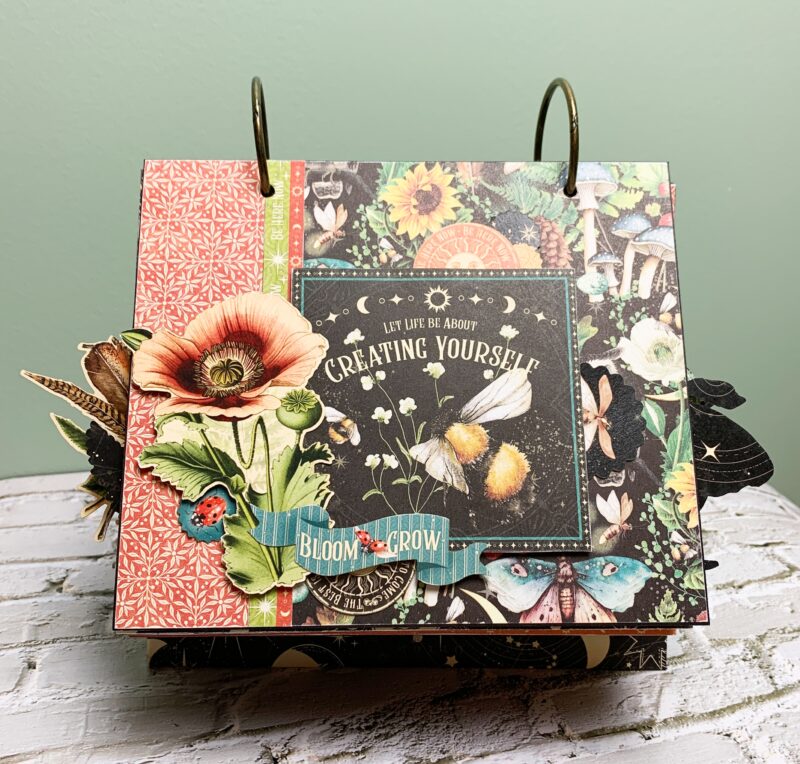
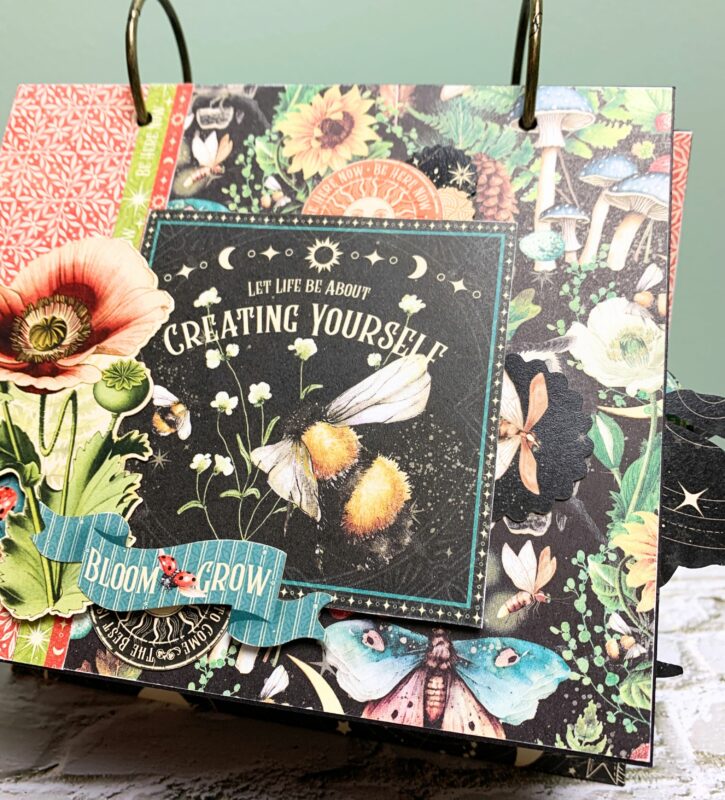
Front Cover Modifications: The pattern papers were cut down so that there is a ⅛” border around the chipboard page. To cover the seam between the two patterned papers, I used one of the border strips that was leftover from one of the month pages. Choose one of the images from the month pages and cut it out. Foam square the image to the front cover as desired. I layered ephemera pieces around the image using foam squares and adhesive.
The front cover and all pages have had the edges sanded.
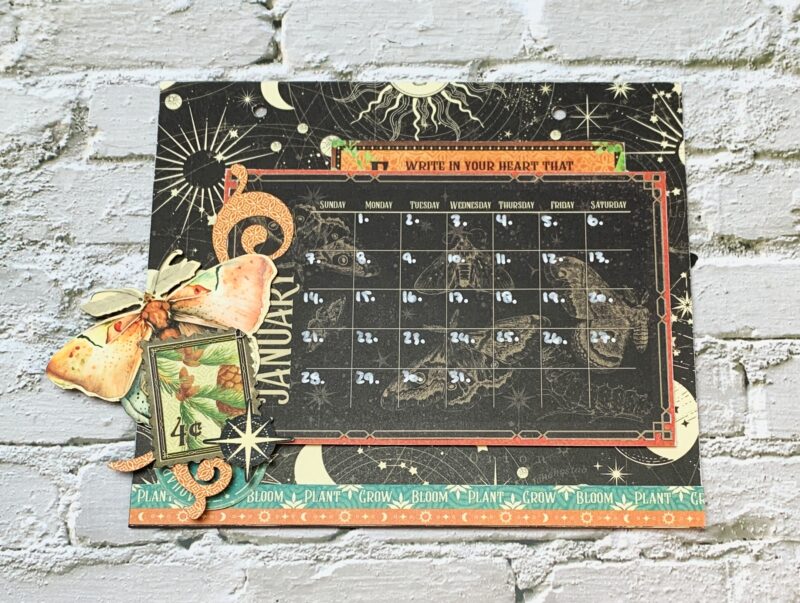
January Calendar Page Modification: I cut the backside of the January Paper to 7” x 6”. Using a second January page, cut out the stacked border to 7” and adhere at the bottom of the page. The January calendar is adhered to a piece from the patterns & solids paper pack. I embellished the page using a stamp and Write In piece from the second January page. Also embellishments out of the Life is Abundant Ephemera Assortment.
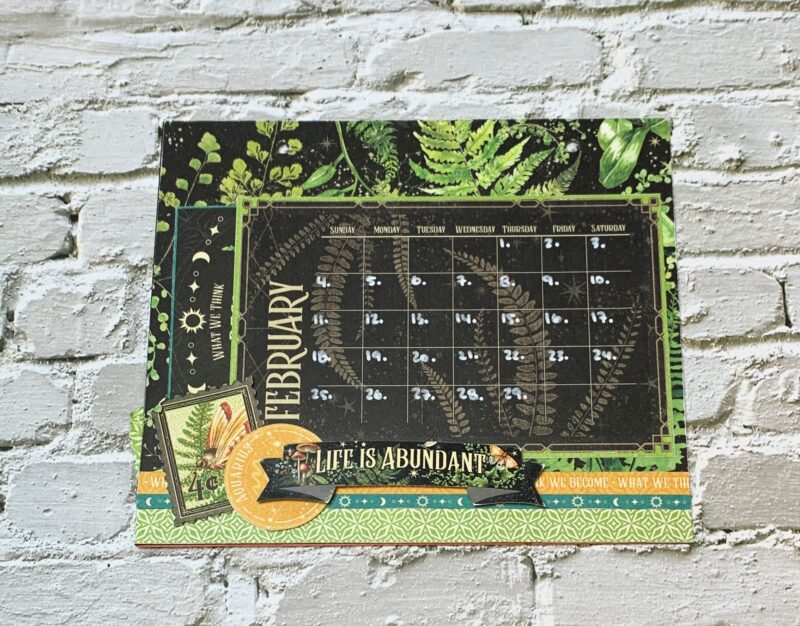
February Calendar Page Modification: I cut the backside of the February Paper to 5 ¼” x 7”. The green piece at the bottom of the page is ¾” x 7”. Using a second February page, cut out the stacked border to 7” and adhere in between the two pages. The February calendar is adhered to a piece from the patterns & solids paper pack and then adhered to the page at the top, right and bottom to create a pocket. I embellished the page using a stamp, aquarius circle and Image piece from the second February page. The image piece slides into the pocket behind the calendar page. Also the Life is Abundant Banner out of the Life is Abundant Ephemera Assortment.
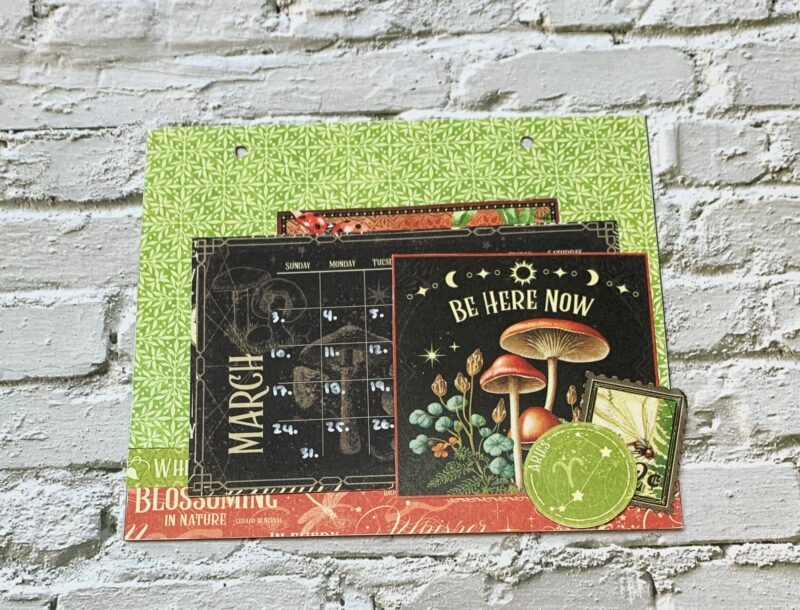
March Calendar Page Modification: I cut the backside of the March Paper to 5 ¼” x 7”. The red piece at the bottom of the page is 1” x 7”. Using a second March page, cut out the single border to 7” and adhere in between the two papers. Instead of using two stamps as a pocket, I used the mushroom image. The March calendar is adhered to a piece from the patterns & solids paper pack. I also added the ladybug quote to the top portion of the March calendar. I embellished the page using a stamp and aries circle. The calendar piece slides into the mushroom image.
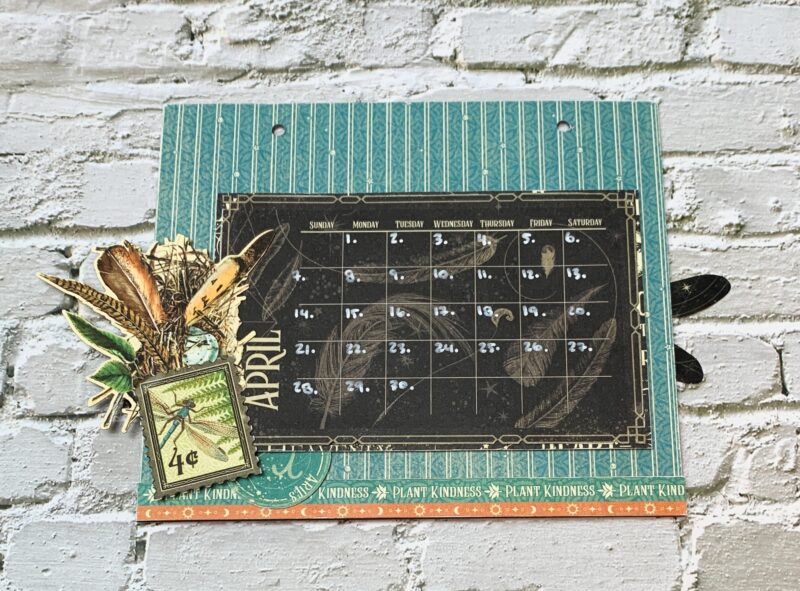
April Calendar Page Modification: I cut the backside of the April Paper to 6” x 7”. Using a second April page, cut out the double border to 7” and adhere at the bottom of the page. The April calendar is adhered to a piece from the patterns & solids paper pack which I foam squared to the page. I embellished the page using a stamp as well as the feather ephemera piece.
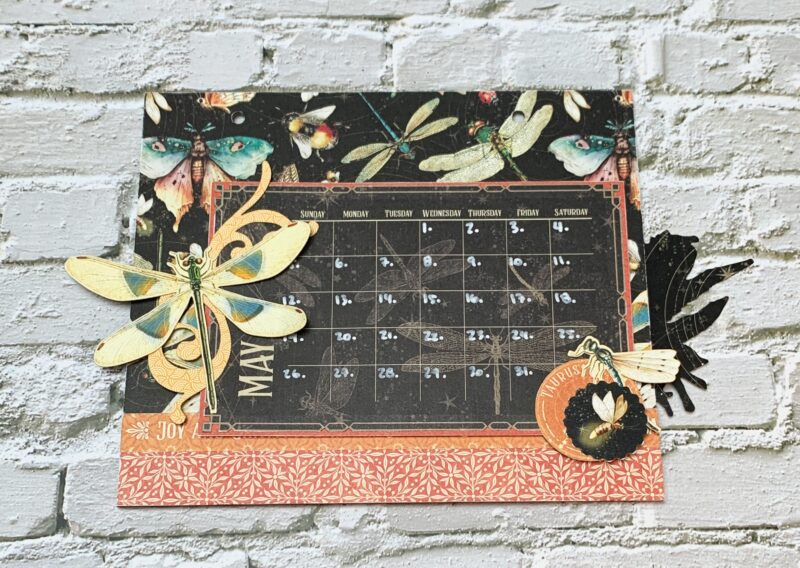
May Calendar Page Modification: I cut the backside of the May Paper to 5 ¼” x 7”. Cut a piece from the red patterned paper out of the patterns & solids that measures 1” x 7. Using a second May page, cut out the single border to 7” and adhere in between the two papers. The May calendar is adhered to a piece from the patterns & solids paper pack which I foam squared to the page. I embellished the page using a taurus circle as well as four ephemera pieces.
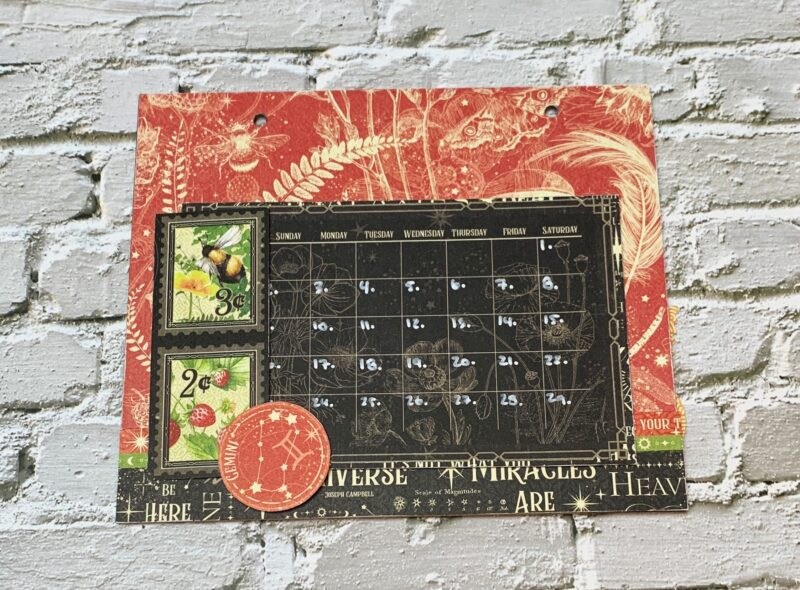
June Calendar Page Modification: I cut the backside of the June Paper to 5 ¼” x 7”. Cut a piece from the black patterned paper out of the patterns & solids that measures 1” x 7. Using a second June page, cut out the double border to 7” and adhere in between the two papers. The June calendar is adhered to a piece from the patterns & solids paper pack. I embellished the page using a gemini circle. Everything else stayed the same.
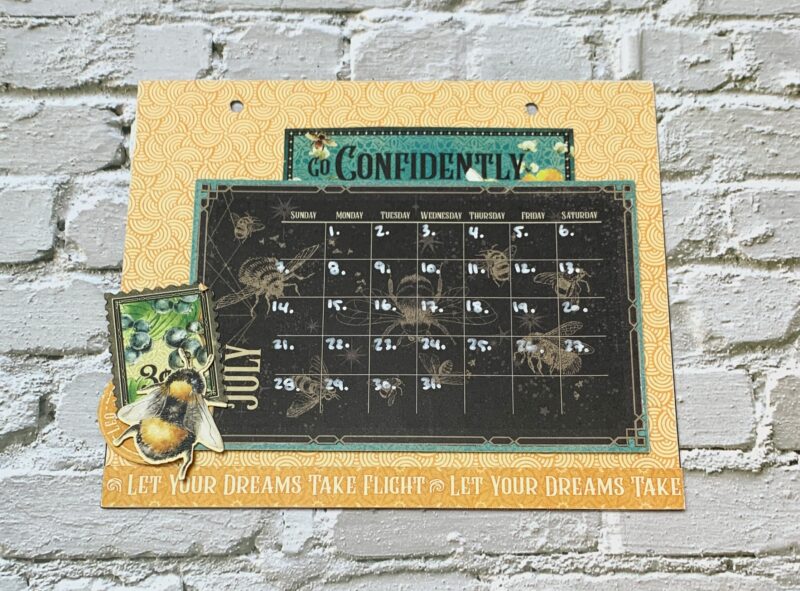
July Calendar Page Modification: I cut the backside of the June Paper to 6” x 7”. Using a second July page, cut out the single border to 7” and adhere at the bottom of the page. The July calendar is adhered to a piece from the patterns & solids paper pack. Adhere the Go Confidently piece to the top of the calendar. Embellish to the bottom left corner of the calendar using a stamp, Leo circle and the bee embellish out of the ephemera package.
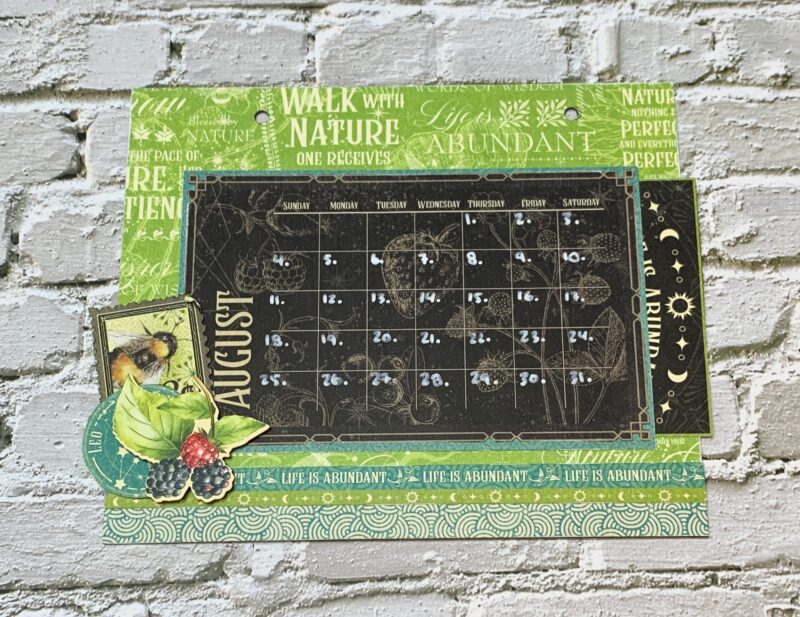
August Calendar Page Modification: I cut the backside of the August Paper to 5 ¼” x 7”. The blue piece at the bottom of the page is 1” x 7” from the patterns & solids paper pack. Using a second August page, cut out the stacked border and adhere in between the two pages. The August calendar is adhered to a piece from the patterns & solids paper pack and then adhere to the page at the top, right and bottom to create a pocket. I embellished the page using a stamp, Leo circle and Image piece from the second August page. The image piece slides into the pocket behind the calendar page. Also the blackberry image is out of the Life is Abundant Ephemera Assortment.
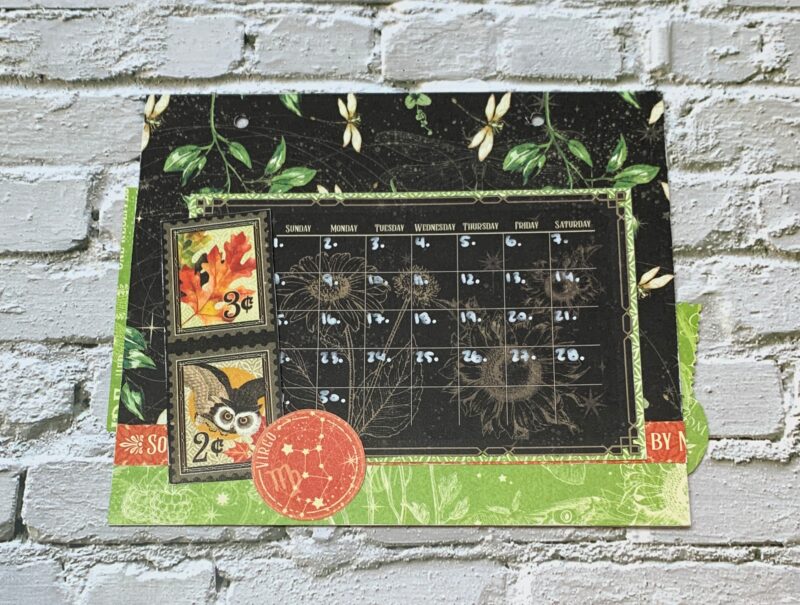
September Calendar Page Modification: I cut the backside of the September Paper to 5 ¼” x 7”. Cut a piece from the green patterned paper out of the patterns & solids that measures 1” x 7. Using a second September page, cut out the single border to 7” and adhere in between the two papers. The September calendar is adhered to a piece from the patterns & solids paper pack. I embellished the page using a virgo circle. Everything else stayed the same.
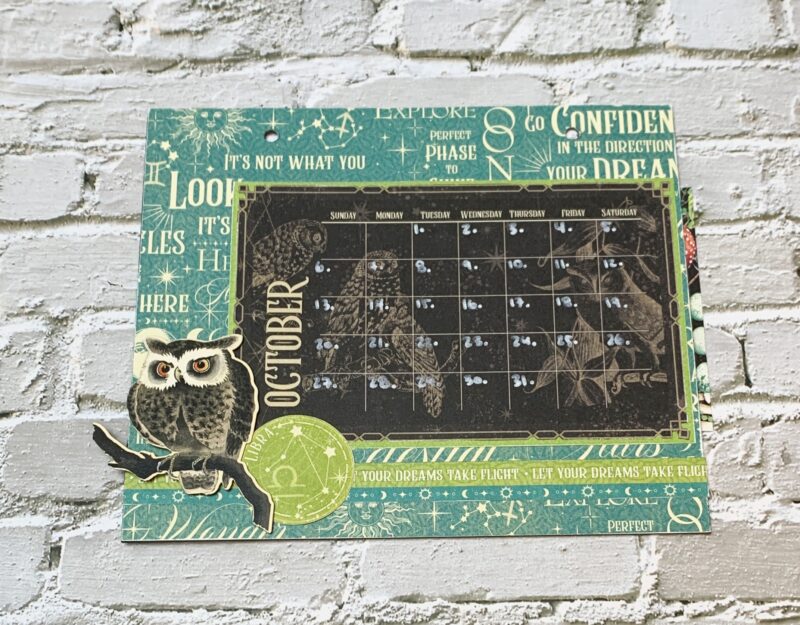
October Calendar Page Modification: I cut the backside of the October Paper to 6” x 7”. Using a second October page, cut out the stacked border to 7” and adhere ⅜” from the bottom of the page. The October calendar is adhered to a piece from the patterns & solids paper pack. Embellish the bottom left corner of the calendar using a Libra circle and the owl embellish out of the ephemera package.

November Calendar Page Modification: I cut the backside of the November Paper to 5 ¼” x 7”. The blue piece at the bottom of the page is 1” x 7” from the patterns & solids paper pack. Using a second November page, cut out the single border to 7” and adhere in between the two papers. The November calendar is adhered to a piece from the patterns & solids paper pack and then adhered to the page at the top, right and bottom to create a pocket. I embellished the page using a scorpio circle from the second November page. The image piece slides into the pocket behind the calendar page.
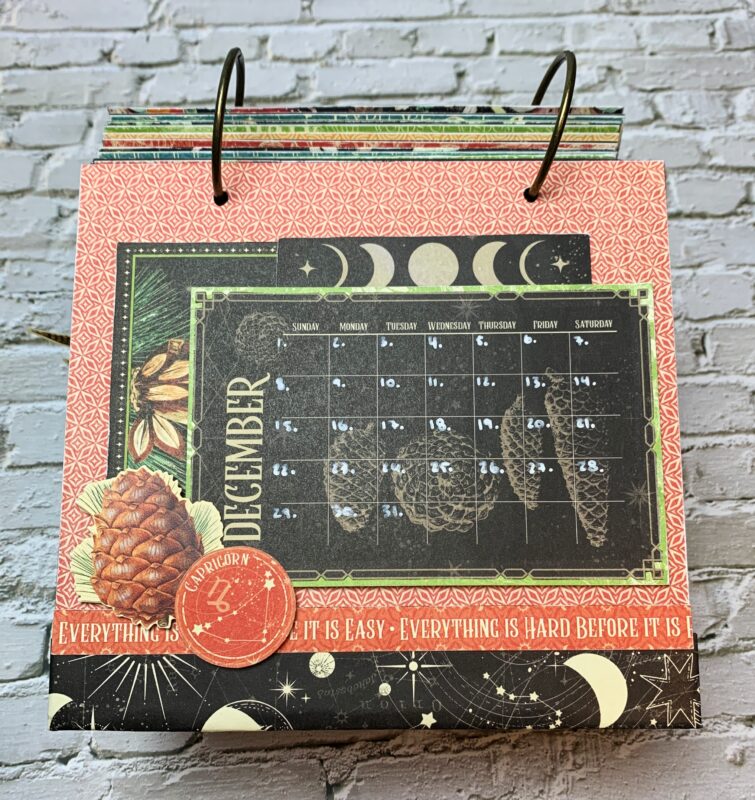
December Calendar Page Modification: I cut the backside of the December Paper to 5 ¼” x 7”. The black piece at the bottom of the page is 1” x 7” from the patterns & solids paper pack. Using a second December page, cut out the single border to 7” and adhere in between the two papers. The December calendar is adhered to a piece from the patterns & solids paper pack. I embellished the page using the pinecone image, capricorn circle and moon images from the second December page. The pinecone image in the bottom left corner of the calendar is from the ephemera package.
All the month pockets were created using the instructions.
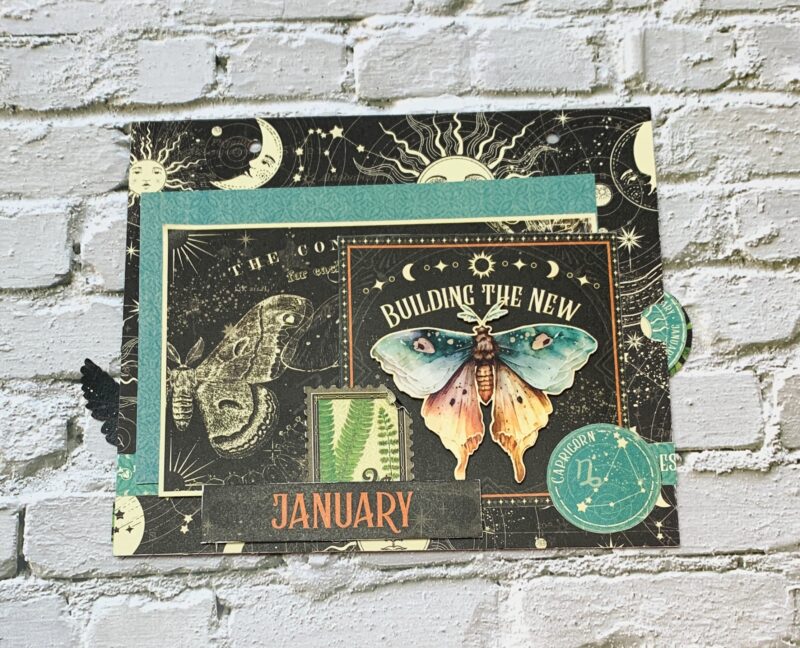
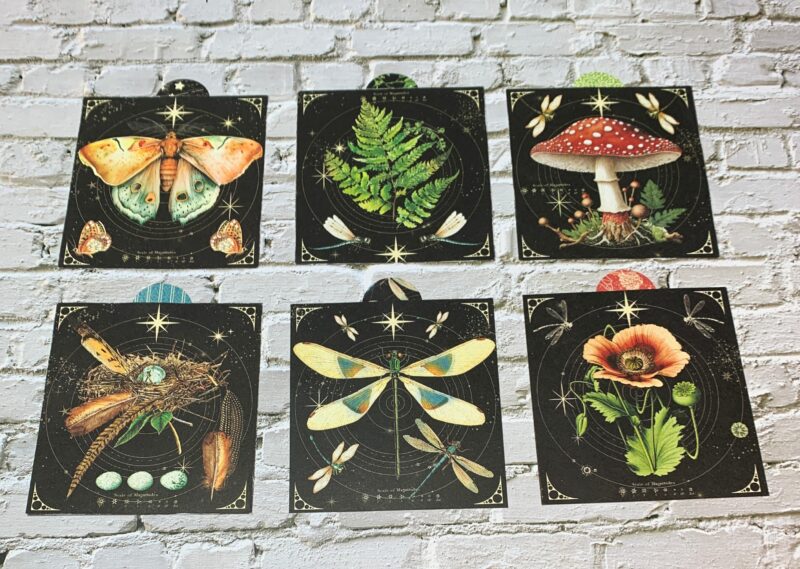
January Pocket Page Modification: From the second January page, I cut the single border to 7” and adhered ¾” from the bottom of the pocket. From the second January page, I fussy cut the capricorn circle, stamp, butterfly image and large butterfly card. I created a pocket out of the butterfly image and slid in the butterfly card and a 4”x6” blue patterns & solids paper. Around the pocket the capricorn circle, stamp and January title were adhered. Overtop of the butterfly image, I foam squared the butterfly ephemera piece.
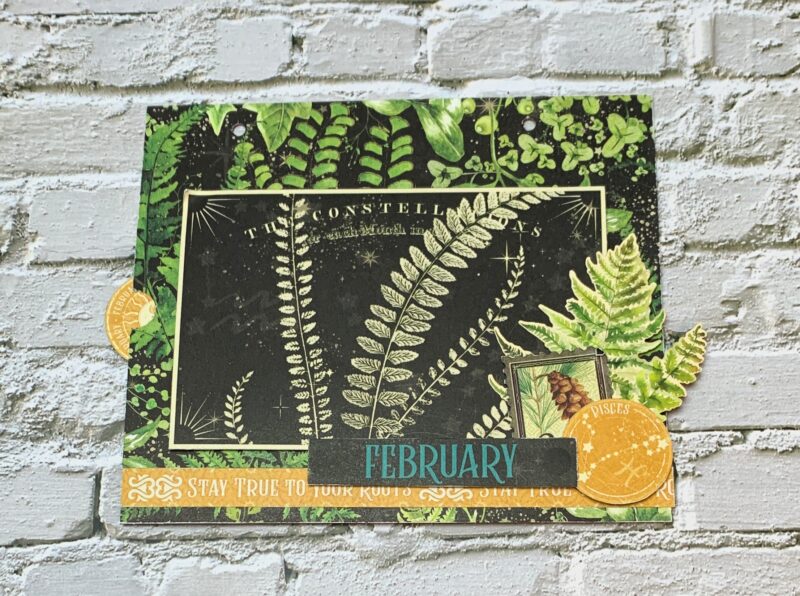
February Pocket Page Modification: From the second February page, I cut the single border to 7” and adhered ¼” from the bottom of the pocket. From the second February page, I fussy cut the pisces circle, stamp, February title and large fern card. The large fern card was foam squared to the middle of the page. Around the fern card, the fern ephemera, stamp, pisces circle and February title were adhered.
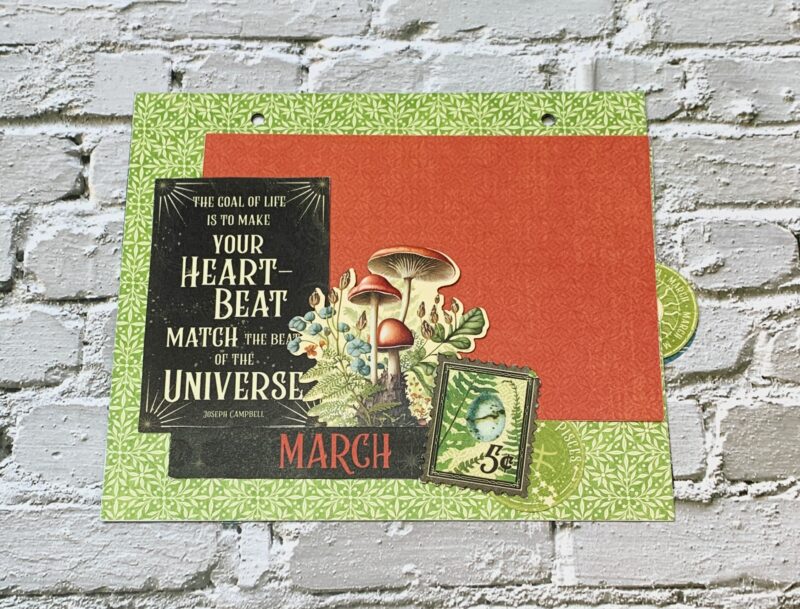
March Pocket Page Modification: From the second March page, I fussy cut the pisces circle, stamp, HeartBeat quote and March Title. I created a pocket out of the Heart Beat Quote and slid in a 4”x6” red pattern & solids paper. Around the pocket the pisces circle, stamp, January title and mushroom image from the ephemera pack were adhered.

April Pocket Page Modification: From the second April page, I fussy cut the Taurus circle, stamp, feather image, large feather card and April title. I created a pocket out of the feather image and slid in the feather card and a 4”x6” blue patterns & solids paper. Around the pocket the taurus circle, stamp and April title were adhered.
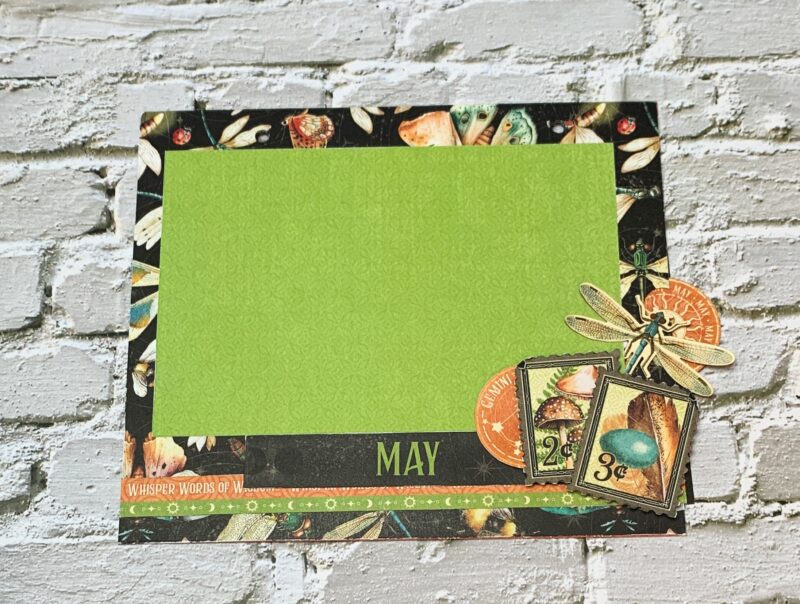
May Pocket Page Modification: From the second May page, I cut the stacked border to 7” and adhered ½” from the bottom of the pocket. From the second May page, I fussy cut the gemini circle, two stamps and May title. Cut a 4” x 6” green paper from the patterns & solids paper pack. Adhere the photo mat to the middle of the pocket. Around the photo mat, the dragonfly ephemera, two stamps, gemini circle and May title were adhered.
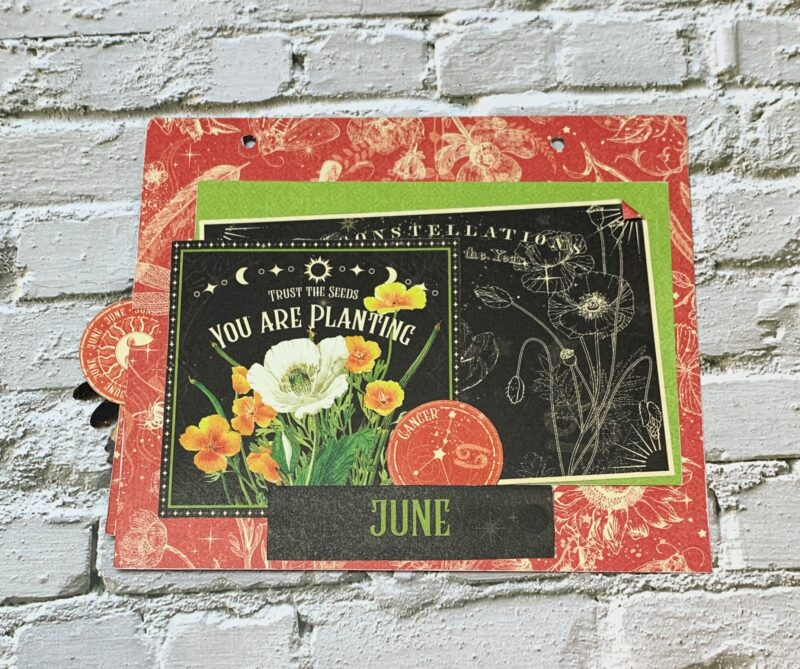
June Pocket Page Modification: From the second June page, I fussy cut the Cancer circle, flower image, large flower card and June title. I created a pocket out of the flower image and slid in the flower card and a 4”x6” green patterns & solids paper. Around the pocket the cancer circle, and June title were adhered.
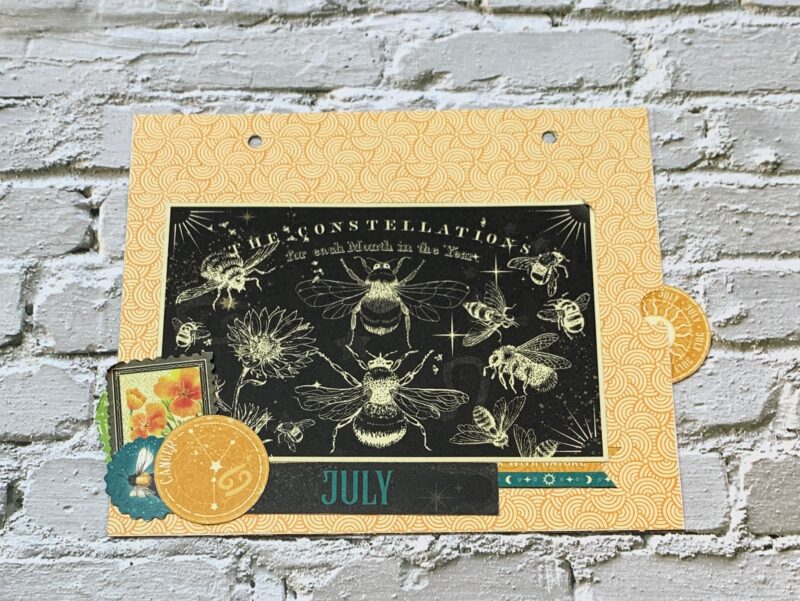
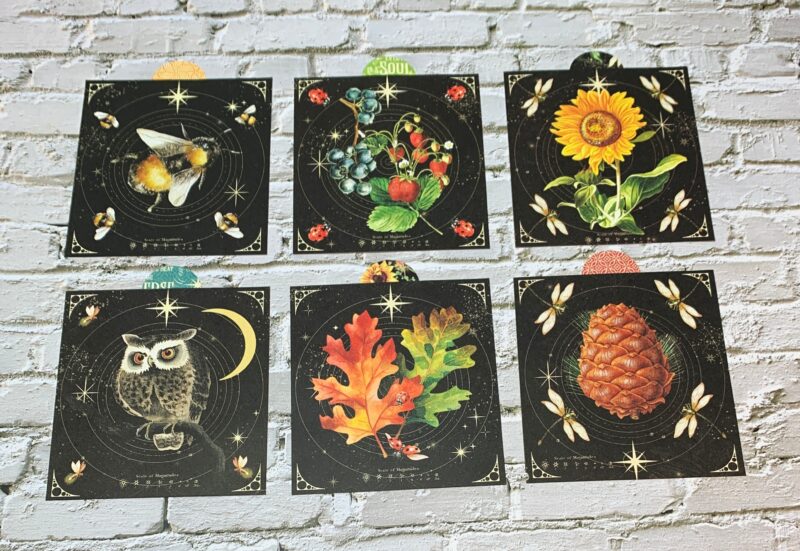
July Pocket Page Modification: From the second July page, I cut the double border to 6”, notch out the right handside and adhered it ½” from the bottom of the pocket. From the second July page, I fussy cut the cancer circle, stamp, July title and large bee card. The large bee card was foam squared to the middle of the page. Around the bee card, the bee circle ephemera, stamp, cancer circle and July title were adhered.
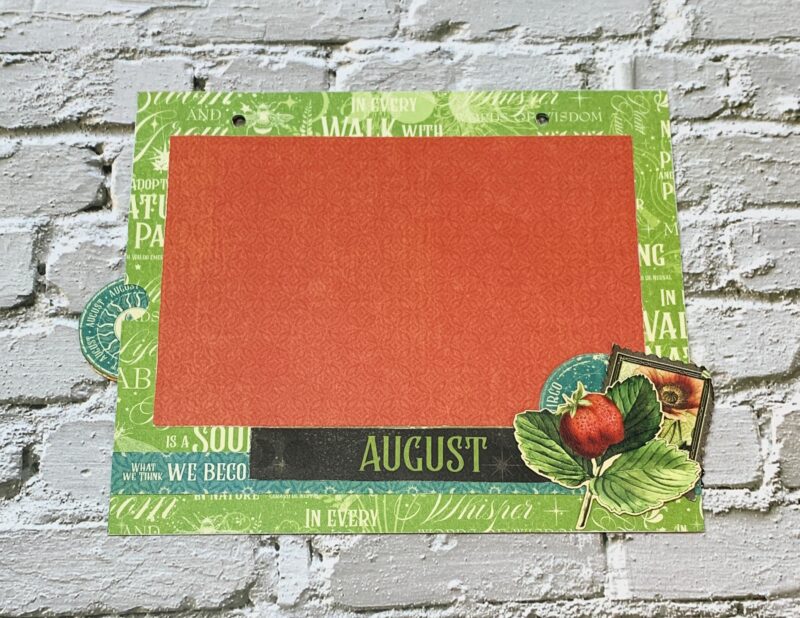
August Pocket Page Modification: From the second August page, I cut the single border to 7” and adhered ½” from the bottom of the pocket. From the second August page, I fussy cut the virgo circle, stamp and August title. Cut a 4” x 6” red paper from the patterns & solids paper pack. Adhere the photo mat to the middle of the pocket. Around the photo mat, the stamp, virgo circle, May title and strawberry ephemera were adhered.
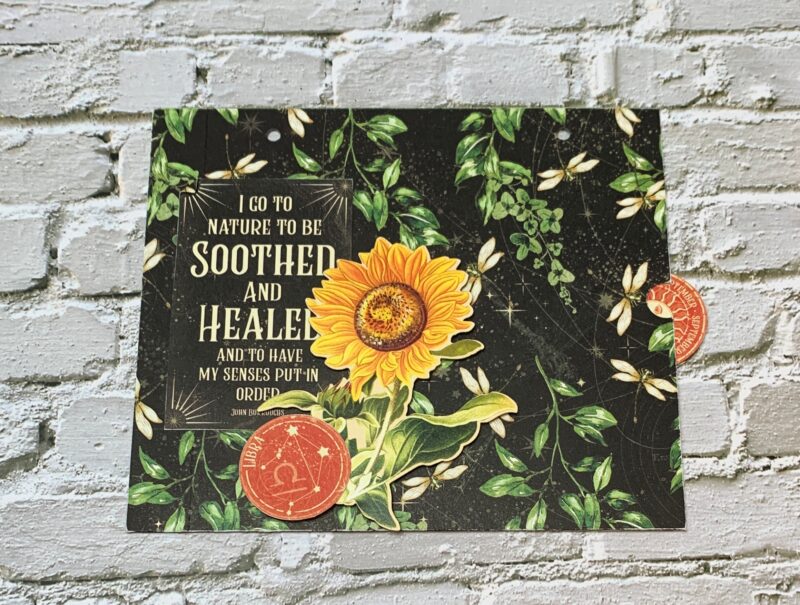
September Pocket Page Modification: From the second September page, I fussy cut the Libra circle, and Soothed quote. Adhere the soothed quote to the top left side of the pocket page. Around the quote adhere the sunflower ephemera piece and libra circle.

October Pocket Page Modification: From the second October page, I fussy cut the Scorpio circle, owl image, large owl card and October title. I created a pocket out of the owl image and slid in the owls card and a 4”x6” green patterns & solids paper. Around the pocket the scorpio circle, and October title were adhered.
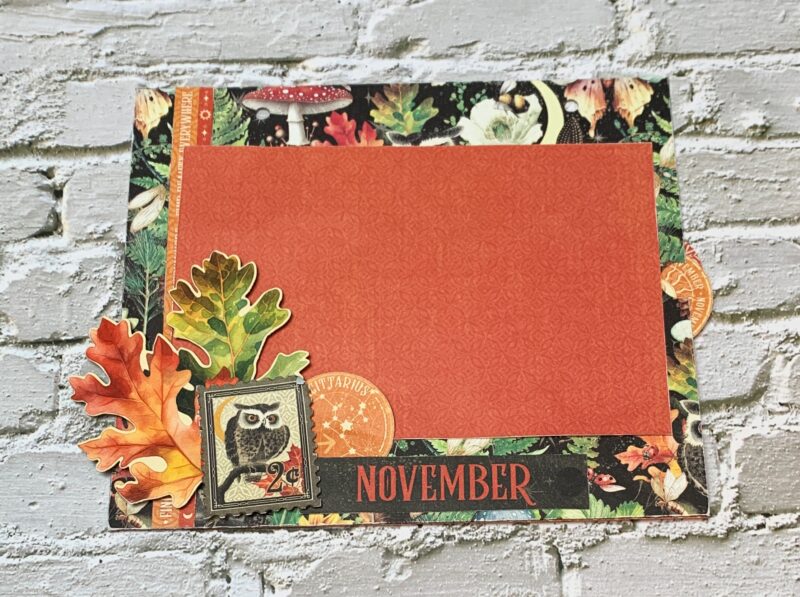
November Pocket Page Modification: From the second November page, I cut the stacked border to 7” and adhered ½” from the left side of the pocket. From the second November page, I fussy cut the sagittarius circle, stamp and November title. Cut a 4” x 6” red paper from the patterns & solids paper pack. Adhere the photo mat to the middle of the pocket. Around the photo mat, the stamp, sagittarius circle, November title and leaf ephemera were adhered.
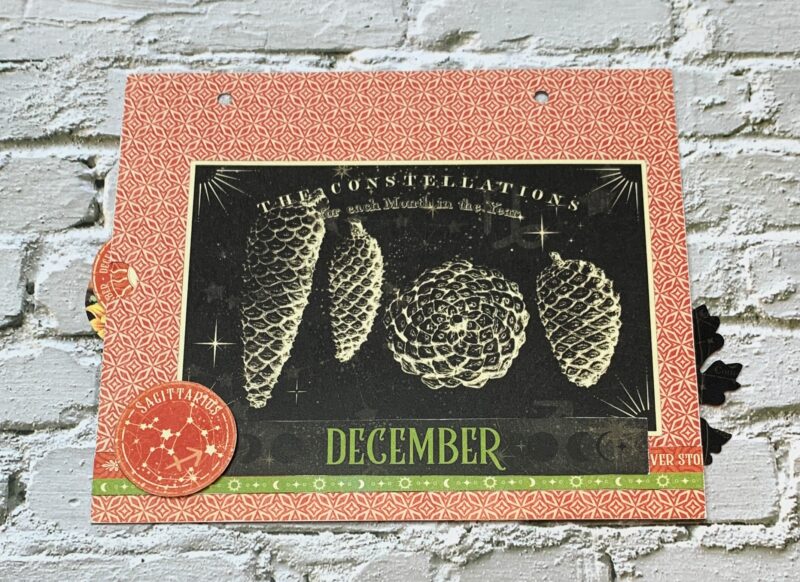
December Pocket Page Modification: From the second December page, I cut the double border to 7” and adhere it ½” from the bottom of the pocket. From the second December page, I fussy cut the sagittarius circle, December title and large pinecone card. The large pinecone card was adhered to the middle of the page. Around the pinecone card, the sagittarius circle and December title were adhered.
For the inserts in the pockets, I used the single images and month circles.
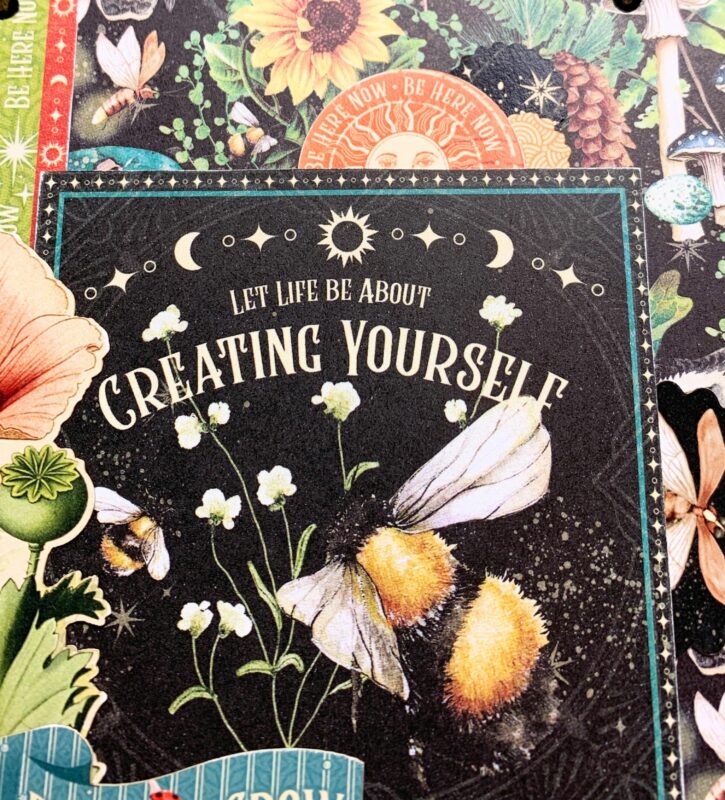
Here are a few closeups of the front cover of the 2024 Desktop Calendar.
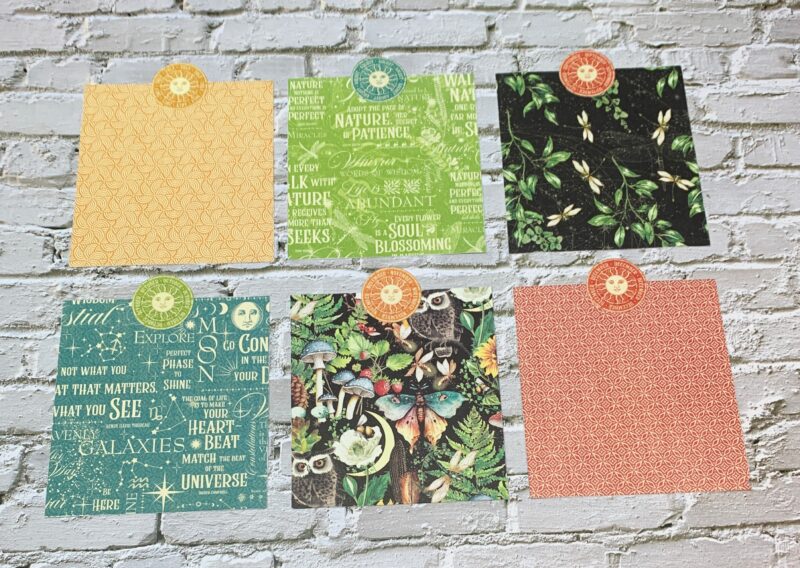
Life is Abundant 12×12 Collection Pack with Stickers
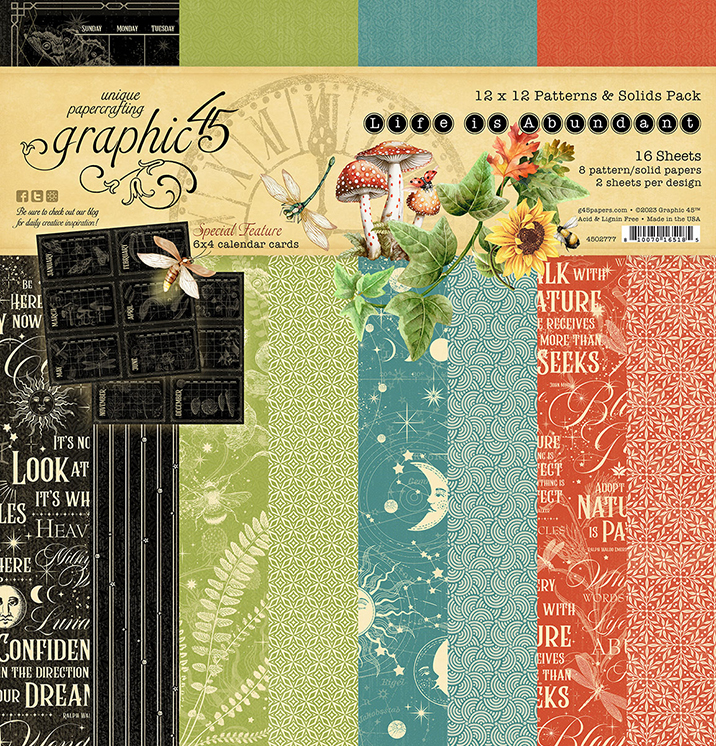
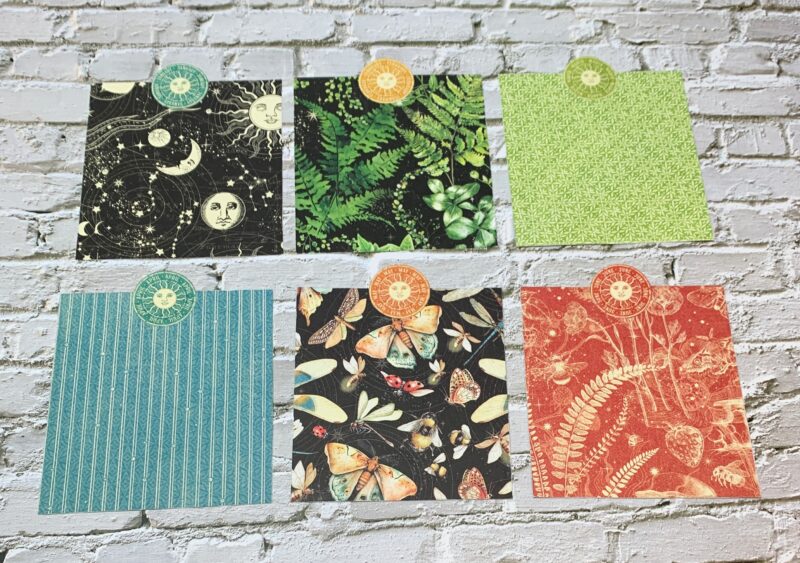
Life is Abundant 12×12 Patterns & Solids Pack
Life is Abundant Ephemera Assortment
Thank you so much for joining me today and I hope that my desktop calendar has inspired you to adapt past Kits.”
Want even more Graphic 45? Sign up for our newsletter here.