Hello, G45ers!
Add a splash of color and some flowers to your next project by using the tips and techniques that Tanya Scrap shares with us in this blog post. Tanya teaches us fun new ways to use Graphic 45 Decades Ink Pads and #G45Techniques using Metal Dies. So grab a few ink pads and dies and let’s get started!
“Bloom where you are planted.”
|
|
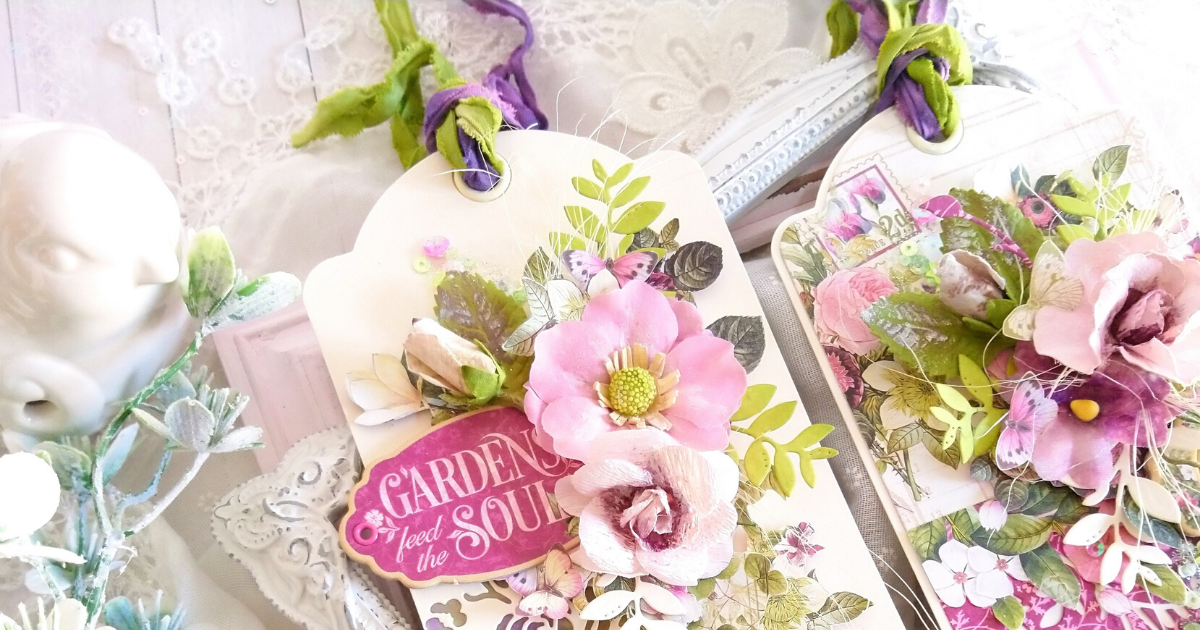
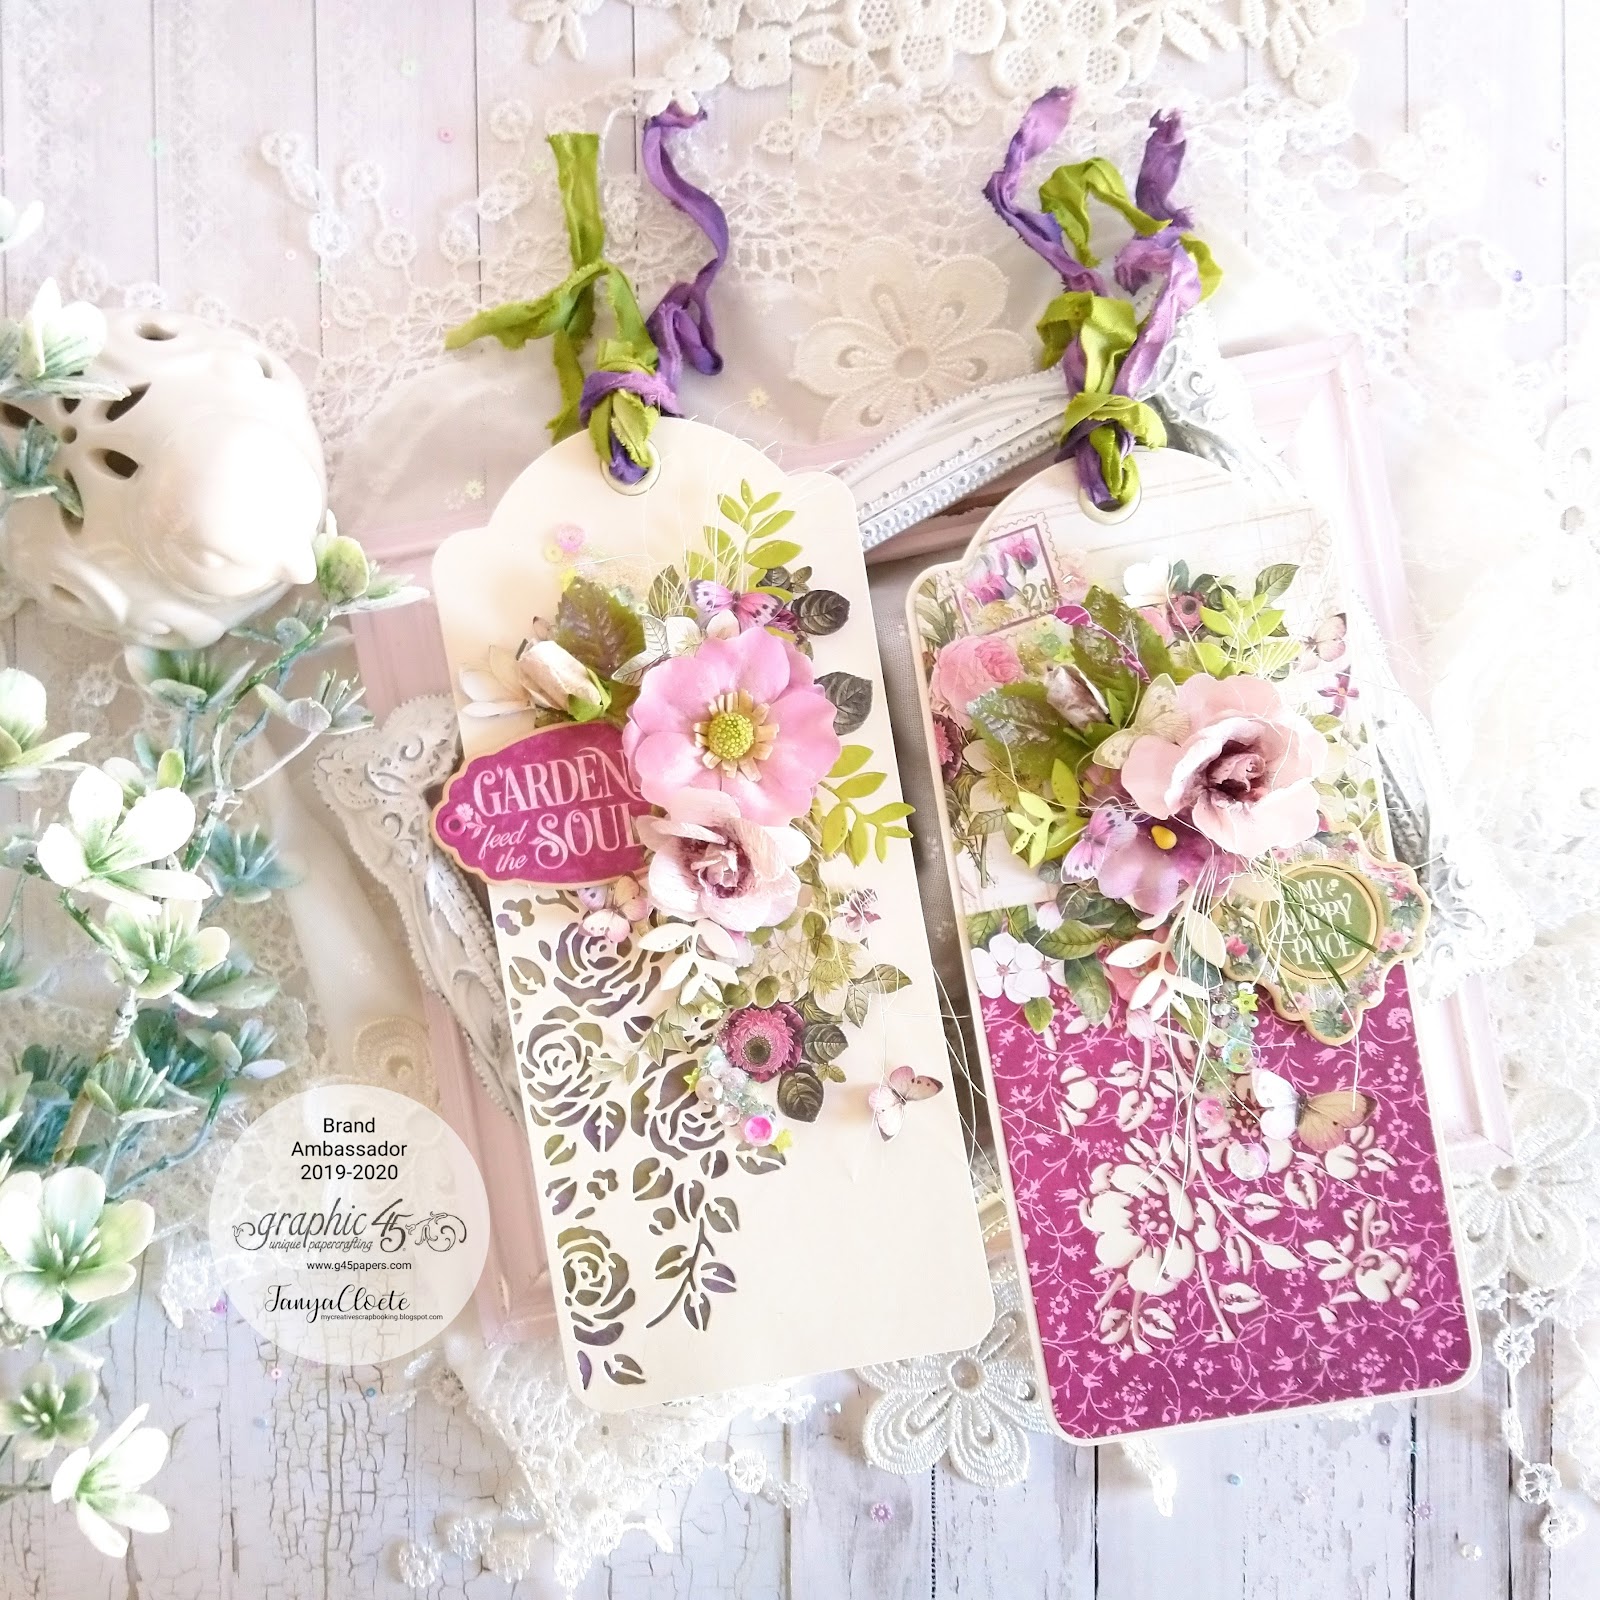
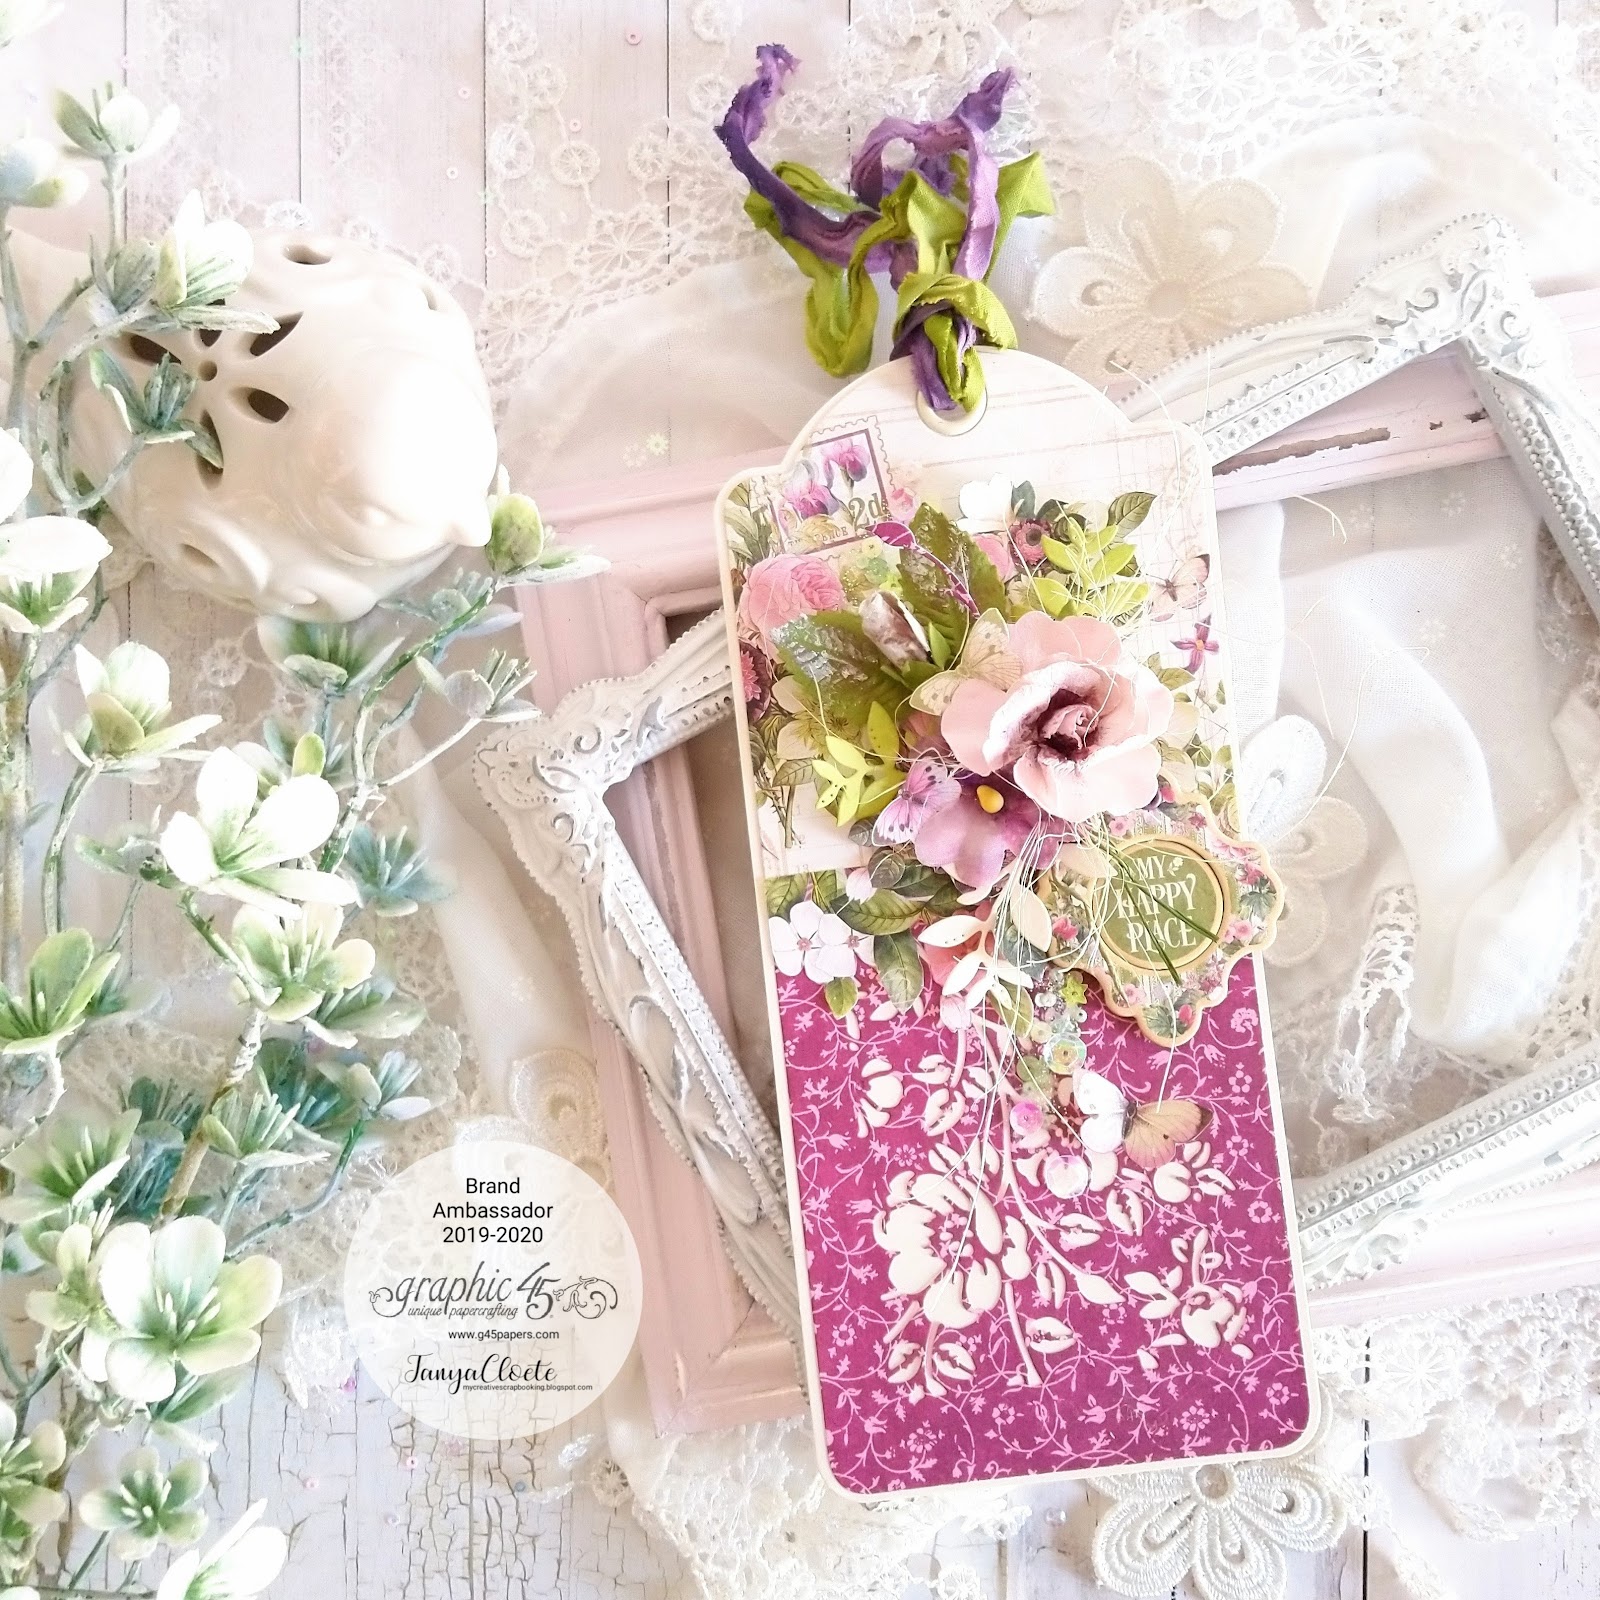
#G45Technique – Bloom Tags
By Tanya Scrap
“Hello, dear G45ers!
I am happy to share with you my #G45Technique project this month featuring the gorgeous Bloom collection. I love this collection with all its beautiful floral imagery and stunning colours! Today I am sharing two different techniques with Graphic 45 Decades Dye Ink pads. I have created a set of Tags with some fussy-cut elements and die-cut leaves.
Herewith the Supplies and Instructions you may use to recreate such a project:
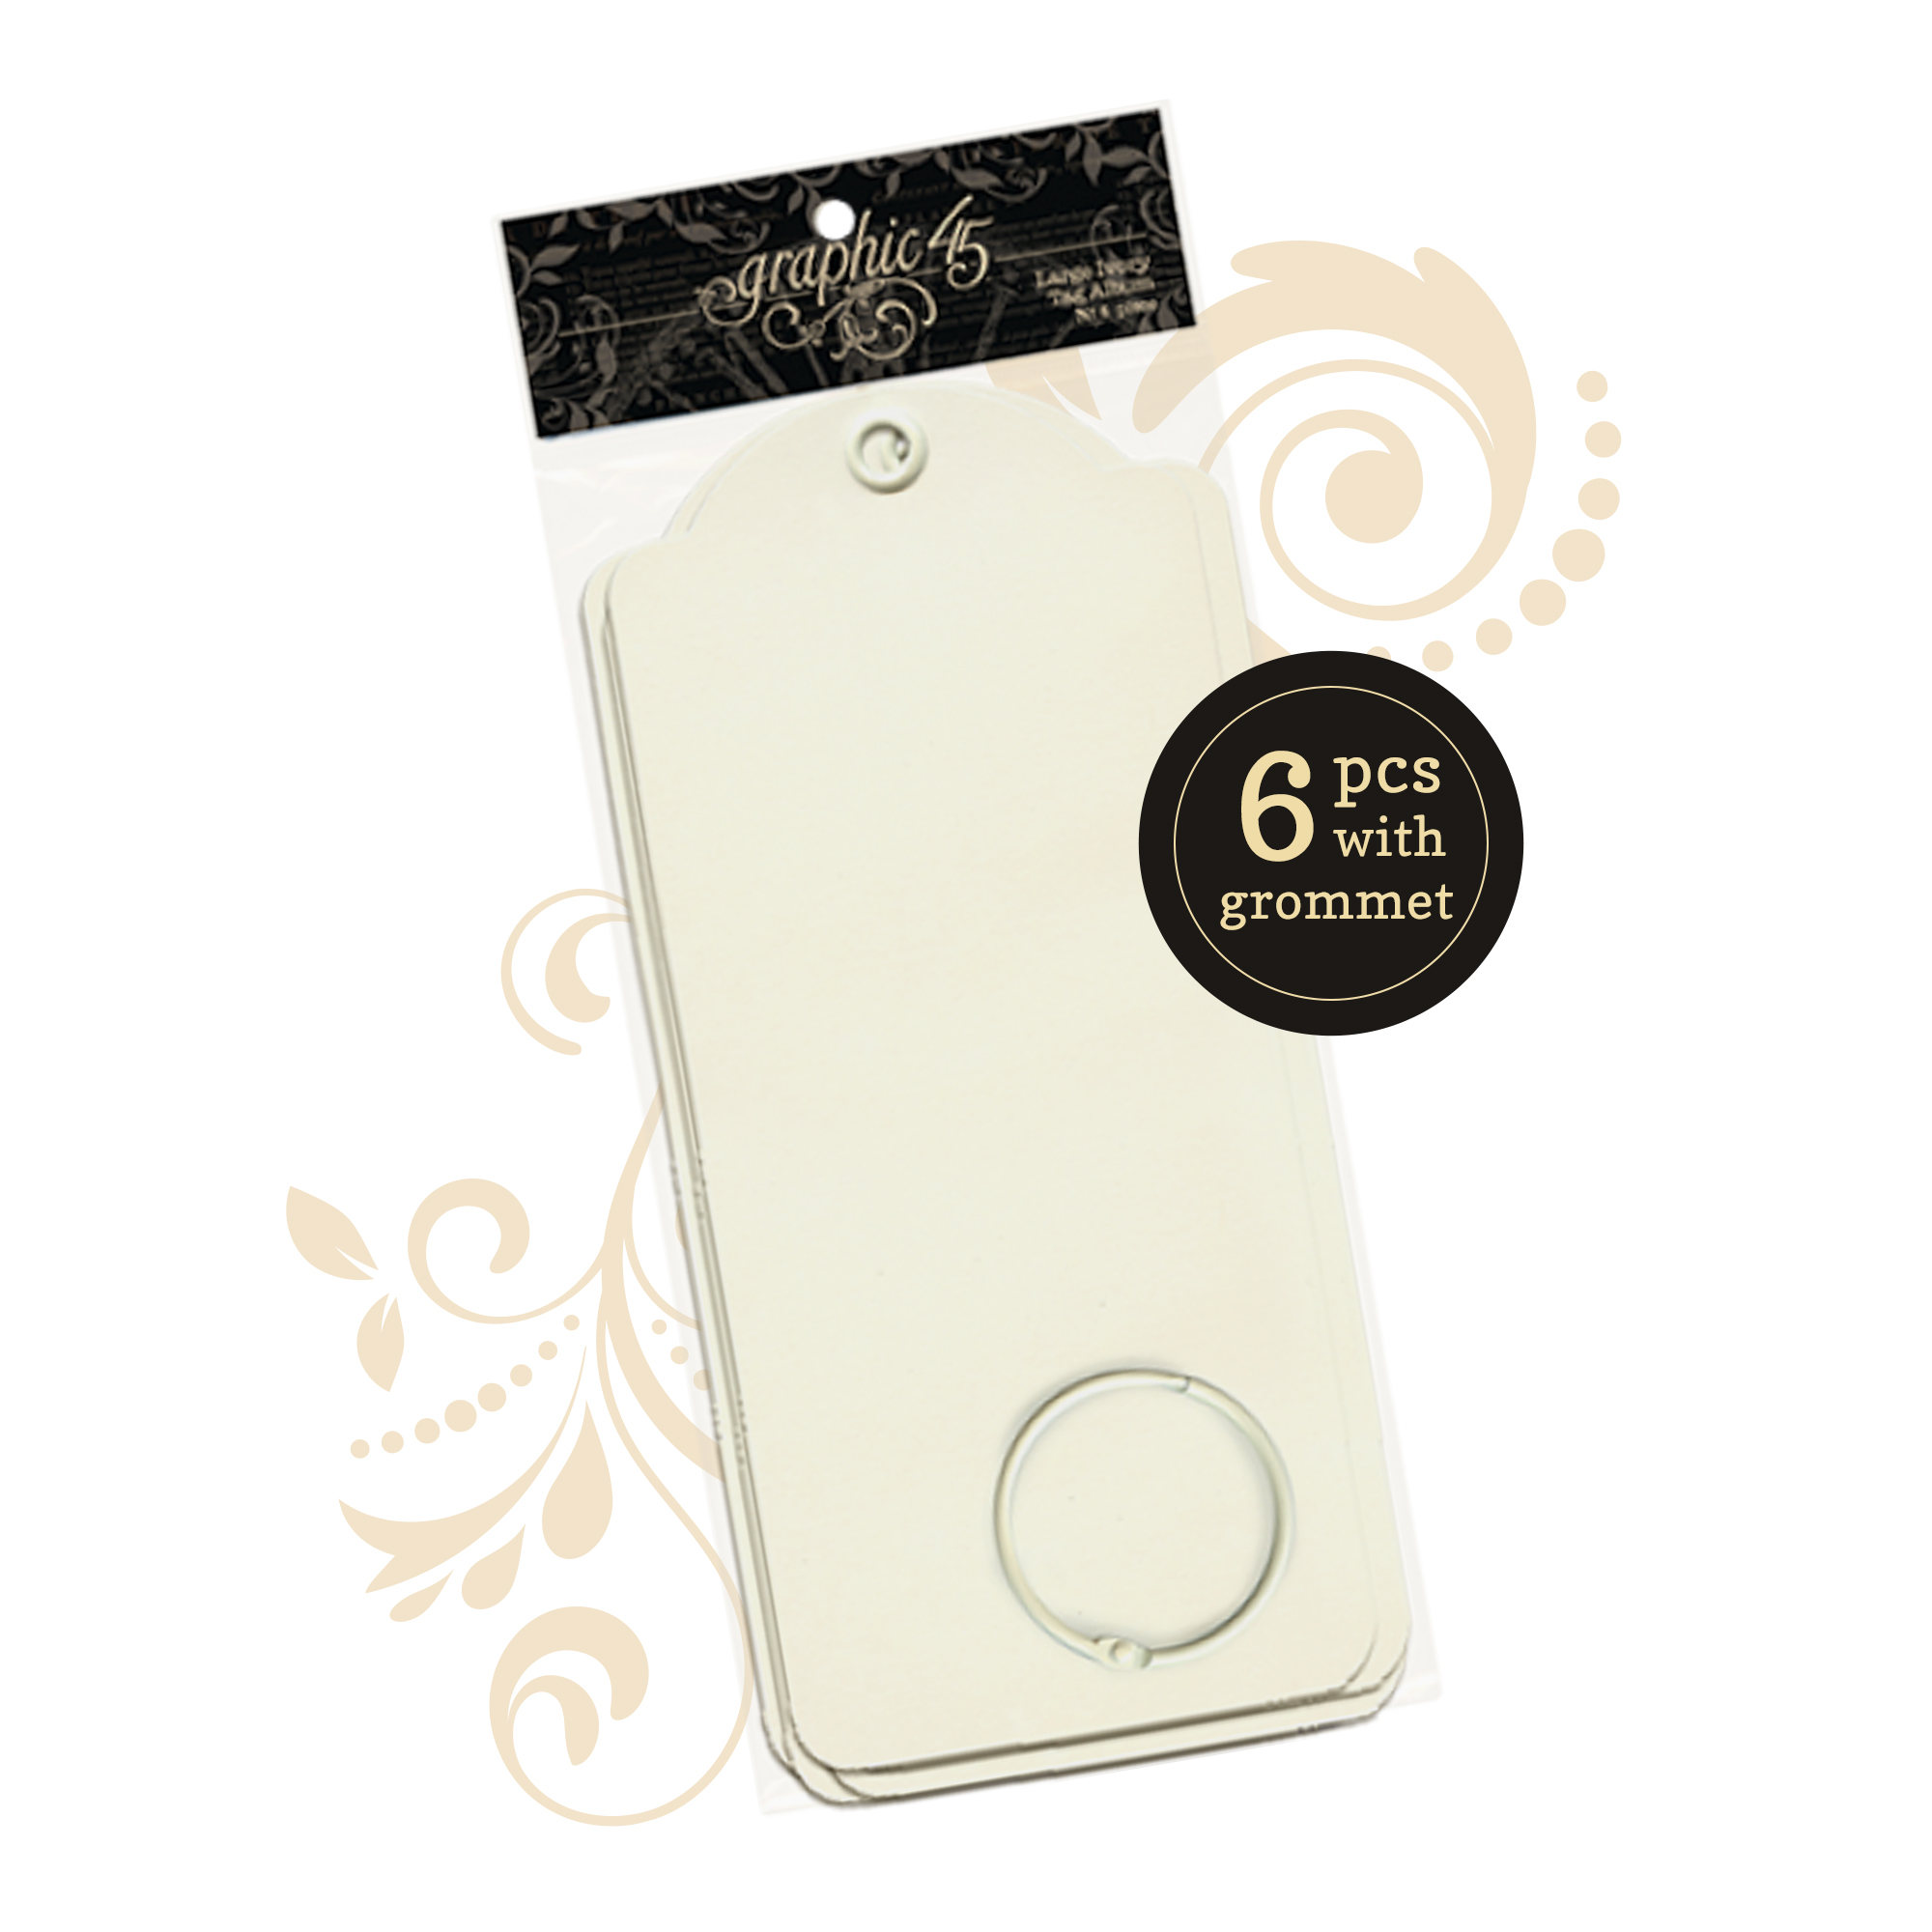
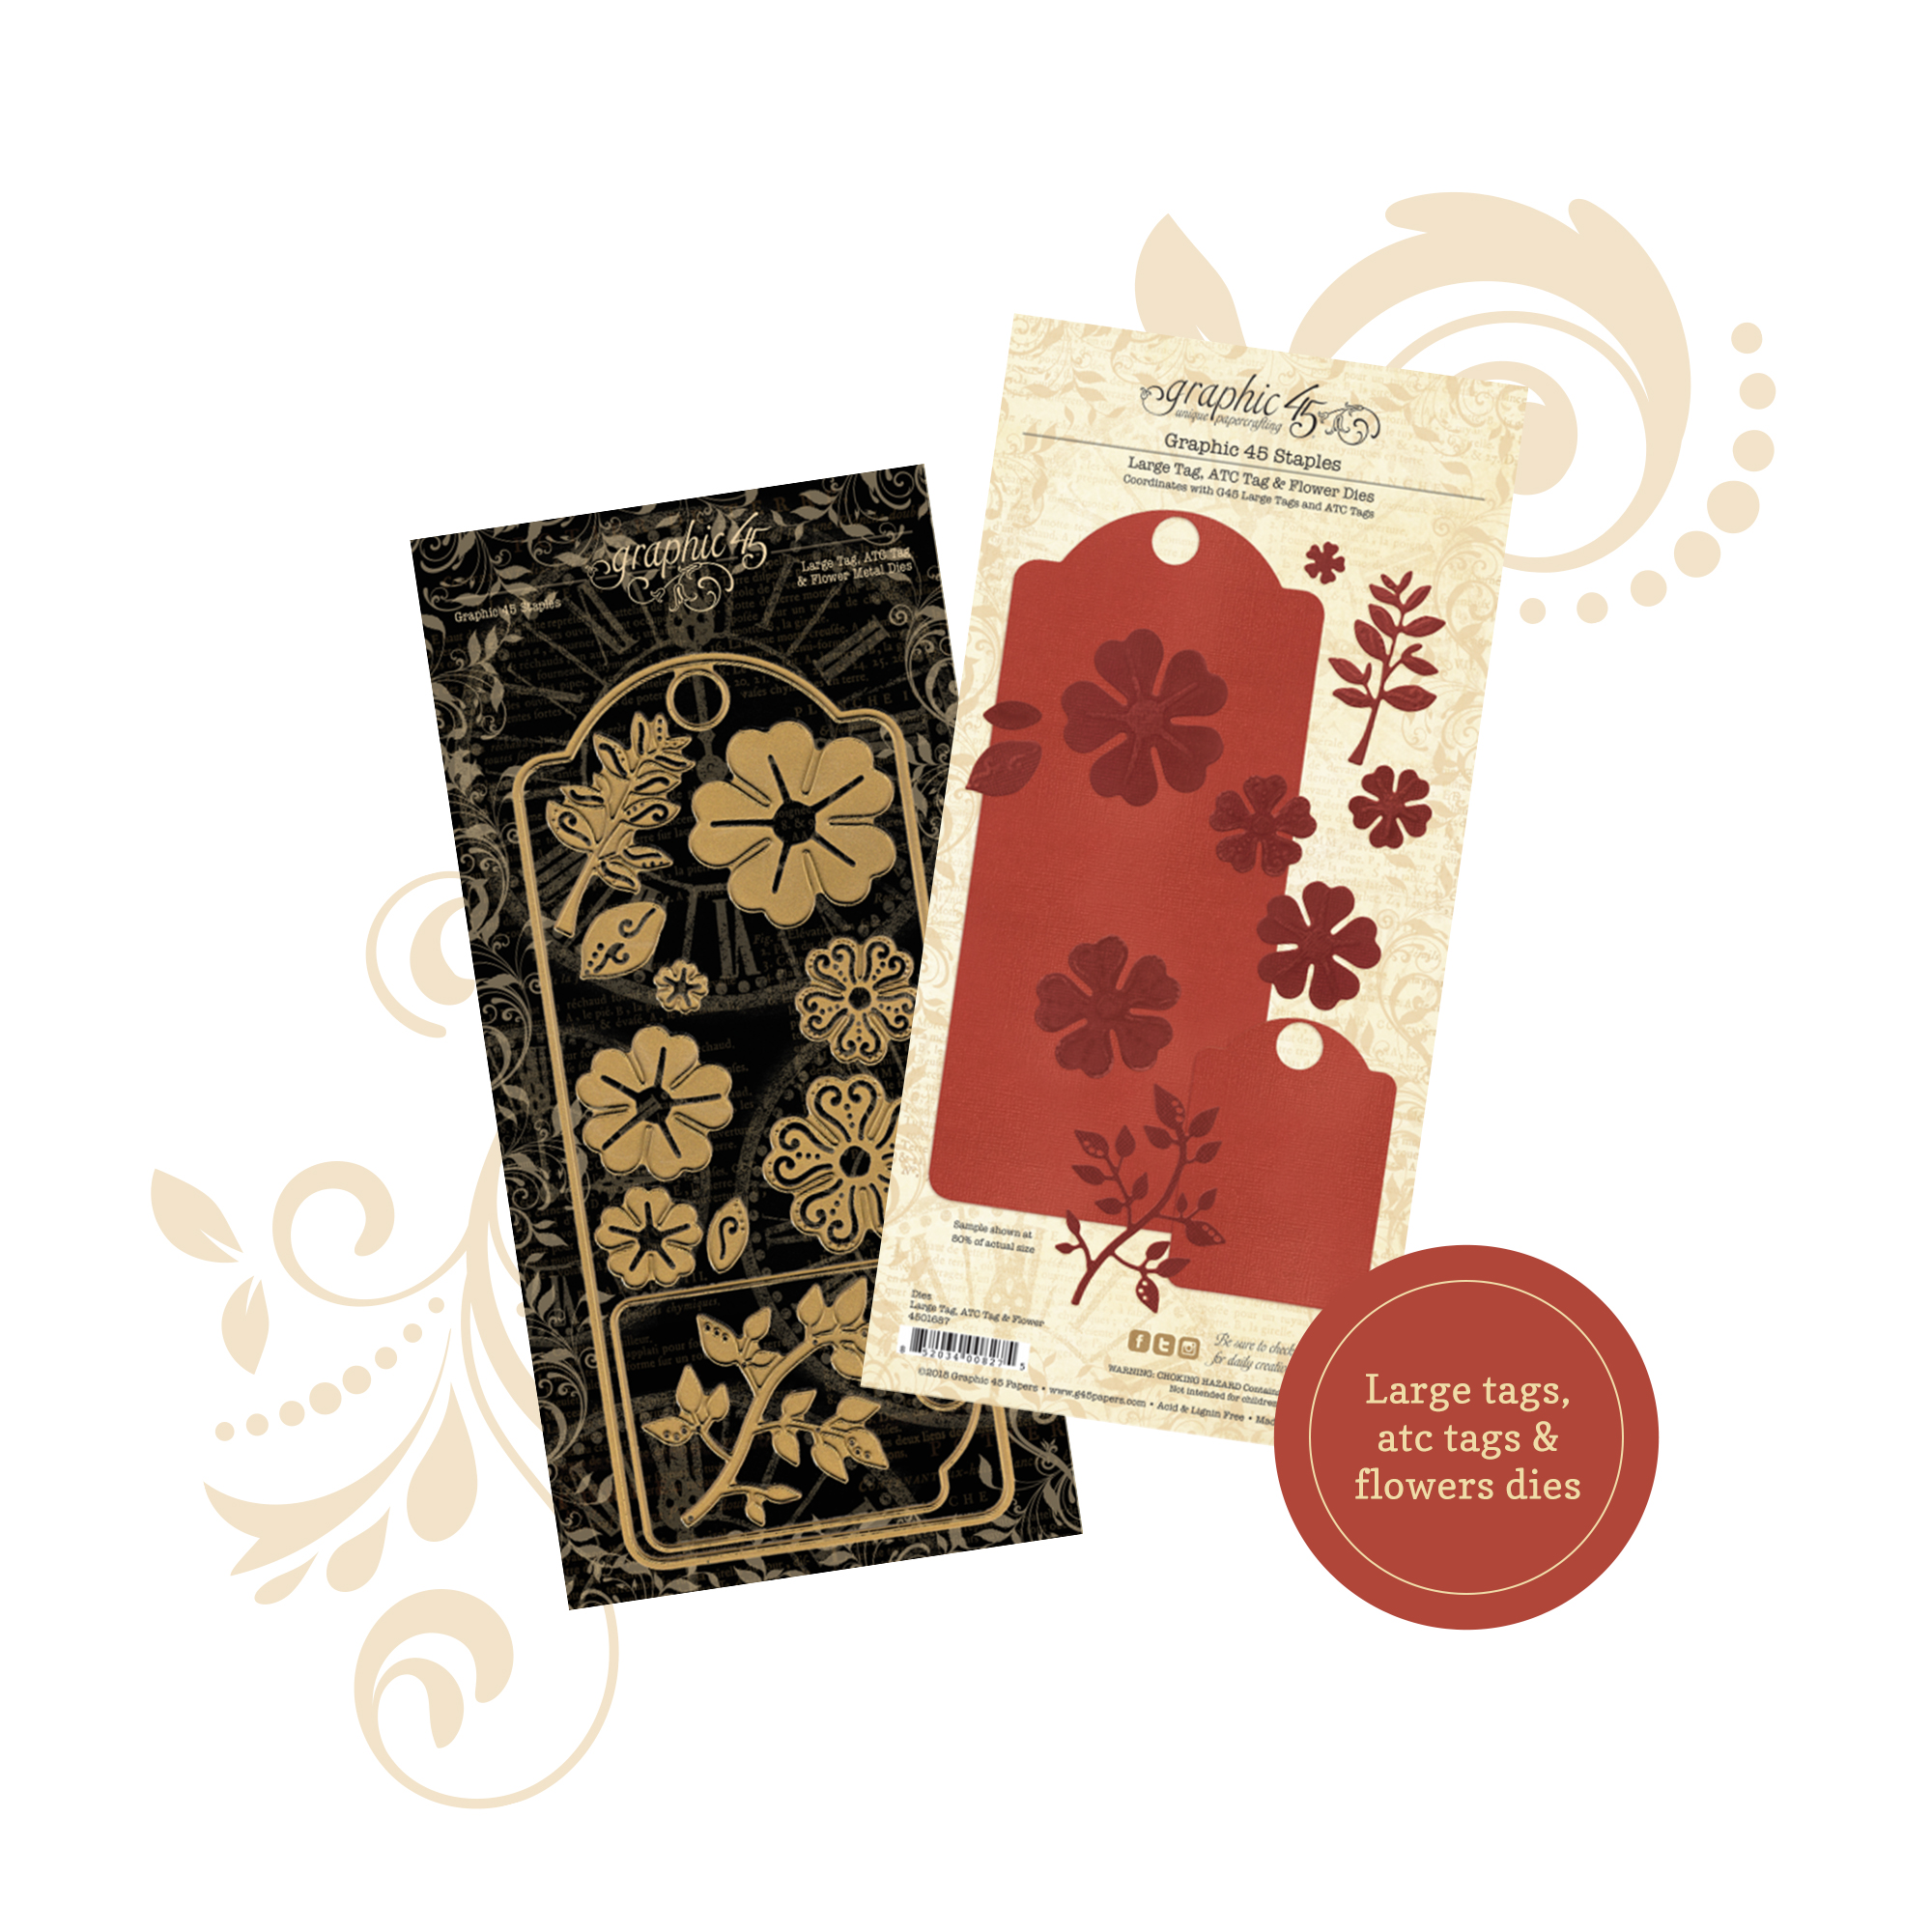
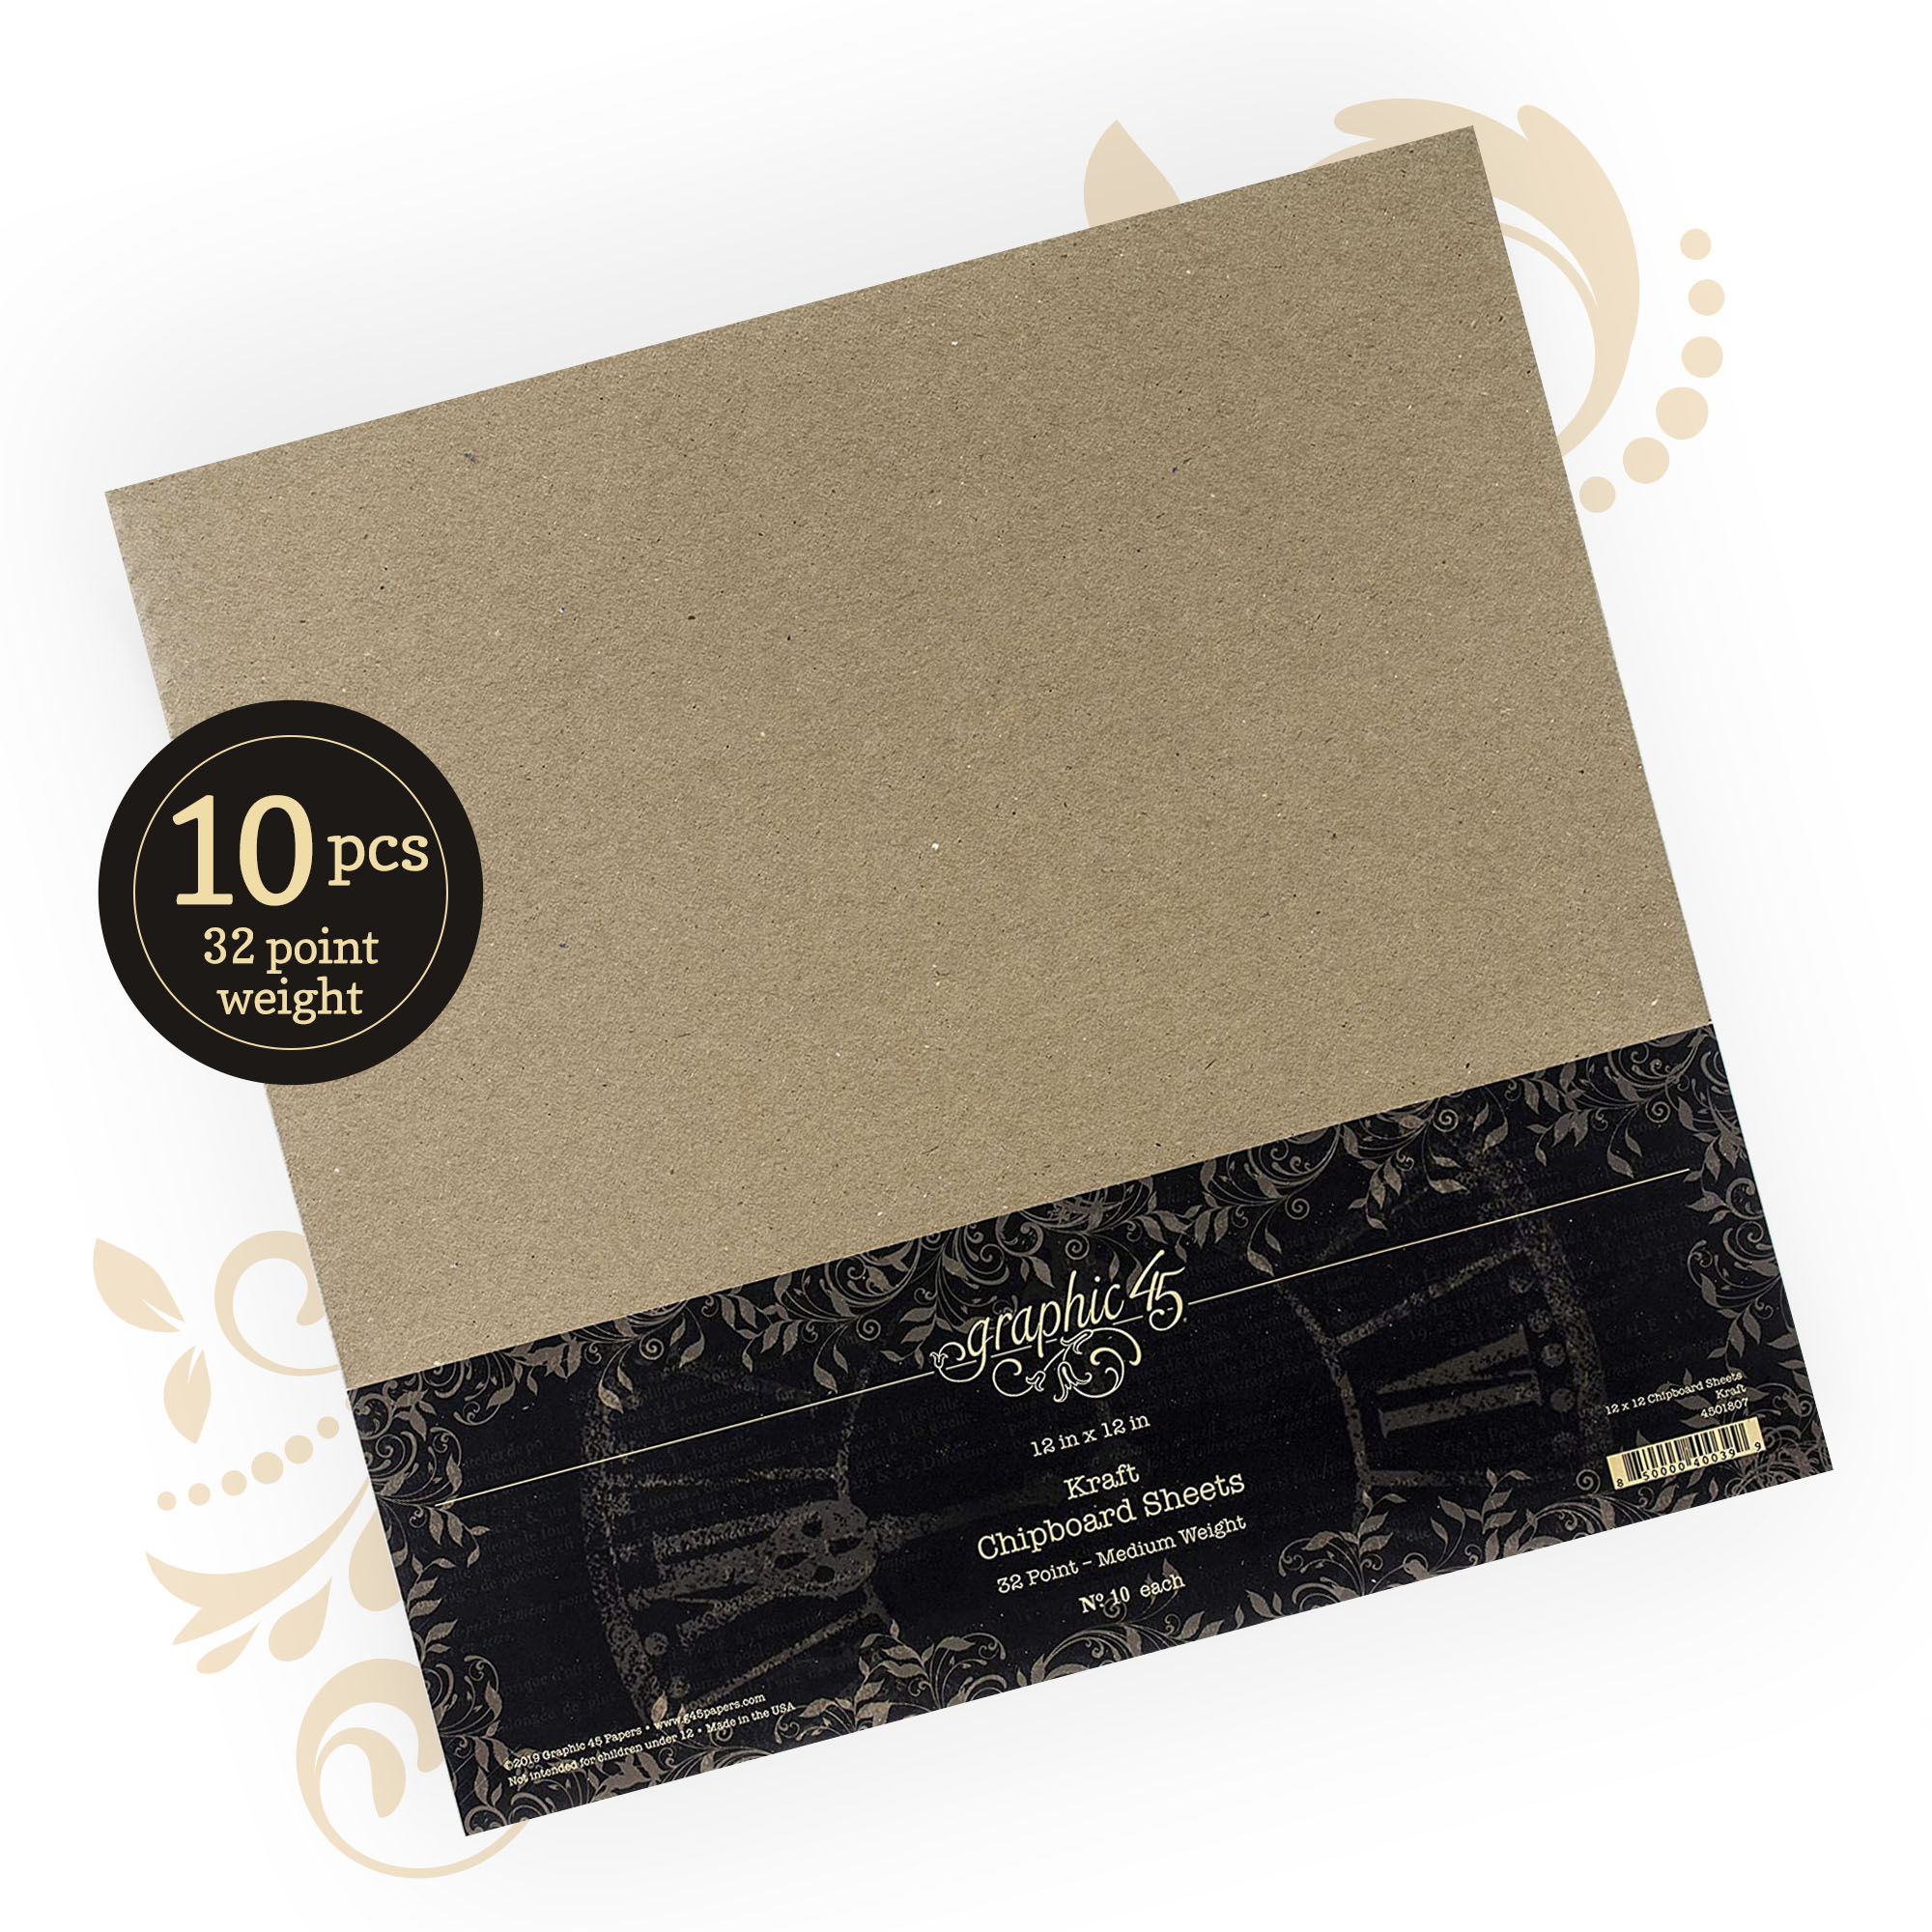
G45 Supplies used:
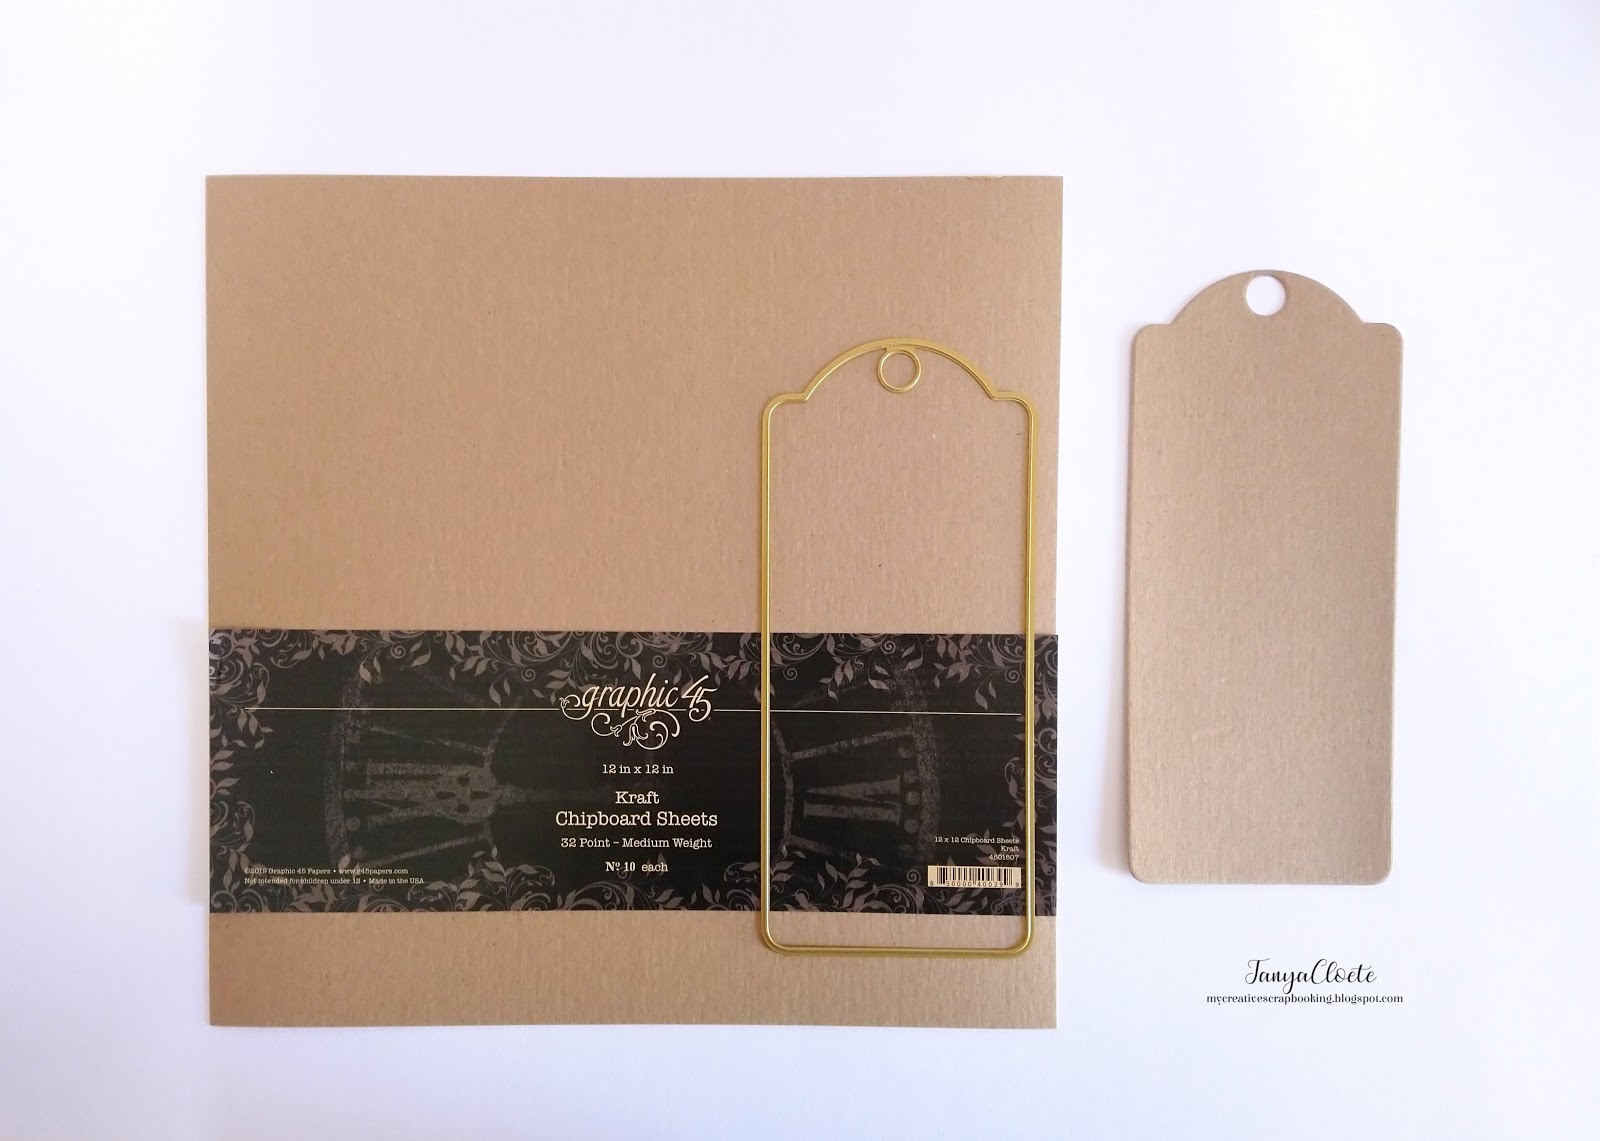
Kraft 12×12 Chipboard Sheets (10 pack)
Large Tag, ATC Tag and Flower Dies
Clearsnap Decades Dye Pad Antique Moss
Clearsnap Decades Dye Pad Purple Royalty
Clearsnap Decades Dye Pad French Lilac
Other Supplies used:
Mixed Media Cutting Dies
Flowers and Leaves
Sequins
Seam Binding
Soft Matte Gel
Adhesive Foam Squares
Sisal
Spray Water Bottle
Wet Wipes
Masking Tape
Craft Sheet
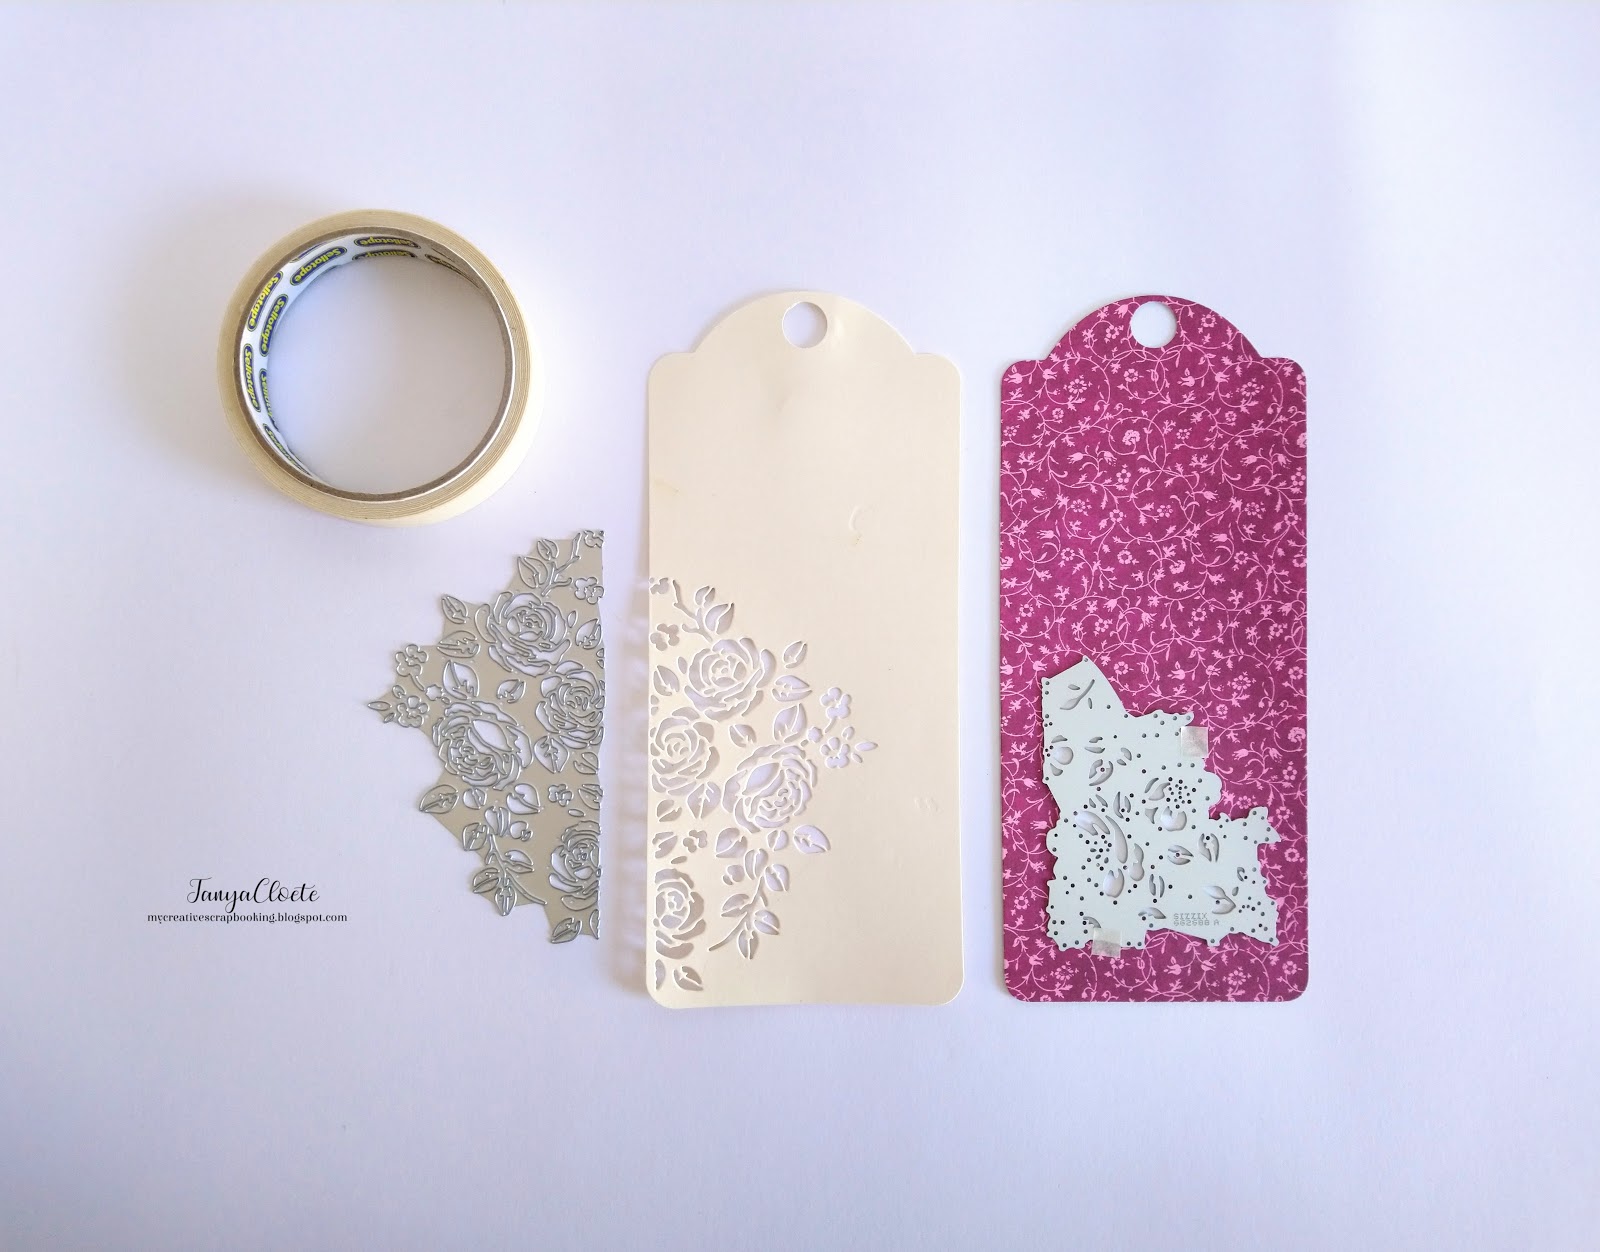
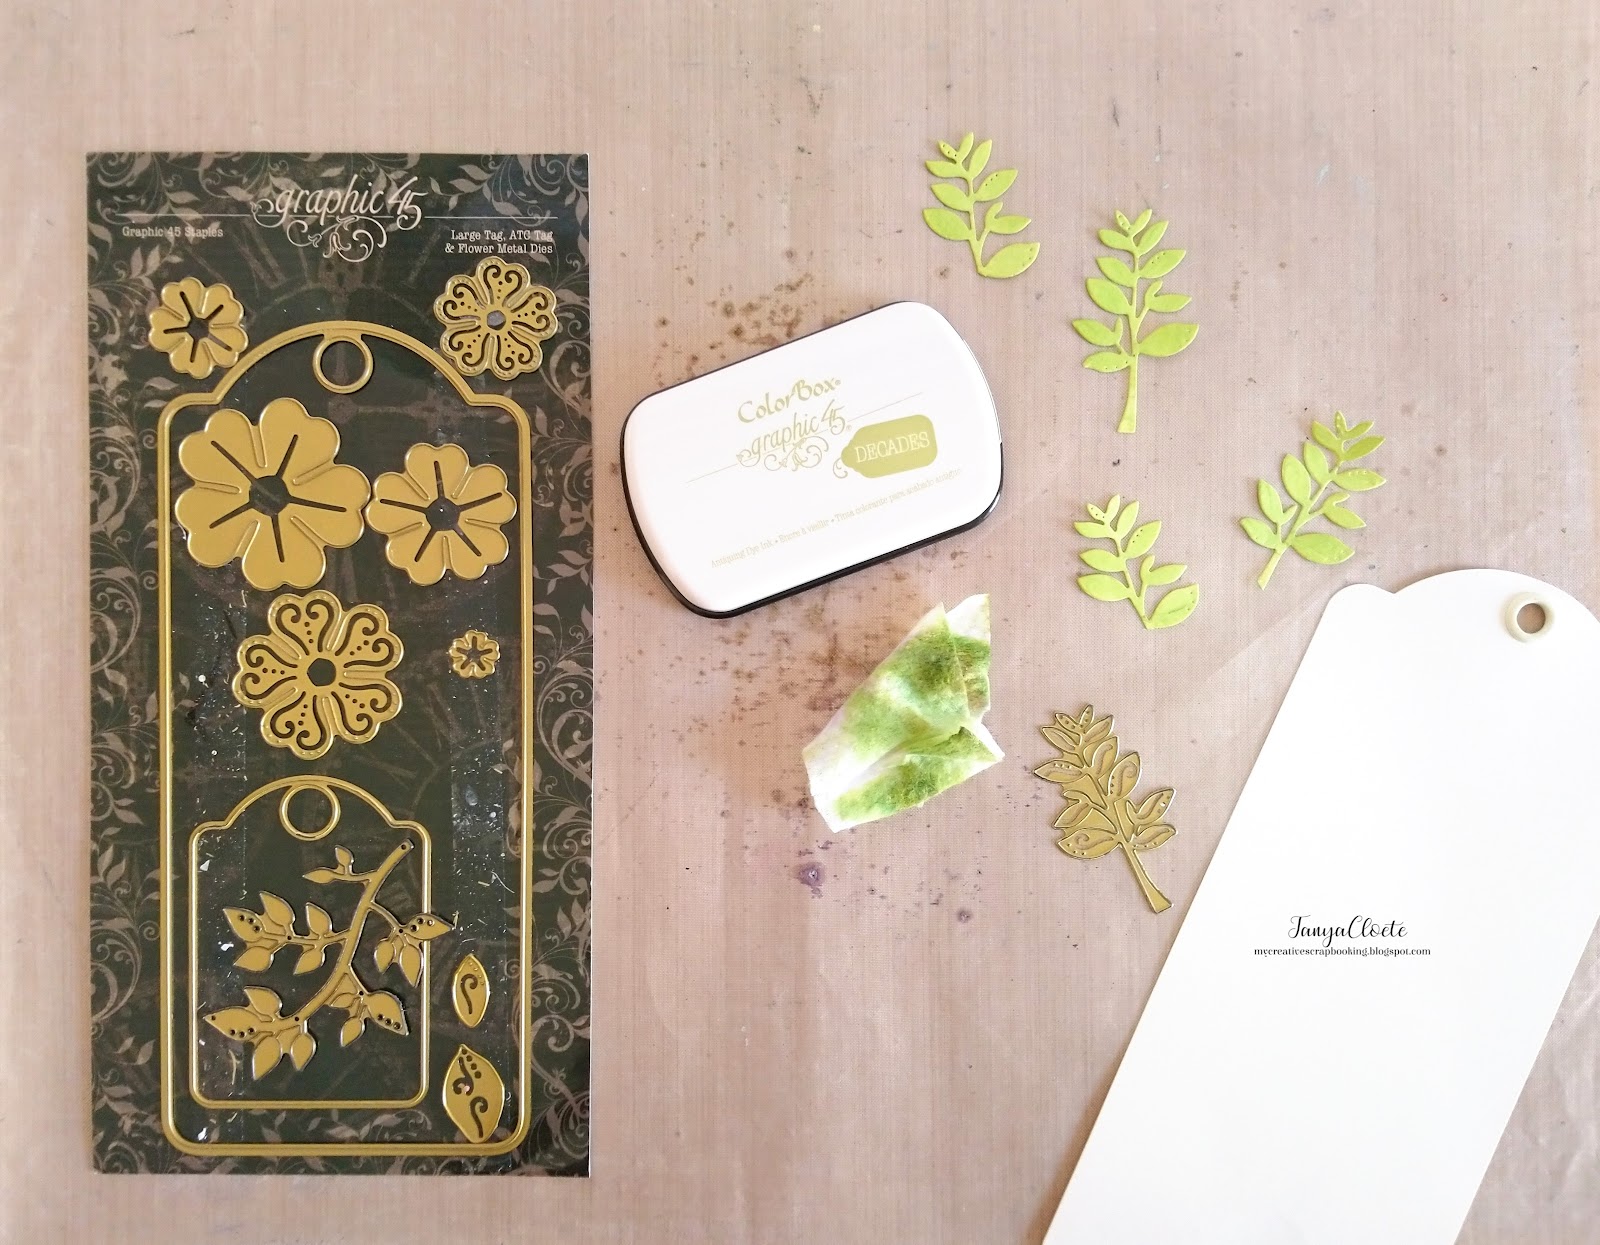
Cut a tag from a Kraft chipboard sheet with the Large Tag metal die.
Tip: This will be glued to the back of the ivory tags to make it sturdy.
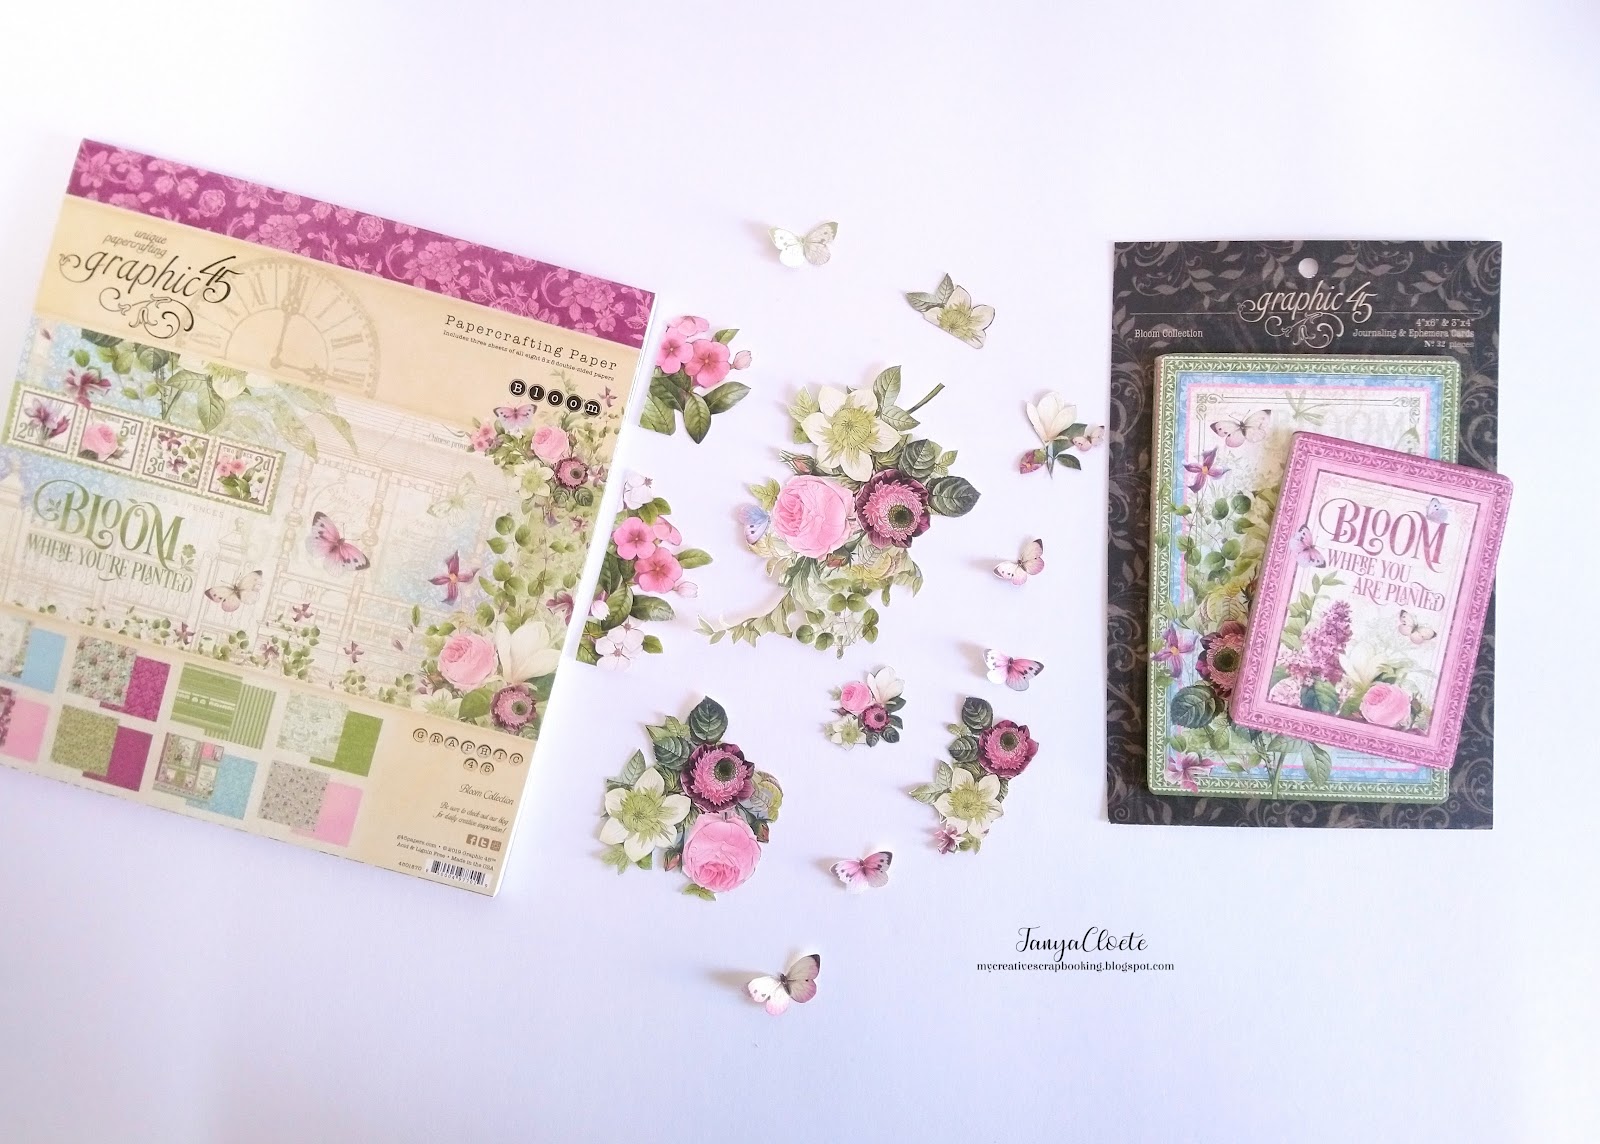
Fussy-cut some floral elements from the 8×8 paper pad and journaling & ephemera cards.
Cut a tag from the pattern sheets in the collection. Next, add a mixed media die to the bottom section of the tags and cut.
Tip: Place a small piece of masking tape on the sides of the metal die and stick to the paper keeping it in place. This will ensure the die doesn’t move when putting it through your machine. Carefully remove the masking tape from the paper once it has been cut.
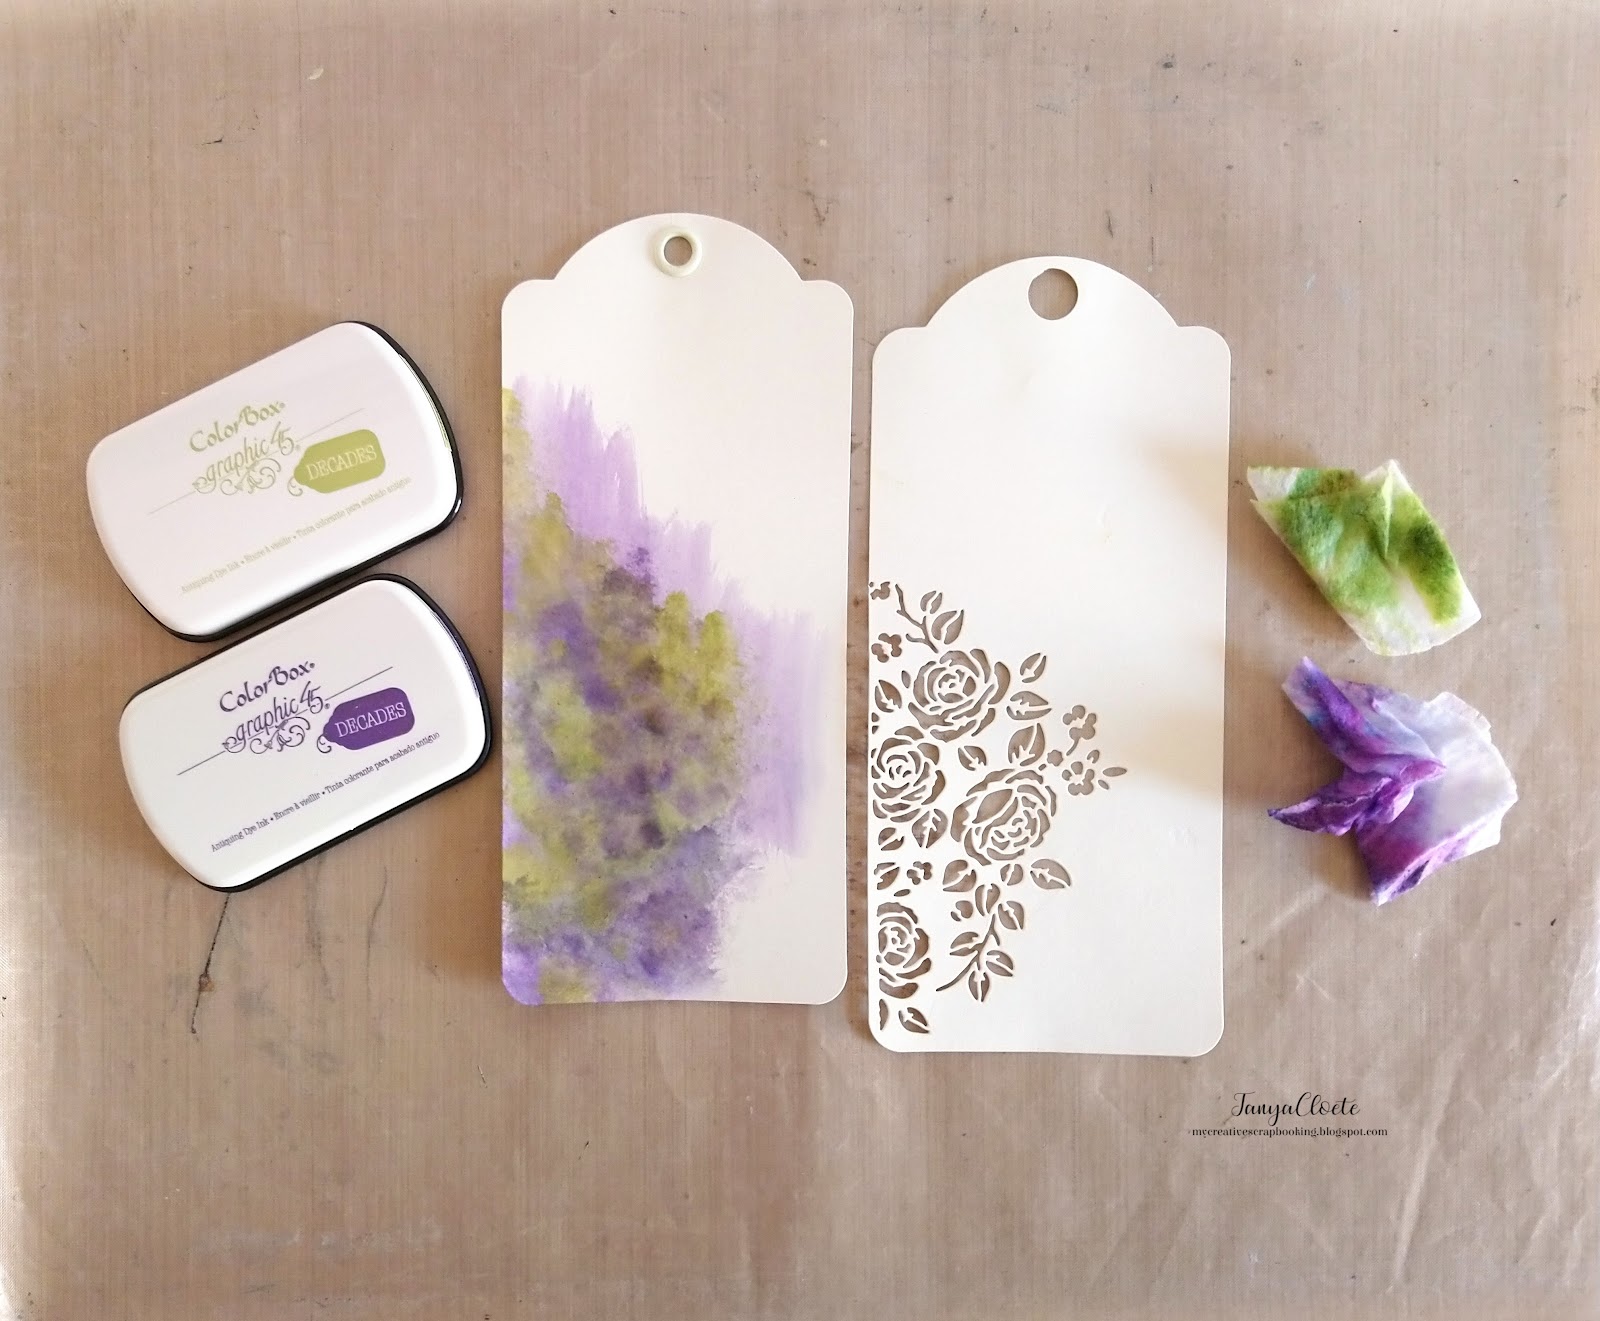
Add two colours of the decades ink to the plain tag mixing them up. Place the tag with the die-cut image over the coloured tag to make sure that the area it is covering is evenly coloured.
Tip: I wanted the colours to be subtle. I used a wet wipe (cut in half) for this process instead of a spray water bottle.
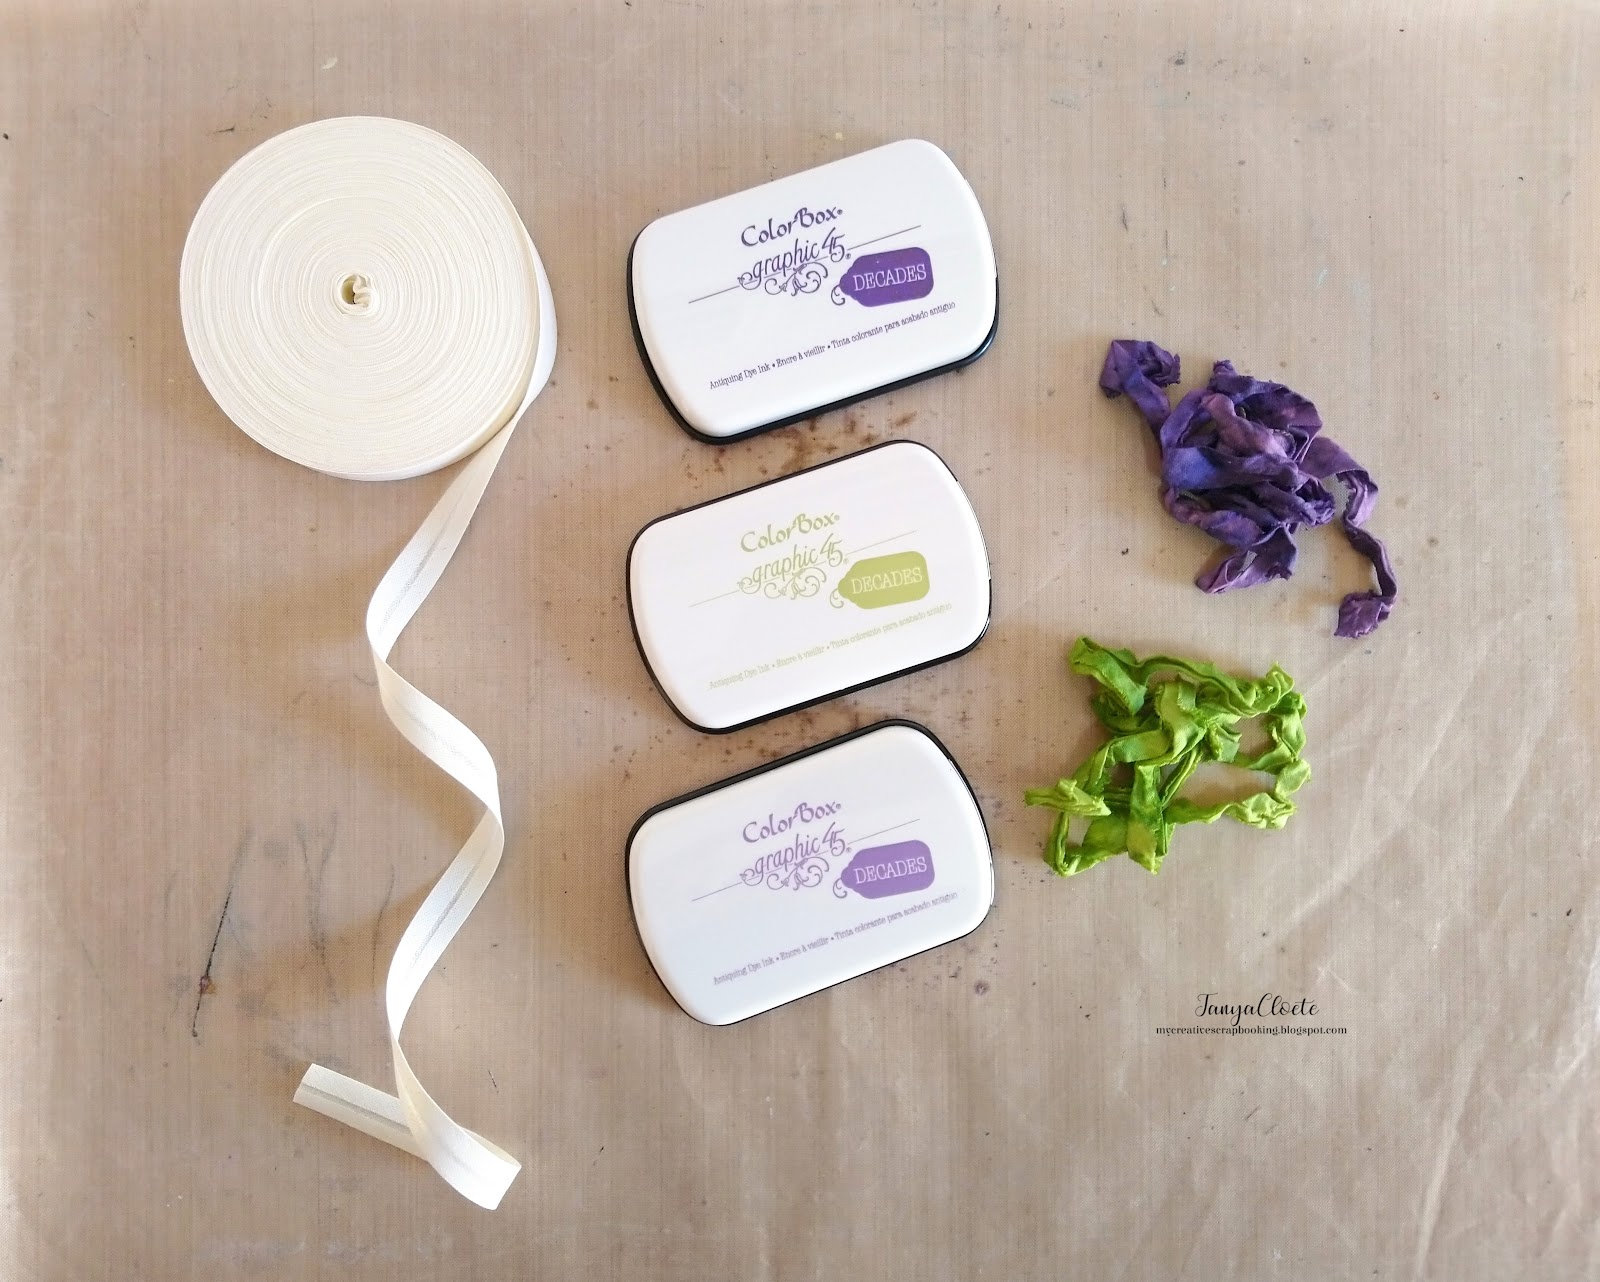
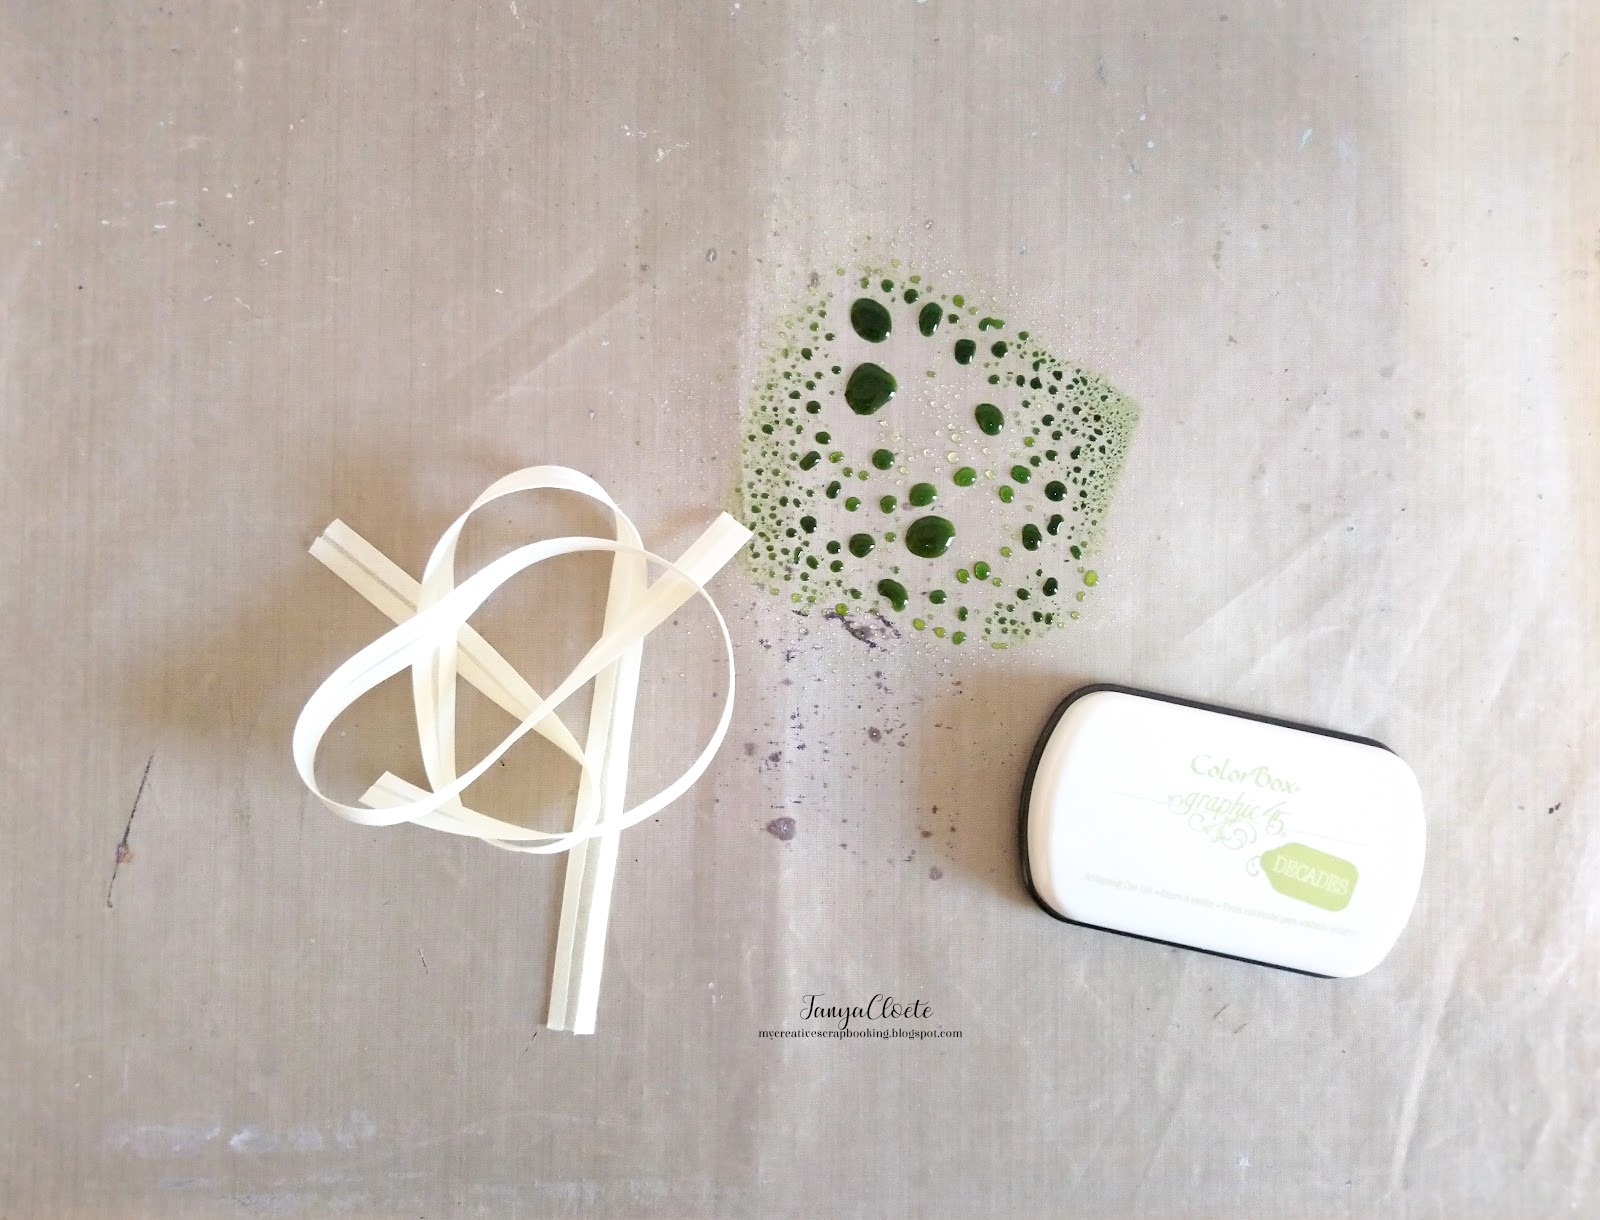
Create your own crinkle ribbon. Colour some seam binding with the Decades ink. I combined the French Lilac and Purple Royalty ink on one piece of the binding..
Add some ink to your craft sheet and spray water onto it. Next, drag the seam binding through the mixture and scrunch it together. Leave to dry overnight or dry with a heat tool.
Die-cut some leaves from an extra ivory tag with the Large Tag and Flower metal die. Colour the leaves with decades dye Antique Moss. Use the same wet wipe as per the step for the tag.
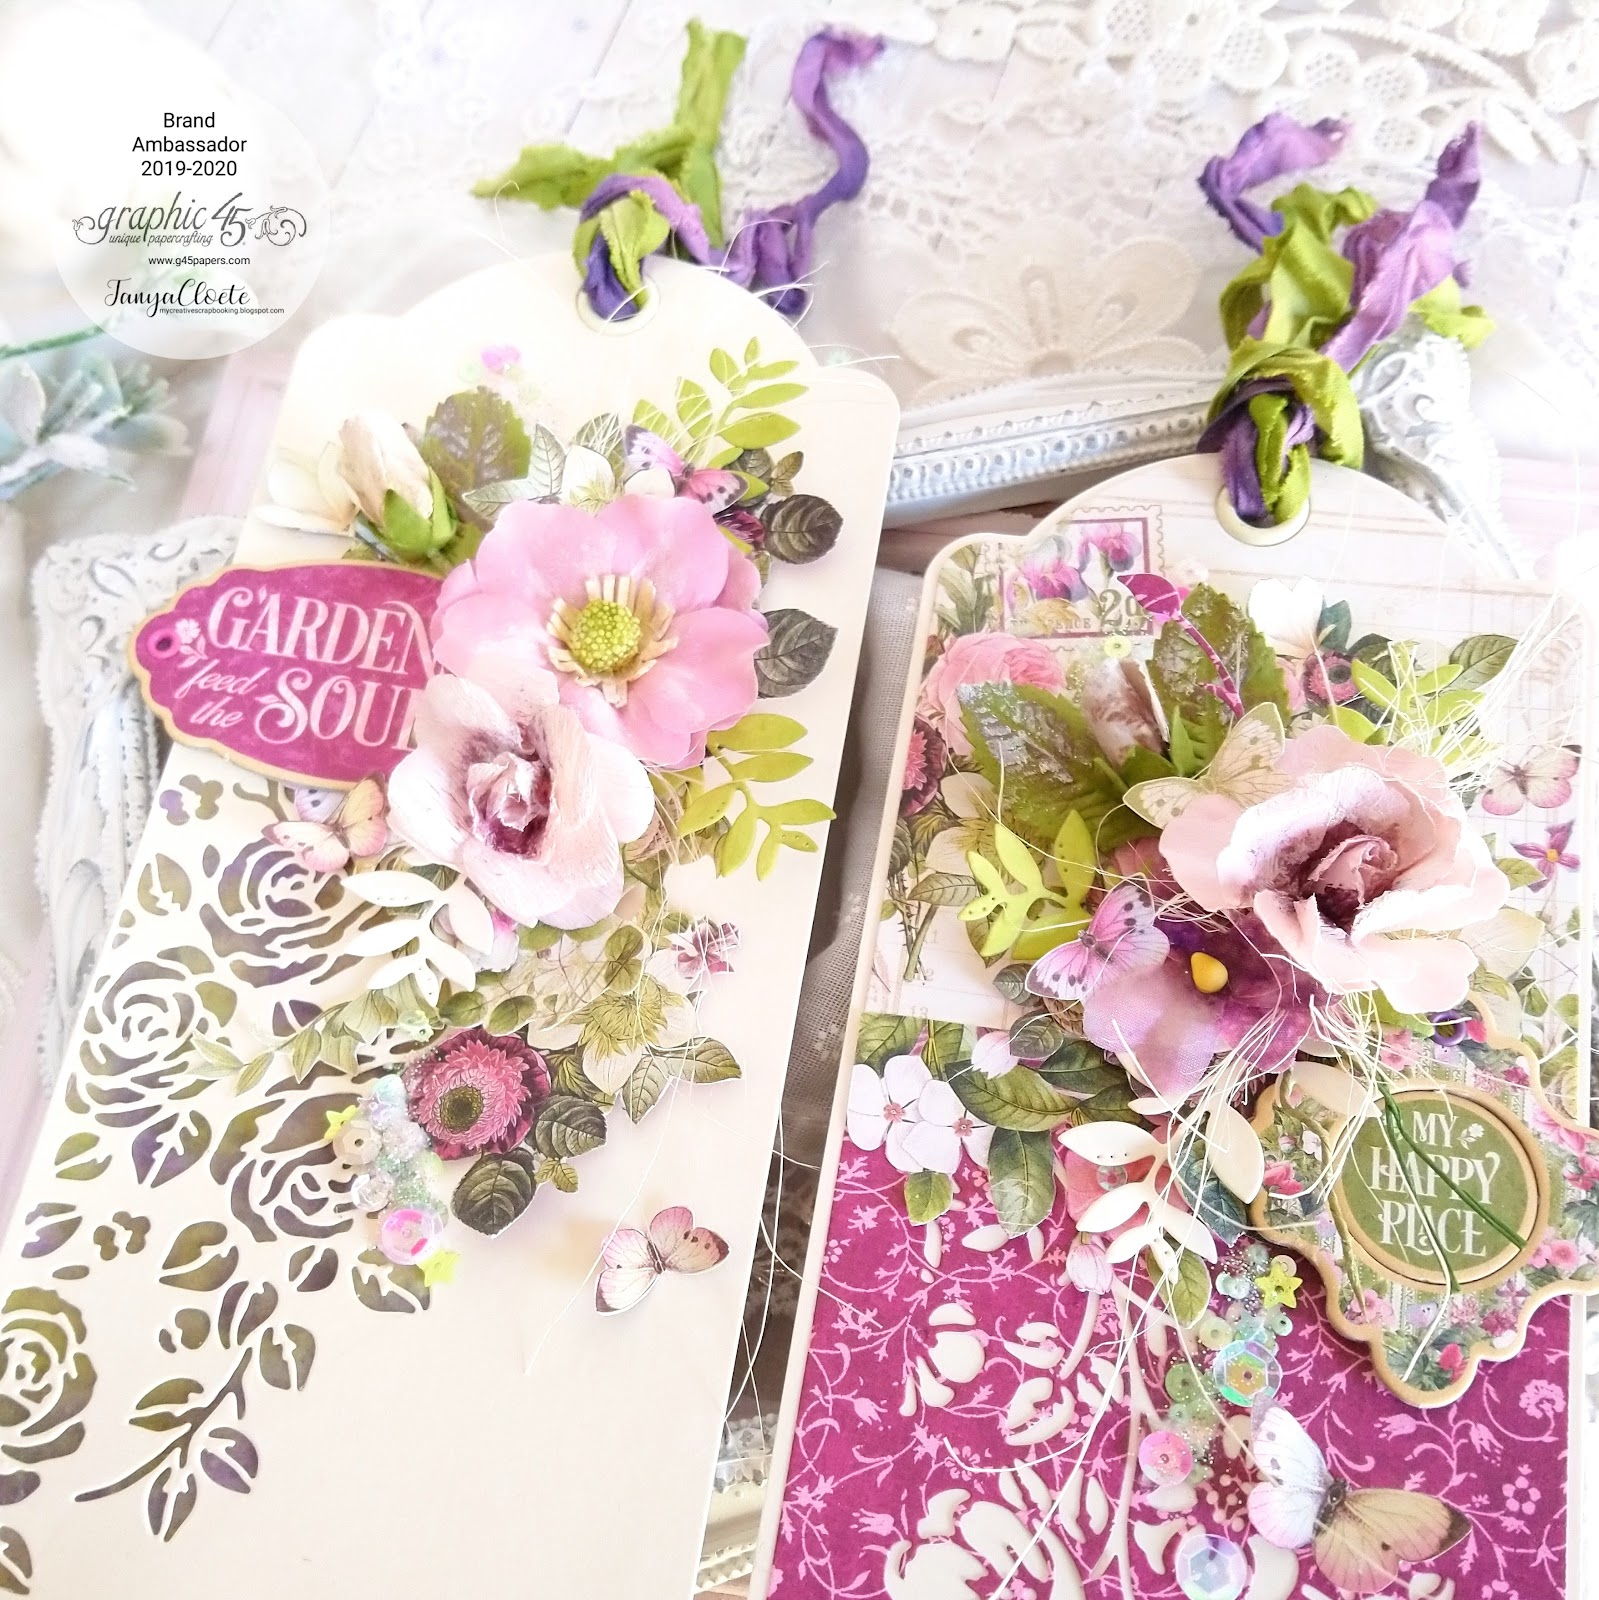
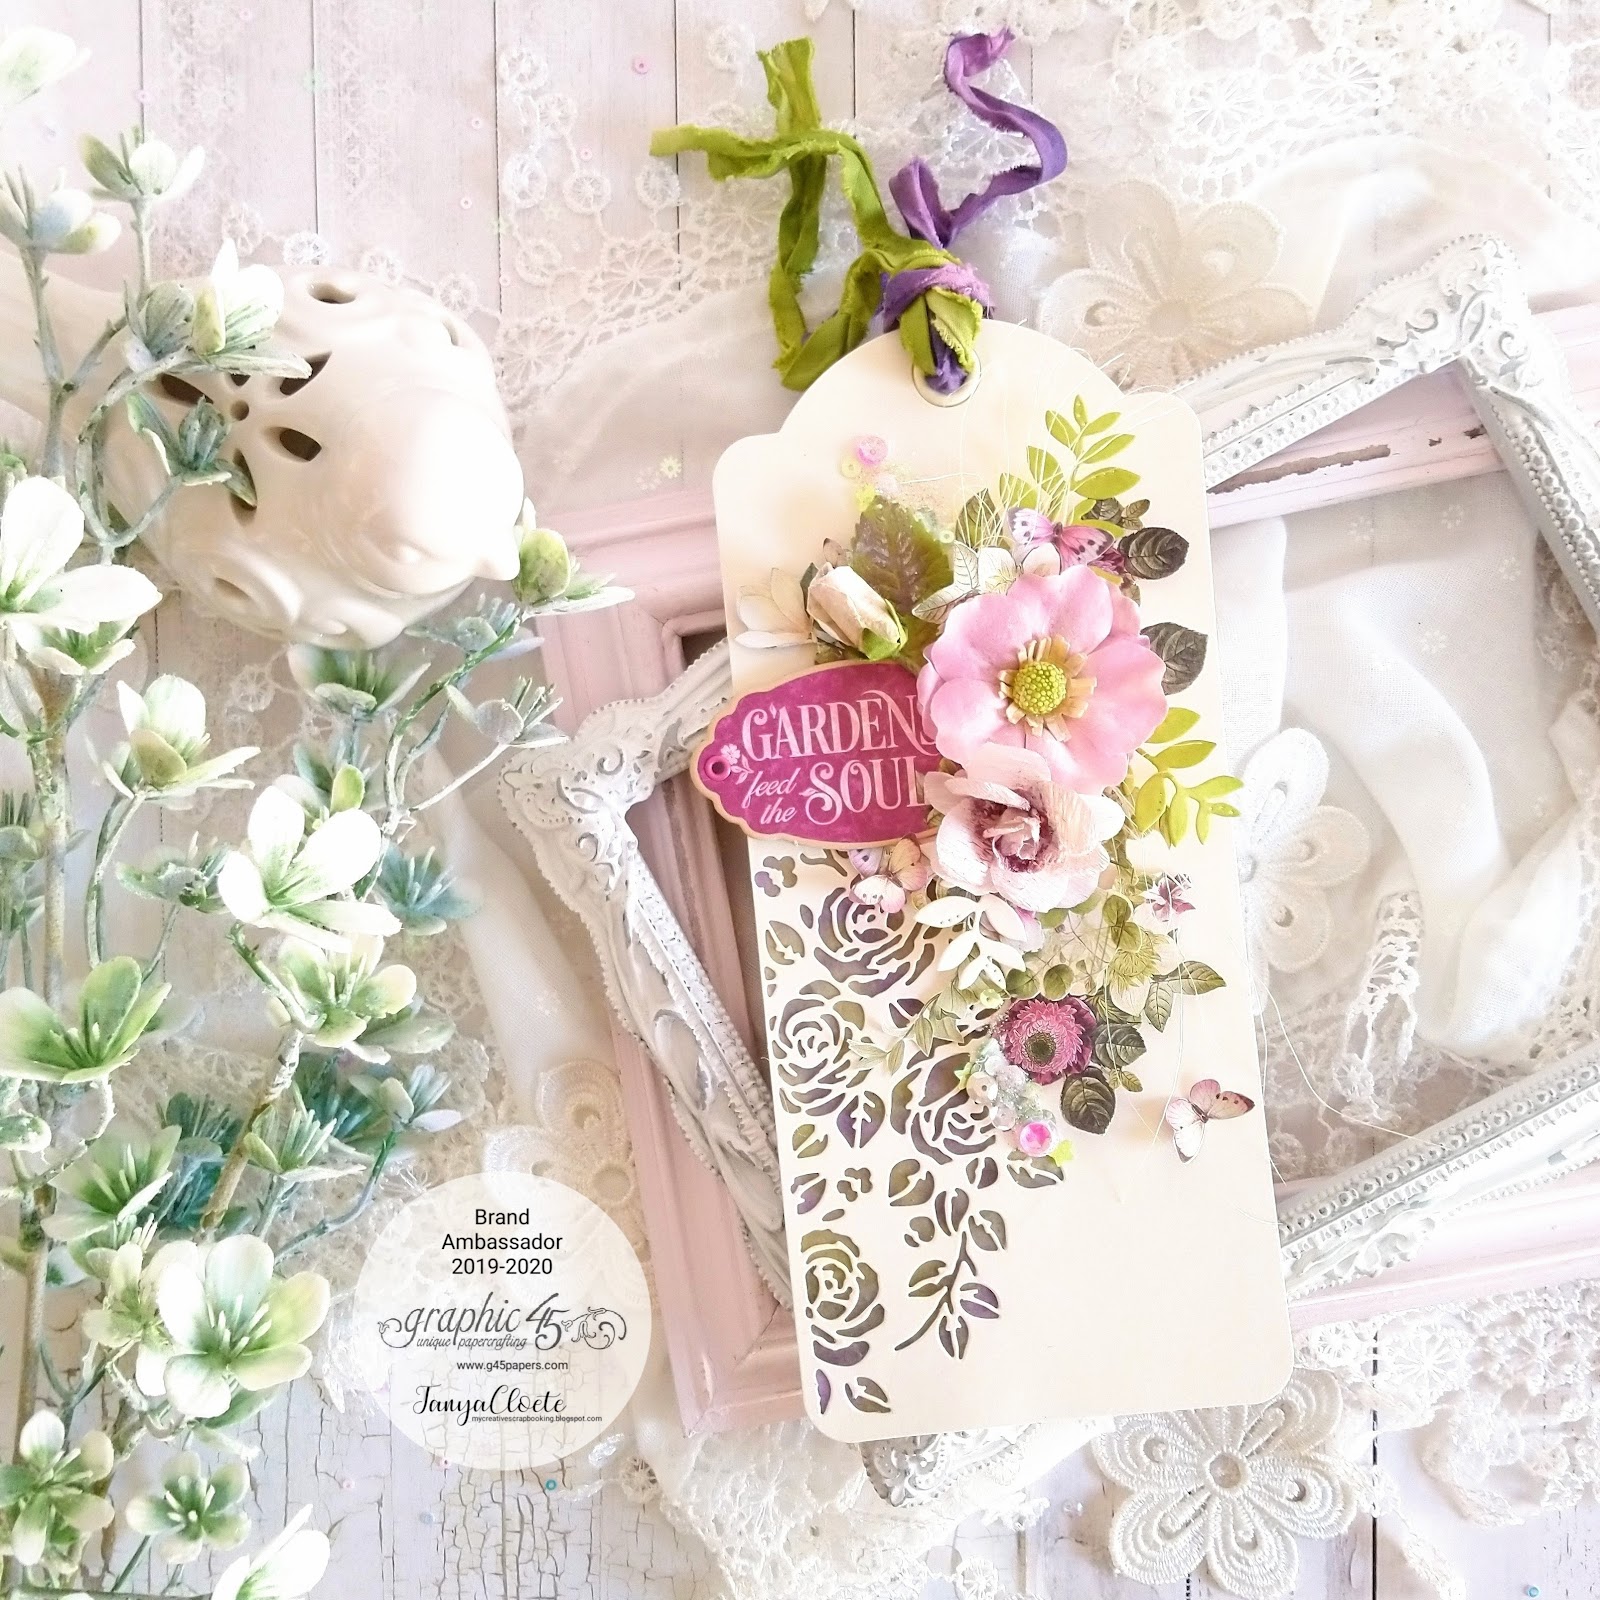
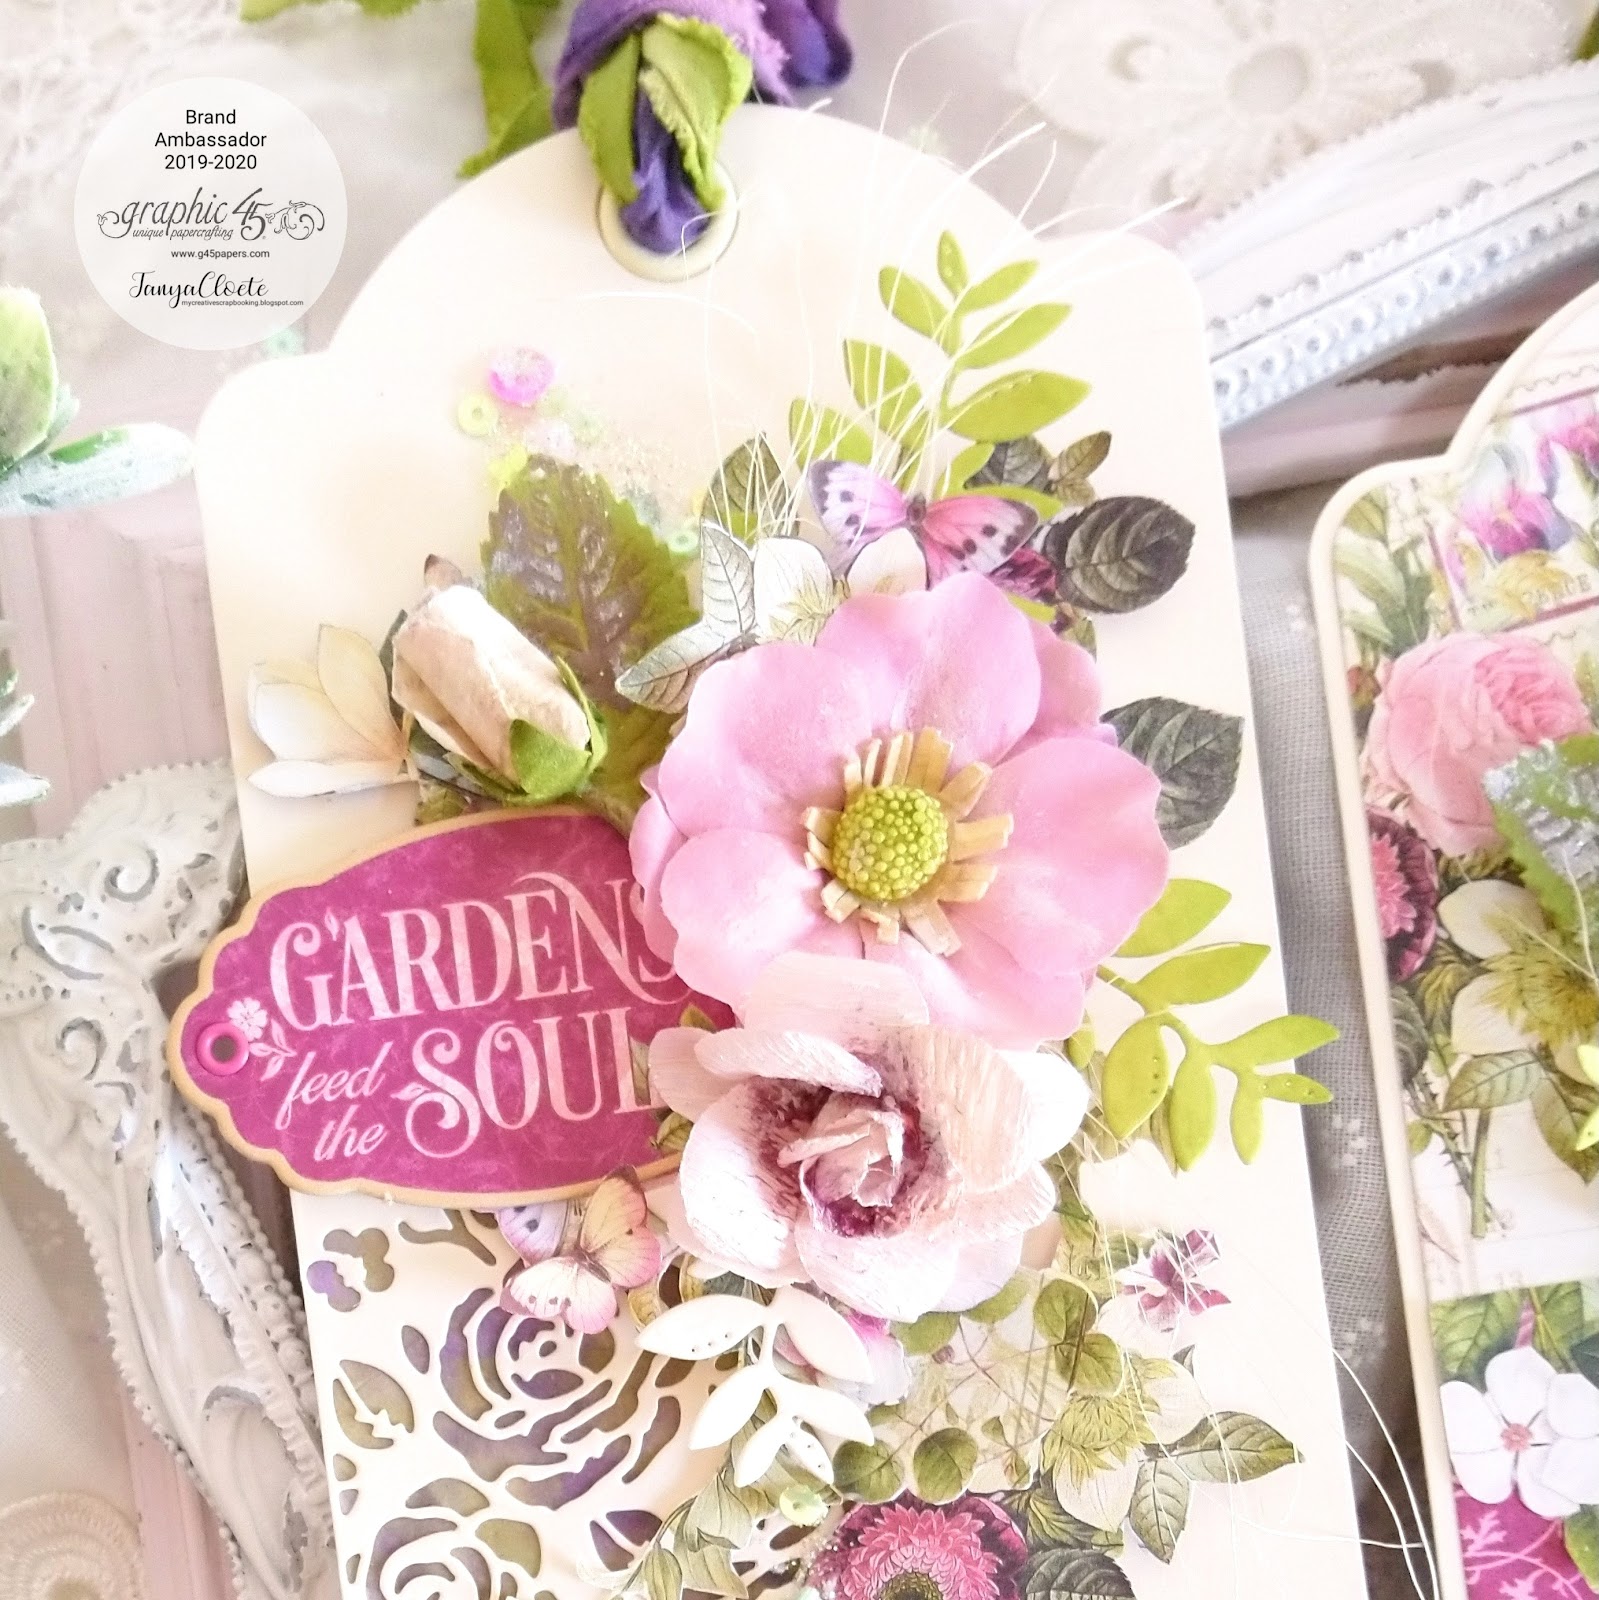
Add some texture and shimmer with sequins. Adhere these with a soft matte gel.
Add the purple and green crinkle ribbon through the hole of the tag.
Add the fussy-cut butterflies to the tags. Tuck some in behind the petals of the flowers.
Tuck in some sisal behind the flowers. Add the chipboard sentiment, adhere with adhesive foam squares for dimension.
Thanks for stopping by!
Happy Papercrafting!”
Stay Safe & Happy Papercrafting!
Want even more Graphic 45? Sign up for our newsletter here!