With school back in session it is officially time to begin the autumn crafts. To kick the season off we have Kristine Woods‘#G45LeveledUp Steampunk Spells Interactive Front-Flip Cards. These cards are super cute, loaded with fun details and perfect for Halloween or a fall birthday. Check out Kristine’s video tutorial and create along with us!

“Hello G45’ers! For my #G45LeveledUp project today, I am going to take Ginger Ropp’s Volume 1 2020 Interactive Front-Flip Cards and show you how to use the newly released Steampunk Spells DCE to create three fun cards! There are some basic written instructions to supplement Ginger’s instructions as well as a video tutorial. So grab your project sheet and Graphic 45 supplies and let’s get started!
Steampunk Spells DCE 8×8 papers
Antique Brass Ornate Metal Keys
Antique Brass Ornate Metal Key Holes
Flower Assortment Shades of Yellow and Orange
Adhesives (wet glue, strong mixed media adhesive, foam tape)
Scissors and paper trimmer
Scoring tool
Metallic gold paper
Flip Top Card Tutorial – Steampunk Spells – by Kristine Woods
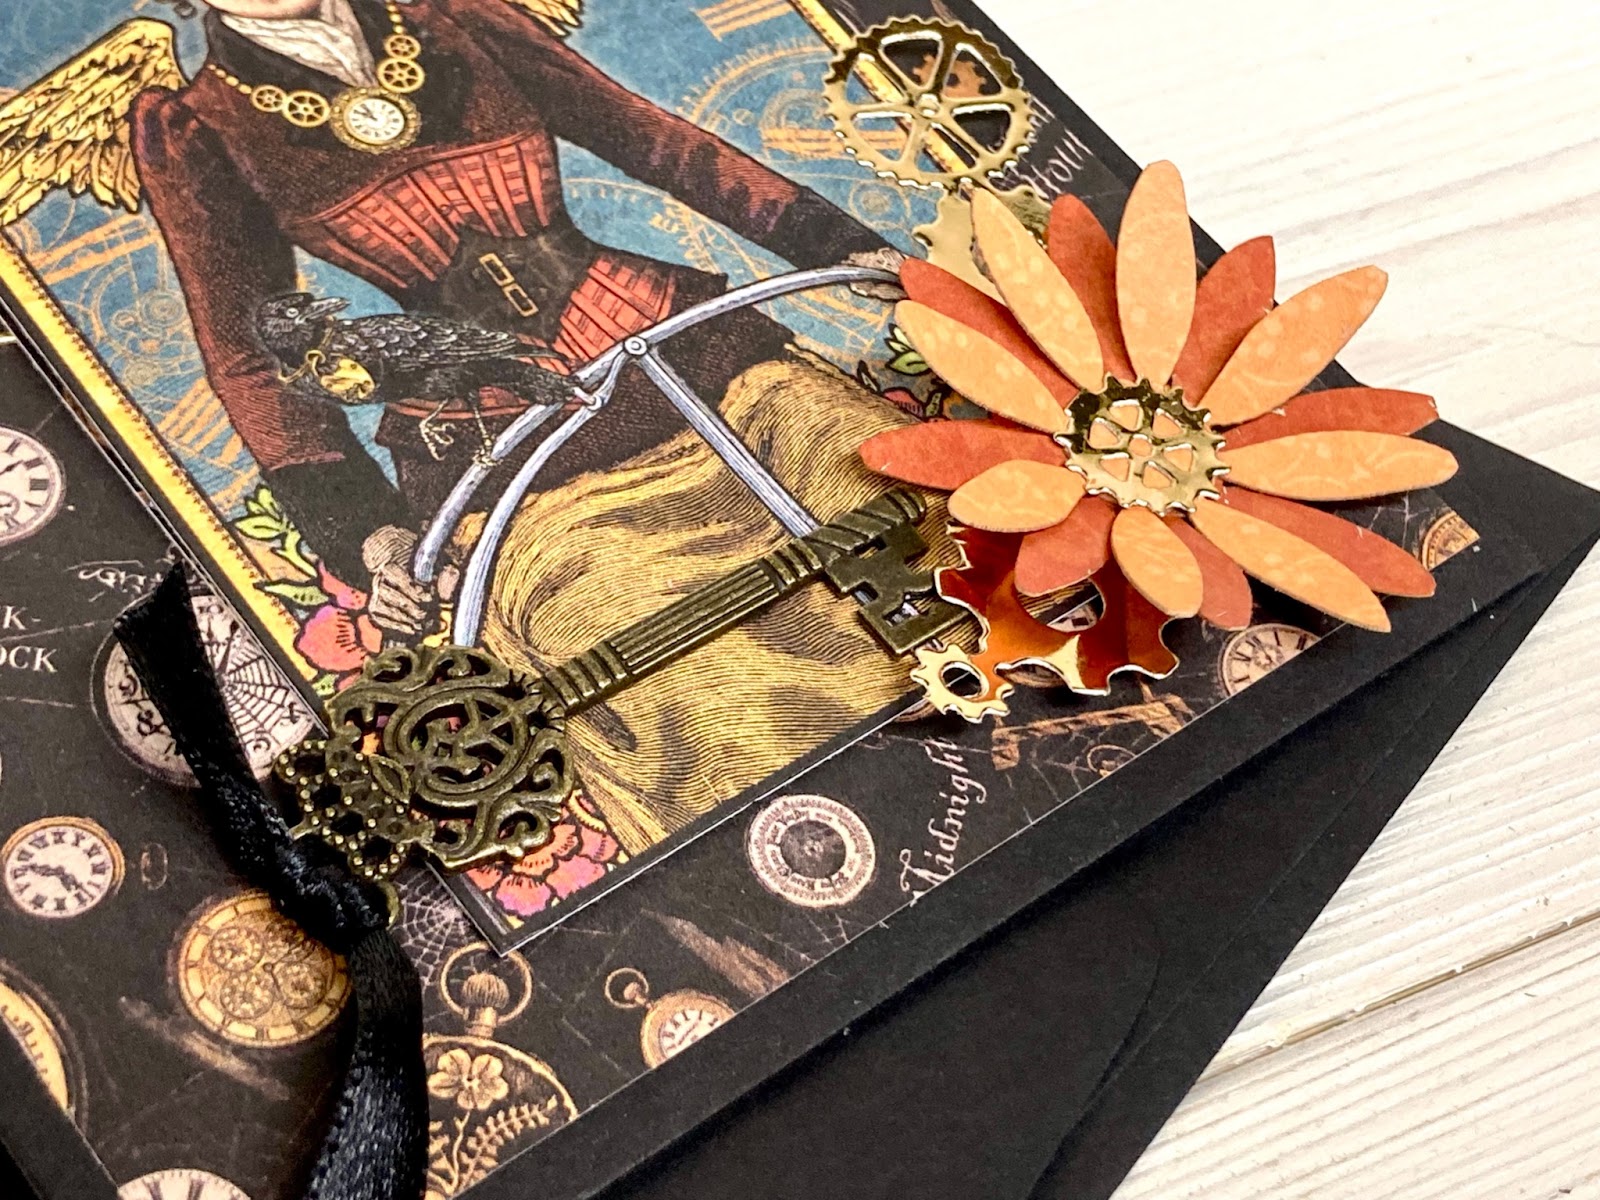
I mostly followed Ginger’s directions, replacing the papers and keeping the general structure of the card in tact. Cut two pieces of Witching Hour to 4” x 5 ¼” and 2 ⅝” x 4 ⅜” (score at ½”). Use one cut apart from Vintage Voyage and one from Freightful Folly. Cut one strip of Totally Wicked for the inside (⅞” x 5”, cut from the top right corner).
To Level Up the card, we will add the metal key and the layered flower to the front of the card to weigh down the front flip. Also, we will add the clock face and gears cut from metallic gold paper.
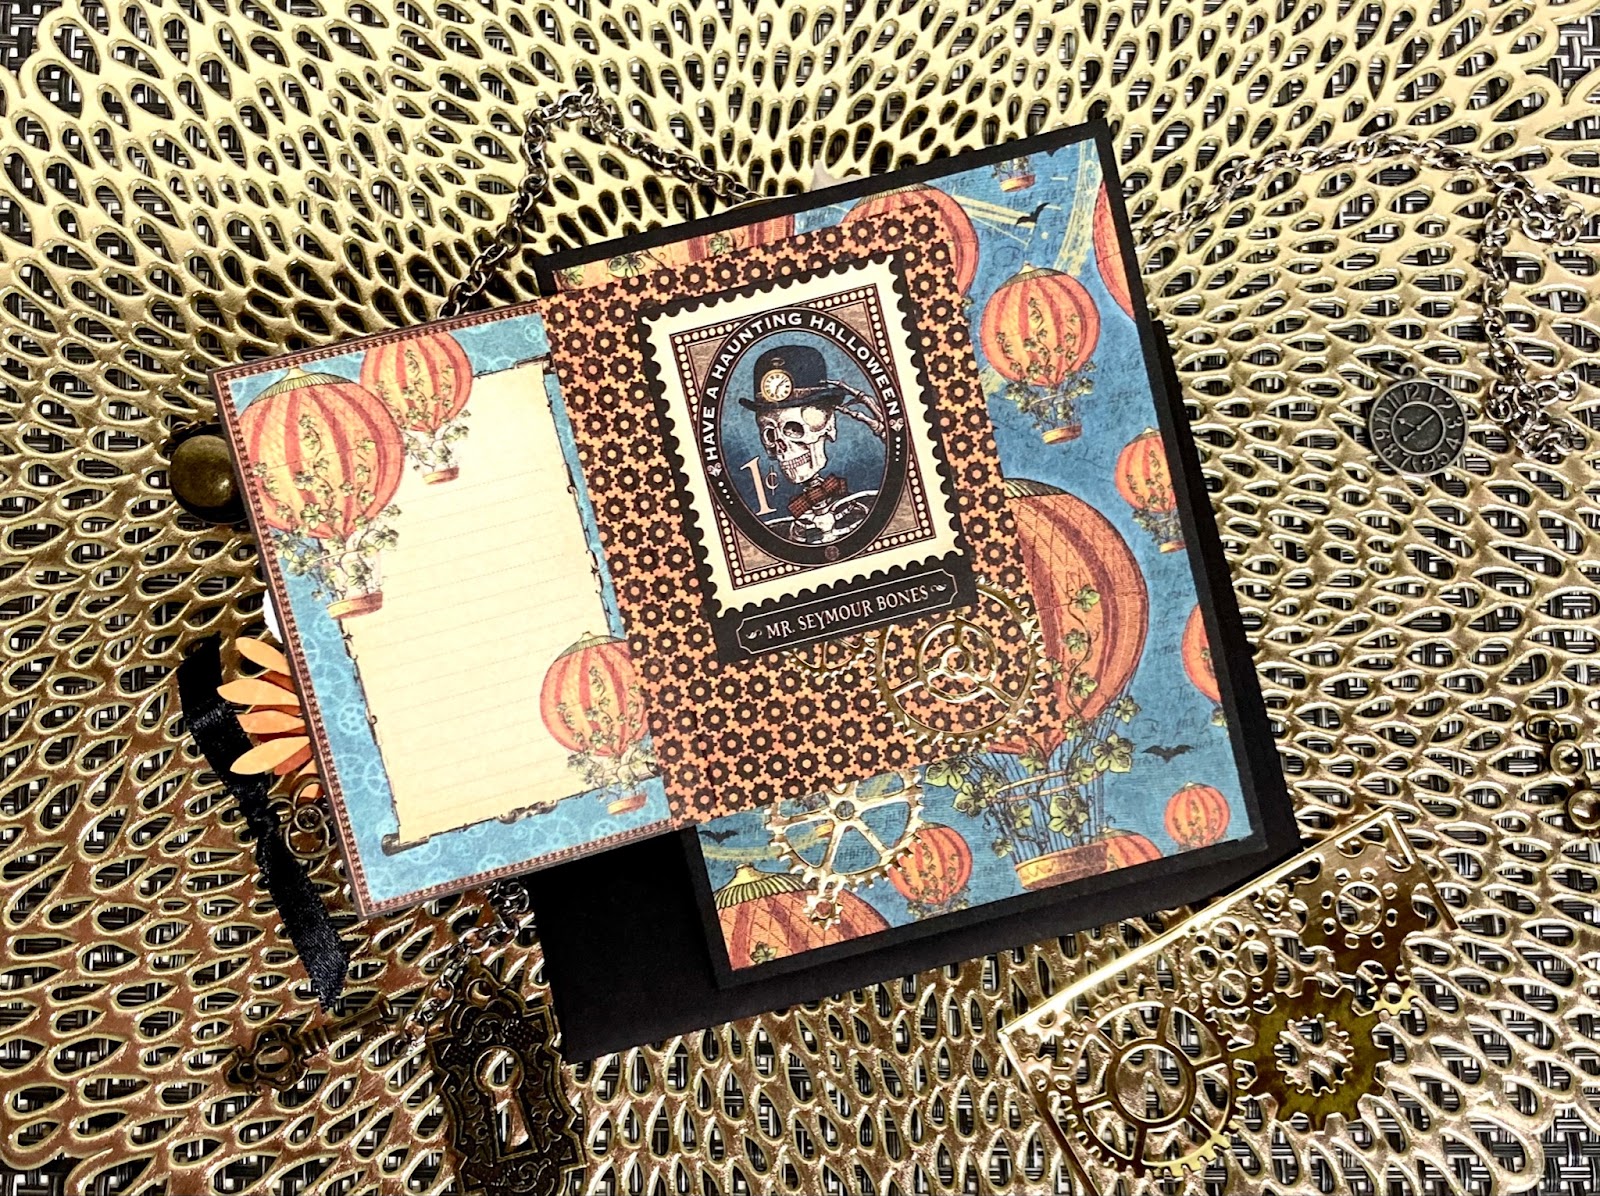
I mostly followed Ginger’s directions, but rather than have the front flip up, our card will flip open to the left. Cut one piece of Pumpkin Power to 4” x 5 ¼”. Cut one piece of Clockworks to 3” x 4” (score at ⅜”). Use one cut apart from Vintage Voyage and one cut apart from Frightful Folly.
To Level Up the card, we will add a metal key and layered flower to the front of the card to weigh down the front flip. Also, we will add some gears cut from the metallic gold paper.
I did not add as many layers to the front of my card as in Ginger’s instructions. Cut one piece of Mechanical Marvels to 4” x 5 ¼”. Then cut two pieces of Fanciful Florals to 4 ¼” x 3 ½” (score at ½”) and 4 ¼” x 3”. Use one cut apart from Nevermore and one cut apart from Frightful Folly. Cut the word “Frightful” from the top of Mechanical Marvels and cut a strip from the top right corner of the paper for the inside of the card.
To Level Up the card, we will add the metal keyhole and a layered flower to the front of the card to weigh down the front flip. Also, we will add some gears cut from metallic gold paper.” ~Kristine
Charmed Kits – Vol 08 2022 – Gatefold Folio & Pop-Up Card Set
Happy Papercrafting!
Want even more Graphic 45? Sign up for our newsletter here!


One Response
Awesome tutorial! TFS