Level Up Your Papercrafting with a DIY Shadow Box & Travel Album Tutorial
Hello G45ers!
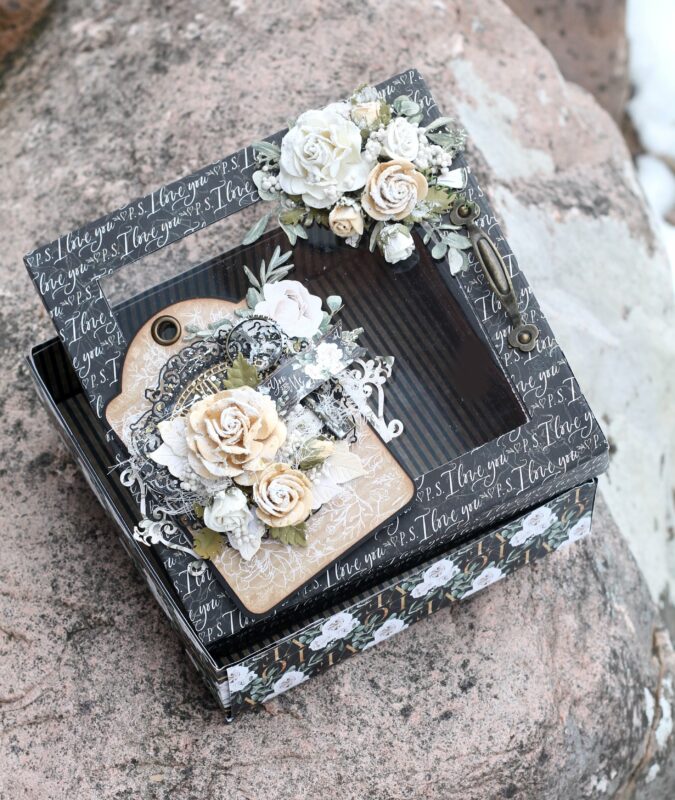
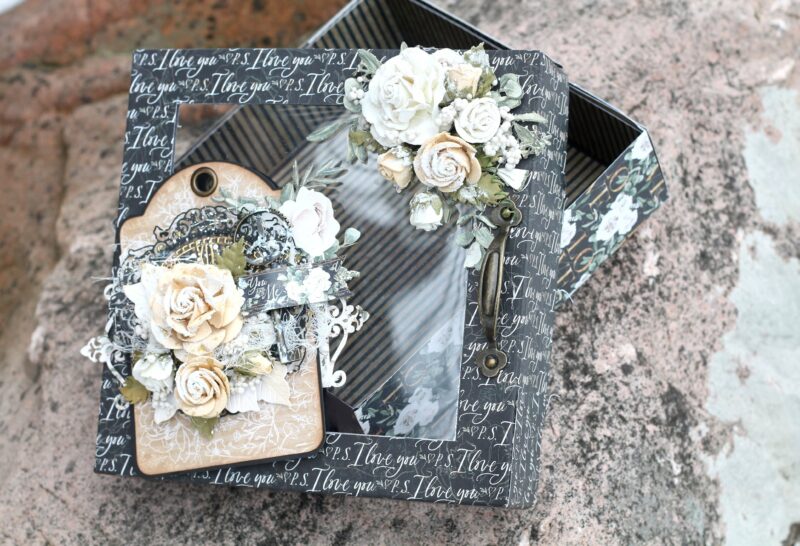
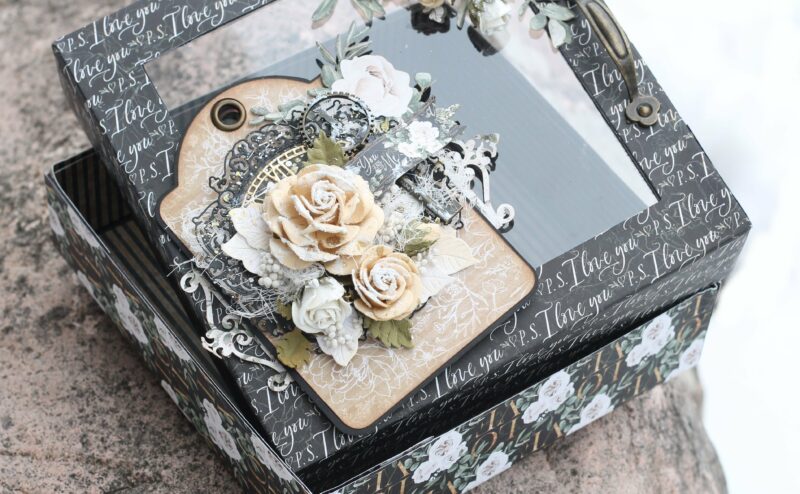
Embark on a journey of creativity with Graphic 45 Brand Ambassador, Karan Gerber, as she unveils her latest masterpiece: the DIY Shadow Box & Travel Album. Showcasing the captivating designs of the P.S. I Love You paper collection, this project is a testament to Karan’s ingenuity and passion for crafting. As part of the #G45LeveledUp series, Karan has elevated the DIY Box from the Album Kit to a larger 8×8 size, providing ample space to accommodate an array of cherished trinkets and goodies. Join us as we delve into the world of imaginative crafting and get inspired to unleash your own artistic flair.
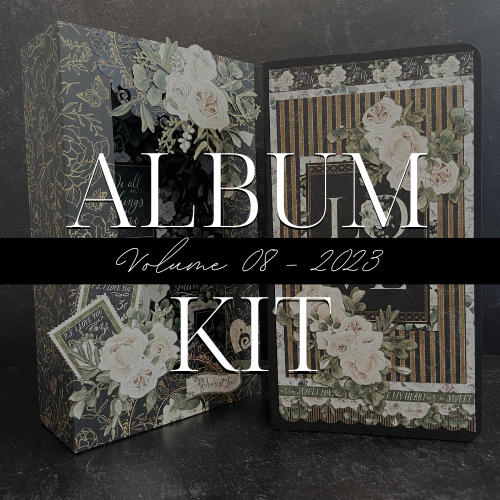
“Hello G45ers and welcome back to the Graphic 45 Blog today as I share a Level Up Project with you. I chose the P.S I love You DIY Shadow Box & Travel Album, Designed by Maria Cole. You can find the P.S. I Love YouDownloadable Instructions Here.
To level the project up I have created an 8 x 8 Album Box, covered the front with acetate and created a walk through video on how to create the box, and how to decorate the beautiful tag with the Graphic 45 Flowers.
I love Mini Albums, I really enjoy creating them and what better way to gift an album than to create a hand made box decorated like this.
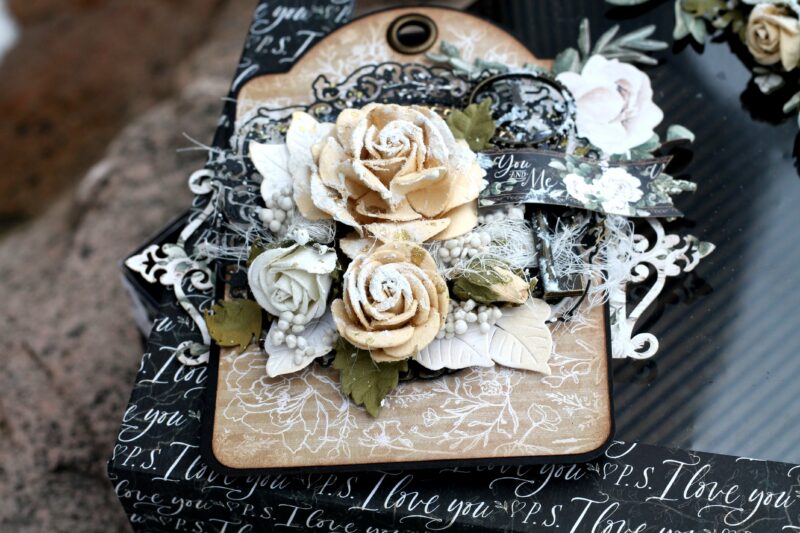
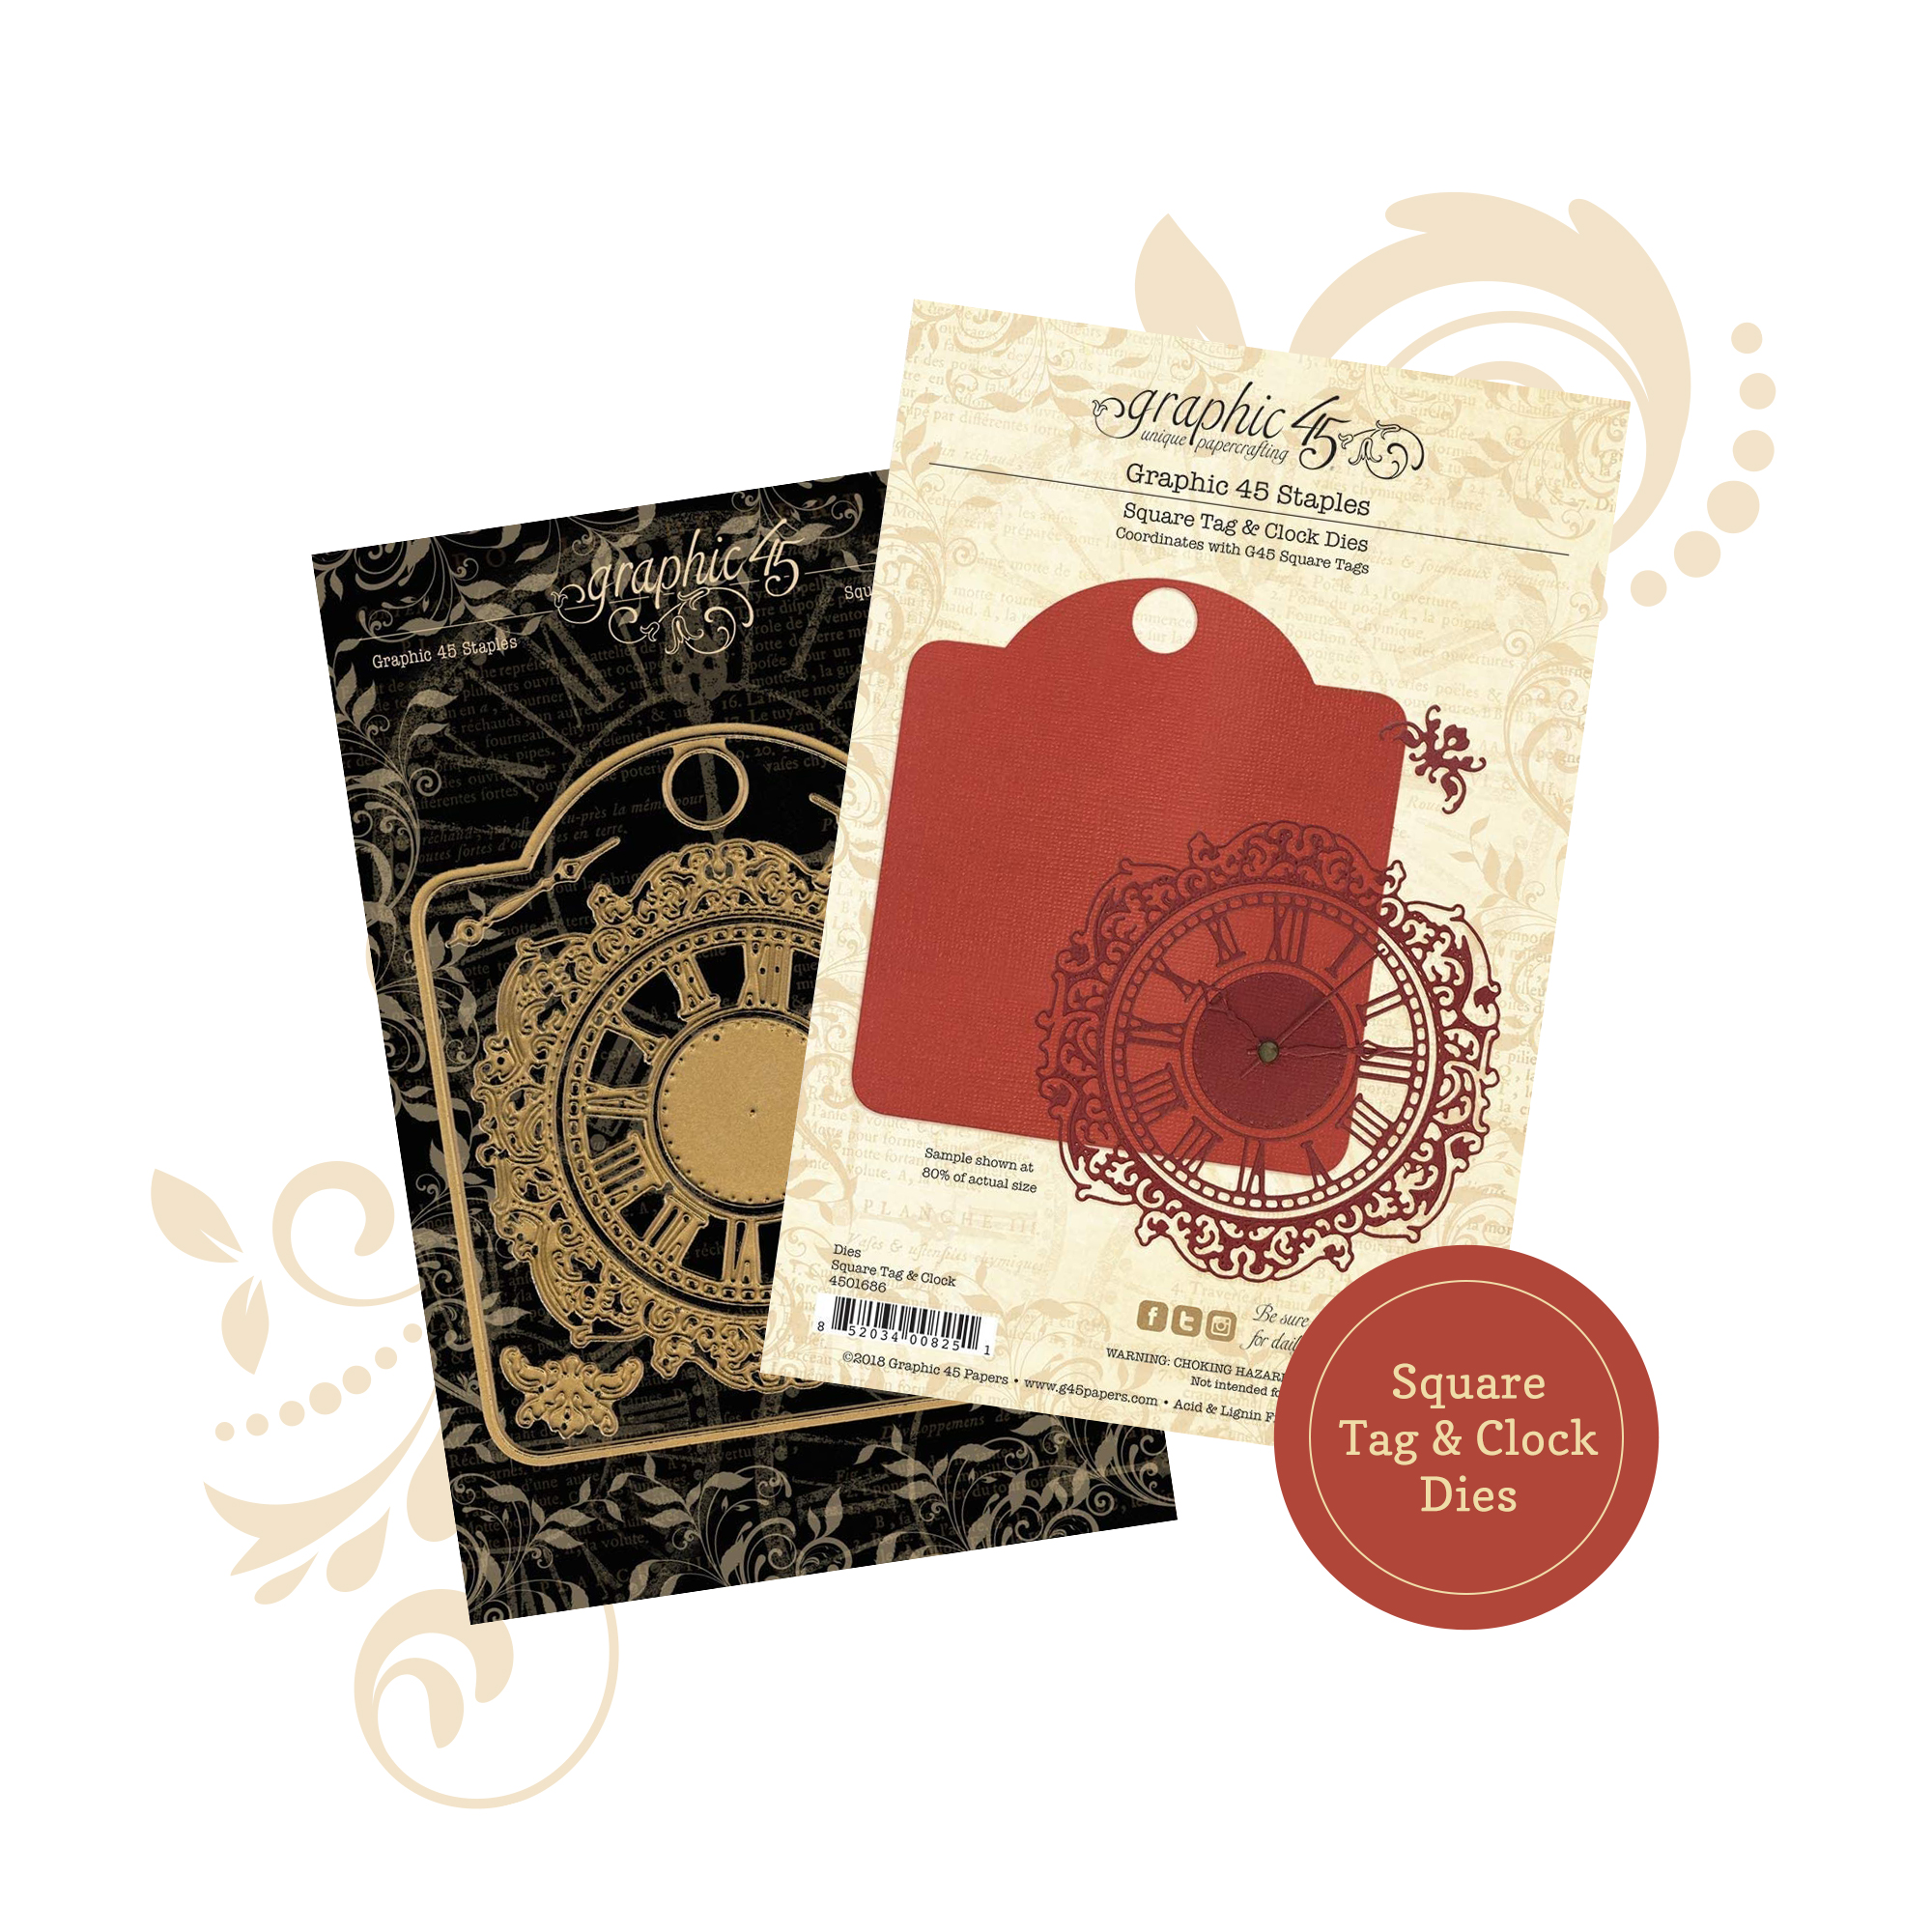
The tag I created is just stunning adorned with a couple of die cuts using the dies from Graphic 45 along with their florals, a couple pieces of ephemera and I added in some art stones, and splattered with white acrylic paint.
To Create the Box:
You will need two sheets of Graphic 45 paper from the PS I love you collection along with two sheets of Chipboard.
Trim off the manufacture strip from the pattern paper and for the top, score on all four sides at 2 inches. Put aside for now
For the box bottom, I want the top to be able to sit over the bottom, so I would like to make the bottom of the box a bit smaller, sore at 2 ⅛ inch all the way around, and wedge all the corners as shown in the video. At the 3:58 minute mark in the video
Taking the top paper, we need to cut out the center, placing the left edge of your paper on the 9 inch mark, and your scored line, on the 1 inch mark on the outside of you paper, set your blade in the track at the 3 inch mark and cut down to 9 inch mark, I have explained this in the video too at the 2:37 minute mark
Cut a 8×8 piece of chipboard from one of the chipboard sheets at the 4:27 mark in the video.
We now need to create a one inch frame from this piece of chipboard, so we need to cut out the middle.
Place your left edge of your chipboard on the 7 inch mark, and the right edge on the 1” mark, slide your blade down to the one inch mark and cut down to the 7 inch mark, you can see this at the 5:33 minute mark in the video , do this on all four sides.
Turn the chipboard over and do the same on the back easier for the frame and thickness of the chipboard.
I wanted to create an acetate cover so cut a piece of acetate 7.75 x 7.75 and adhere to the back ,
Cut a piece of pattern paper of your choice, the same way as I have above to cover the back of the chipboard which is now covered with acetate.
You can now adhere this to the back of the cover sheet for the box top. You can see this at the 6:48 mark in the video
For the bottom of the box, we need to cut a 7 ¾ x 7 ¾ piece of chipboard to go on the inside and I have cut a 7 .5 x 7.5 piece of pattern paper to cover and center over the chipboard. I like the black frame the chipboard creates. You can find this at the 7:20 minute mark in the video
You now need to cut four pieces of chipboard measuring 1 ⅞ x 7 9/16 we will use this to line the sides of the box, be sure to cut pattern paper strips measuring the same to cover the chipboard
Going back to the top, we need to cut 4 pieces of chipboard measuring 1 7 ⁄ 8 x 7 ⅞ these will go on the inside of the top cover for the box.
Now your box is complete and you can decorate it, continue watching the video to see how I decorated the tag cluster to add some awesome detail to the album box.
I hope I have inspired you to get creative with your album boxes. Thank you for dropping by.