Hello, G45ers!
We are thrilled to share a great way to enjoy summer for months, no years to come with this jaw-dropping Lost in Paradise Paper Tiki Hut with Coaters and Wine Glass Charms. This cute home decor set has been brought to us by the Master of Home Decor, Jim R. Hankins the Gentleman Crafter. Jim not only shares delicious eye candy, but he is also sharing step by step directions, tips, and printable SVG Files and PDF Templates so you too can create your own paper paradise.
Staycation Holiday-
Tiki Bar- Coaters and Wine Glass Charms
Copyright 2019
“For a HOLIDAY at home or a dreamy beachside vacation try this exotic Tiki Bar that holds nine coasters as well as nine glass charms to help identify your personal Lost in Paradise Concoction.
Things Needed and Options:
|
|
|
|
Graphic 45 Supply List:
Other Supplies:
Beyond the Paper and Chipboard the above things used to decorate the Tiki Bar are optional. You can dude up the Tiki Bar to your Lost in Paradise dreams. The list above is what I used.
Printable PDF Templates and SVG Files
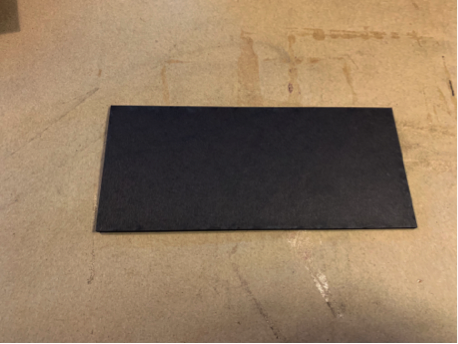
Identifying the Base Pieces:
(2) 6-1/4 x 8-1/4-inch Front/Back Pieces
(3) 2-3/4 x 6-1/4-inch Top, Bar Top Interior piece and Bottom Pieces
(2) 2-3/4 x 4-1/4-inch Left/Right Top Side Frames
(1) 2-3/4 x 3-5/8-inch Left Bottom Side
(1) 3-1/3 x 6-inch Notched Bar Top
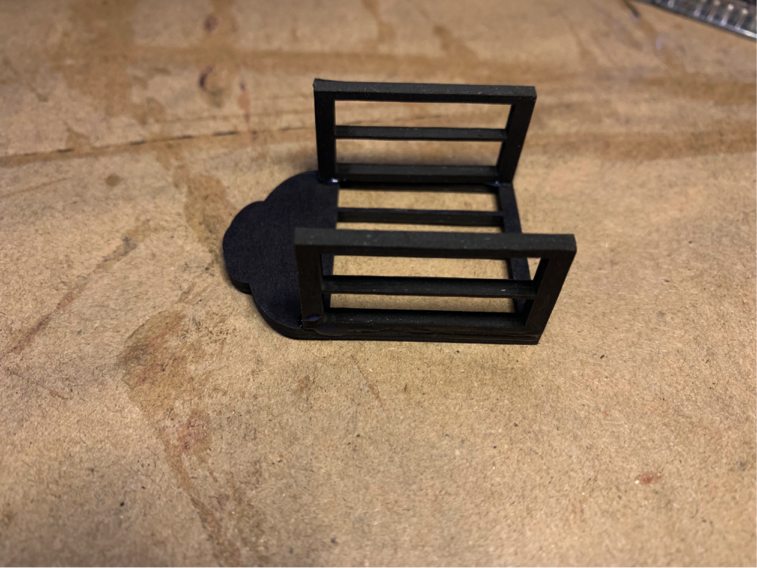
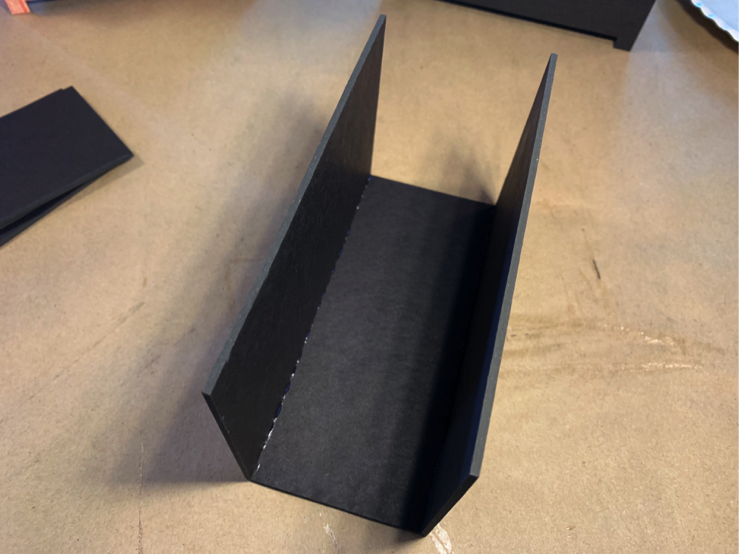
Making the Base-
Start by adhering the three 2-3/4 x 6-1/4-inch Top, Bar Top Interior Piece and Bottom Pieces to one of the 6-1/4 x 8-1/4-inch Front/Back Pieces. Apply glue to the long edge of one of the 2-3/4 x 6-1/4-inch pieces and adhere to the top. On top of the Back Piece flush with the edge. Again, apply a bead of glue to the long edge of another 2-3/4 x 6-1/4-inch piece and adhere just under the opening of the cut out of the bar top. Last, apply a bead of glue to the long edge of the remaining 2-3/4 x 6-1/4-inch piece and adhere to the long edge of the bottom right above the two feet.
Apply a bead of glue to the shorter top and bottom and down the long side of the 2-3/4 x 3-5/8-inch Right Bottom Side and adhere on top of the Back Side and in between the top and bottom 2-3/4 x 6-1/4-inch Bar Top and Bar Bottom pieces previously glued.
Apply a bead of glue to the top, bottom and long edge of one of the 2-3/4 x 4-1/4-inch Left/Right Top Side Frames and adhere on top of the back piece and in between the top and the bar top. Repeat for opposite side.
Apply a bead of glue to the exposed top edges of the bar assembly and adhere the remaining 6-1/4 x 8-1/4-inch Front/Back Piece to them.

Apply glue or tape to the backside of the 3-1/3 x 6-inch Notched Bar Top. Slide the piece into the middle at an angle and slide the piece down allowing the Bar assembly sides to go into the notches and flat down onto the bar top interior piece.
Please Note: The overhang of the Bar Top Piece will be to the front and come out over the top around ¼-inch.
Cover the Front, Back, Left Side, Right Side and Bar Top with the Lost in Paradise Patterned papers of your choice. See Templates
Identifying the Roof Pieces:
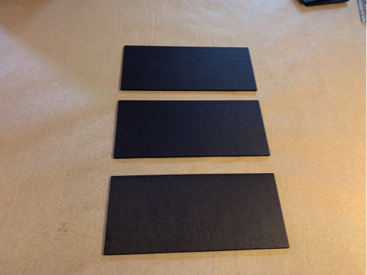
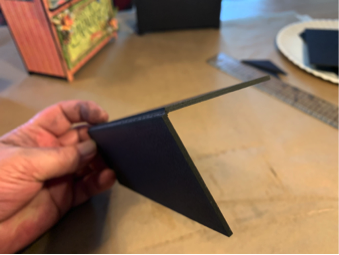
(1) 4-1/2 x 6-1/4-inch Scored Roof Piece
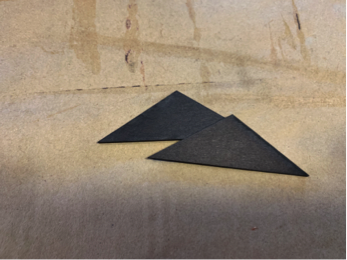
(2) Triangular Left/Right Roof Arches
Making the Roof-
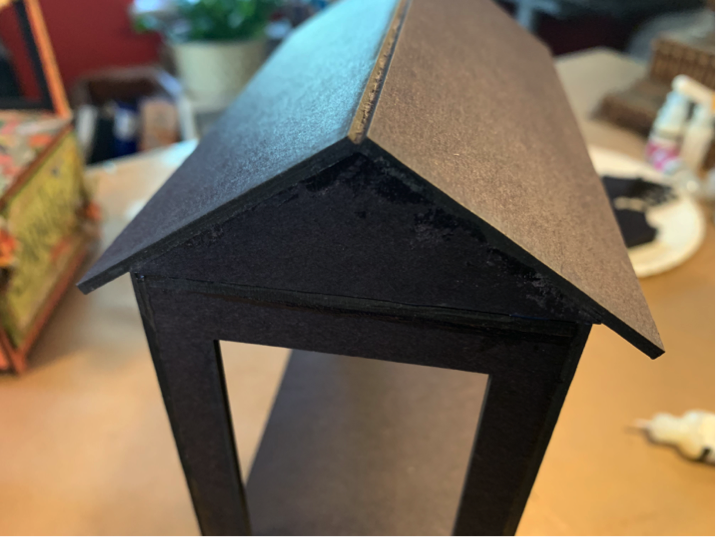
Bend the Scored Roof Piece on the score line. Apply glue to the top angles of the roof pieces and adhere the pieces under the bent Scored Roof Piece on the left and right ends.
Apply a bead of glue to the middle straight edge of the roof pieces and adhere to the Tiki Bar Top.
Cover the left and right-angled arch roof side pieces with patterned paper. You may choose to cover this with raffia as well.
Apply Hot Glue to the top of the roof and adhere raffia from the front to the back lined up side by side. Cut off the raffia evenly across the front and back.
Apply a bead of hot glue to the top of the roof and adhere a ¼ x 6-1/2-inch dowel to the glue.
Again, right where the chipboard roof stops I adhered another ¼ x 6-1/2-inch dowel to the roof.

Please Note: I used a black pen and made vertical stripes on all the dowel pieces to try and replicate bamboo.
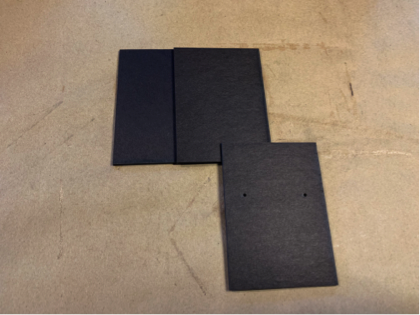
Making the Right Side Drawer-
Identifying the Pieces:
(1) 2-3/4 x 6-1/8-inch Drawer Bottom
(2) 3-1/2 x 6-1/8-inch Left/Right Sides Pieces
(3) 2-1/2 x 3-1/2-inch Front, Back and Middle Pieces
Please Note: The Front Piece has (2) Holes midway for the Graphic 45 Handle to be attached.
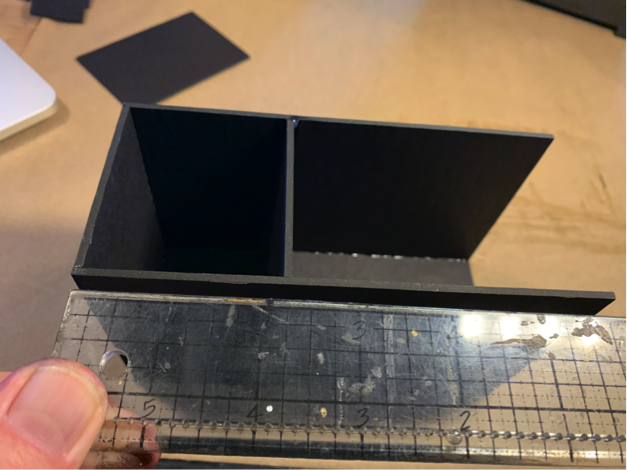
Apply a bead of glue to the long edge of one of the 3-1/2 x 6-1/8-inch Left/Right Sides Pieces and adhere on top of the 2-3/4 x 6-1/8-inch Drawer Bottom. Repeat for opposite side with remaining Side Piece.
Apply glue to the left, right and bottom of one of the solid 2-1/2 x 3-1/2-inch pieces and adhere on top of the drawer bottom piece and in between the two longer left/right pieces.
Take your ruler and come in around 2-1/4-inch from the previously adhered back piece and mark. Apply glue to the left, right and bottom of the remaining 2-1/2 x 3-1/2-inch solid pieces and adhere the piece on the marked lines.
Last, apply glue to the left, right and bottom of the 2-1/2 x 3-1/2-inch piece with the holes pierced through the middle. You want the holes to be closer to the top when adhering. Adhere the piece on top of the drawer bottom and between the longer left/right sides.
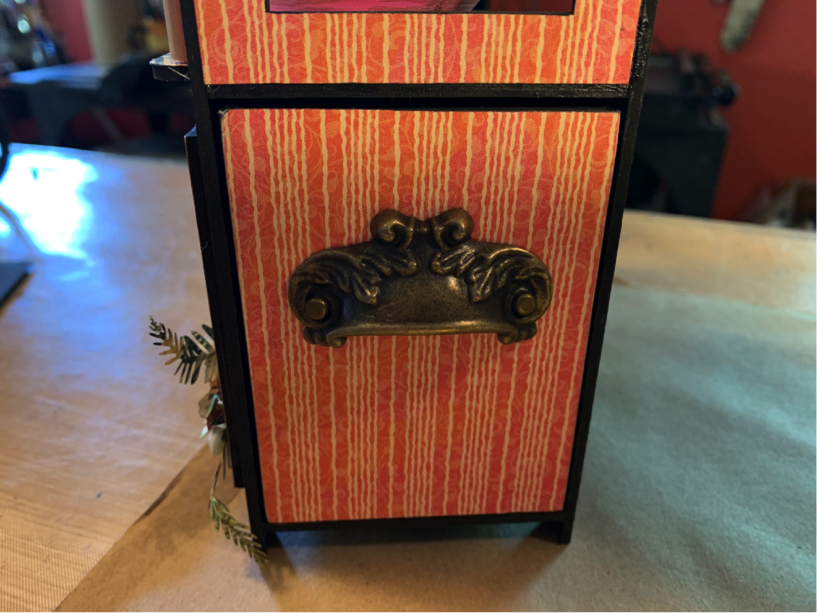
Cover the front side of the drawer with patterned paper. Place the brads through the Brass pull and attach to drawer side.
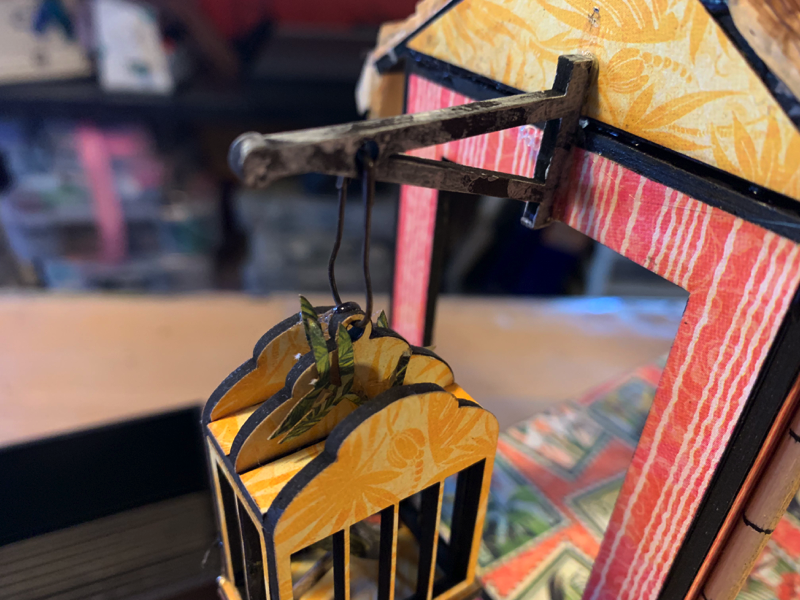
Making the Birdcage and Hanger-
Birdcage Pieces:
(2) 1-1/4 x 1-3/4-inch Front/Back Birdcage Pieces
(2) ¾ x 1-1/4-inch Left/Right Birdcage Sides
(1) Birdcage Hanger with pierced hole in top
(1) 5/8-1-1/4-inch Birdcage top
(1) 7/8 x 1-1/4-inch Birdcage Bottom
(1) Birdcage Hanger
Start by applying a bead of glue to the long edge of the ¾ x 1-1/4-inch Birdcage Side pieces and adhere on top of the larger birdcage back piece flush with the bottom edges. Repeat for opposite side.
Apply glue to the two exposed top edges of the sides and adhere the remaining 1-1/4 x 1-3/4-inch front cage piece to them.
Apply a bead of glue to the two top edges of the birdcage roof and adhere the 5/8-1-1/4-inch Birdcage top to them.
Cover the front, back, top and sides of the birdcage with the patterned paper.
Apply a bead of glue to the bottom of the Birdcage Hanger with pierced hole in top to the middle top centered.
From the paper collection, fussy cut a small parrot or bird. I found a small stick from outside and glued the bird to it and placed inside the cage.
Last, apply glue to the bottom edges of the cage and adhere the 7/8 x 1-1/4-inch Birdcage Bottom to them.
Adhere the hanger to the topside of the Tiki Bar Roof side. Place a Jump Ring or Garment Pin through the hole and attach to the hole in the middle pierced birdcage top.
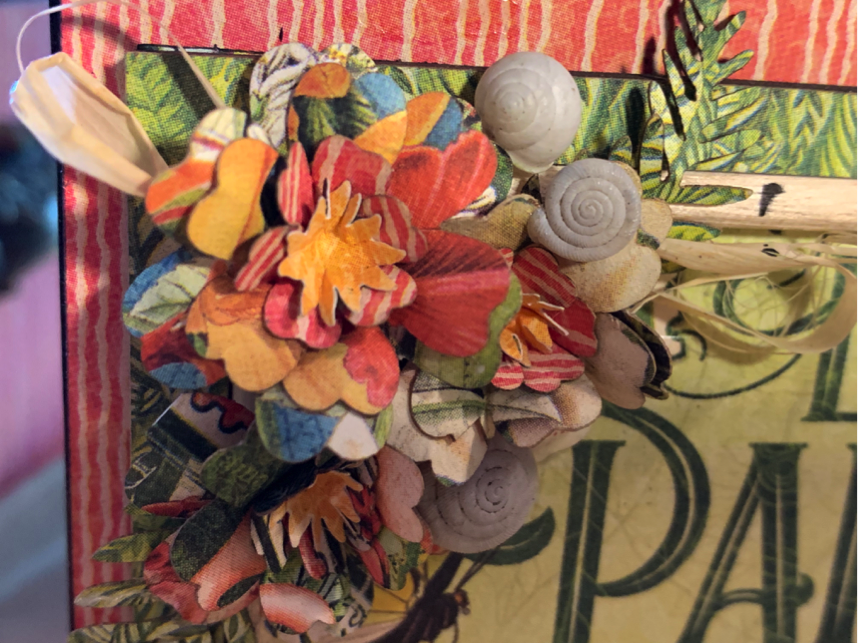
Adding Embellishments to the Tiki Bar-
I added flowers, small shells and leftover raffia to the left corner and bottom right of the Tiki Bar to add a bit of a decoration.
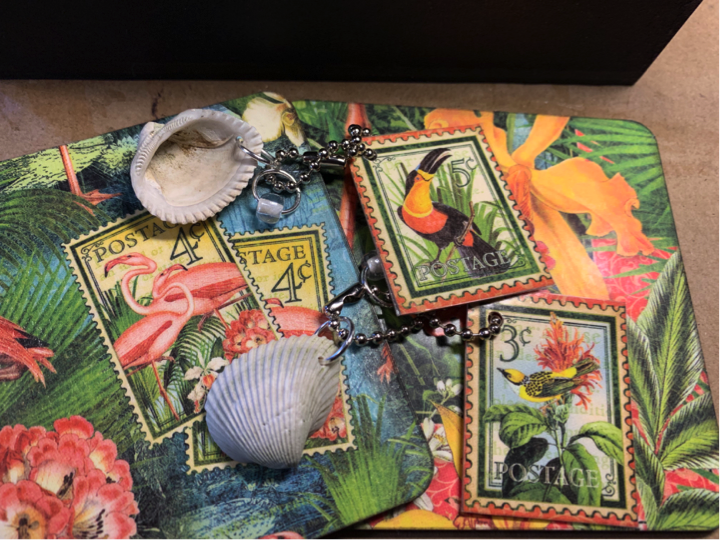
Final Thoughts on Making the Coasters and the Glass Charms-
For the charms, I purchased some keychain-sized ball chain with closures on Amazon. Seems like there were 50 pieces for $3.00. I can always use the remainder for something.
I cut the stamps from the patterned paper and then laminated it with my Xyron machine. I punched a hole on the left corner and strung the ball chain through.
Tip: If you do not have a laminating machine, try using clear packing tape.
I used my Dremel and drilled holes in small shells that I picked up on the beach and added them to a jump ring and then onto the ball chain.

For the coasters, I covered the front and back with patterned paper from the collection. I then cut out (9) 3-1/2 x 3-1/2-inch squares and rounded over the corners with a corner chomper. I laminated them with my Xyron machine and laminate film. Remember you can use clear packing tape too.

There really is enough room to make more coasters and charms if you like. I just chose an uneven nine.
Place the charms in the smaller area of the drawer and the coasters in the larger.
It’s now ready for any Holiday Staycation Party in the back yard or if you’re lucky enough to have a beach or vacation house it’s perfect!
Hope you enjoy!” ~Jim
Happy Papercrafting!


")