Hello, G45ers!
Exciting News from Kristine Woods! We are thrilled to share some of her latest paper crafting projects with you all. Take a look.
First up, a Shaker Box Top. Dive into the magical world of the Enchanted Forest with my whimsical Shaker Box Top! Shake it up and watch the magic unfold!
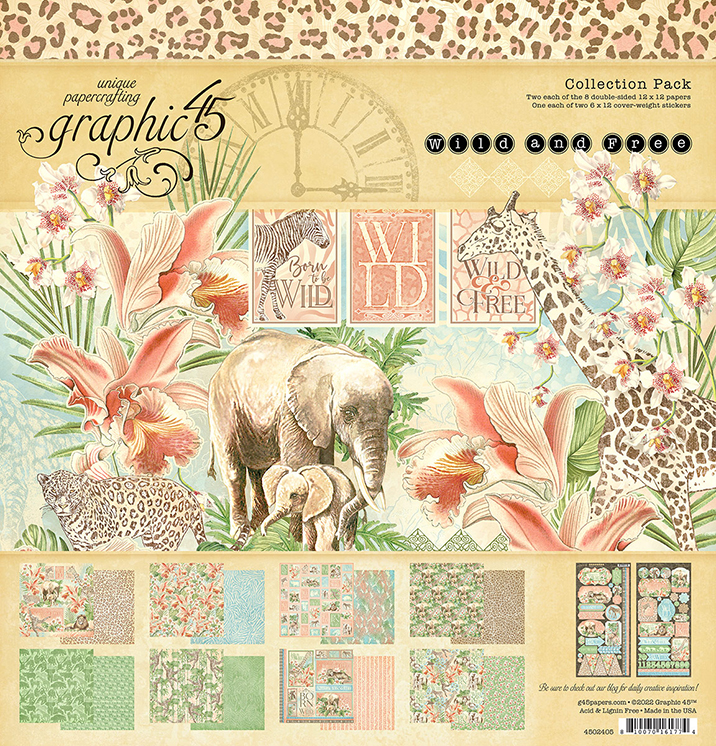
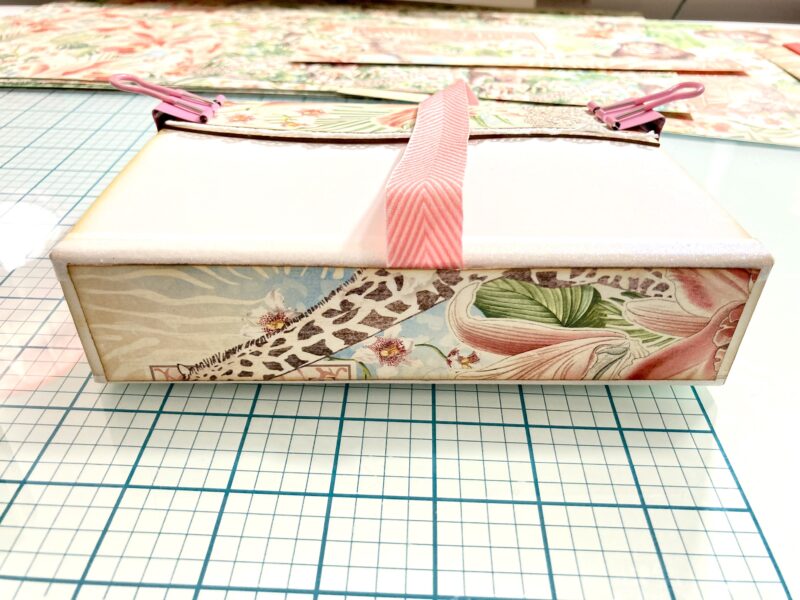
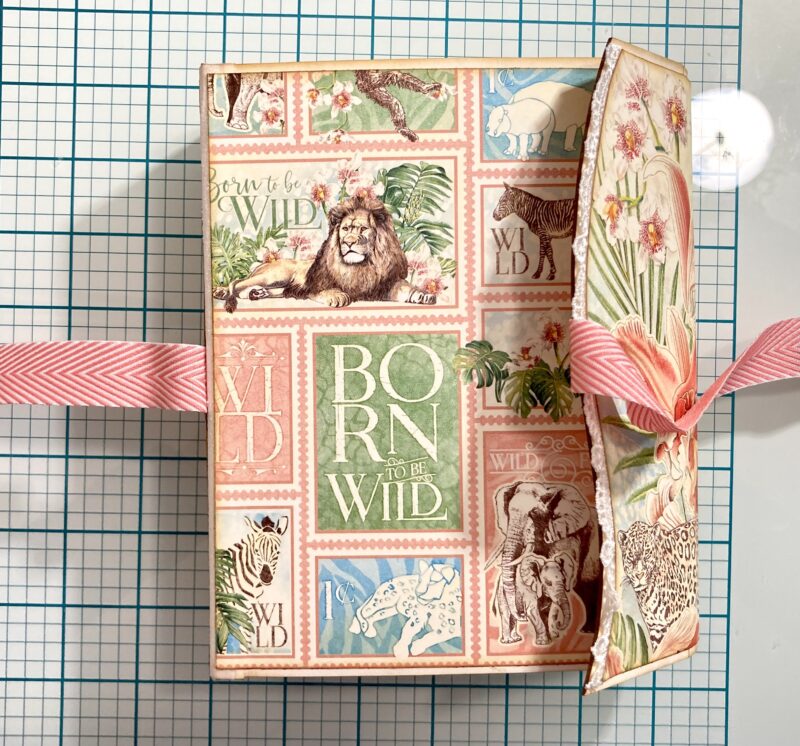
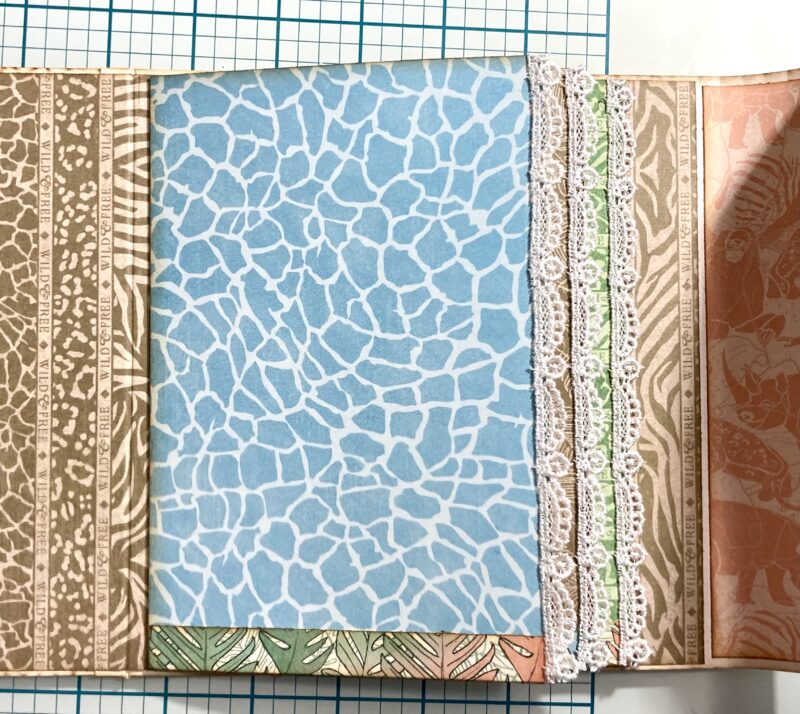
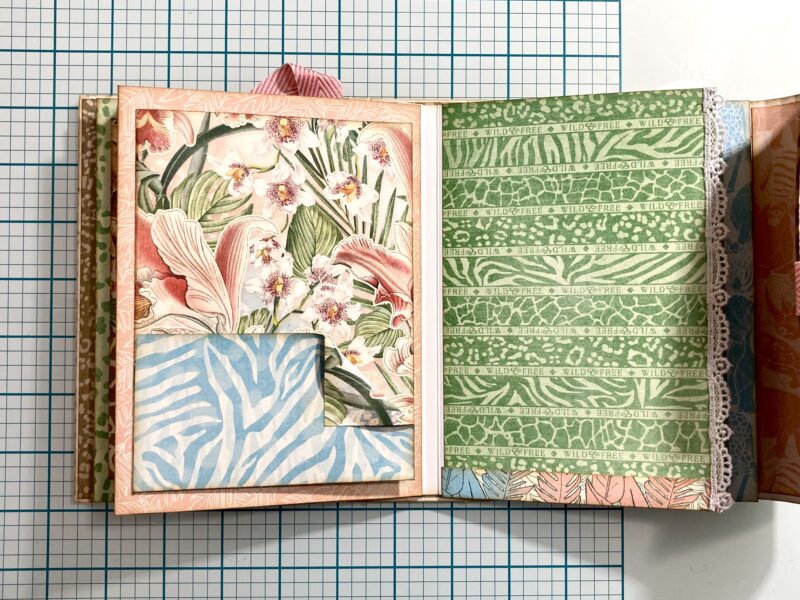
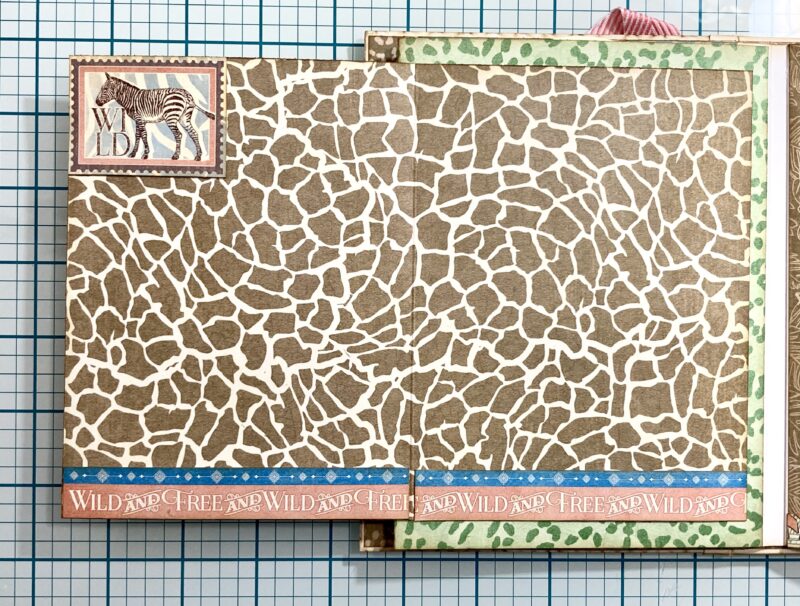
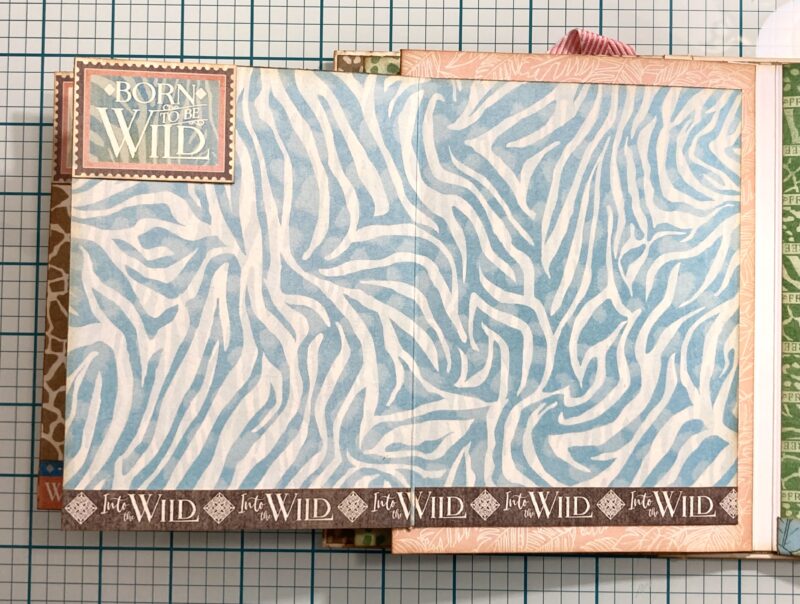
Next we are excited to share a Wrap Around Album. Discover the beauty of Kristine’s Wrap Around Album! Using the captivating Wild & Free paper collection (at a fantastic 50% off clearance price).
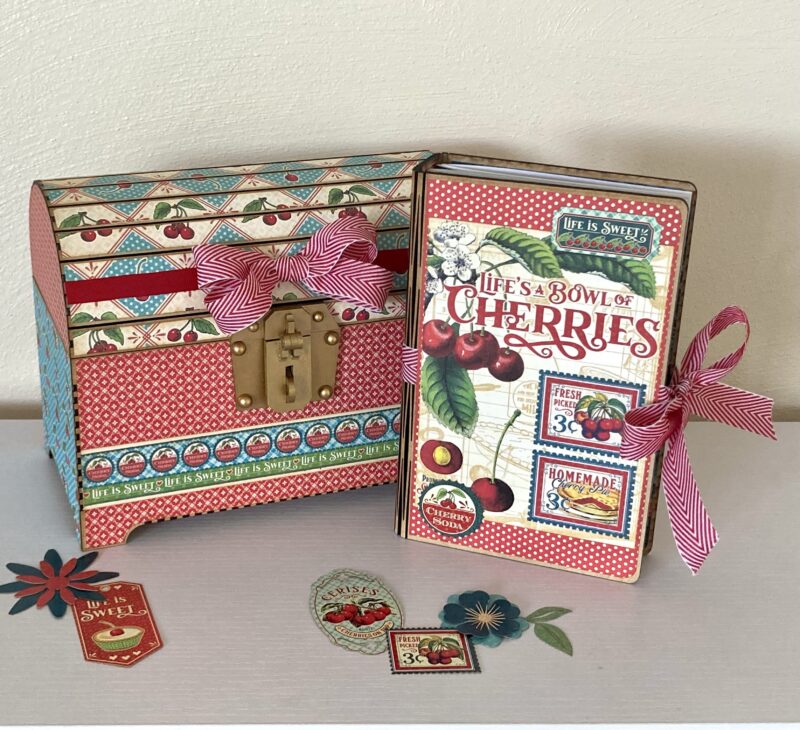
Last, but not least, Kristine shares a Treasure Box, Recipe Book, and Tags. Indulge in the sweetest creations with our Life’s a Bowl of Cherries collection! This fine crafted Treasure Box is filled with delightful surprises, including a set of tags and a recipe book.
Join us on this creative journey and let’s celebrate the joy of paper crafting together! Which project catches your eye the most? Share your thoughts in the comments below!
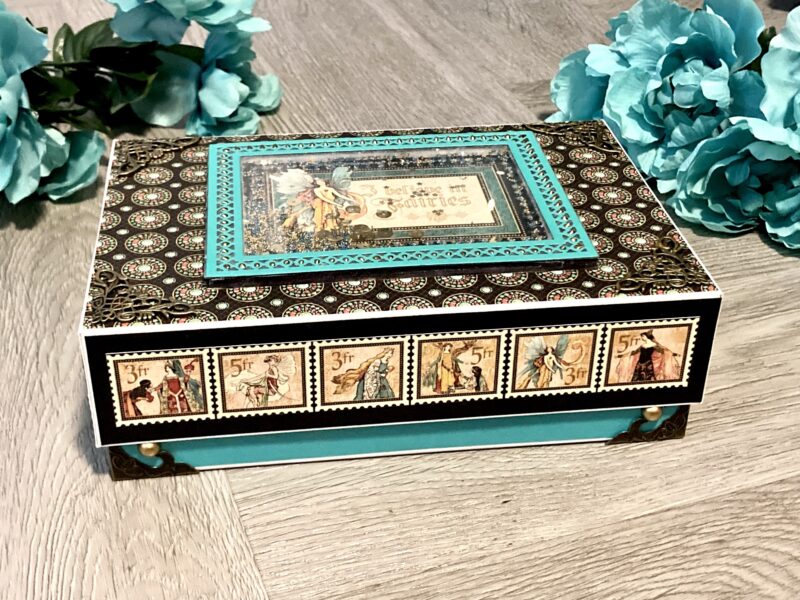
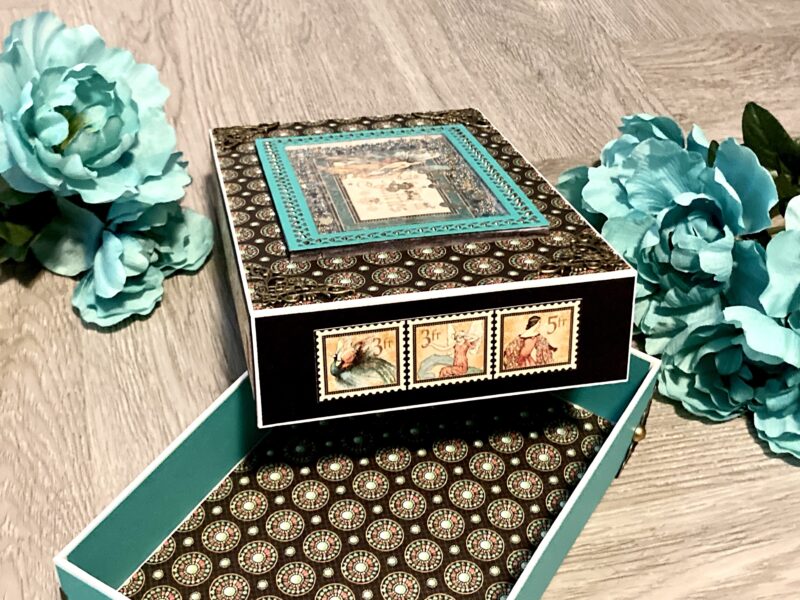
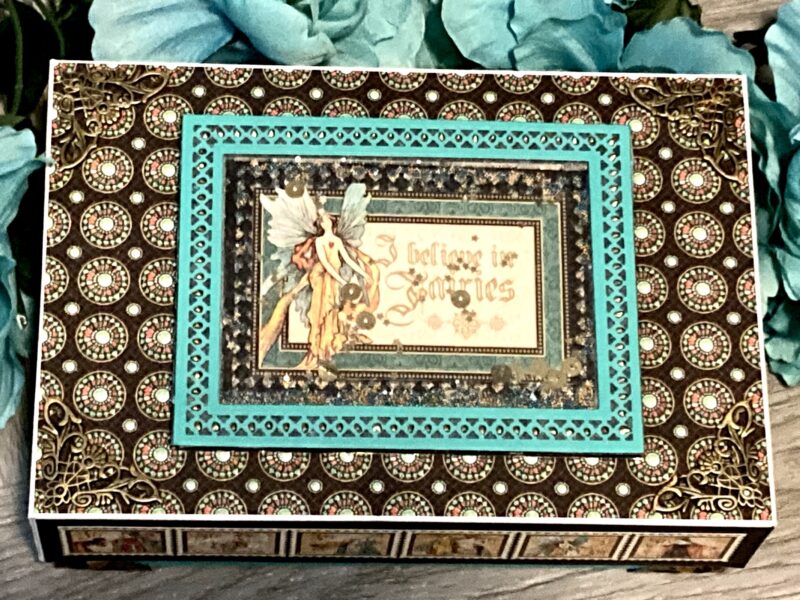
“Hi crafty friends. I am so excited that Graphic 45 released Enchanted Forest as a Deluxe Collector’s Edition. The color palette and images in the collection are gorgeous and so much fun to use! For my #G45Reel project, I will show you how to make the shaker box top and then you can see my completed box at the end.
Enchanted Forest Shaker Top Box
If you’re anything like me, you always need more storage for things in your craft room! I absolutely love to use my Graphic 45 papers to decorate beautiful boxes to store my supplies. It makes me happy when I pull out a box and see theses gorgeous papers put to good use!
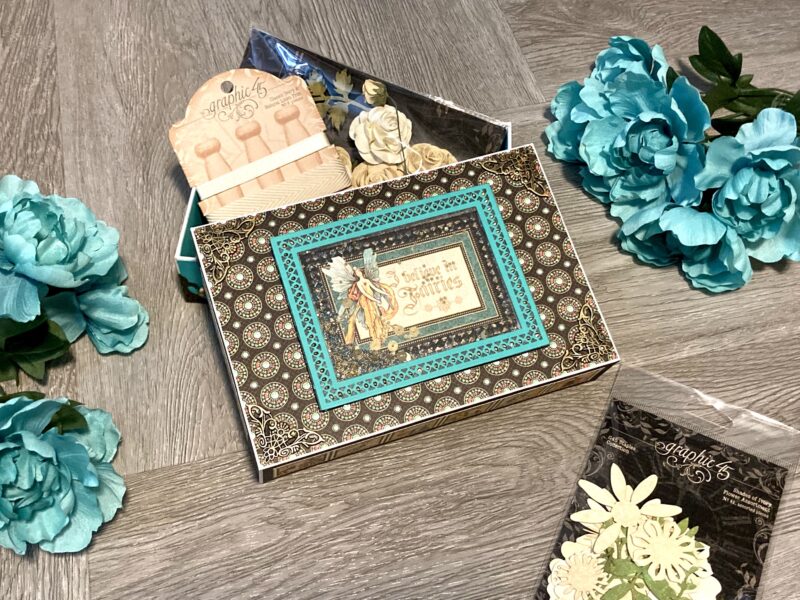
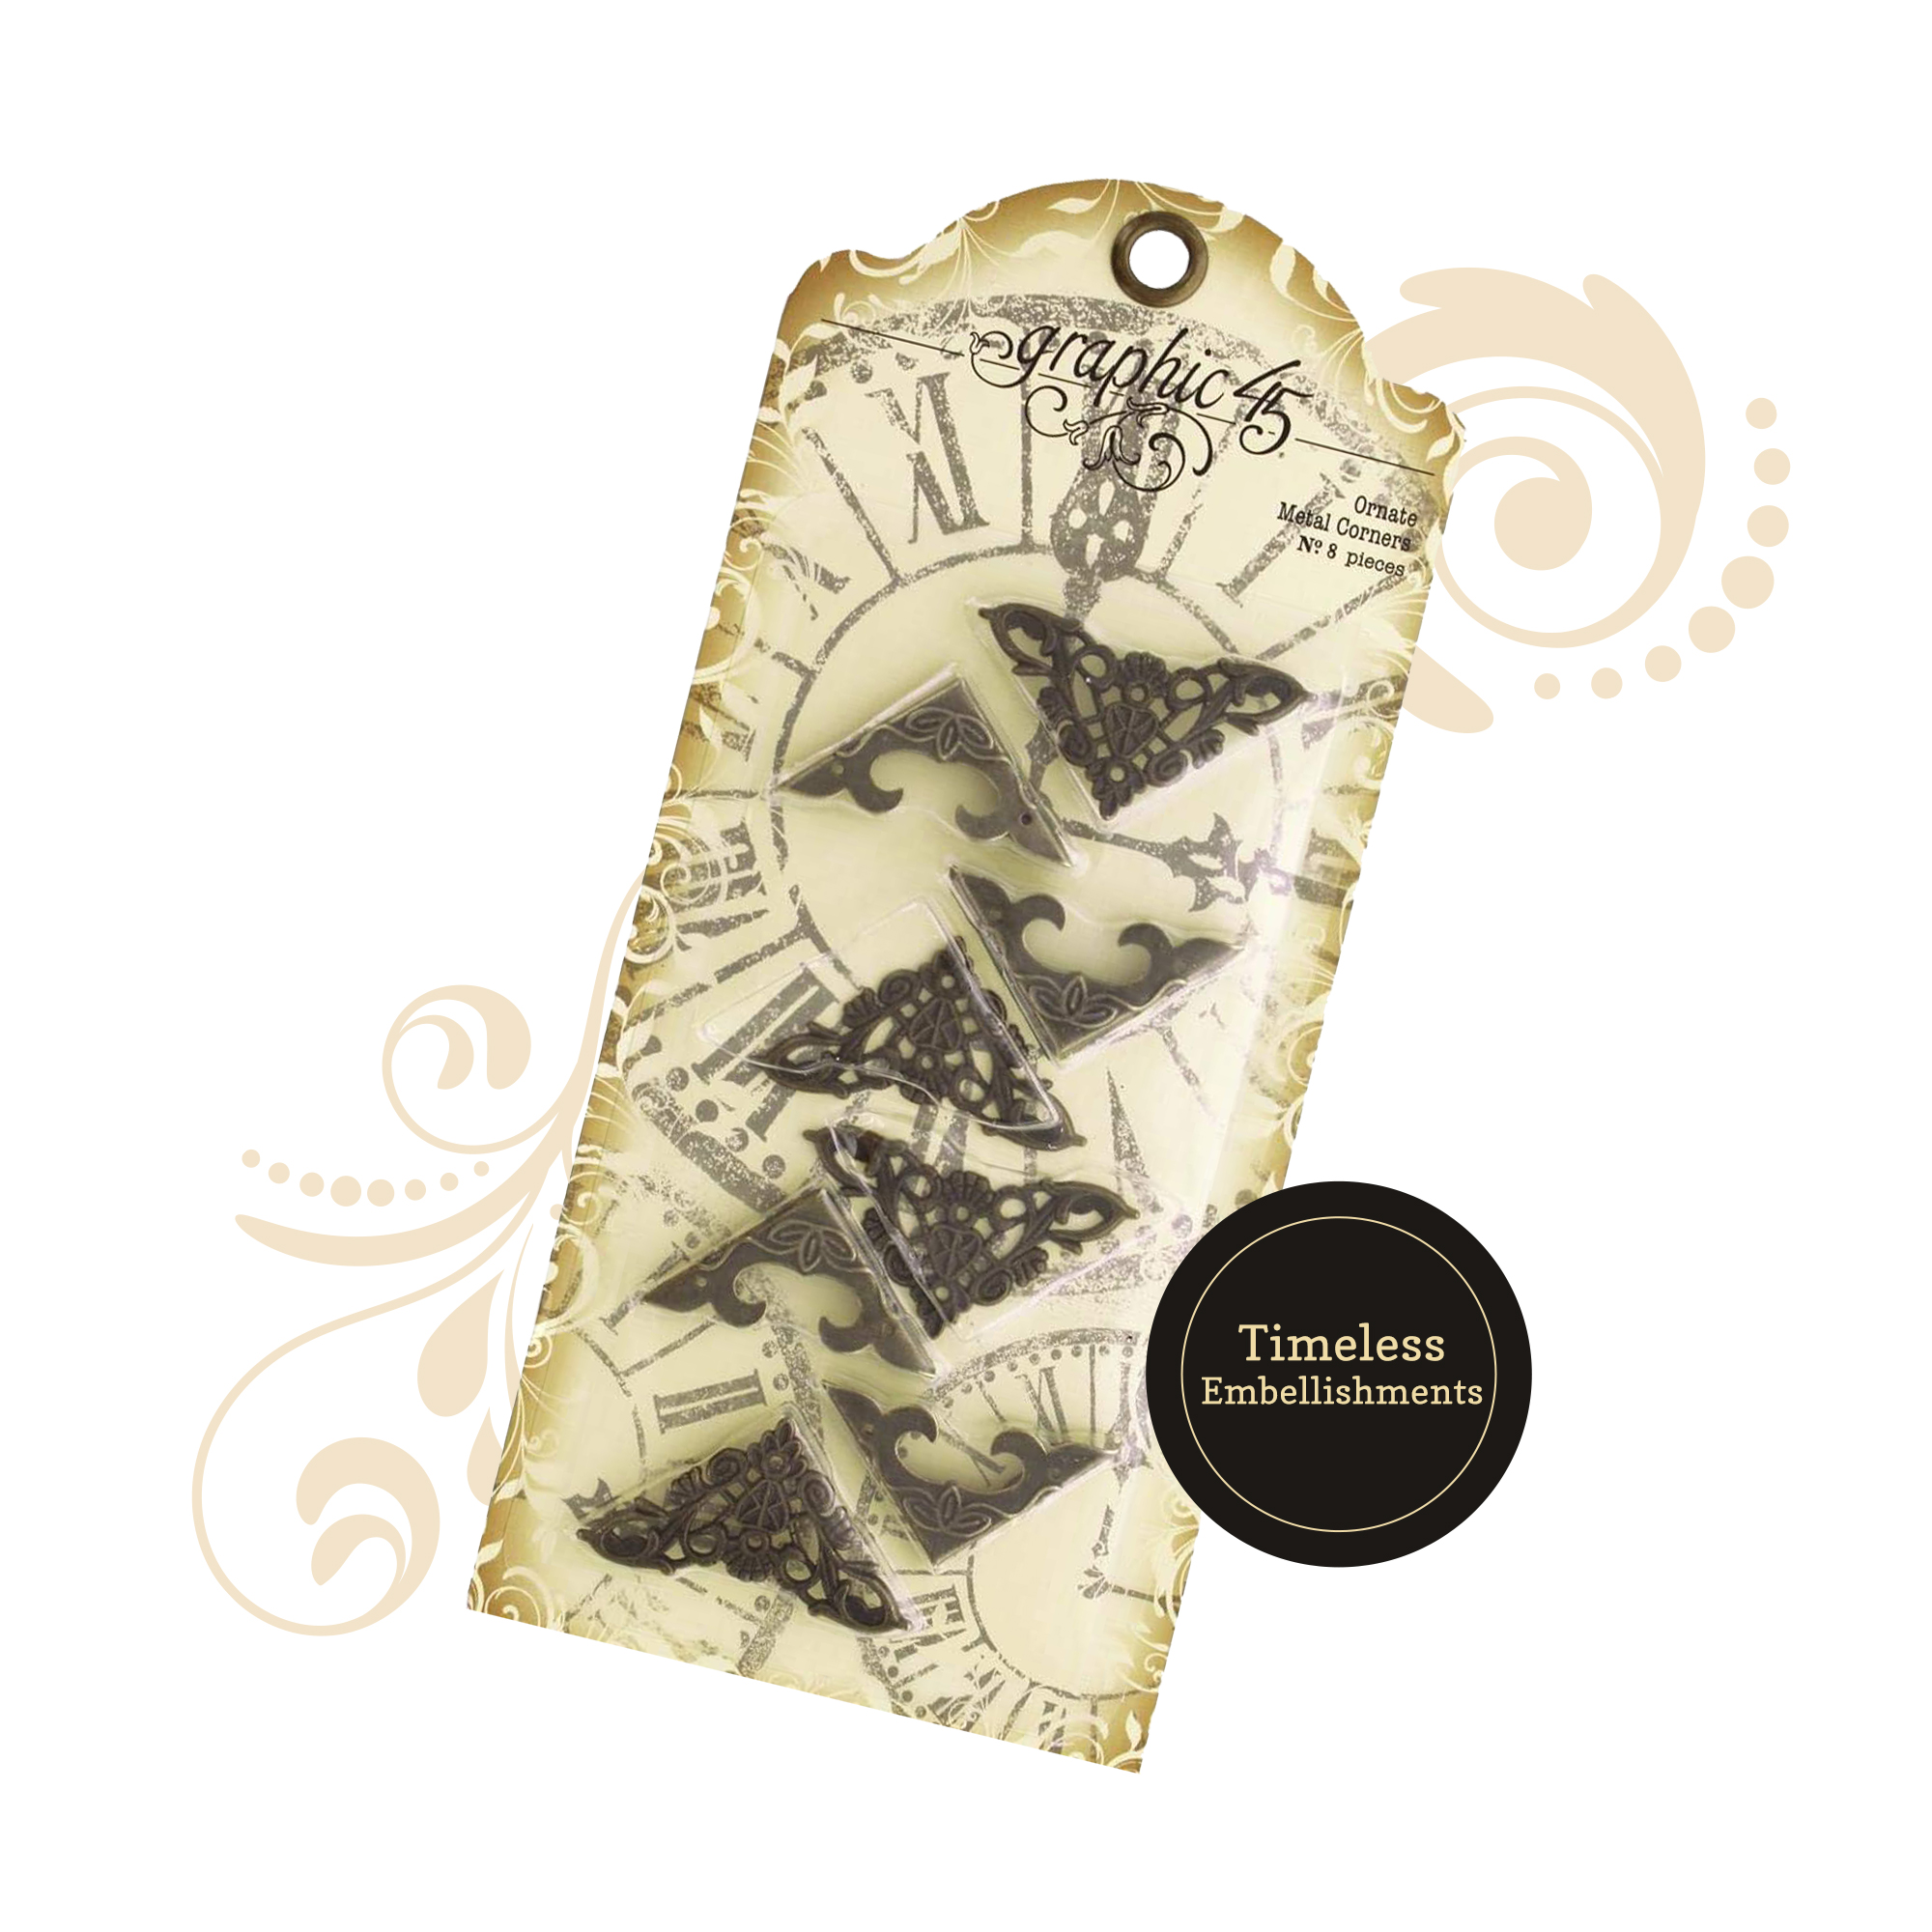
The metal corners on the top of the box were a bit hard to see on the darker paper I chose from the Enchanted Forest collection. So I lightly brushed them with bronze distress paint to brighten them up just a bit!
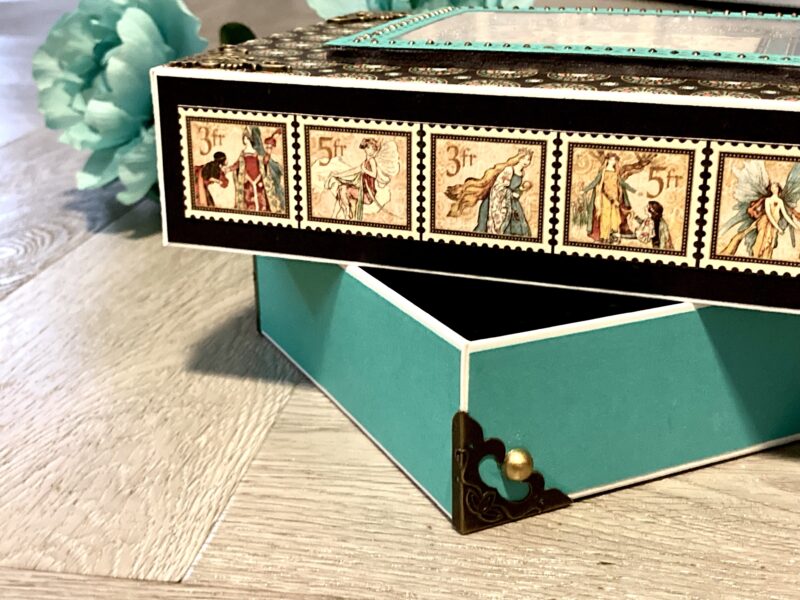
For the bottom corners of the box, I used the metal corners with the small shelf. Then, I added one gold Matte Pearl Gem to the center. The gems act as a “stop” for the lid to catch on, making the box easier to open.
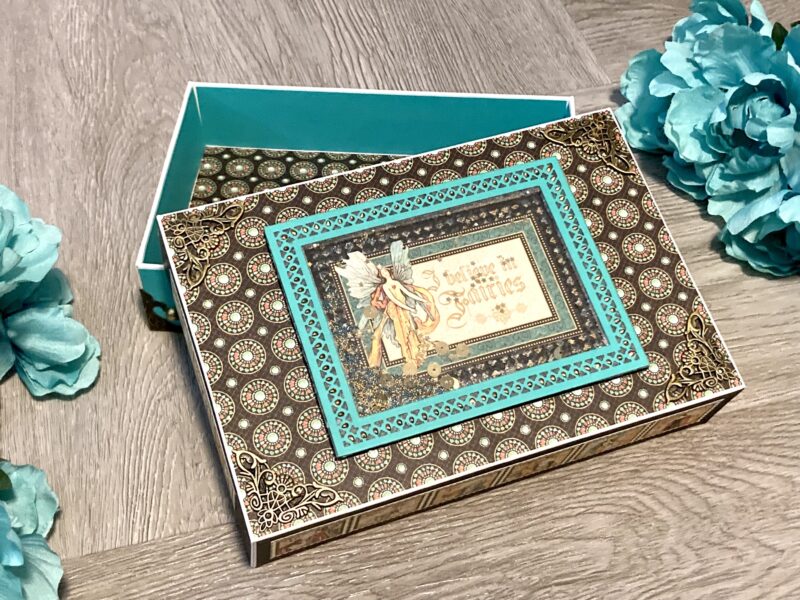
Since there is not a coordinating Patterns & Solids with the Enchanted Forest Deluxe Collector’s Edition, I am using plain coordinating cardstock to offset my chosen papers. Then, I used the patterned Graphic 45 papers as my main papers for the box top and inside base.
You can use this technique with any of your Graphic 45 collections. Grab your favorite, find some coordinating shaker bits, and give it a try! Don’t forget to show off your creations on social media and tag Graphic 45!
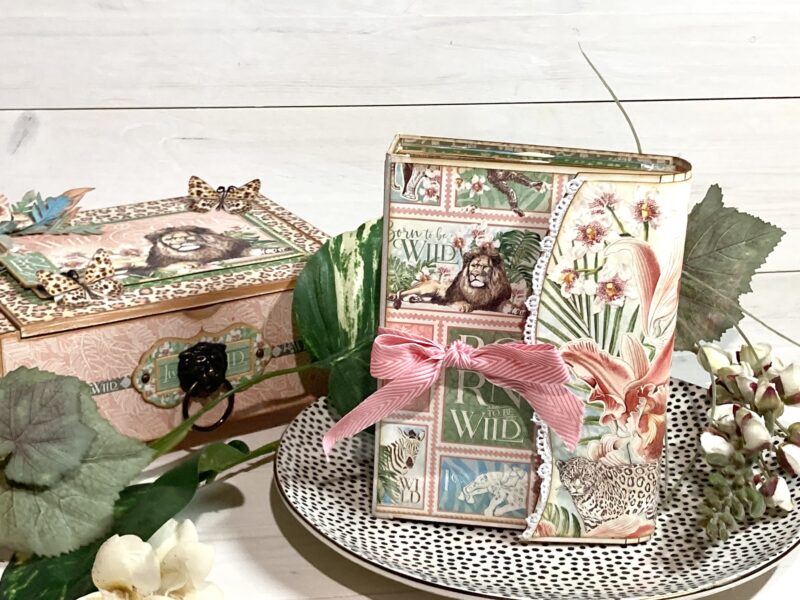
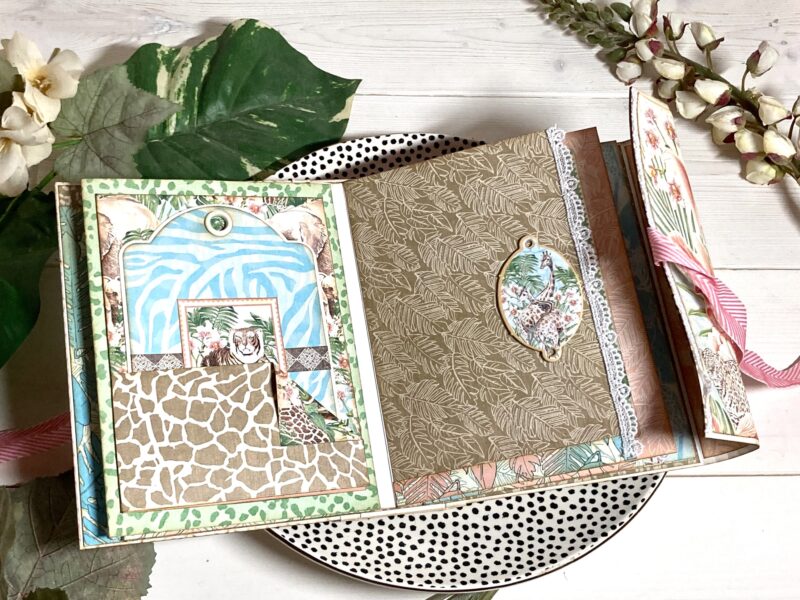
Hi crafty friends. This #G45LeveledUp project is inspired by one of my all-time favorite Club G45 projects. It was designed by Annette Green and is Volume 1 from 2021. The project features a unique wrap album cover that was included in the Club G45 kit. However, the SVG file is available in Annette’s Etsy shop so you can purchase her file and use your cutting machine to make one from chipboard. I have a similar cover in my shop made from MDF wood that I have adapted for my project and cut out of white mat board.
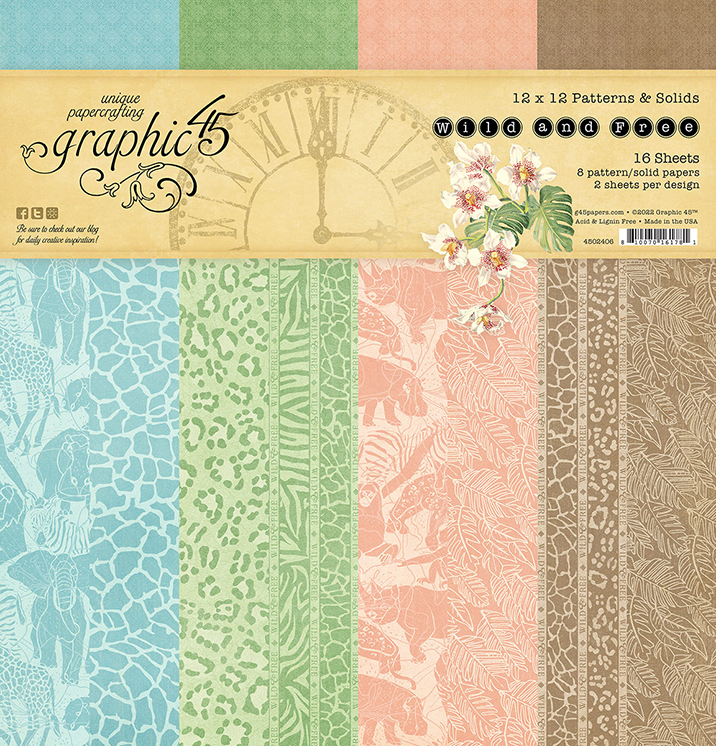
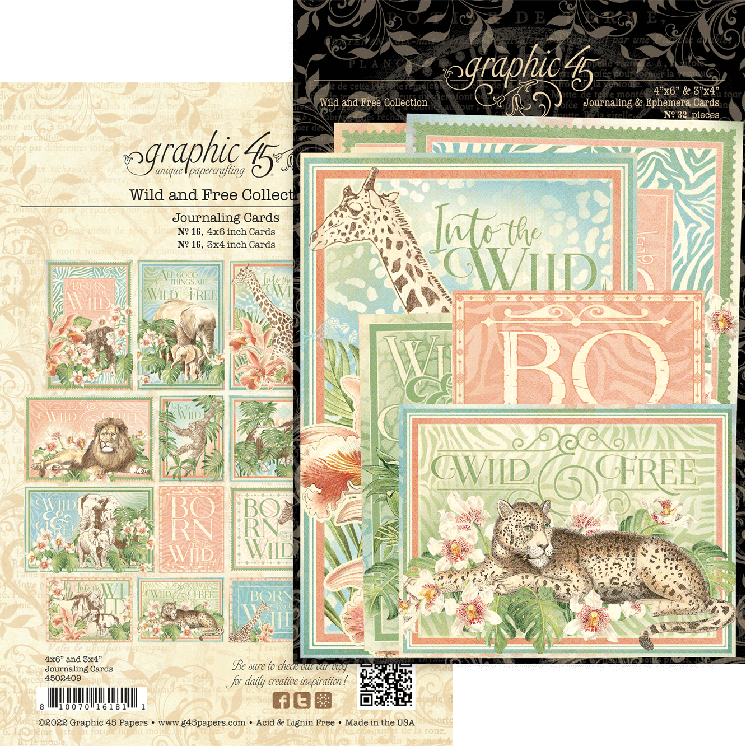
To make this project, it will be handy to have the Club G45 project sheet along with the instructions below. You can use any Graphic 45 paper collection to decorate your album, but I will be using the beautiful Wild and Free collection for mine and a complete supply list is below.
Graphic 45 Supply List
Wild and Free 12×12 Collection Pack
Wild and Free Patterns & Solids
Wild and Free Chipboard
Wild and Free Journaling Cards
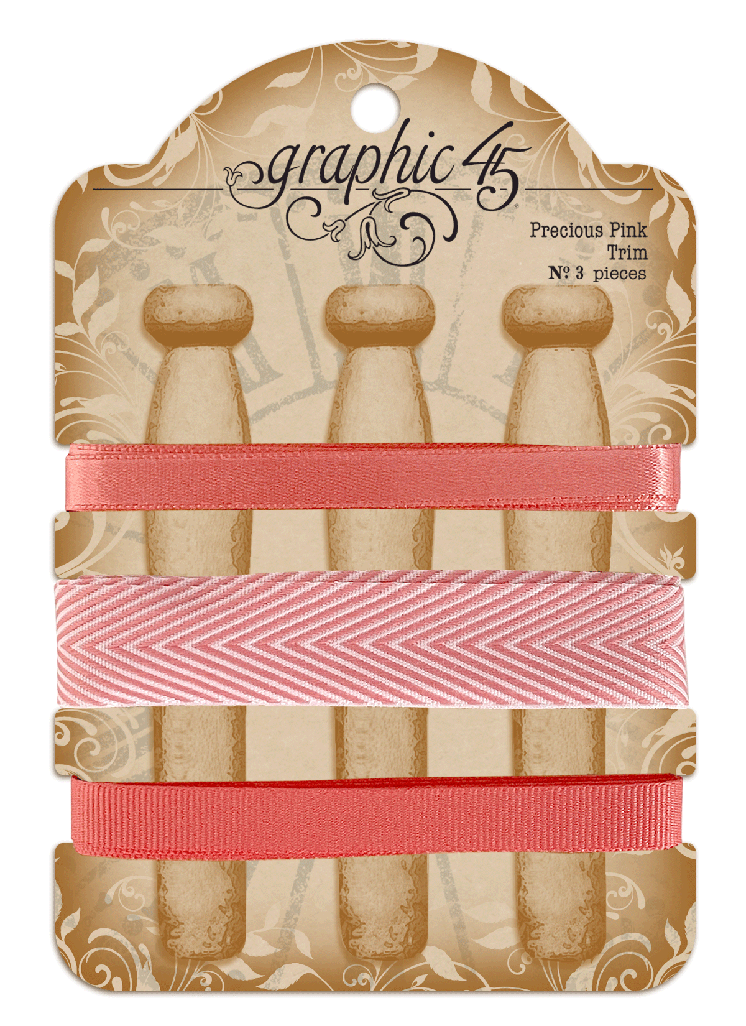
Graphic 45 Trim in Precious Pink
Graphic 45 Regular Tags in Ivory
Graphic 45 Regular Tag & Gears Die Set
Graphic 45 Washi Tape in white
Other Supplies
Chipboard cover
1 sheet of 8 ½” x 11” cardstock
28” thin white trim
Distress Ink
Scoring tool
Paper trimmer
Scissors
Pencil
Adhesive
Before following steps from the Club G45 tutorial, you will first need to cut or purchase your chipboard covers. Follow Steps 1-7, using Kraft cardstock if you are using chipboard, or matching cardstock if you are using a different cover. My cover is white so I will be using white cardstock to match.
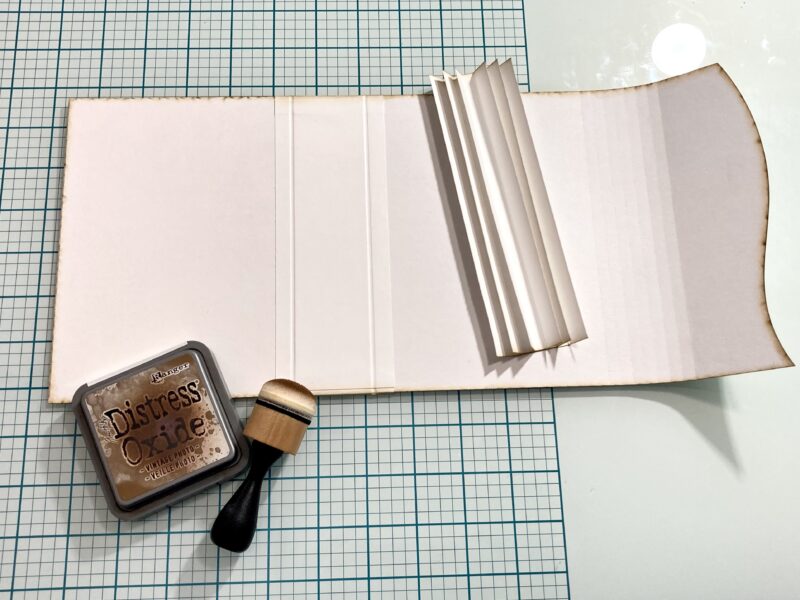
Steps 8-10: Follow the instructions in the Club G45 tutorial using a piece of brown Patterns & Solids paper.
Step 11: Add two strips of white Washi tape down the spine to reinforce where the spine and covers meet. Be sure to adhere the Washi down with a permanent adhesive such as wet glue or double-sided tape.

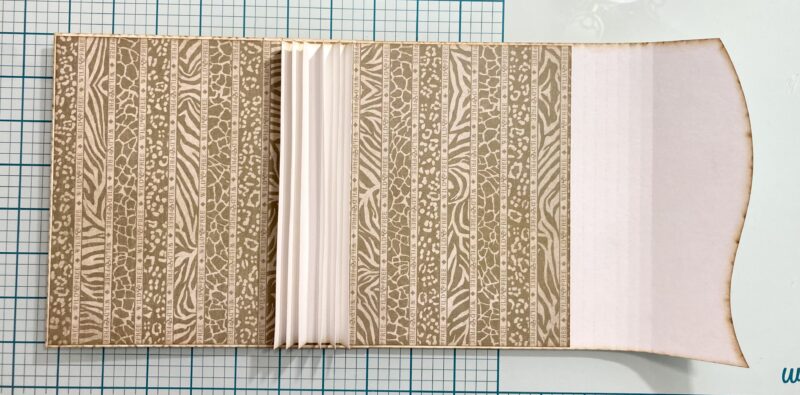
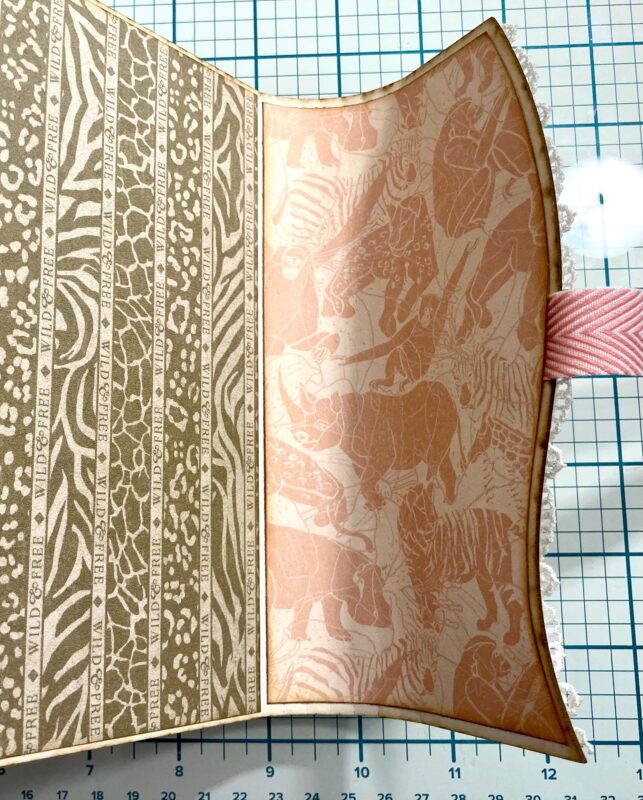
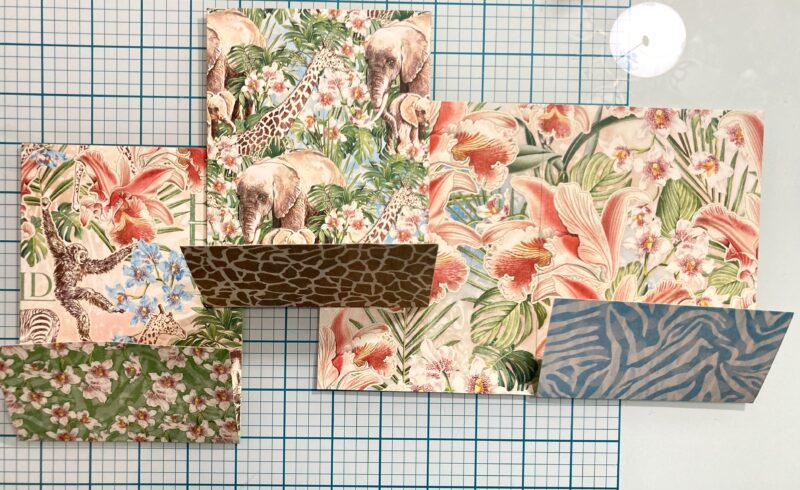
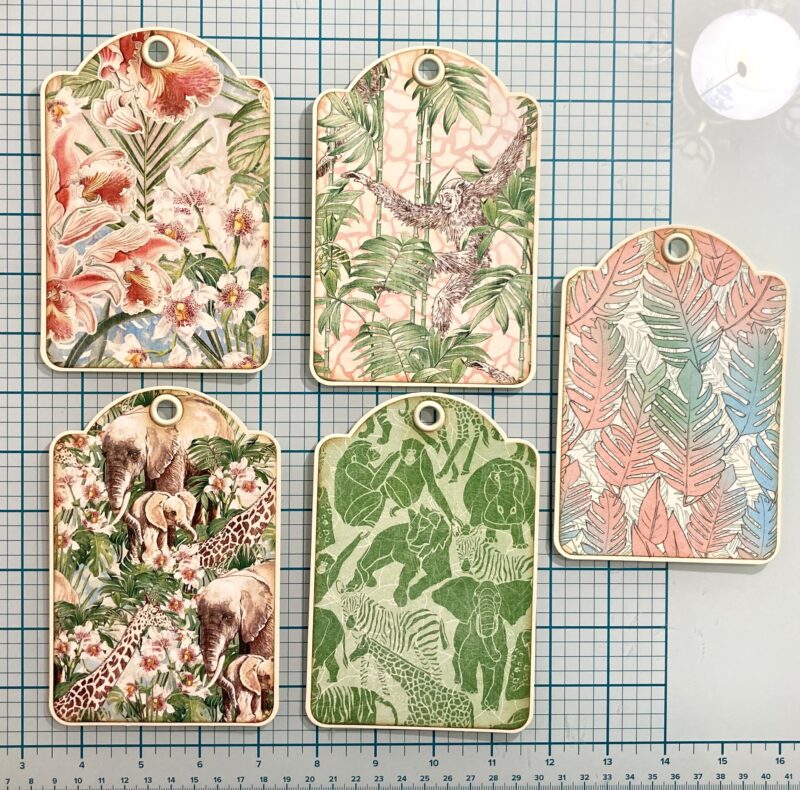
Cut a 12” x 6 ¾” piece of Wild and Free. Trace the curve of the album cover on the left edge and cut out. Trim the piece to 10 ⅛” x 6 ¾” for the curved section, and cut the next piece to 1 ½” so the image continues on the spine piece.
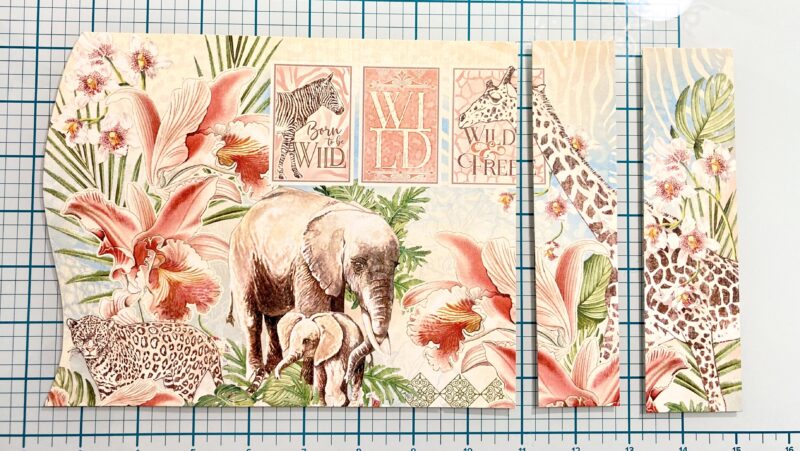
Use the curved piece as a template. Cut a piece of pink Patterns & Solids to 4 ¾” x 6 ⅞” (if using Annette’s cover) or 4” x 6 ⅞” (if using my cover). The curve should be on the right edge of this piece.
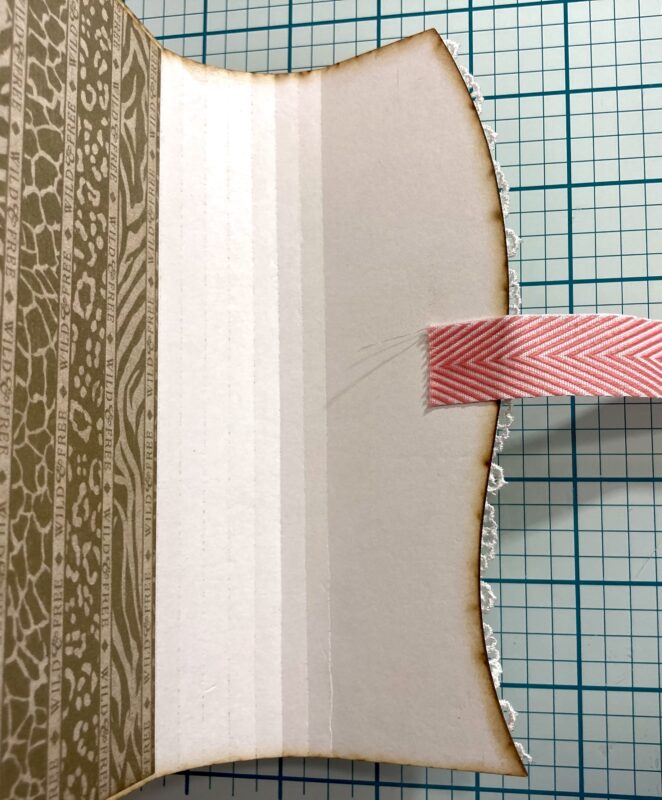
Step 12: cut a 7” piece of the thin white trim and adhere to the back side of Wild and Free along the curve. Then follow step 12 on the instructions from the Club G45 tutorial.
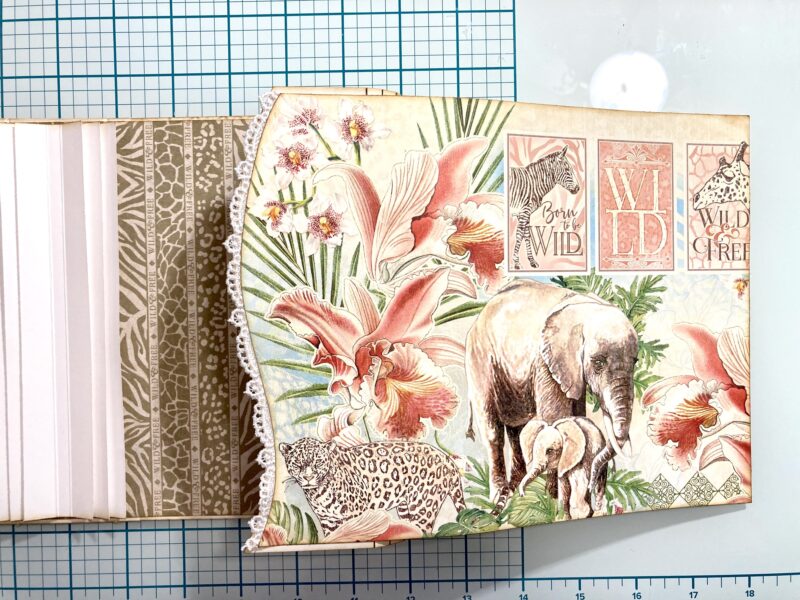
Step 13: Cut a piece of Graphic 45 trim to 11” and adhere to the center of the curve in the album from the inside.
Step 14: Cut a second piece of Graphic 45 trim to 11” and adhere to the right side of the spine in the center. Line the trim up with the first trim strip on the cover. Adhere the 1 ½” x 6 ¾” piece from step 11 to the outer spine to cover the ribbon.
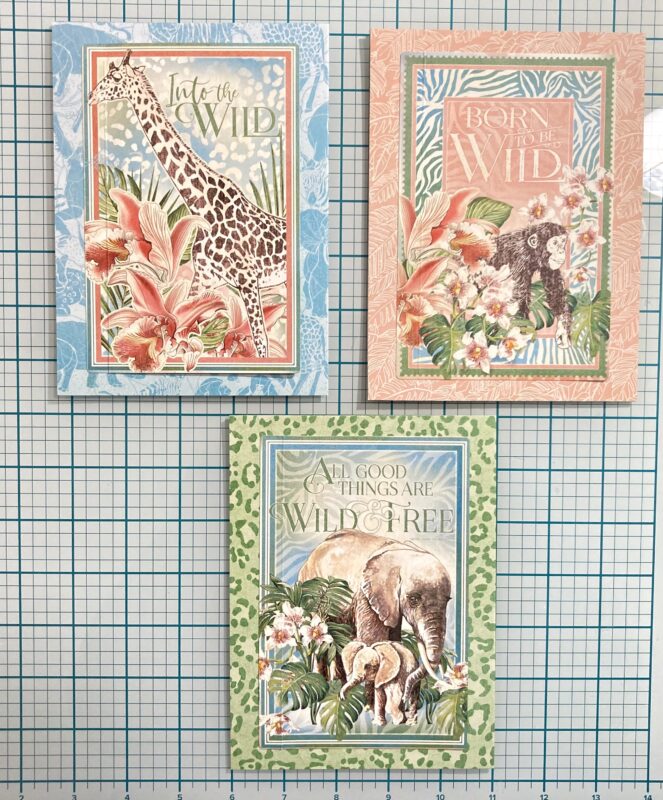
Cut the bottom right corner of Creatures Great and Small, cut a piece to 4 ¾” x 6 ¾” and adhere to the front cover.
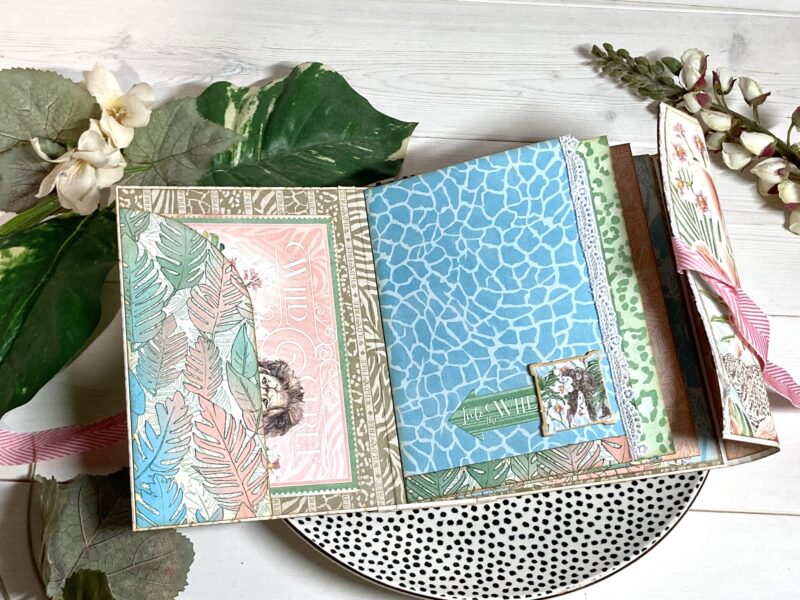
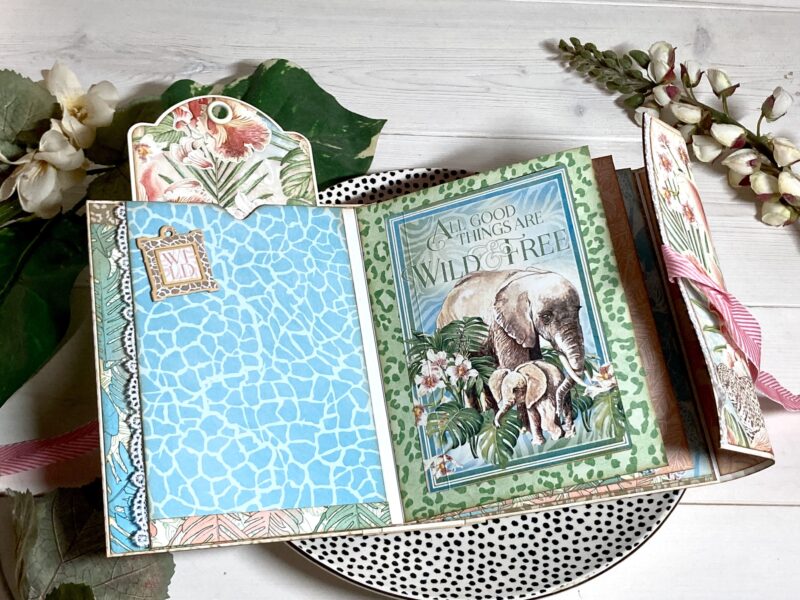
Step 15: Follow step 15 in the Club G45 tutorial using the b-side of Creatures Great and Small. I used my envelope punch board instead of a circle punch to notch my pocket. Then add a large journaling card to each pocket.

Step 16: Follow step 16 in the Club G45 tutorial to adhere the inside curved piece we cut in step 11.
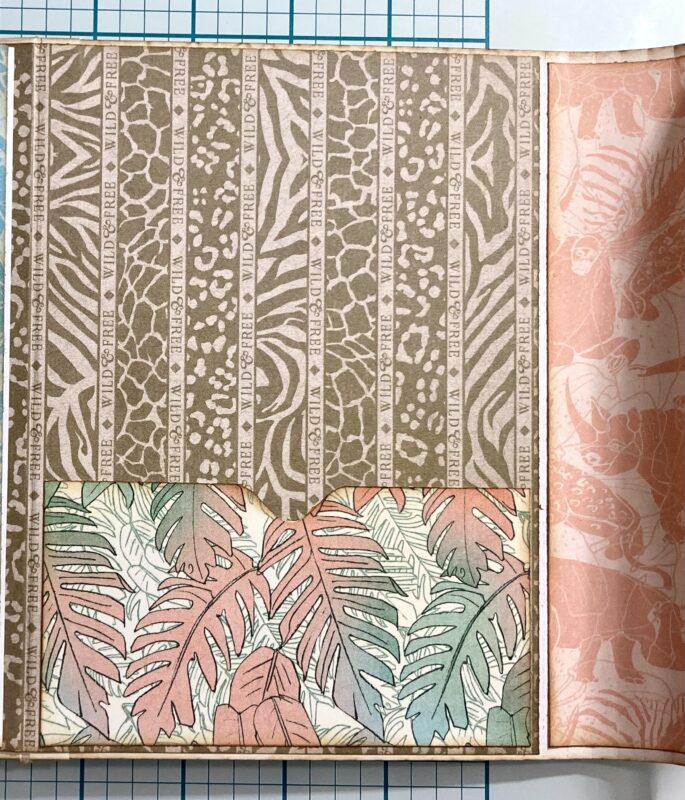
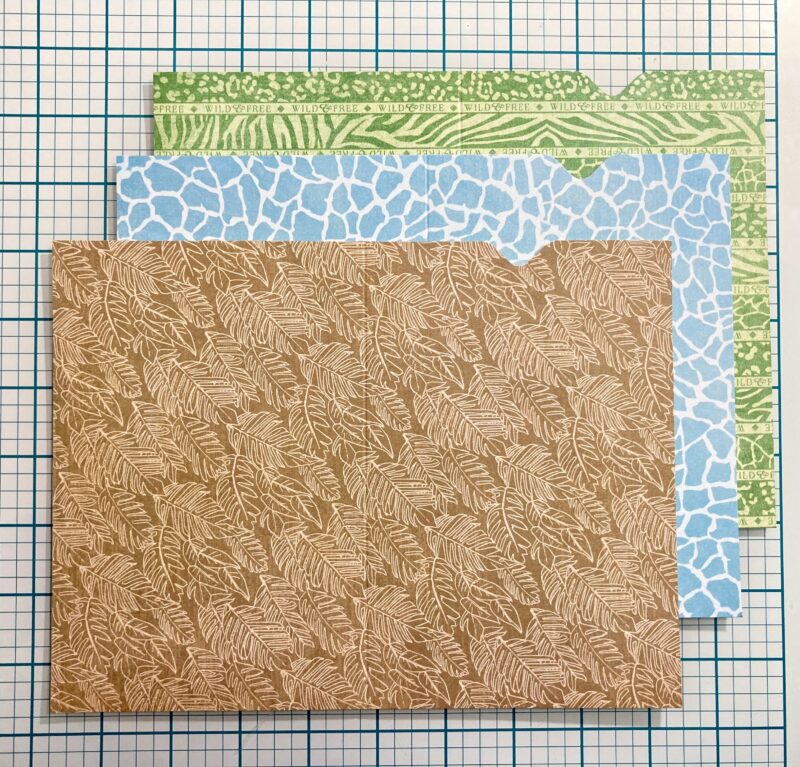
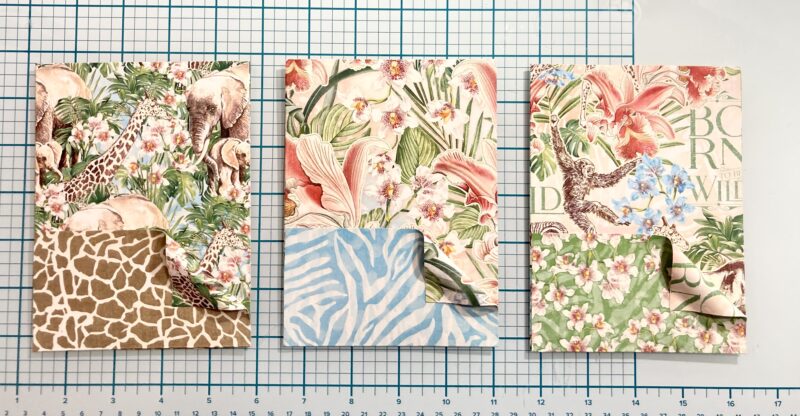
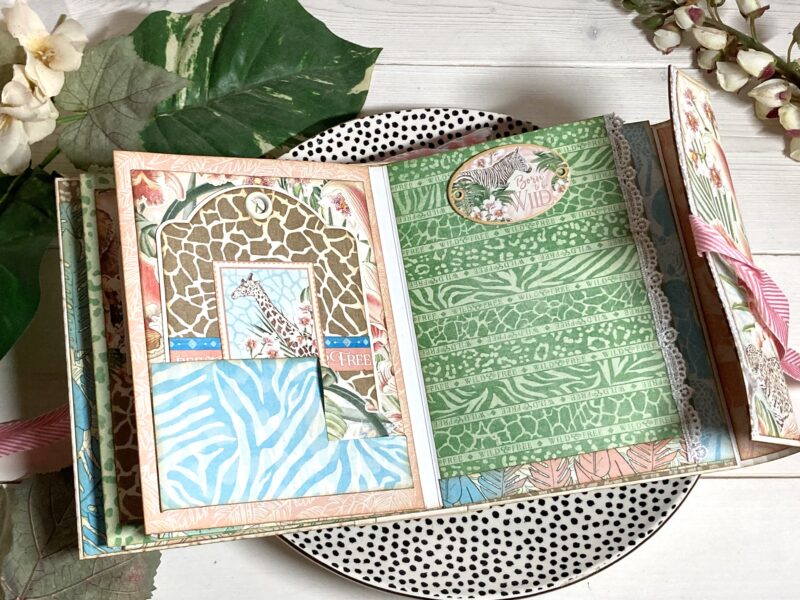
Steps 17-19: Follow steps 17-19 in the Club G45 tutorial for measurements using brown, blue, and green Patterns & Solids papers. I used my envelope punch board instead of a circle punch to notch my pockets.
Steps 20-21: Follow steps 20-21 in the Club G45 tutorial using the b-side of Creatures Great and Small. Then cut three pieces of thin white trim to 7” each and adhere to the right edge of each page on the front side.
Step 22: Follow step 22 in the Club G45 tutorial using blue, pink, and green Patterns & Solids papers.
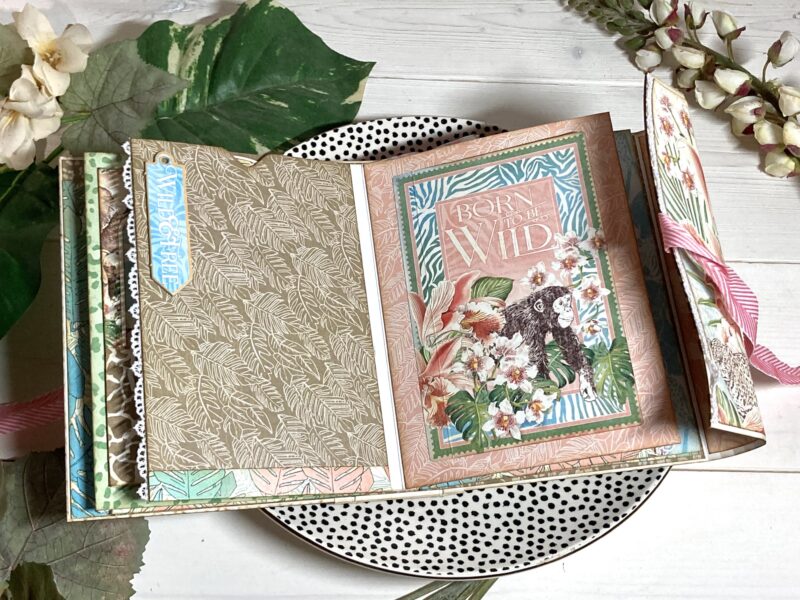
Step 23: Select three large journaling cards and score at ½” down the left side of each card and fold on the score lines. Follow step 23 on the Club G45 tutorial but only adhere the ½” tab on the journaling card to the front of the page so it will open up to the left for journaling/photos.
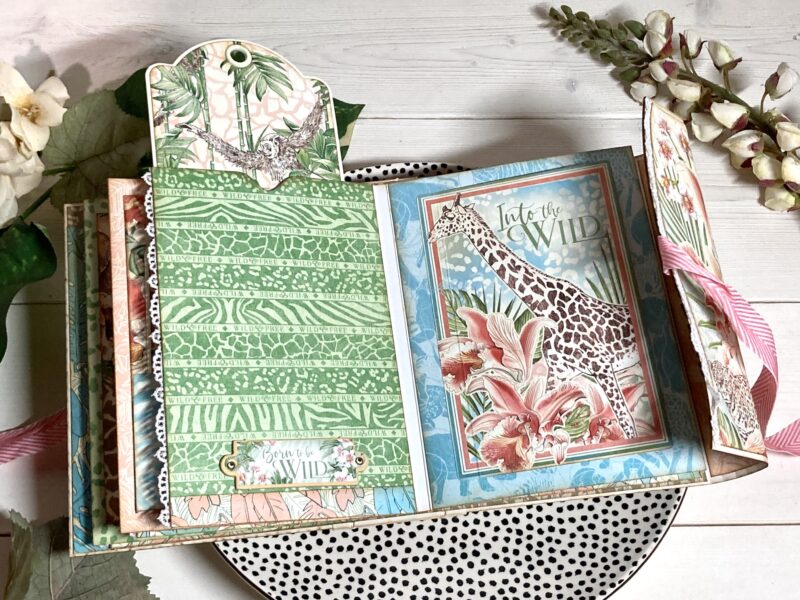
Step 24: Follow step 24 in the Club G45 tutorial using Savanna Babies, Lush and Lovely, and Mighty Menagerie papers.
Step 25: Fold the paper as instructed in the Club G45 tutorial, but only adhere the left side of the pocket to the page. Then curve the top right corner down approximately 1 ½” and adhere only the tip of the paper to the front of the pocket. Add a bit of adhesive to the small section on the bottom right to seal the pocket.
Step 26: Follow step 26 in the Club G45 tutorial.
Step 27: Adhere each unit from step 26 onto the remaining three hinges. Add adhesive to the tab section of the hinge and adhere the page. Be sure to seal the bottom of the pocket closed with a thin line of adhesive.
Step 28: skip this step. We will be using the Graphic 45 Regular Tags later.
Step 29: From Born to Be Wild, cut the three stamp images at the top and the border strips from the page. Trim the border strips so there are three sets measuring 4 ½” in length.

Steps 30-32: Follow steps 30-32 in the Club G45 tutorial using the pieces cut in step 29.
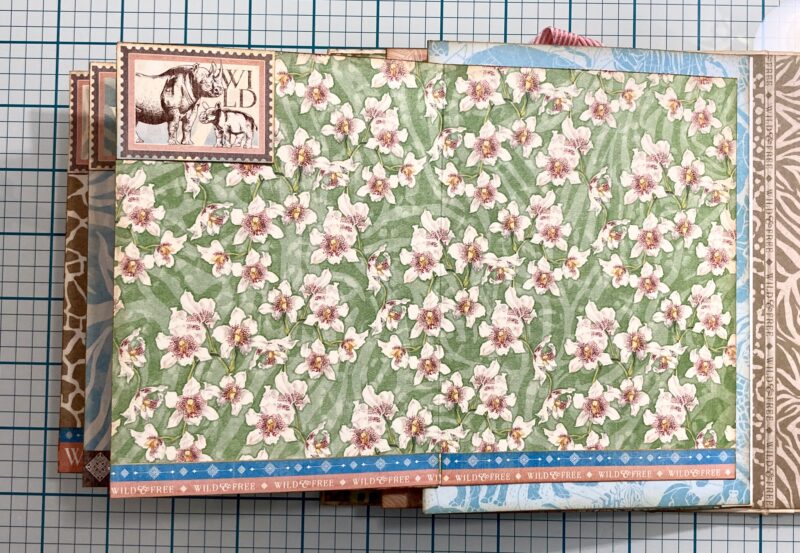
Step 33: Use the Graphic 45 metal die to cut 9 pieces of patterned paper for the tag fronts. I will leave my tag backs blank for photos or journaling. Cut the individual postage stamp images from Creatures Great and Small and use the leftover border strips for the front of some tags. Place one tag in each pocket of the album.
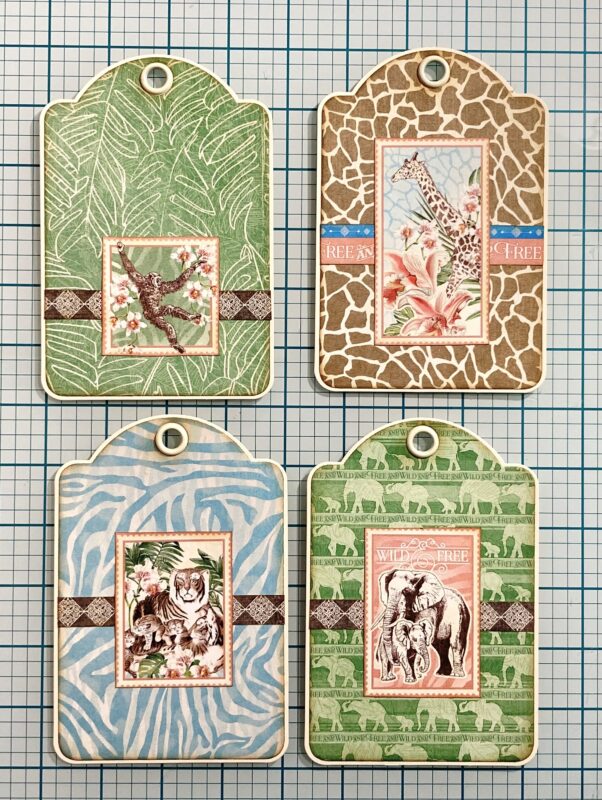
Step 34: Add chipboard pieces and stickers to the pages in the album for added decoration.

Optional: Add additional decorations to the front cover such as chipboard or some of the Graphic 45 flowers. I kept my cover flat and without any embellishments.
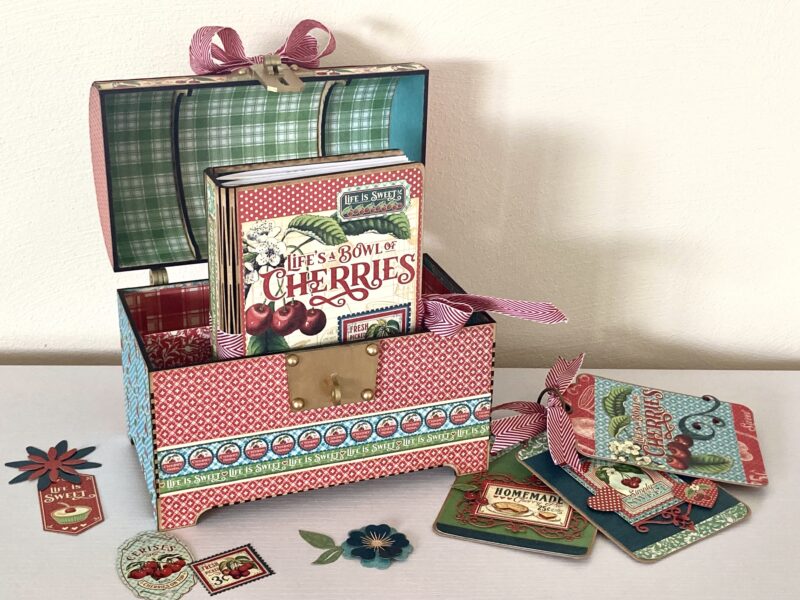
Hi crafty friends. It’s Kristine and this is my last post as a Graphic 45 Brand Ambassador. It has been a wonderful two years and I will miss designing for Graphic 45. This month, I will be completing a #G45Feature project, which will showcase how you can use an entire collection to create an amazing project (or three!). For my last project as a Brand Ambassador, I used the Life’s a Bowl of Cherries collection to create a recipe box with a matching recipe book. The box and book both are made from wood cut on a laser cutter. I also made a set of three tags just for fun!
There is a full length video tutorial for the recipe book on my YouTube channel. The book is made as a journal with two signatures for the recipe pages. I designed the recipe pages and they are available for free if you would like to make a recipe book yourself.
Graphic 45 Supply List for Recipe Book
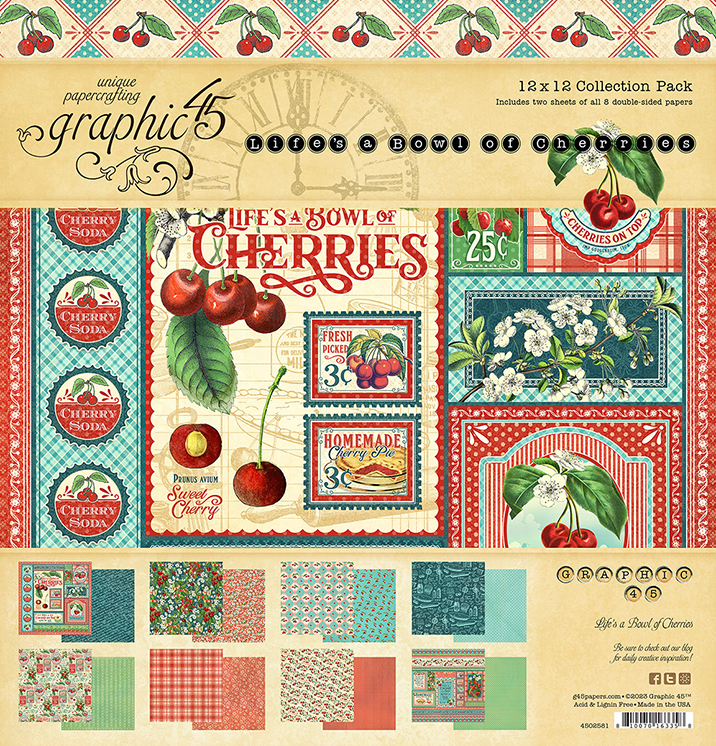
Life’s a Bowl of Cherries Collection Pack
Life’s a Bowl of Cherries Patterns & Solids Pack
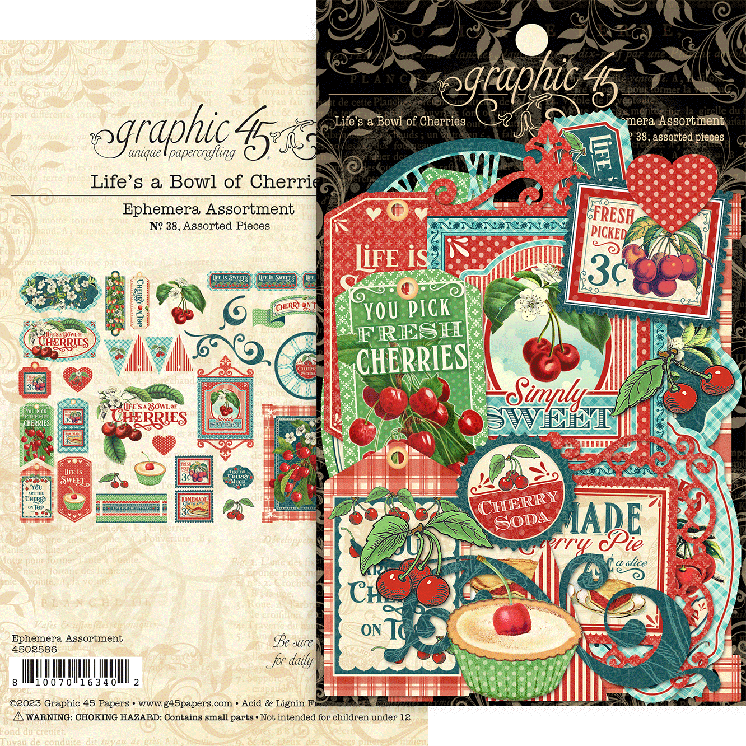
Life’s a Bowl of Cherries Ephemera Assortment
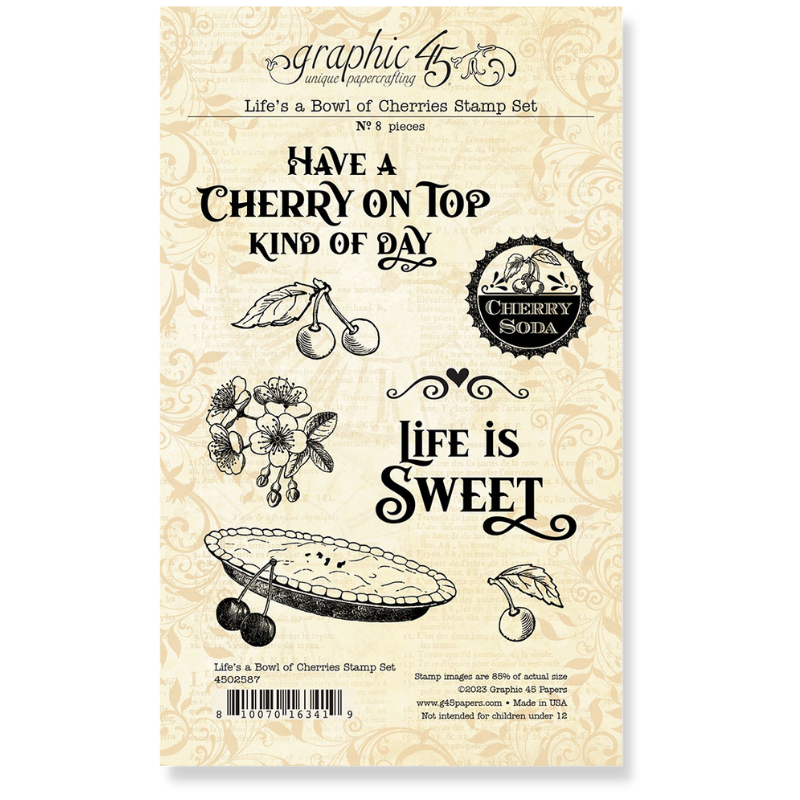
Life’s a Bowl of Cherries Stamp Set
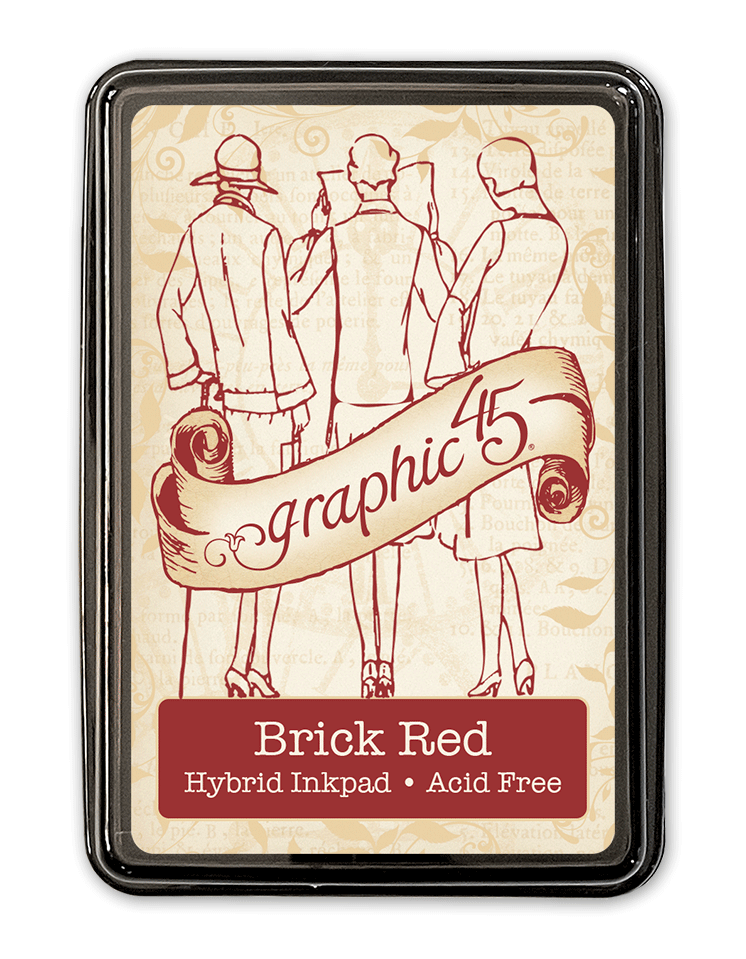
Graphic 45 Ink in Brick Red
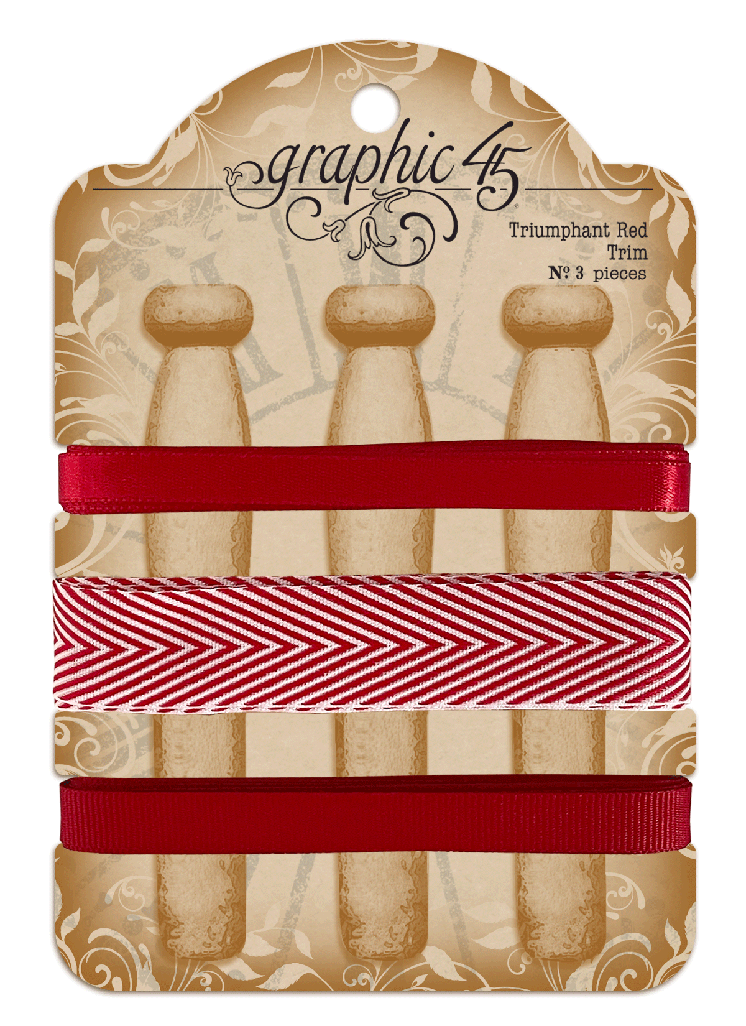
Graphic 45 Trim in Triumphant Red
Other Supplies
Journal cover (I am using my own wooden design, but you can use chipboard or an old book, too)
Journal pages (I designed my own for the project and they are available for free here)
Book binding thread or twine
Sewing needle
Basic craft supplies: paper trimmer, scoring tool, scissors, pencil, adhesive
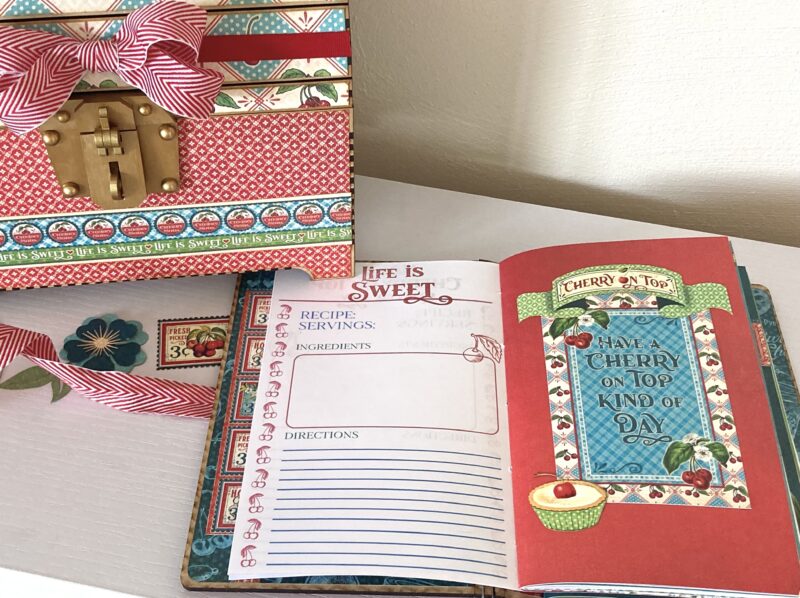
Inside the recipe book, I used the “Life is Sweet” and “Have a Cherry on Top Kind of Day” stamps from the set. Paired with the Brick Red ink, the stamps give the pages some added color and bring the collection to the printable pages.
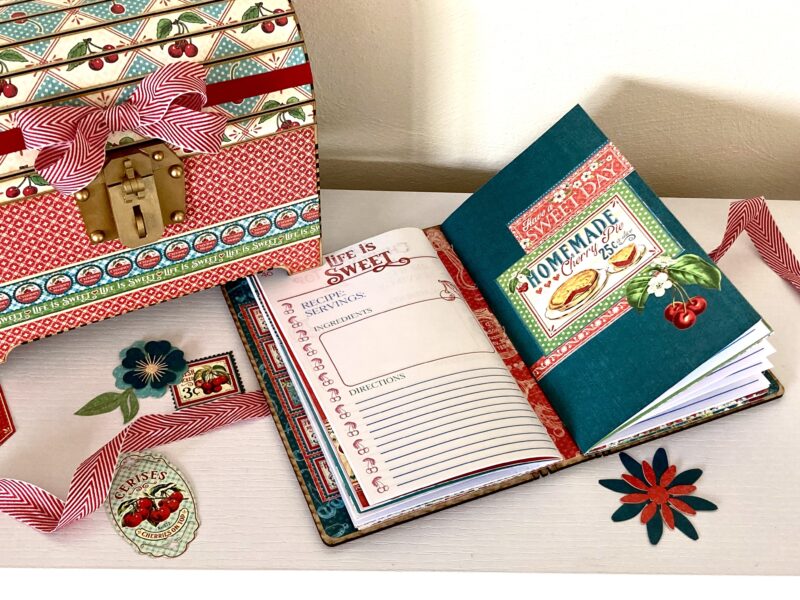
The folders are constructed from the Patterns & Solids papers and then decorated with the cut apart cards and borders from the 12×12 collection pack. Inside, the pockets are decorated with prints from the collection pack.
The front cover is decorated with the main image from the signature sheet in the collection. I trimmed it down to fit my wooden cover and then added two of the die cuts from the Ephemera Pack for a little extra. Of course, the Triumphant Red trim is the perfect match for this collection so I used it for a closure on the recipe book as well as a sweet bow on the recipe box.
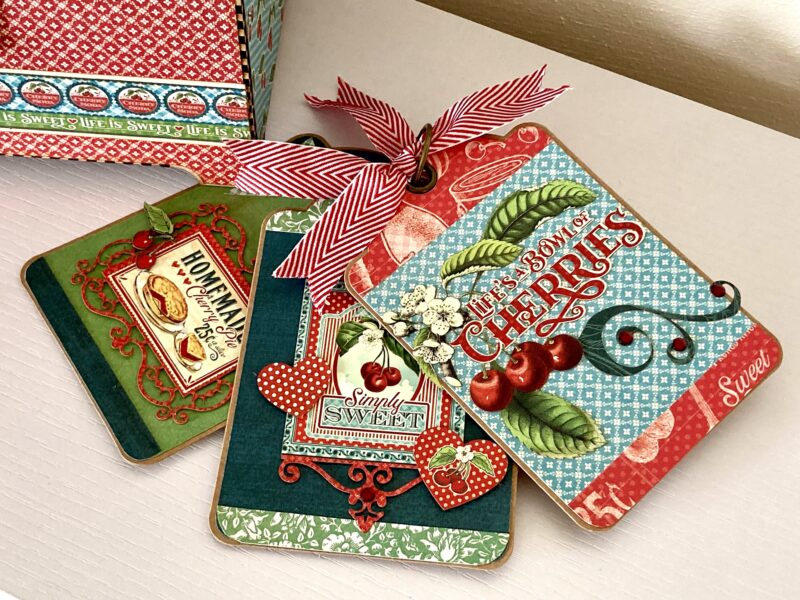
I pulled out a few of my leftover regular size Kraft Graphic 45 tags and my metal dies to create this tag trio. I used some of the scraps from my folders to create the base of the tag and then simply layered some of the die cuts from the Ephemera Assortment to the front. The Triumphant Red trim finishes the tags off. They’re tucked into my recipe box, behind the recipe book, as an “extra” for the recipient.

There is a full tutorial that will show you step-by-step how to create the recipe book. The cutting guide below is included as a reference, but I will show in the video how to cut and fold all of the papers. I also will show you how I stamped my pages, and the process for sewing the signatures into the book is included.
Recipe Book Cutting Guide
Journal pages (printed double sided at 100%): trim ⅜” from the long edges (top/bottom of pages) and ¾” from the short edges (left and right side of pages). Score in the middle at 4 ¾” and fold in half. Print as many pages as you want in your book.
Folder Base: use the Patterns & Solids to cut folders to 7 ¾” x 9 ½”. Score at 4 ¾” on the 9 ½” side.
Folder Pocket: use the 12×12 collection pack to cut pieces to 3 ½” x 10 ½”. Score at ½” 5 ¼”, and 10” on the 10 ½” side. Score at ½” on the 3 ½” side. Miter the bottom corners and fold on the score lines. Cut the vertical center of the pocket at a slight angle to create a V so the pocket will lay flat when folded. On the ½” tab at the bottom, cut a small V but do not cut all the way to the score line.
I hope you will follow along and enjoy the tutorial. A special thank you to the Graphic 45 family for the amazing two years as a Brand Ambassador. I continue to be inspired by the gorgeous Graphic 45 papers and cannot wait to see what’s next. If you’d like to follow me, I can be found on YouTube, Facebook, and my website. Until next time, happy crafting!” ~Kristine