Hello, G45ers!
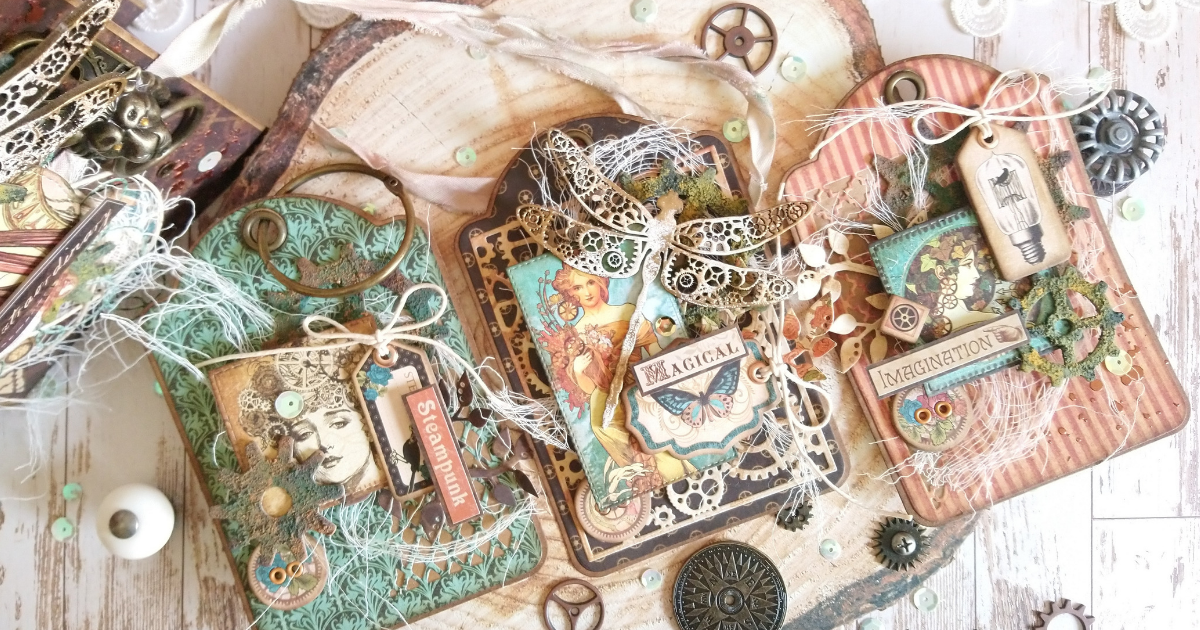
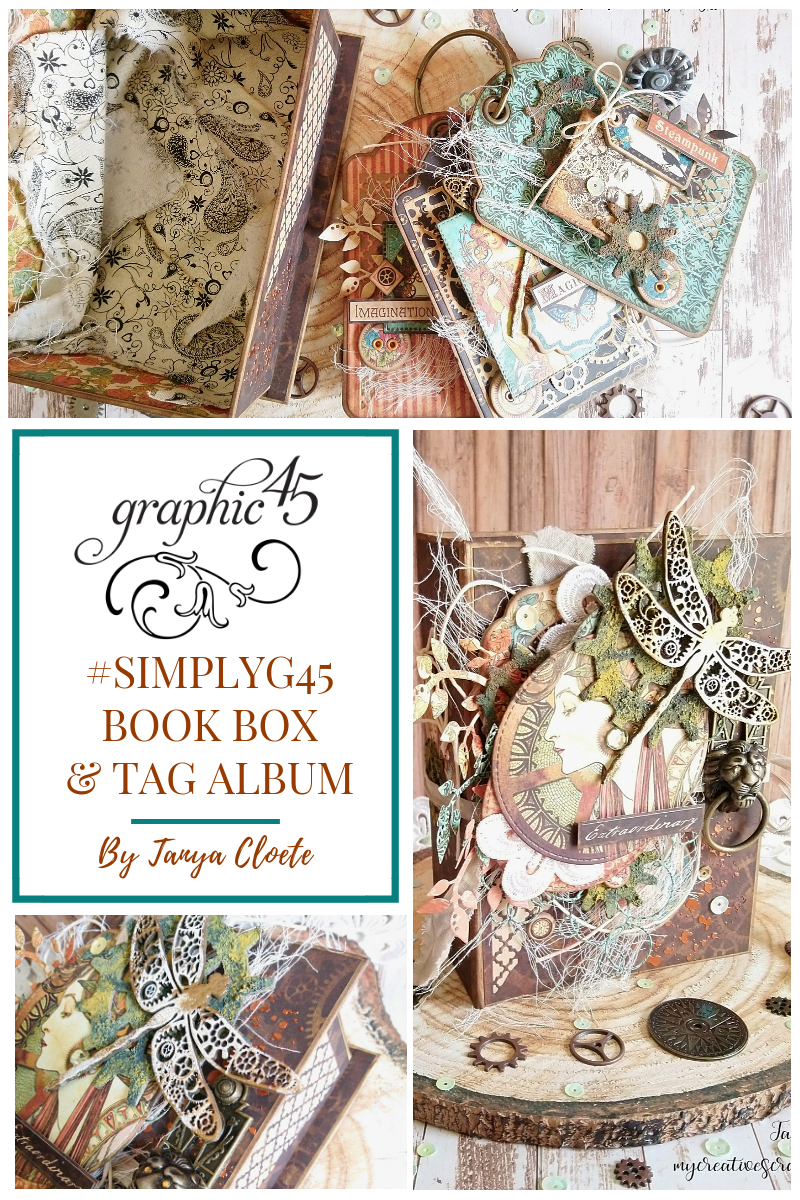
Welcome to the Graphic 45 blog. We encourage you to pull out your metal dies, papers and try out one of the handy tips featured here. The amazing Book Box & Tag Album has been created by our talented Brand Ambassador, Tanya Cloete. Tanya has used our Steampunk Debutante paper collection, Book Box, Regular Tag Staples, and Regular Tag & Gears Dies to create this memory keeping masterpiece.
Steampunk Debutante Book Box
By Tanya Cloete
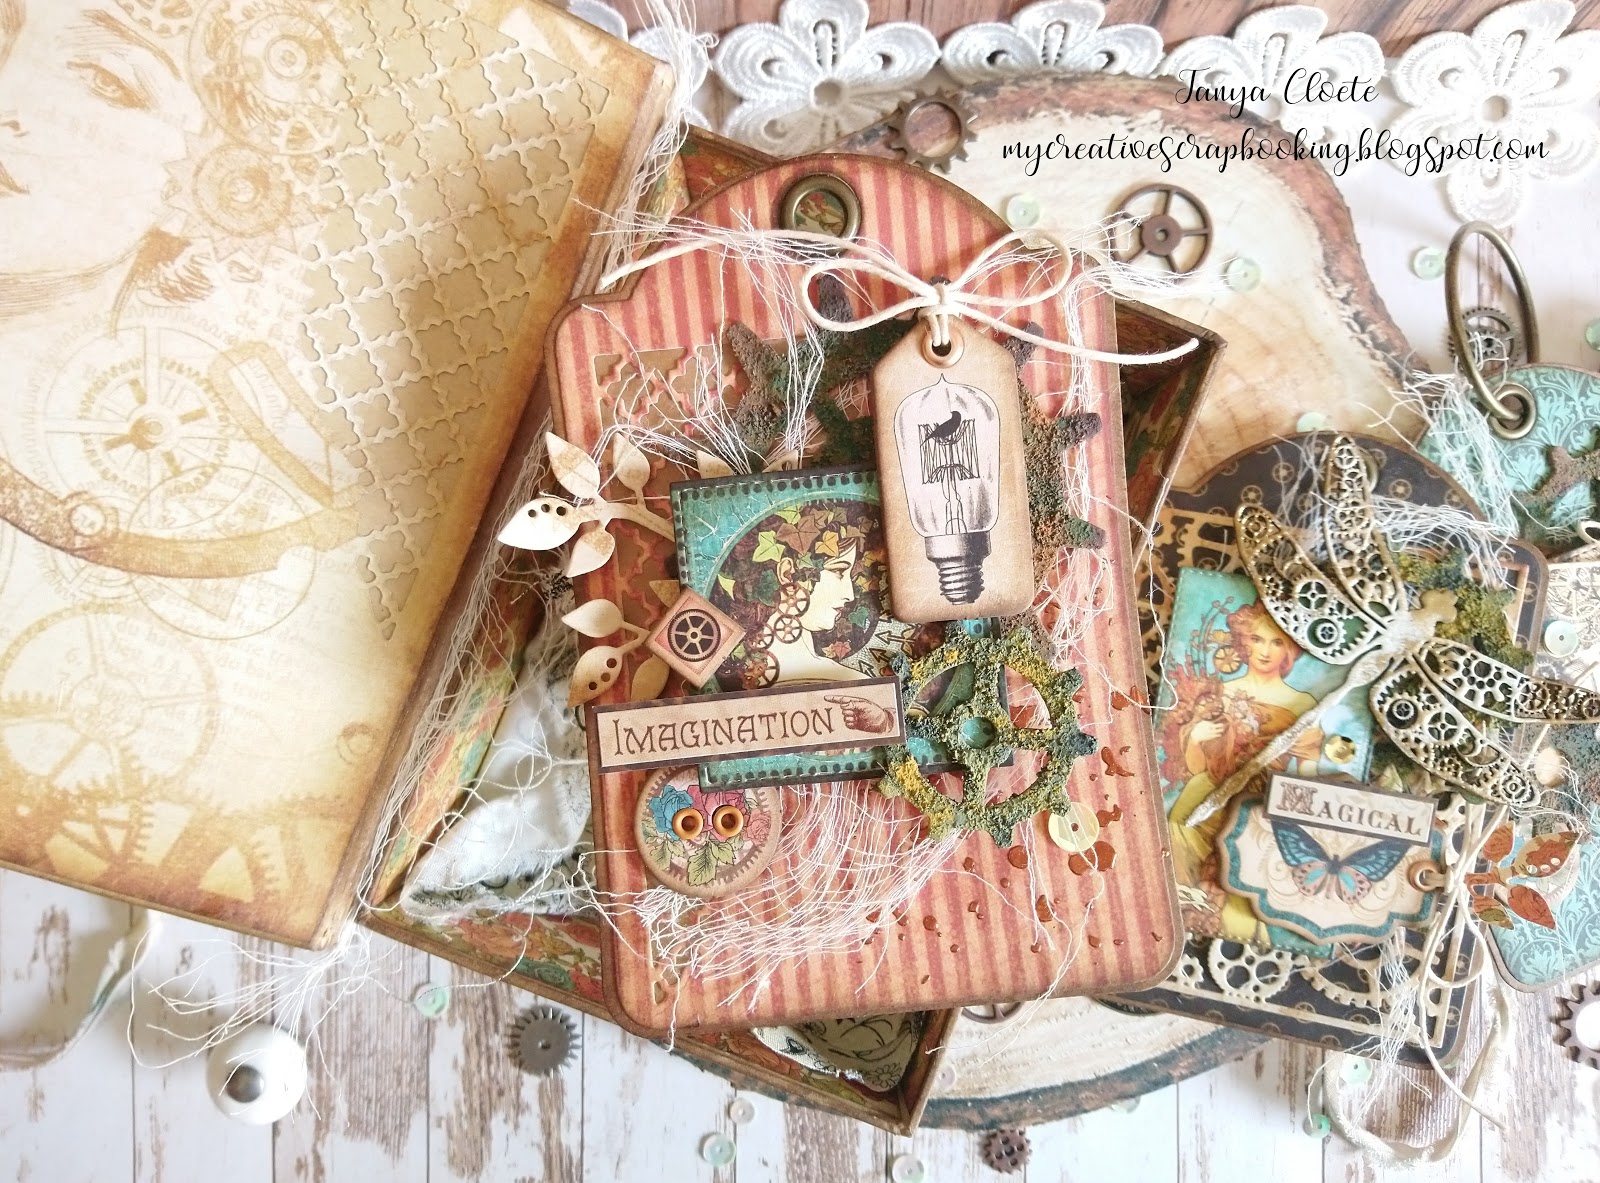
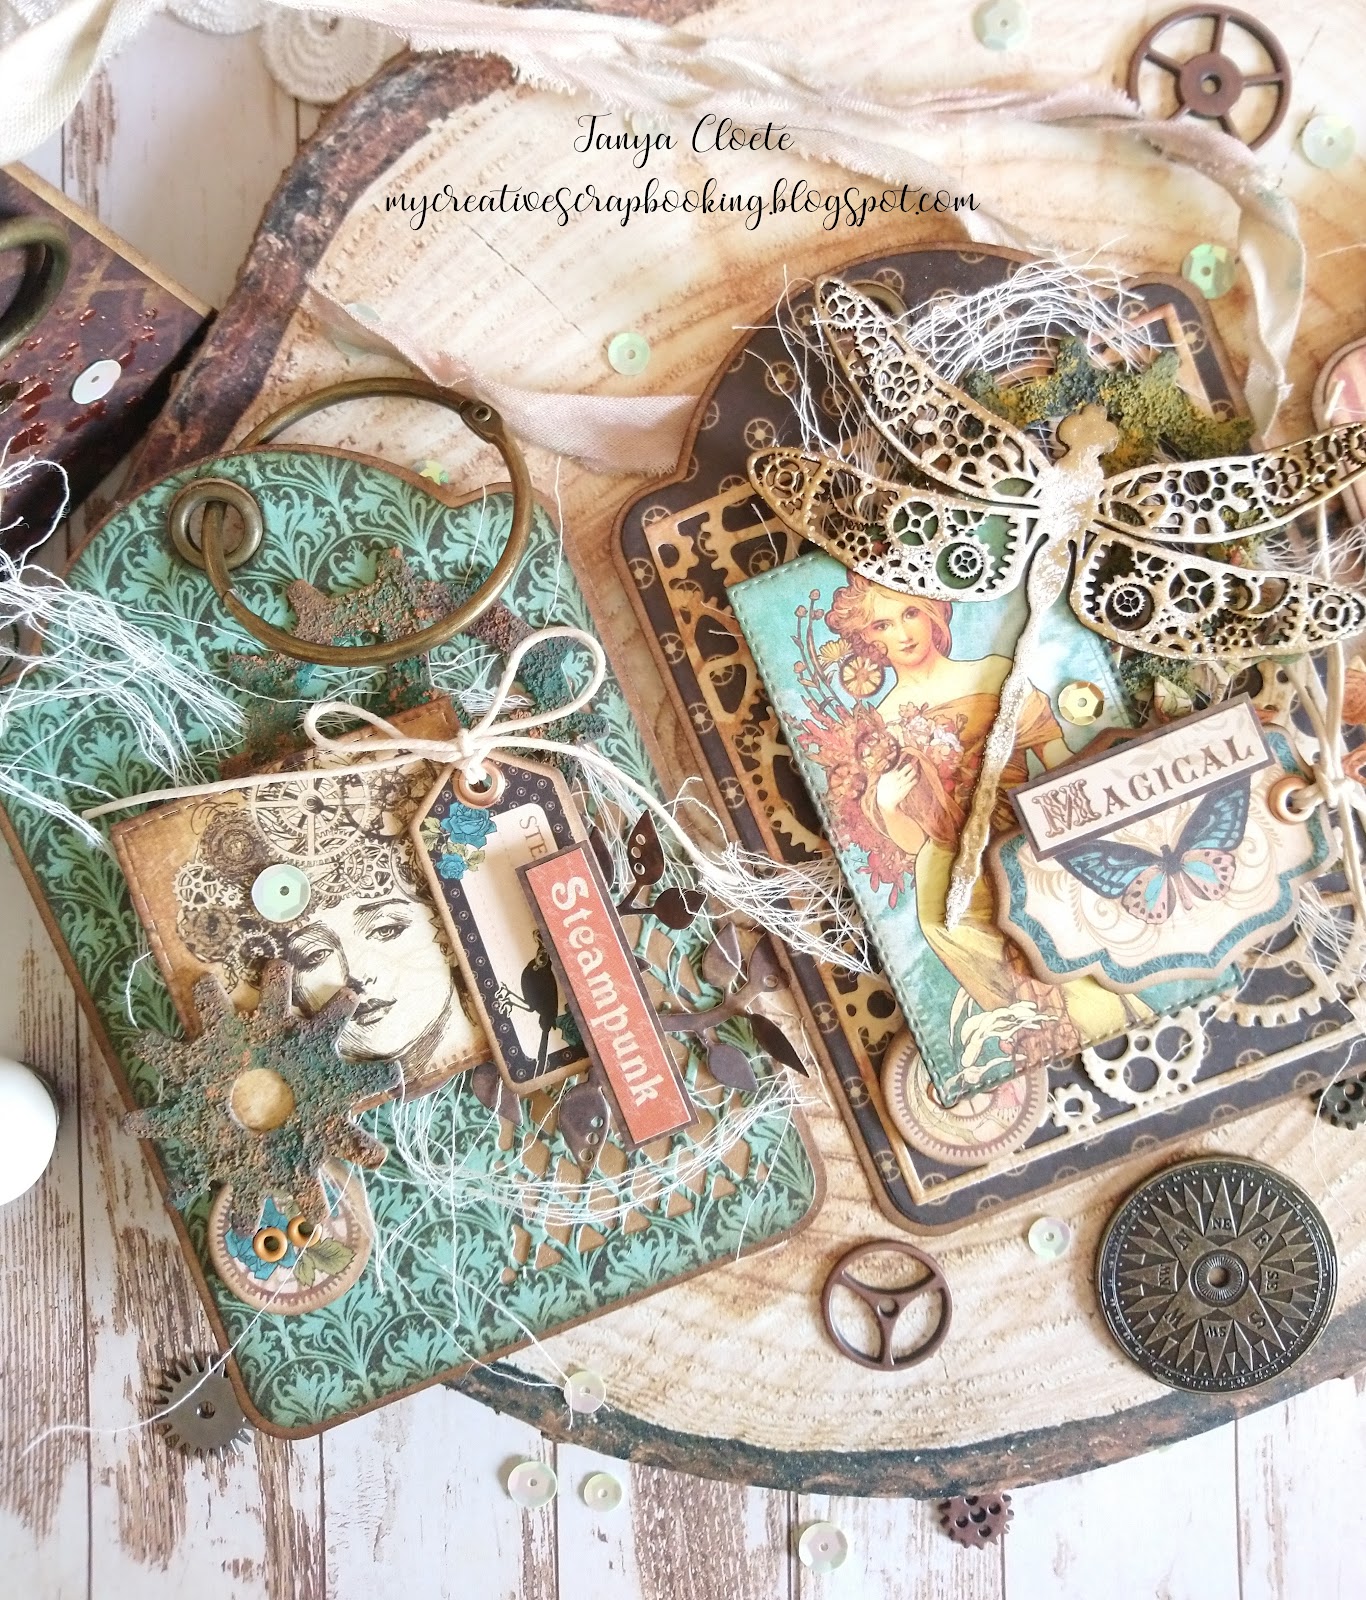
“Hello, dear G45ers! Happy to share with you my #SimplyG45 project for this month featuring the awesome Steampunk Debutante DCE! I have also used the Graphic 45 Book Box Staples. I just love these boxes they are lovely to create with and so versatile. Love that they come with adorable tags too! I have used lots of cutting dies and mixed media products to put this all together.
Herewith the Supplies and Instructions you may use to recreate such a project:
Graphic 45 Supplies:
Steampunk Debutante – Deluxe Collector's Edition
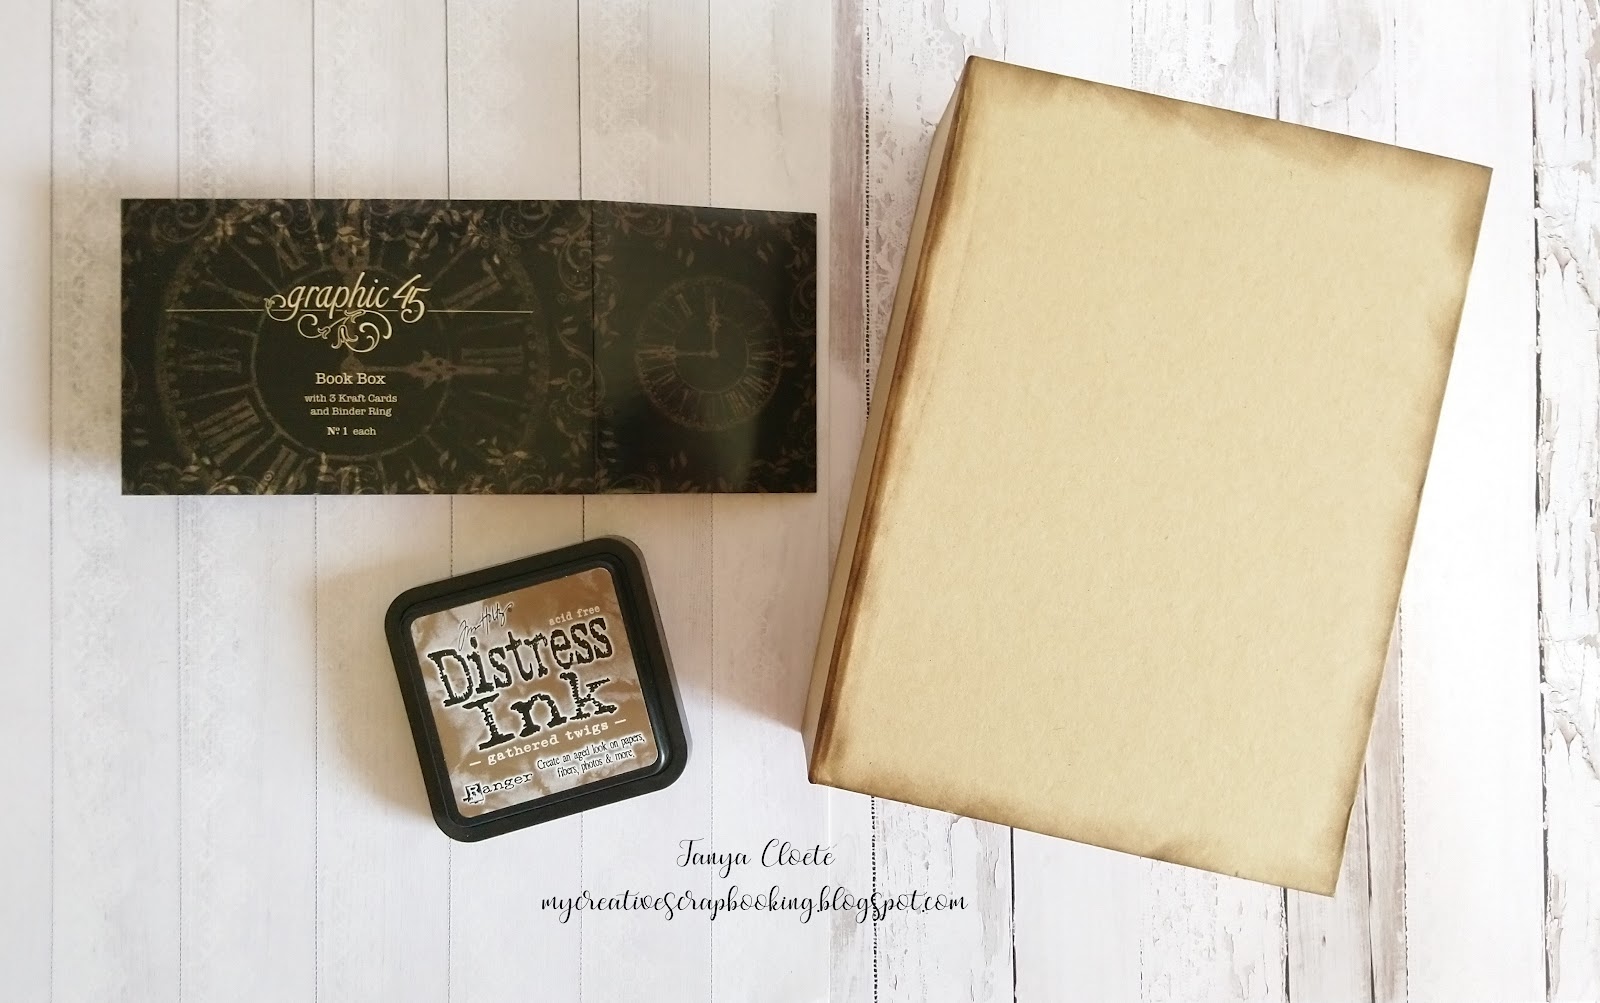
Book Box (4.625 in x 6.625) (Back in stock!)
Antique Brass Stamped Metal Brads
Antique Brass Ornate Metal Key Holes
Color Box Decades Ink Robin's Egg
Color Box Decades Ink Dark Cashmere
Other Supplies:
Various Dies
Distress Ink (Ground Espresso)
String and Gauze
Seam Binding
Cloth
Foam Board
Foam Squares/Adhesive
Rust Paste
Icing Paste
Stencil
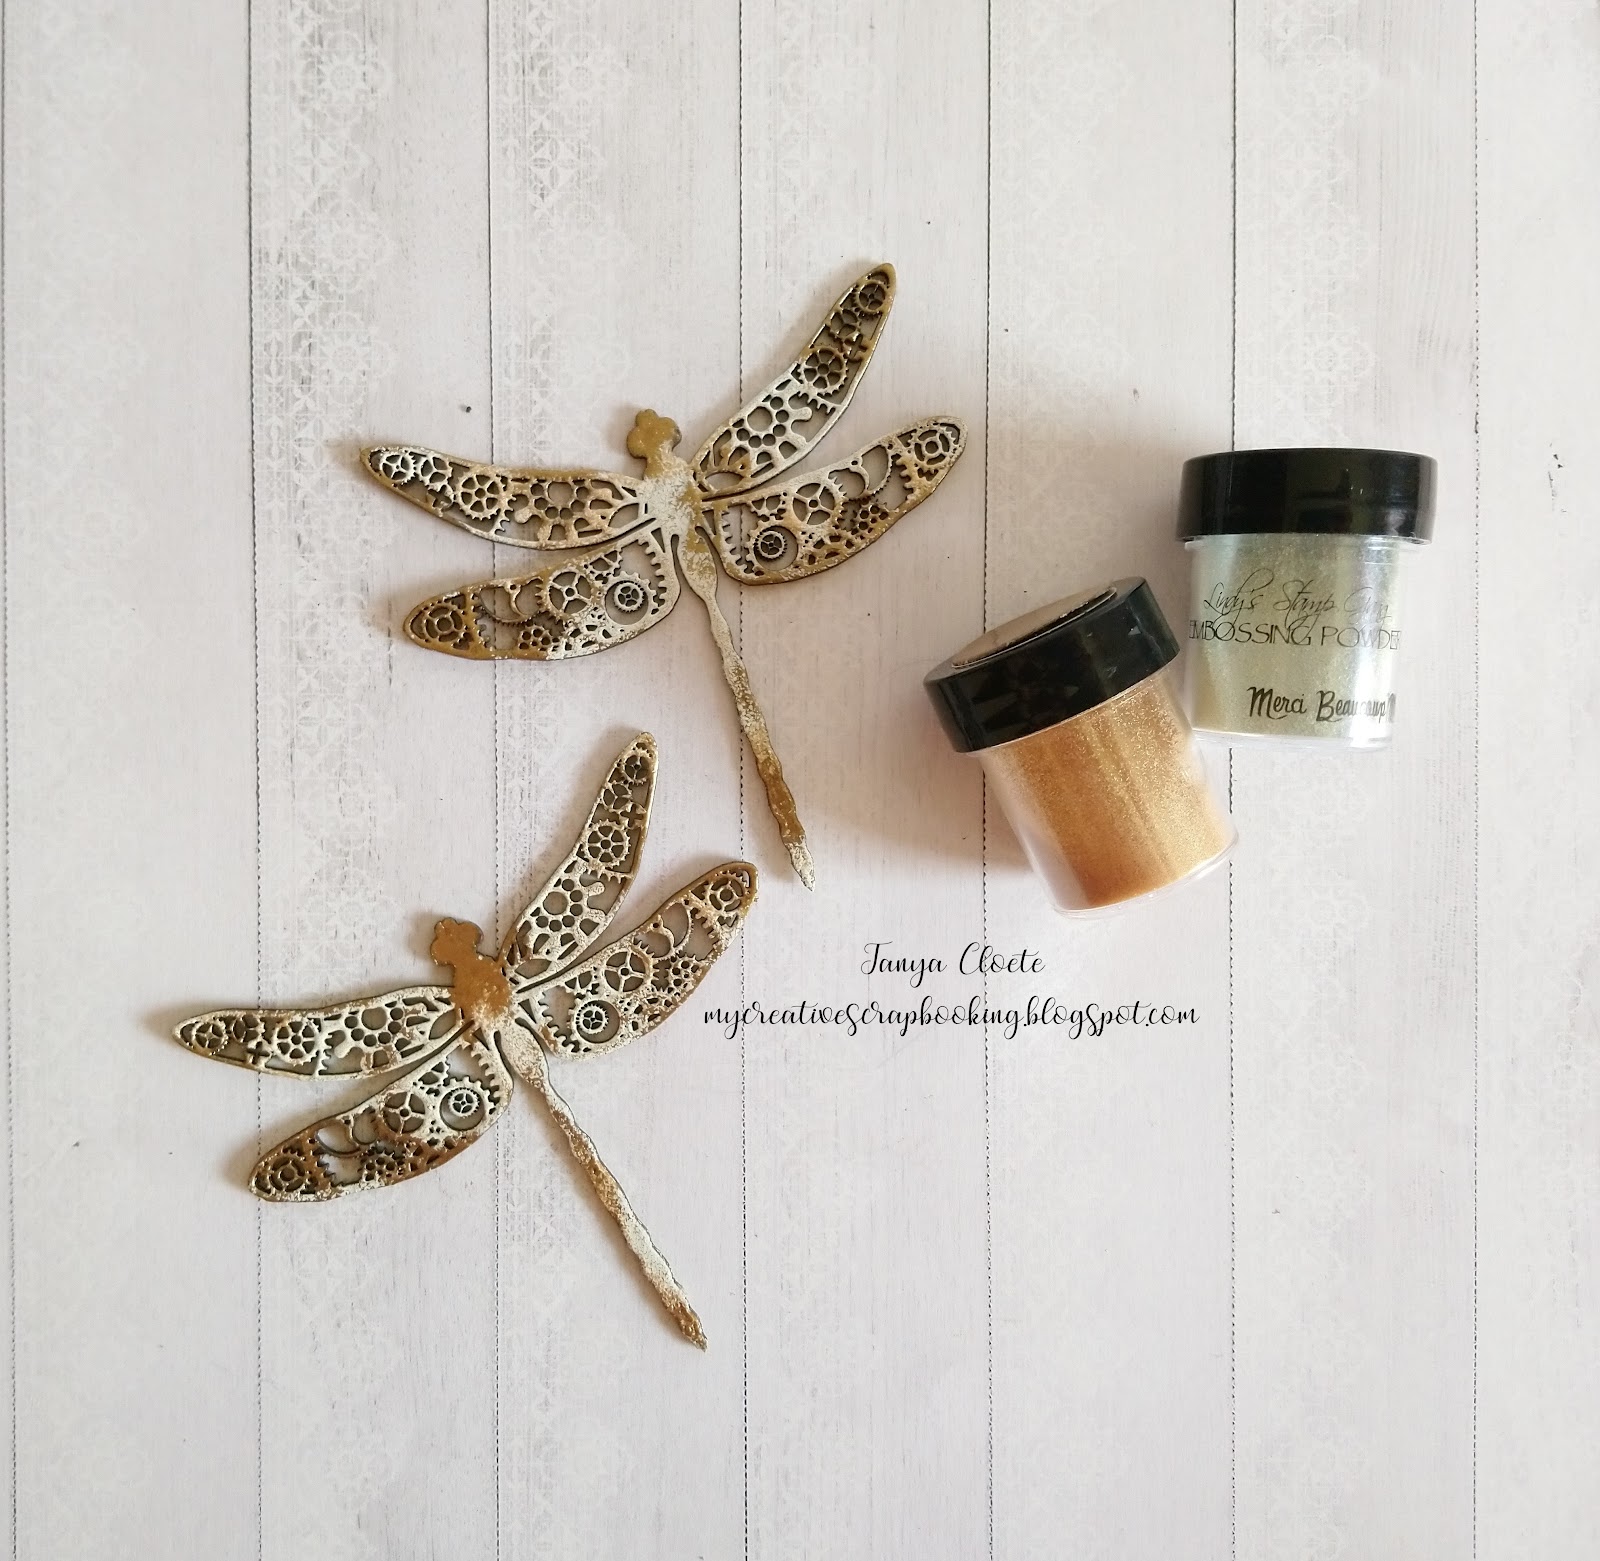
Embossing Powders (Caesar's Gold & Merci Beaucoup Mint)
Sequins and Rhinestones
Glossy Accents/Soft Gloss Gel
Ink the edges of the book box with distress ink.
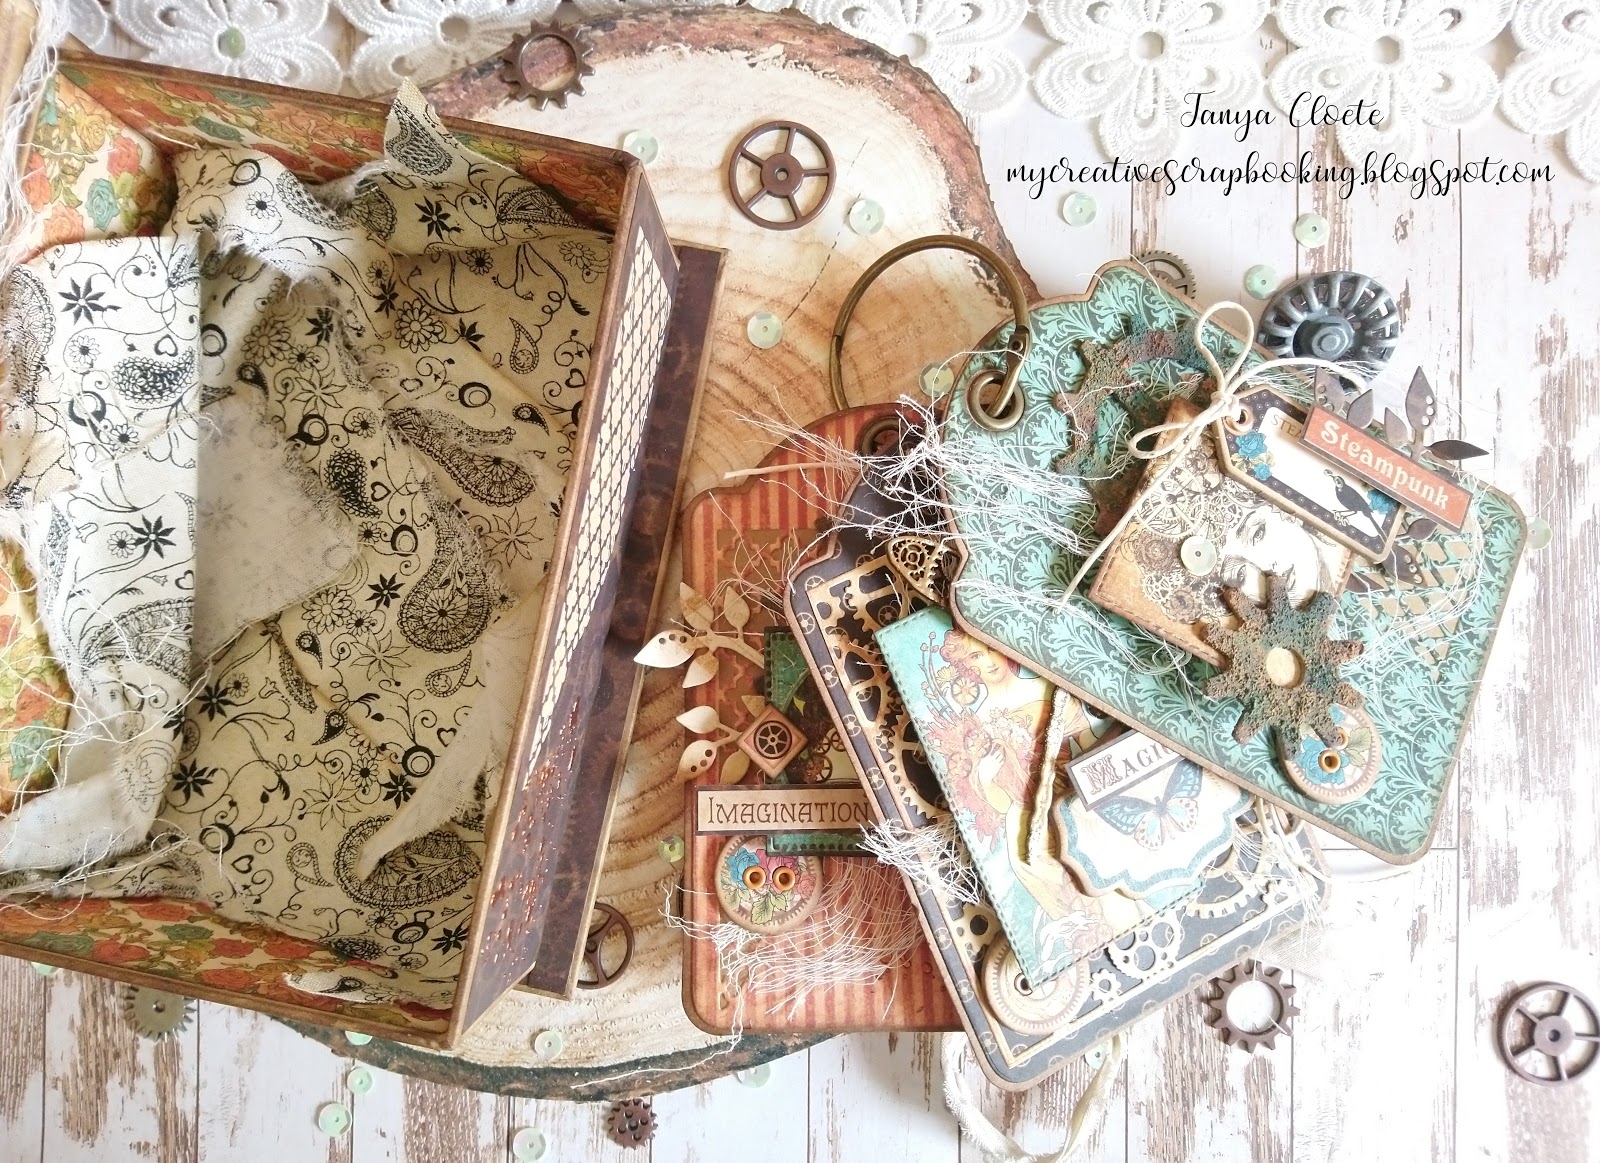
Cut pieces from the pattern sheets to fit the box leaving a small border for each. Ink the edges with distress ink.
Tip: Leaving a border will show off the beautifully inked edges of the book box.
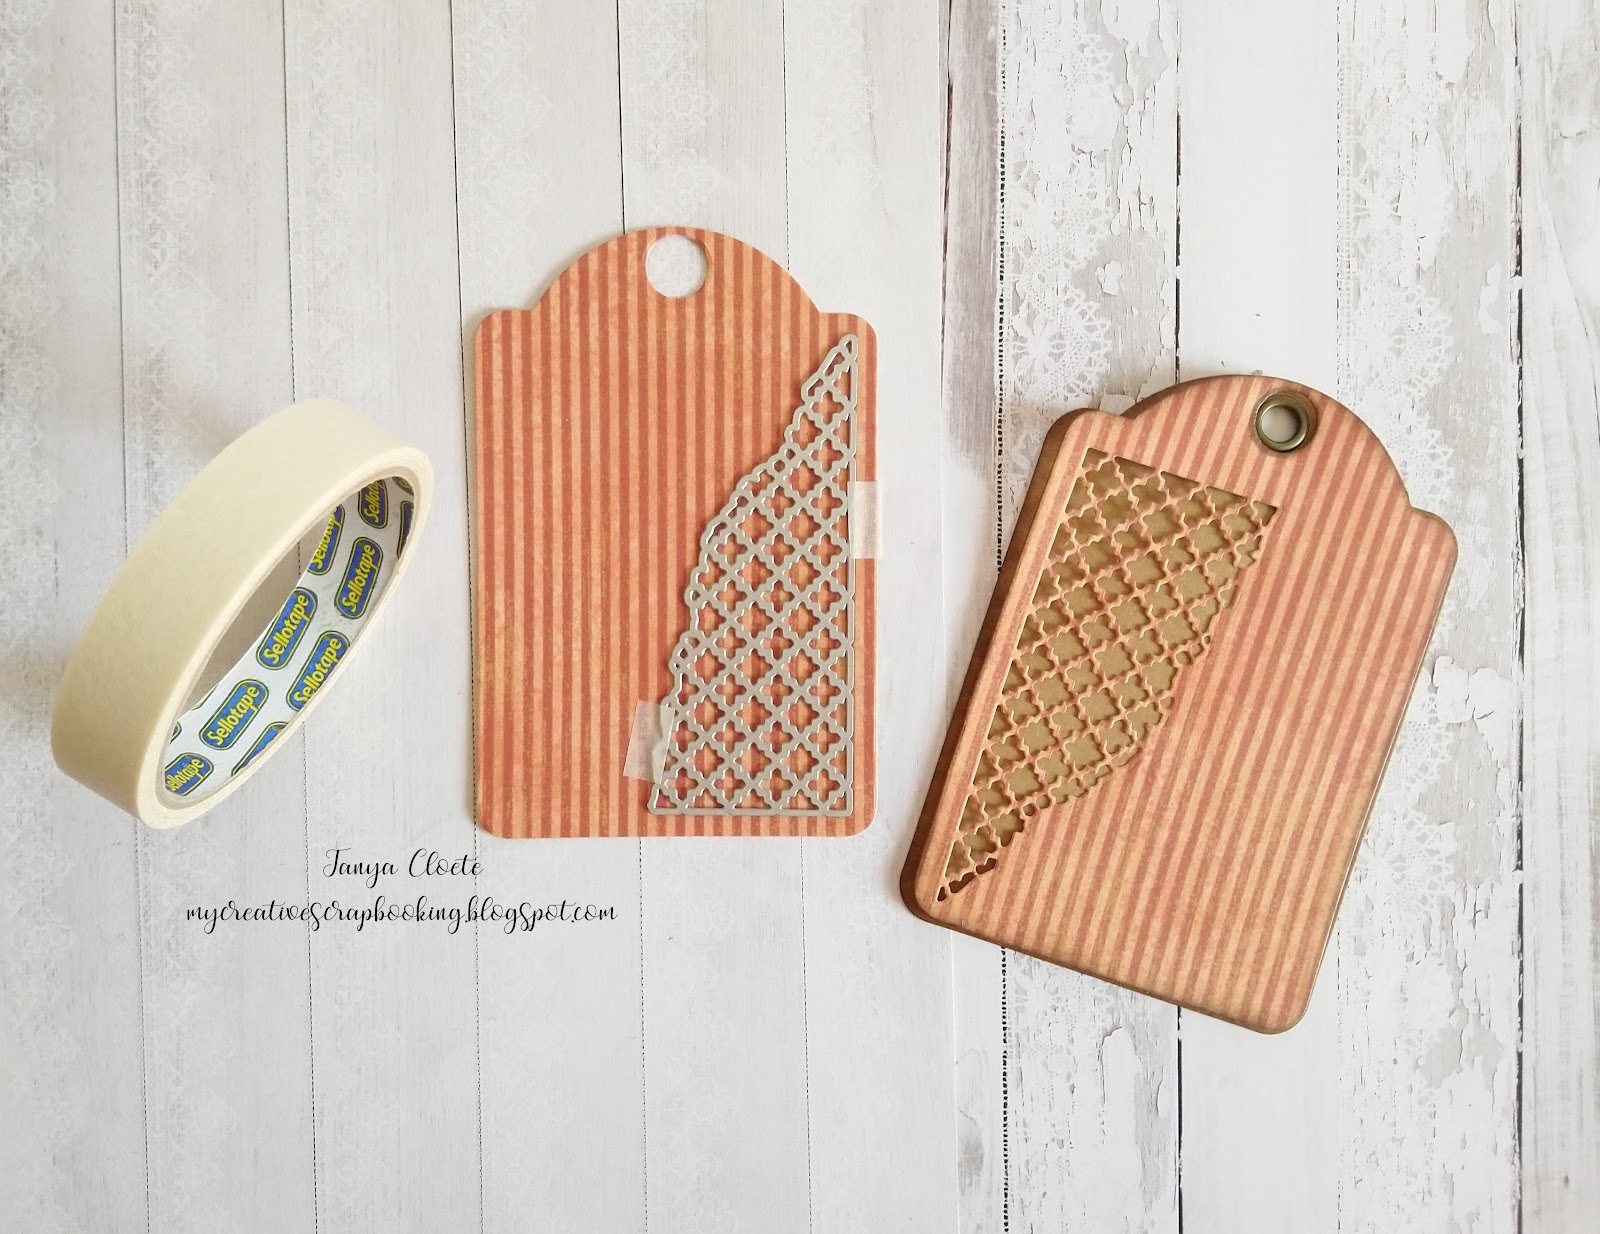
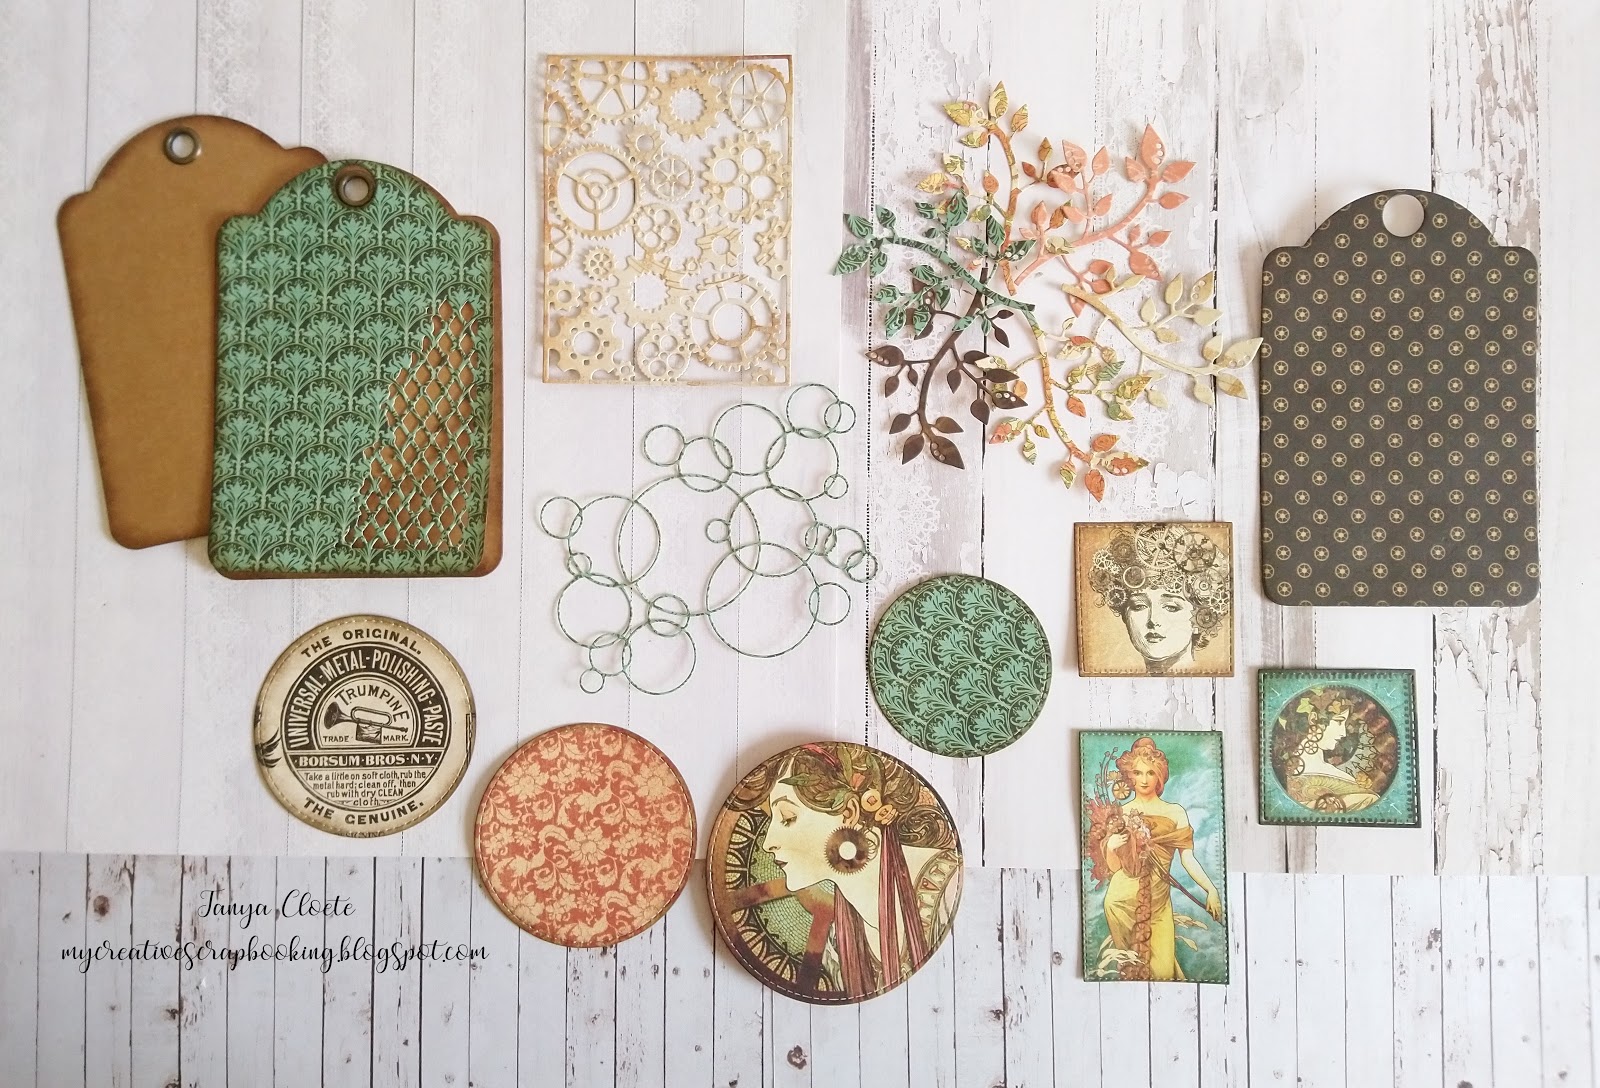
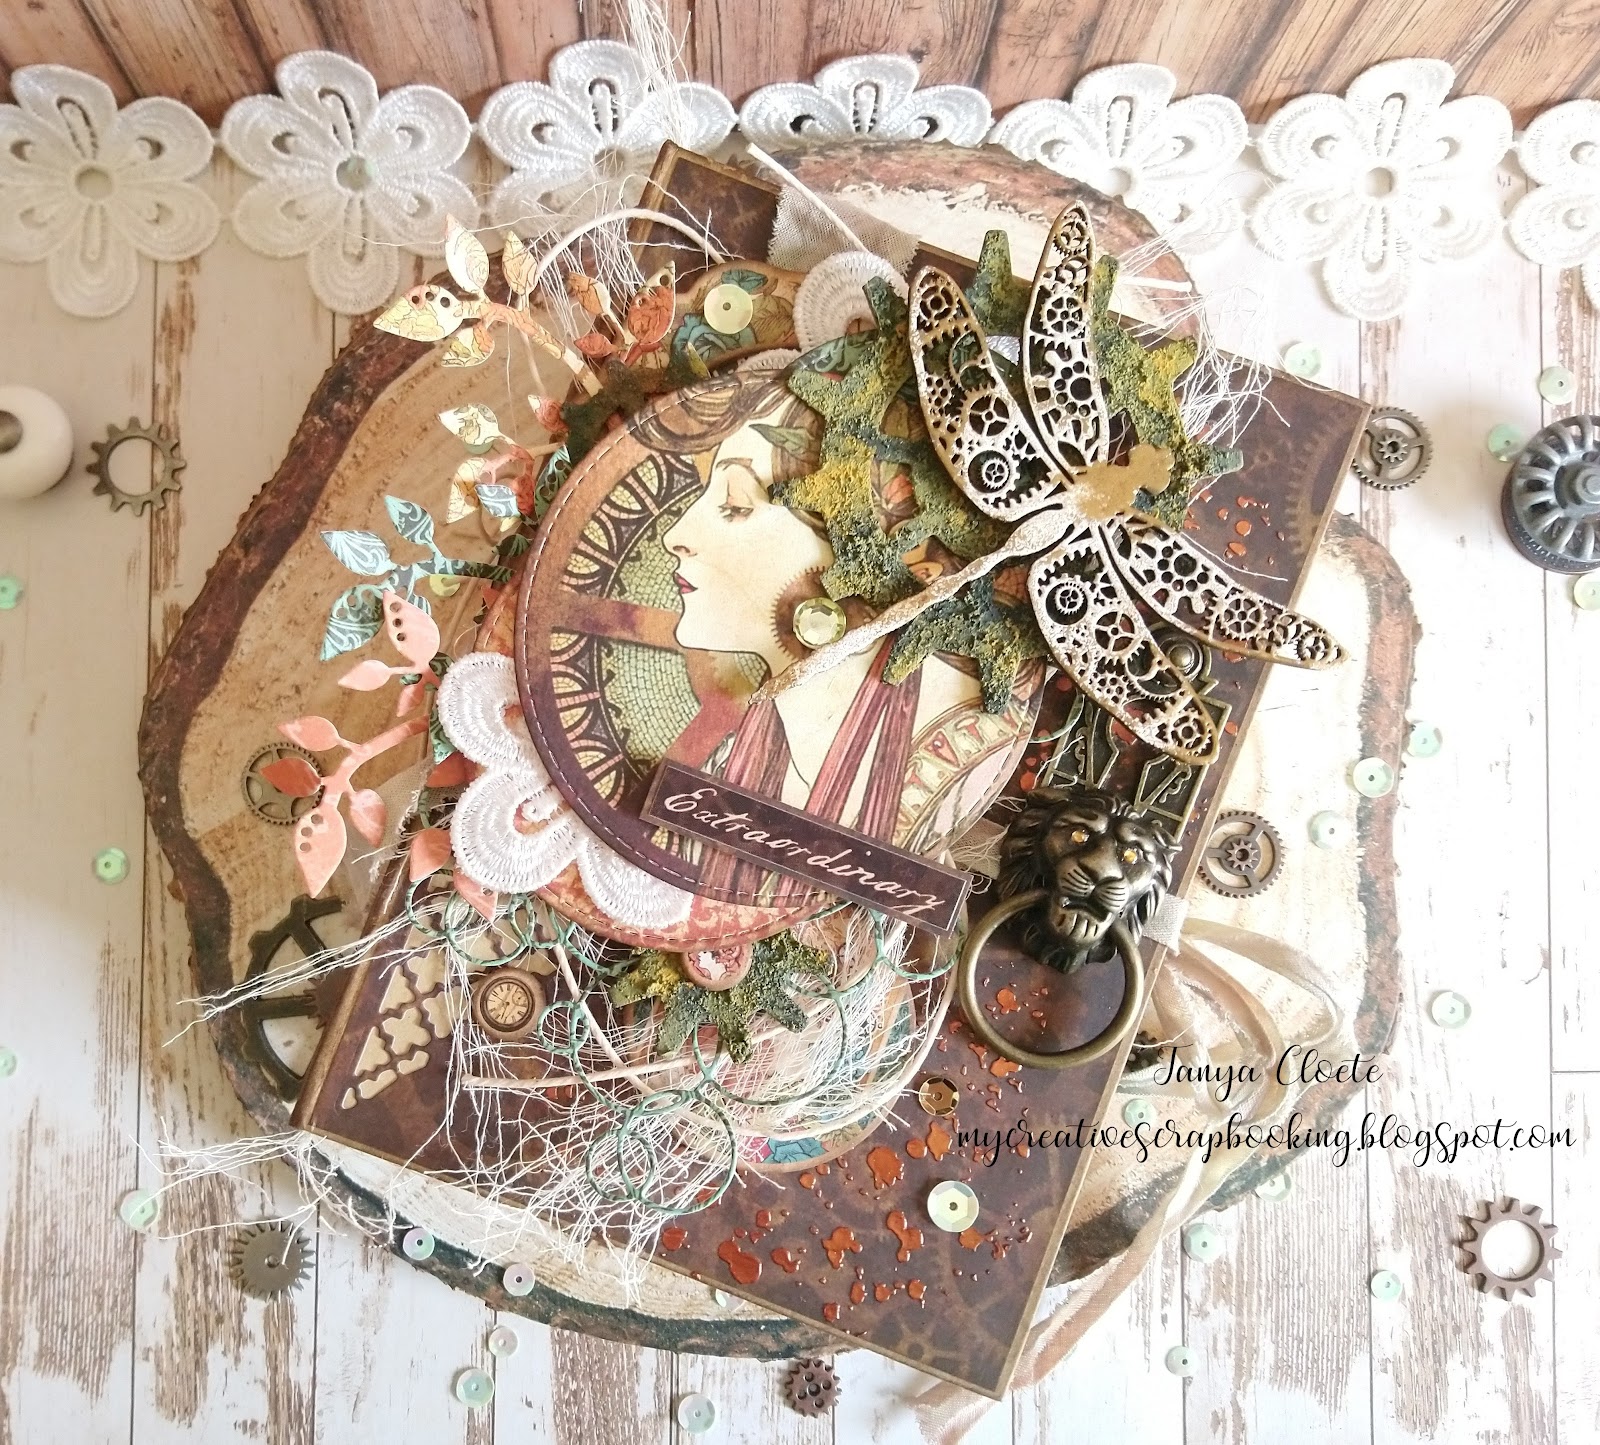
Cut 3 tags to mat the kraft tags using the G45 tag die. Add a mixed media textured die to the tags and cut.
Tip: Use masking tape to keep the die in place, thus making sure it stays in the position you want it.
Cut a few die cut shapes and Ink the edges with distress ink.
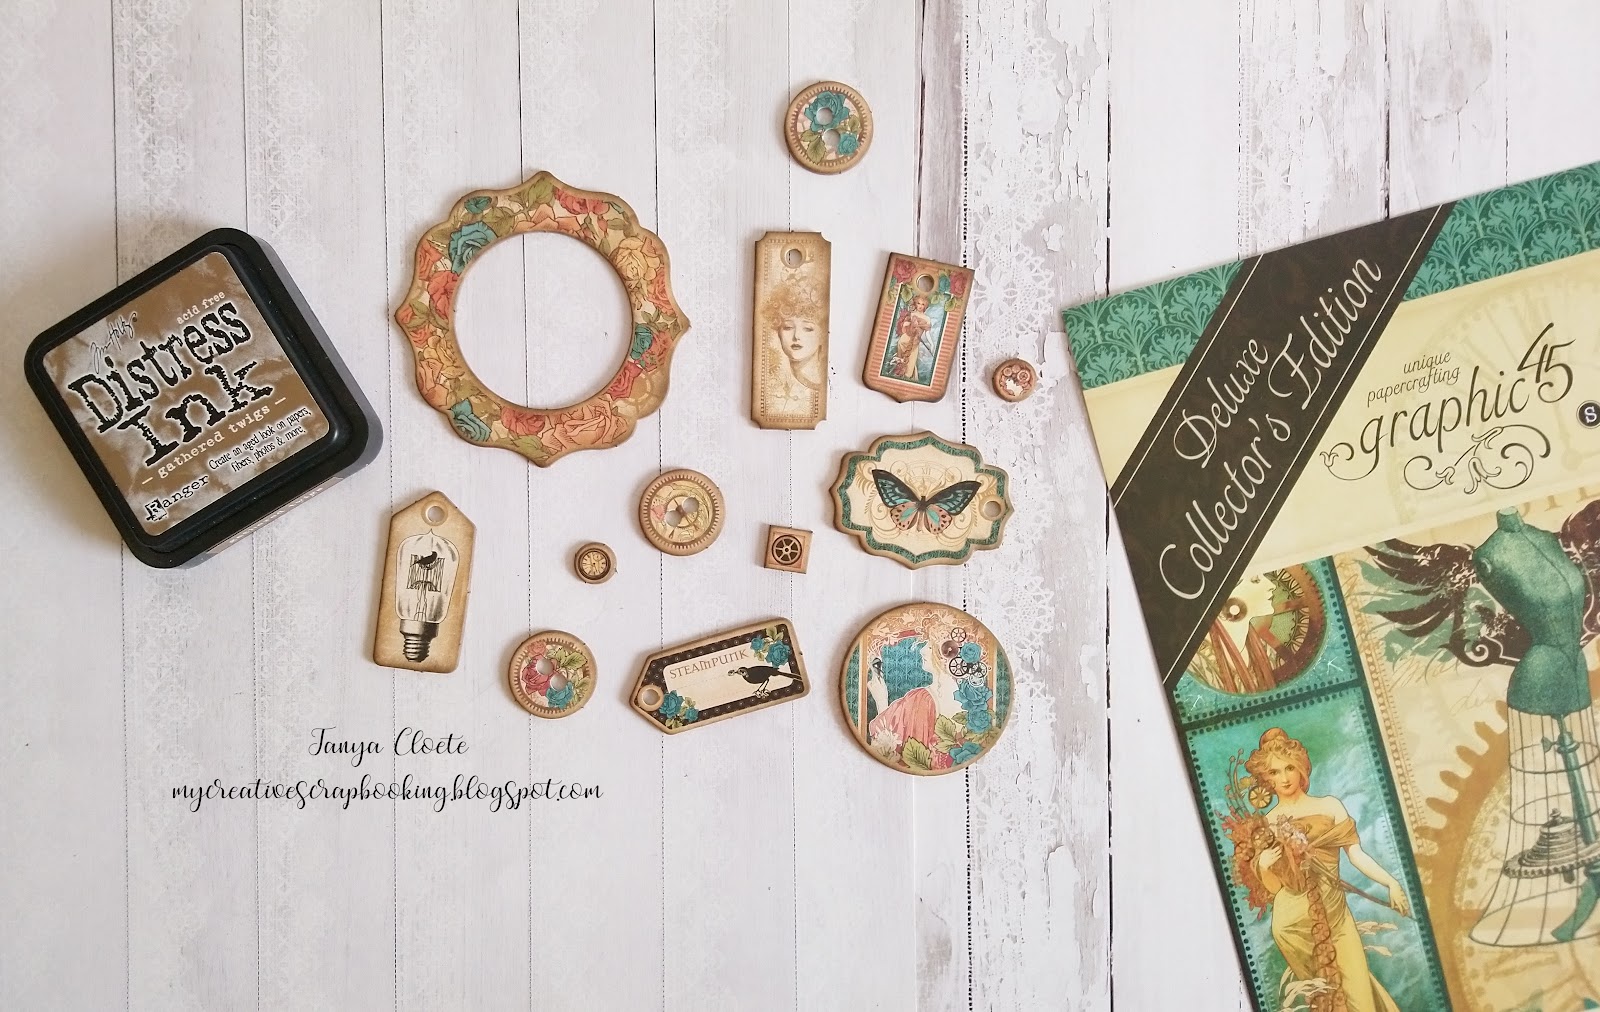
Ink the edges of the chipboard elements with distress ink. Add eyelets to the holes of the mini tags.
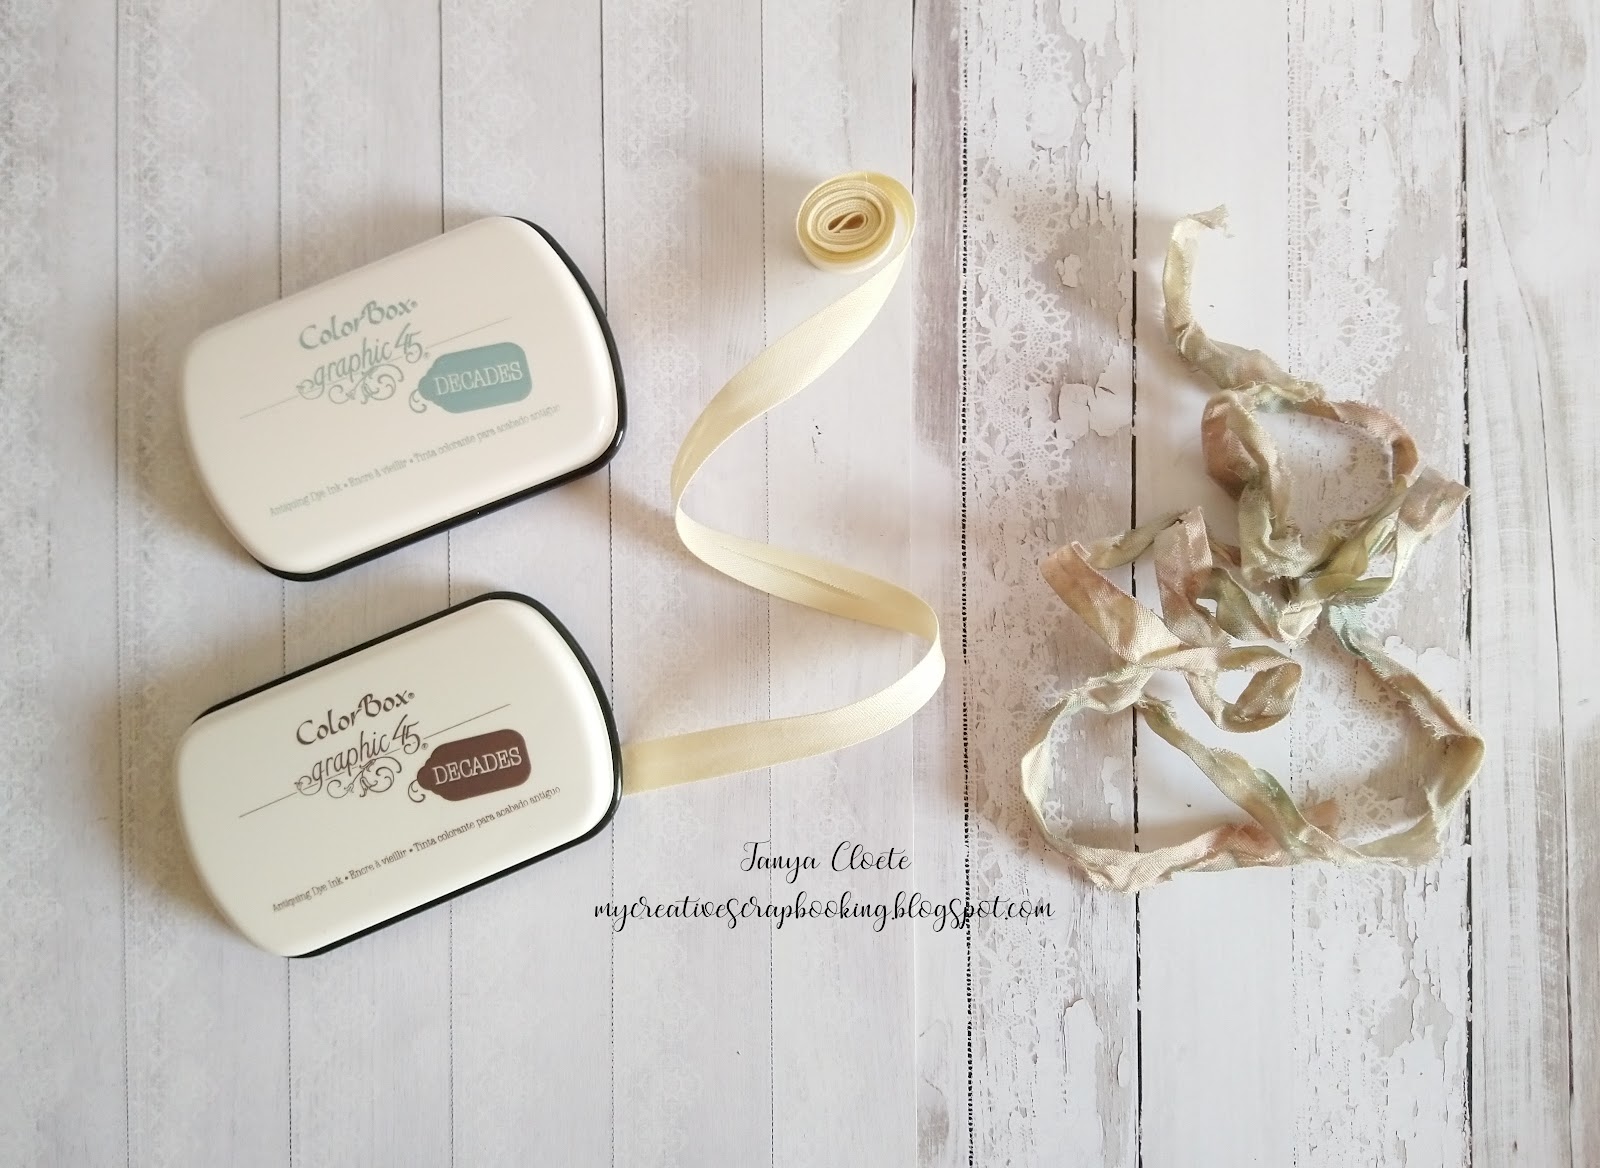
Create your own crinkle ribbon. Colour some seam binding with G45 color box inks randomly.
Tip: Add 2 different colours to your craft sheet and spray some water onto it. Then drag the ribbon through the mixture and scrunch it together. Leave to dry or dry with a heating tool.
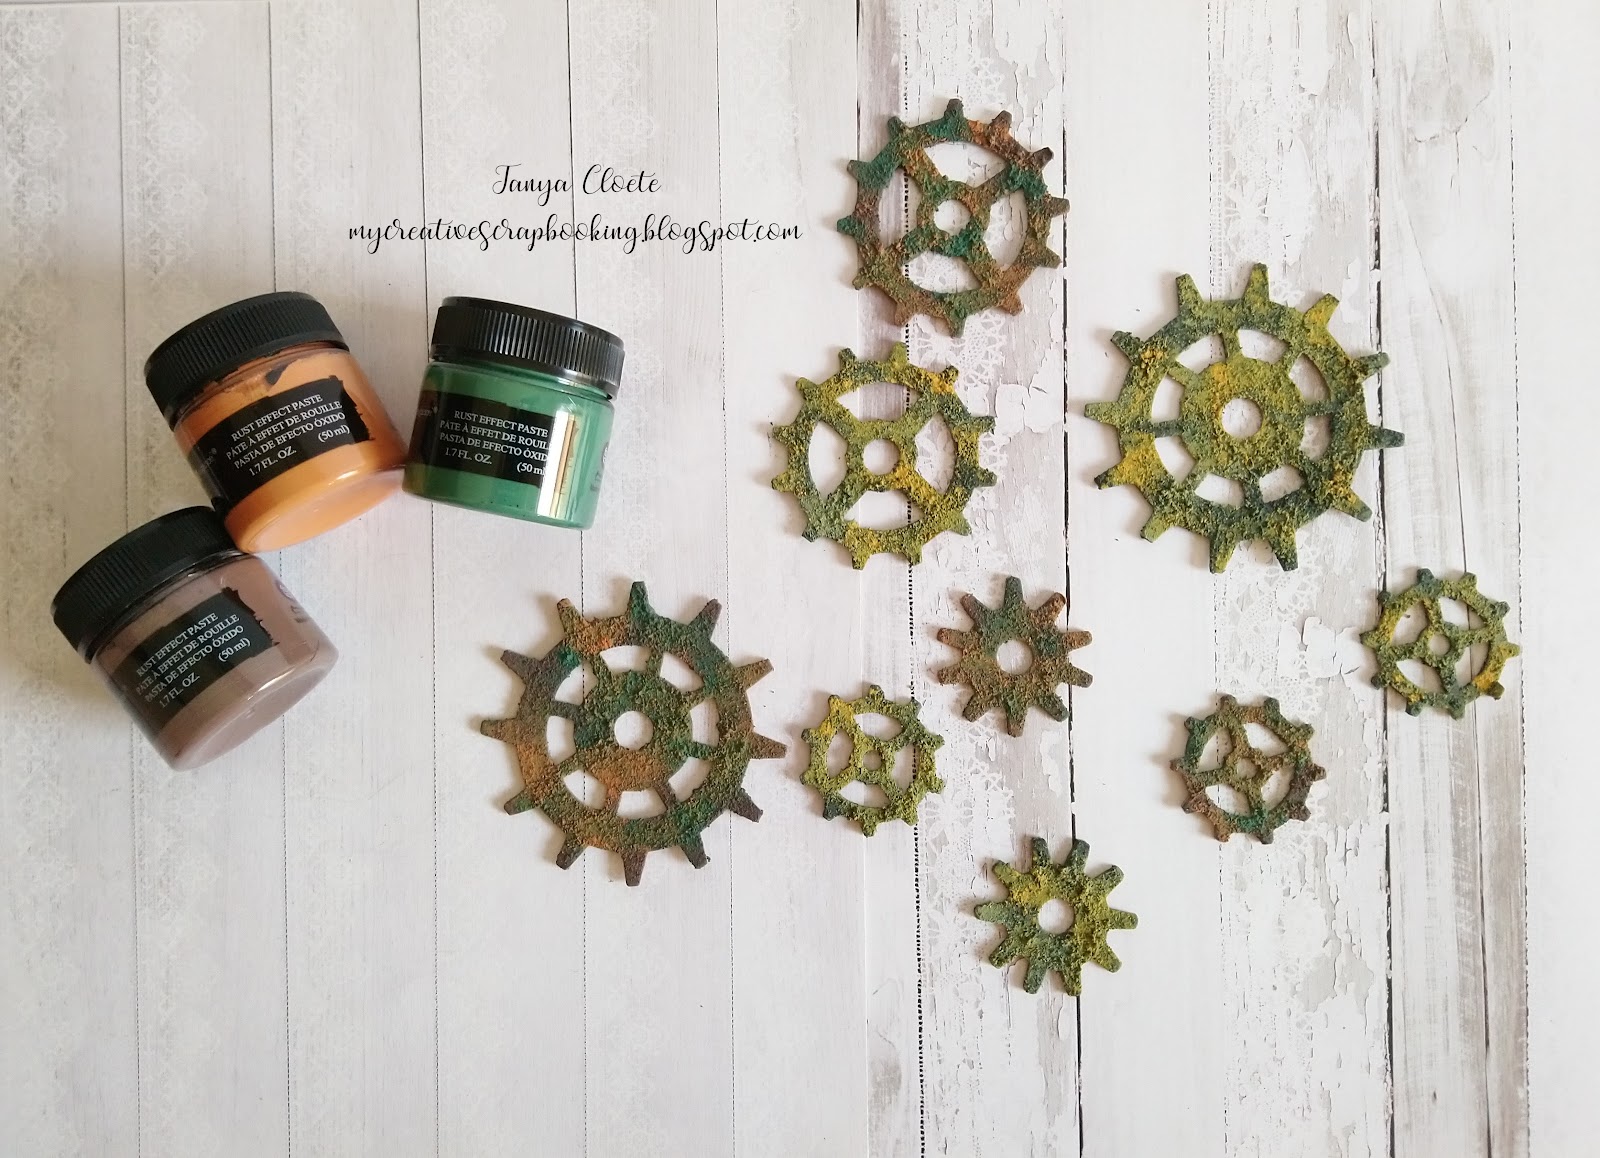
Cut a few gear shapes from chipboard and colour with rust pastes.
Emboss the chipboard pieces with 2colours embossing ink.
Tip: Emboss the complete piece with one colour first and then randomly add the other colour and heat it again.
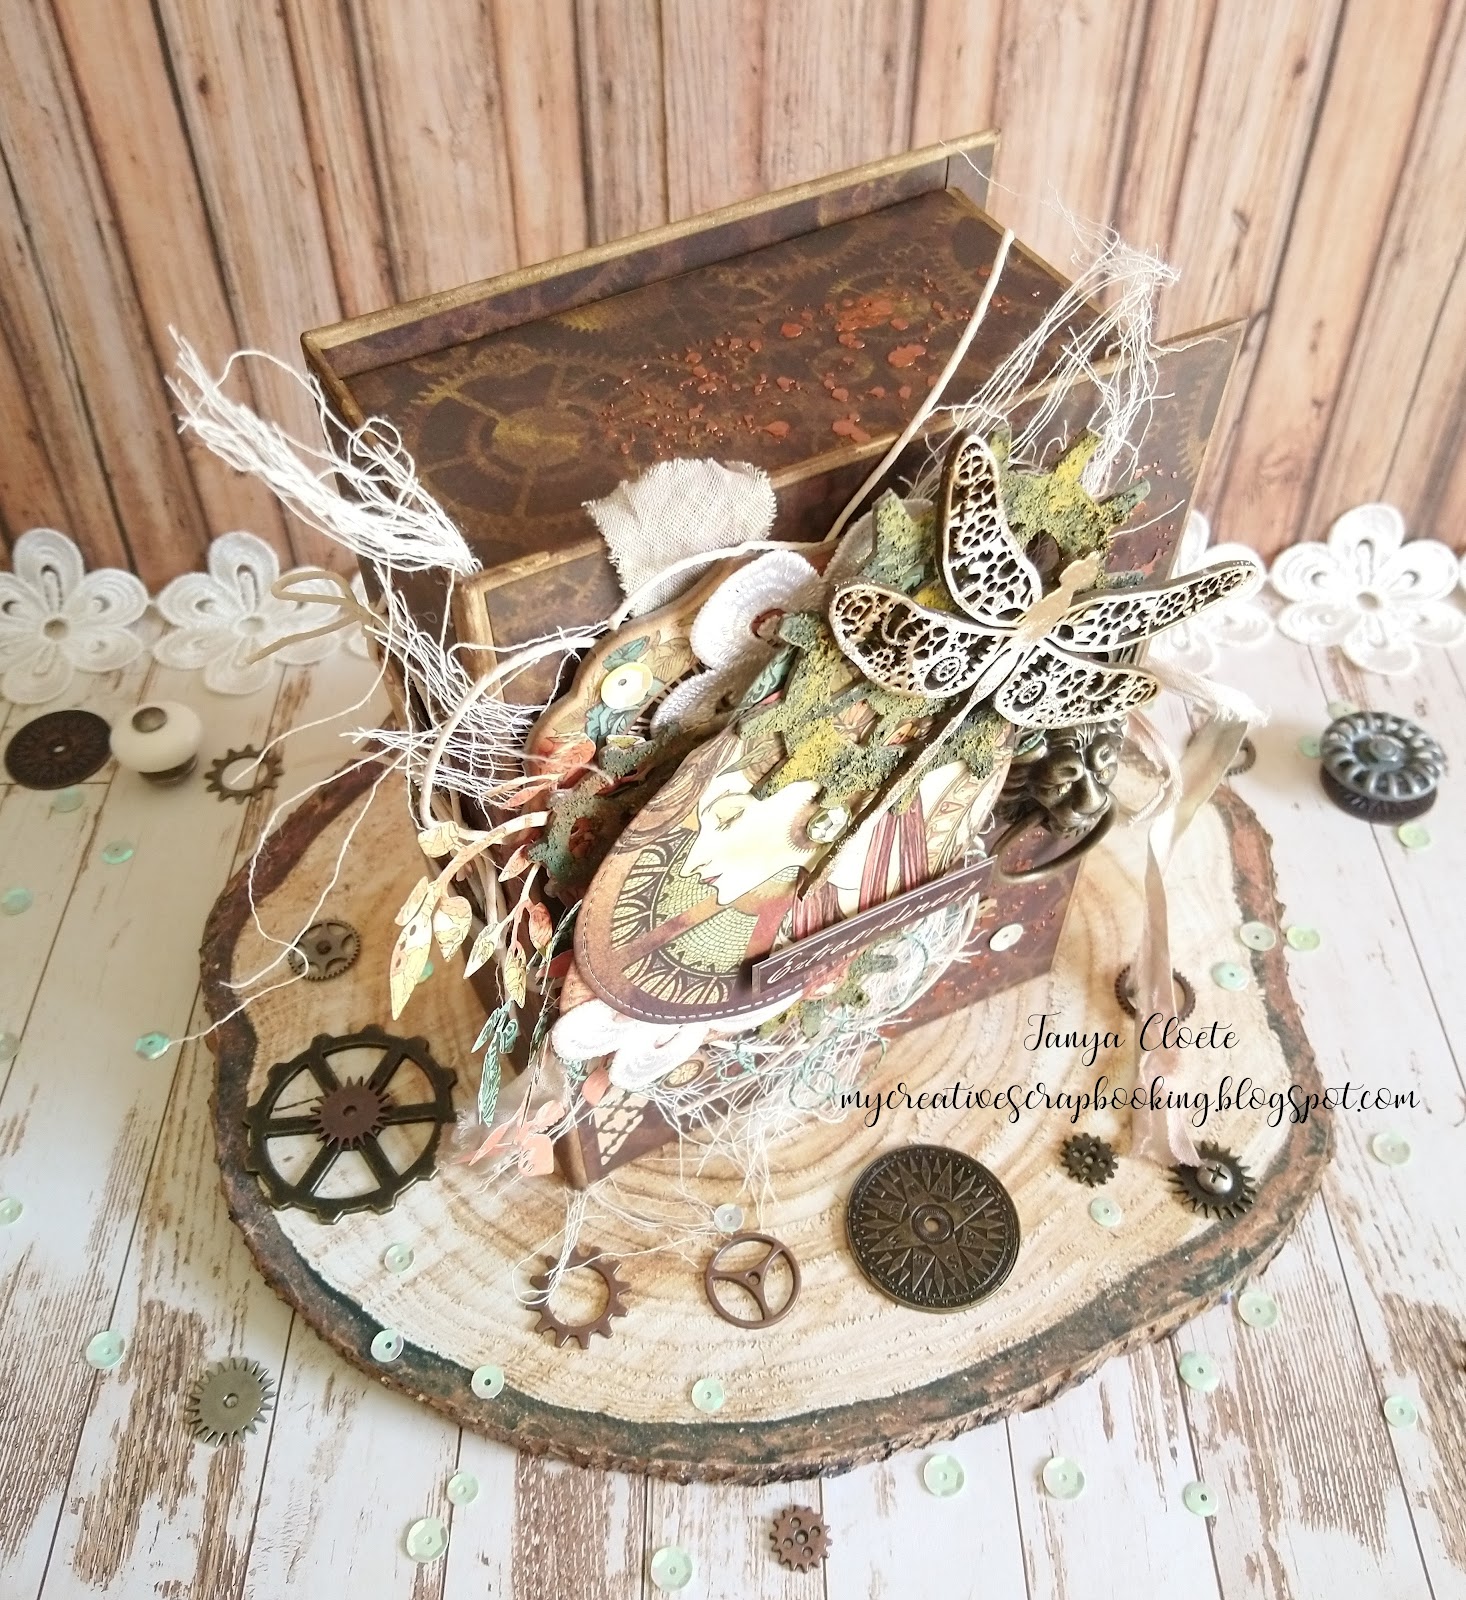
Add some icing paste to the box using a stencil.
Add gauze, string, die cut elements, metal embellishments and sequins on the cover of the box.
Add rhinestones to the lion's eyes of the brass door knocker.
Tear some pieces of cloth randomly and add to the inside of the box.
Adhere the die cut pieces with foam board.
Addstring to the mini chipboard tag elements.
Mat the stickers onto the pattern sheets and adhere with foam squares/adhesive.” ~Tanya
How thrilling! We want you to join us in the comments below to thank Tanya for sharing this box, album, and tips to fuel our creative engines. We extend our gratitude to you as well for stopping by the G45 blog for your daily dose of inspiration. We hope you create time to play with your paper stash and try out something new.
Happy Papercrafting!