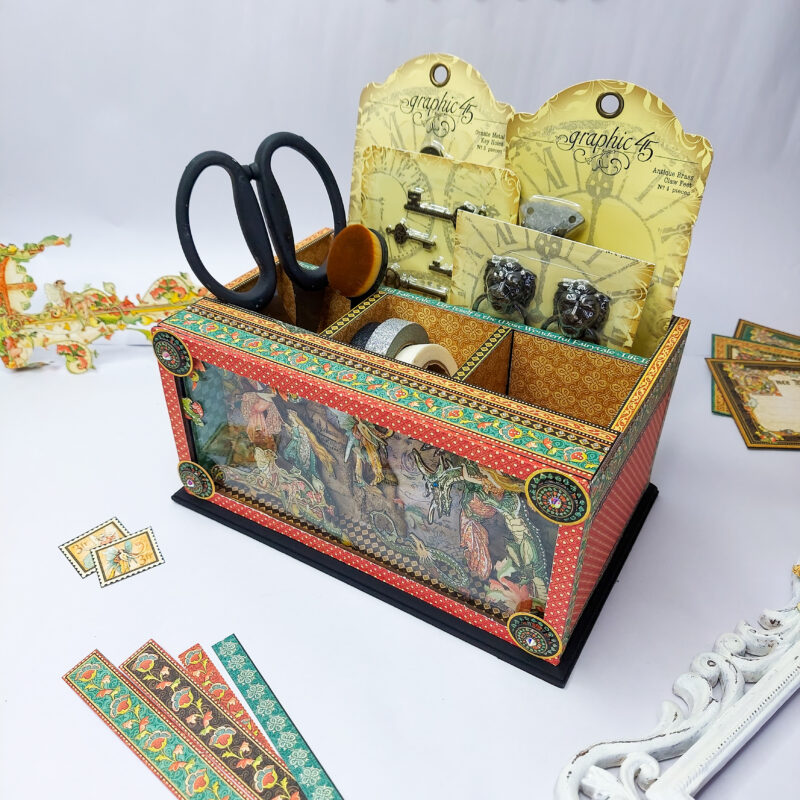
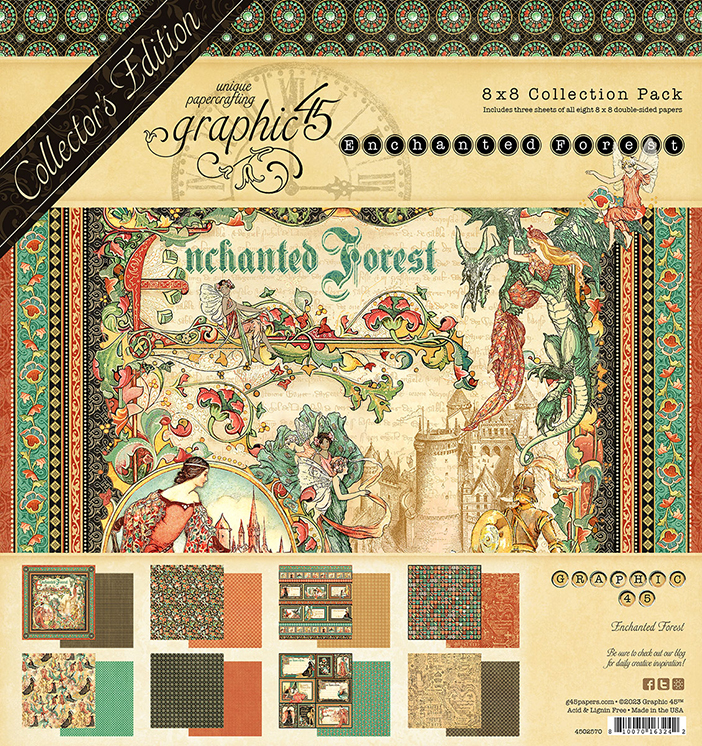
Welcome to another exciting installment on the Graphic 45 blog. Today, we’re thrilled to present a stunning tutorial by the talented Sabaa Hassan featuring the Royal Desk Organizer with 3D Window. This craft organization solution features our Enchanted Forest – Collector’s Edition now available at a fabulous 50% off! Don’t miss out on this opportunity to explore Sabaa’s creative process and immerse yourself in the magic of this papercrafting video tutorial.
In honor of National Scrapbook Day, we’re thrilled to introduce four captivating Collector’s Editions, now offered at irresistible prices. Journey through the enchanting realms of Enchanted Forest, indulge in the delightful ambiance of Cafe Parisian, embrace the romance of Mon Amour, and lose yourself in the mesmerizing world of Steampunk Spells. Don’t miss the seven kits that are also on sale now. And that’s just the beginning! Treat yourself to the charming designs of our Little One and revel in the joy of Life’s a Bowl of Cherries collections, both at an unbeatable 50% off.
“Hello G45ers!
This is Sabaa and I welcome you to my beautiful world of creativity.
Today’s project is with a unique idea, full of love and useful for every crafter.
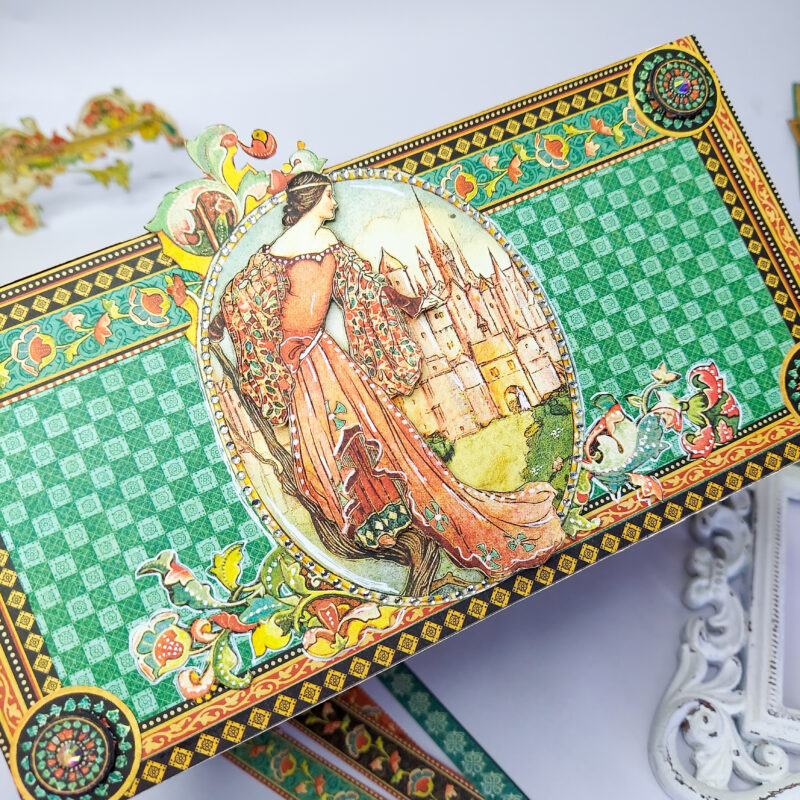
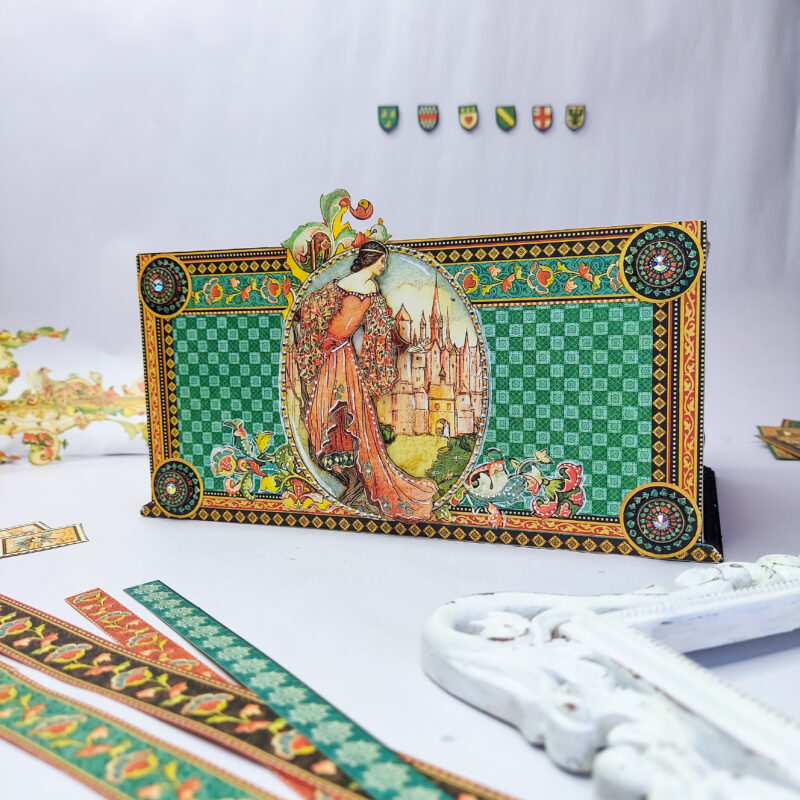
Today’s project is full of vibrant colors and yet so adorable. We will be making Mini Album using Enchanted Forest Collector’s Edition 12×12 Collection Pack from Graphic 45
This project is part of #G45CraftRoom series. I just can’t hold my excitement enough to share the process.
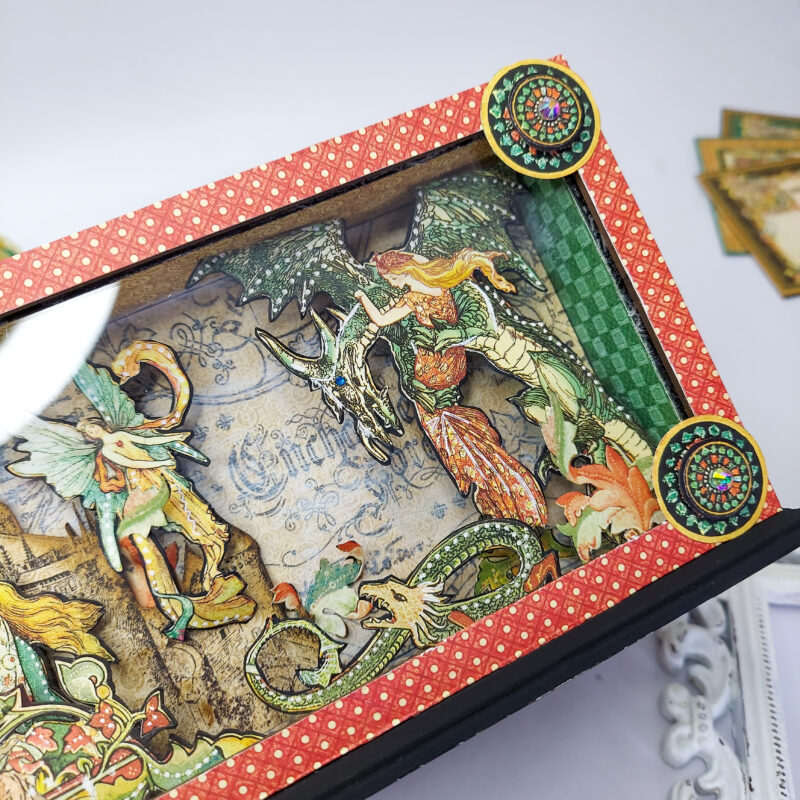
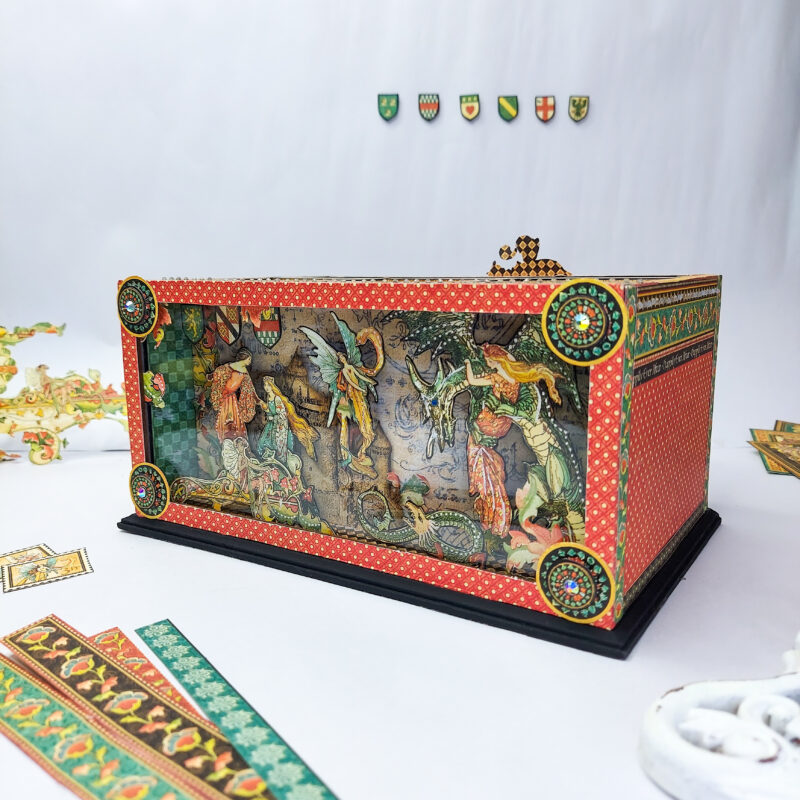
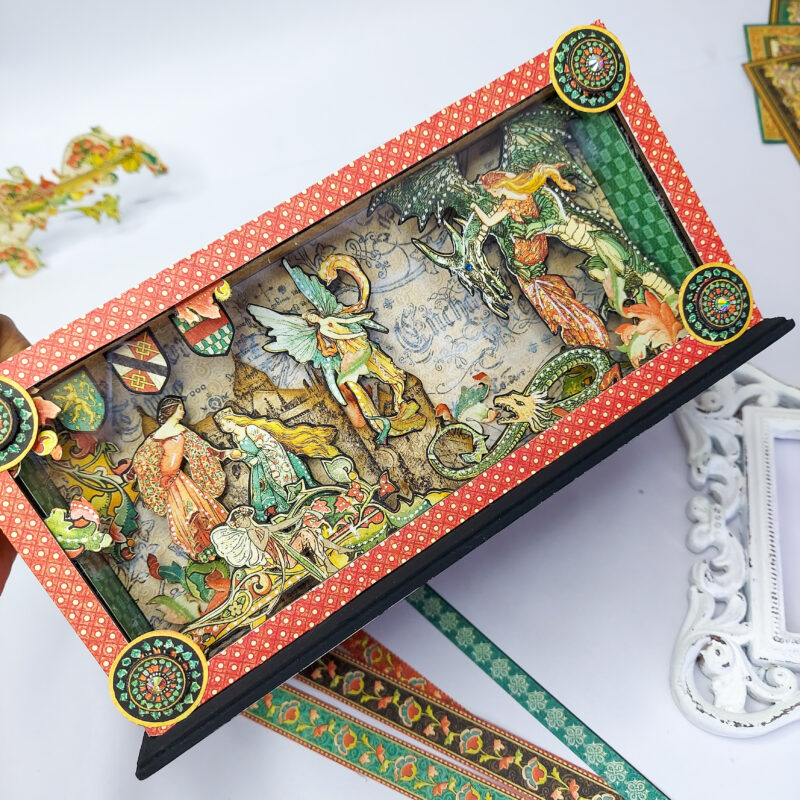
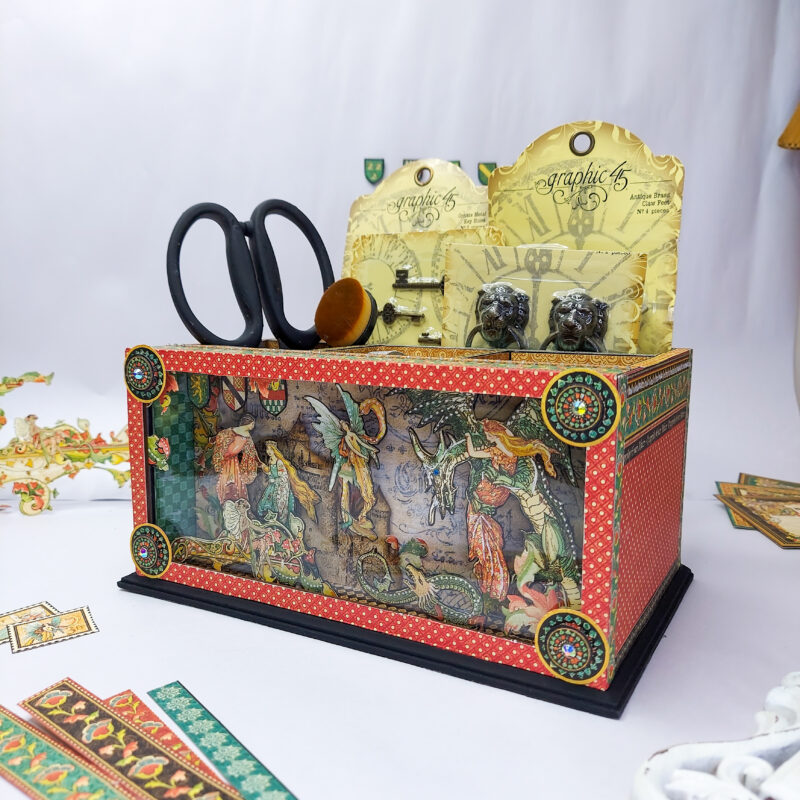
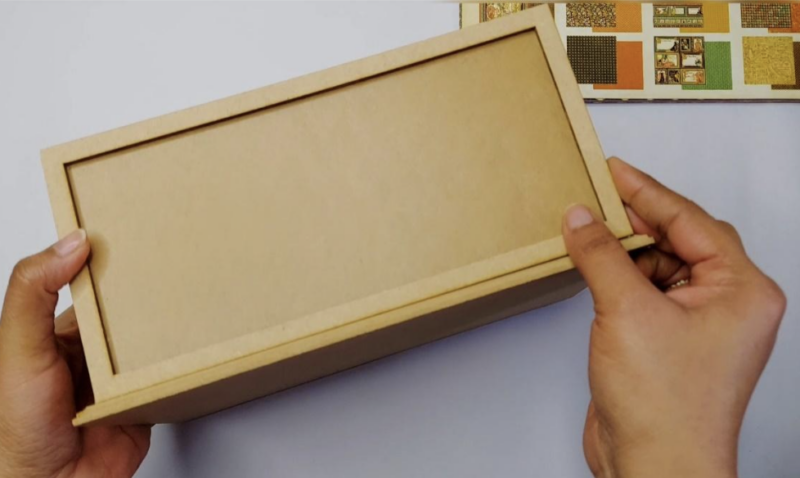
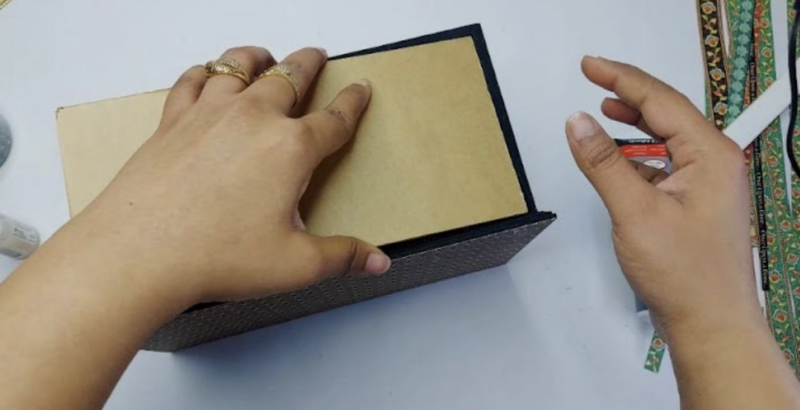
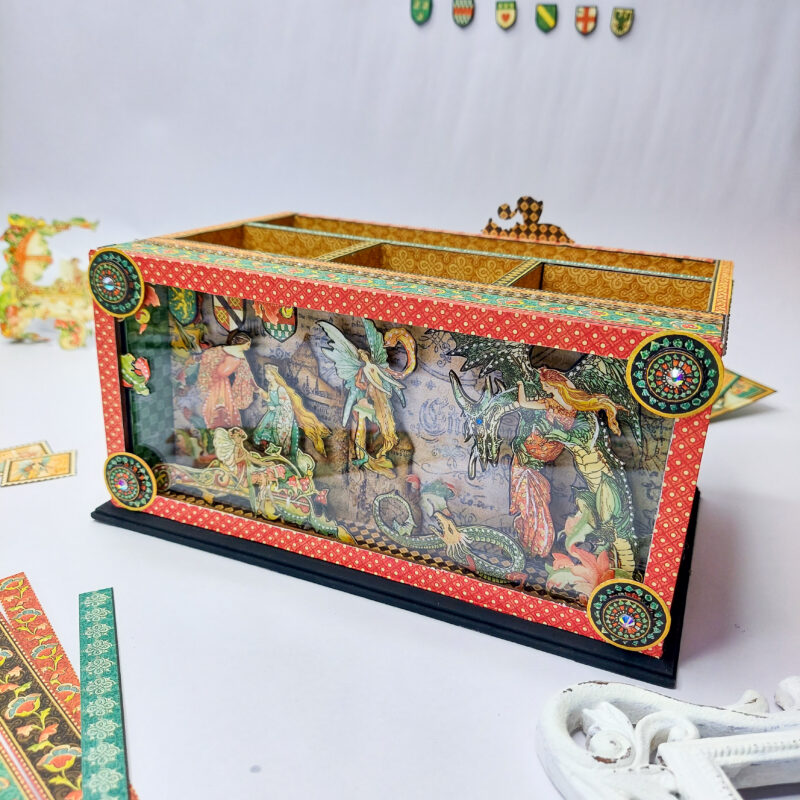
To start the process, I have used the pre-prepared MDF cutlery box, this has a shadow box for 3D arrangements, this I have used to create my desk organizer. But you can choose some other surface too to create your project.
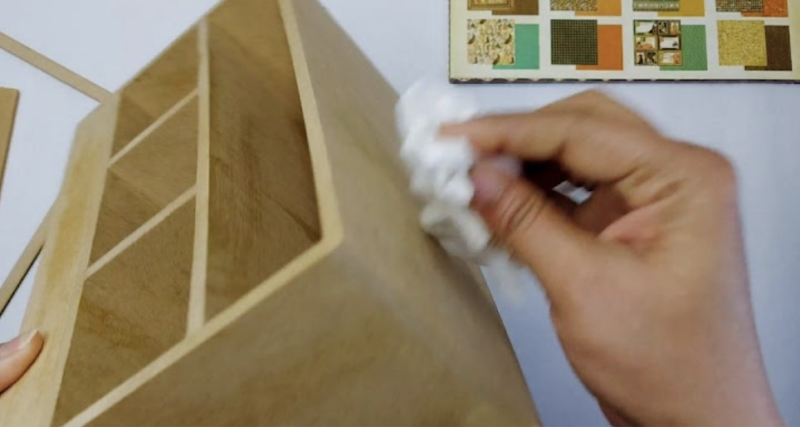
Firstly, I have cleaned my entire box using a wet wipe to remove dust, this will make our further paper pasting process easy.
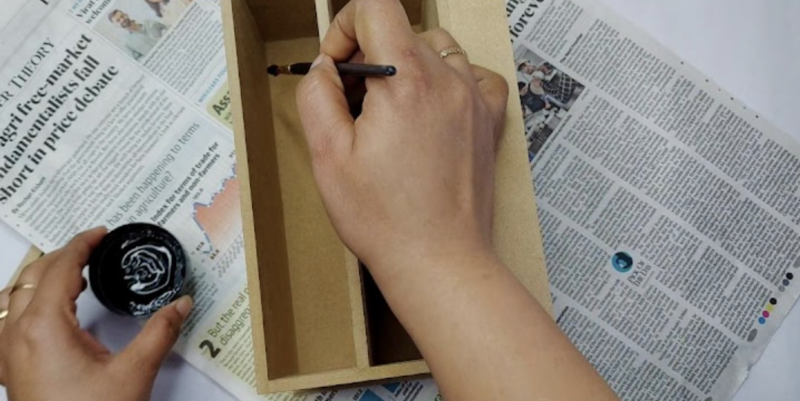
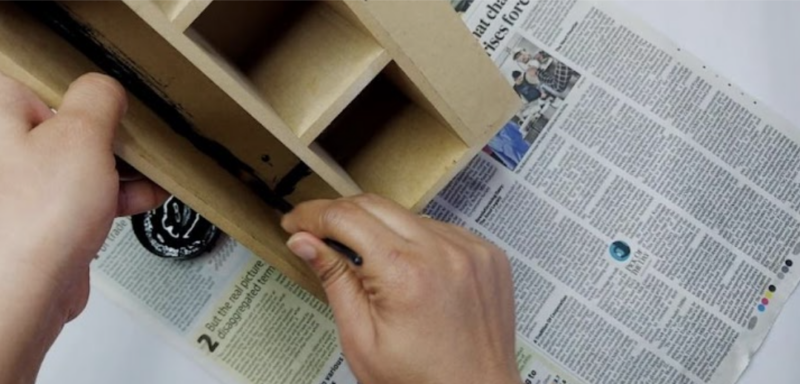
I took a chalk paint and colored only the corner edges of my box.
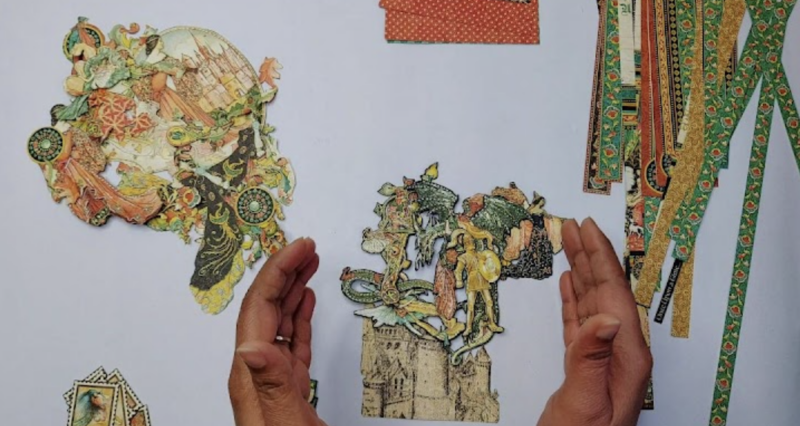
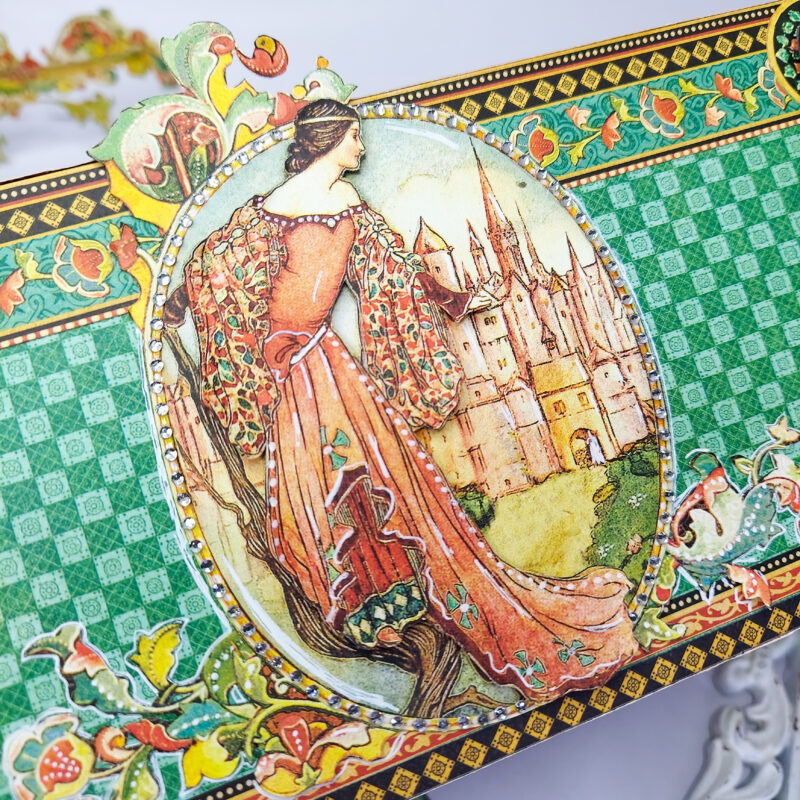
By the time the box was drying, I did all the fussy cut outs. To the main fussy cut out characters, I pasted again on a black cardstock and again fussy cut these out. This way my character was sturdy and it got thin black outline to highlight it.
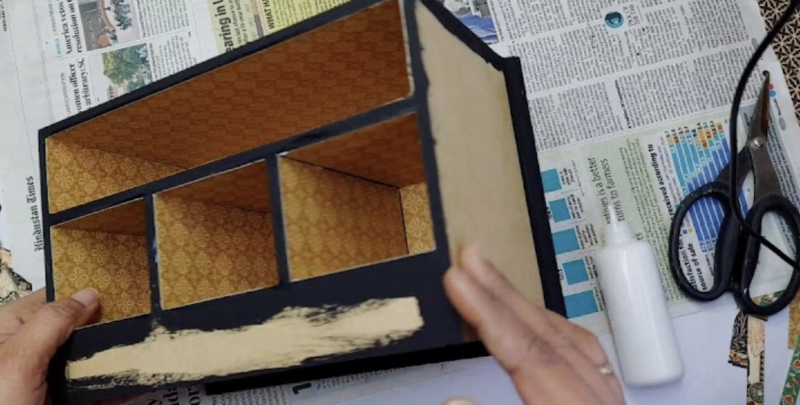
Once the box completely dried, I have pasted the pattern papers on the box.
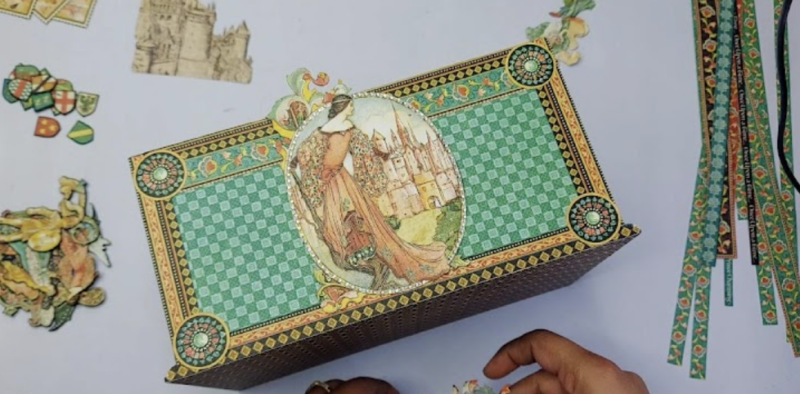
I have used ample of paper laces to decorate my box.
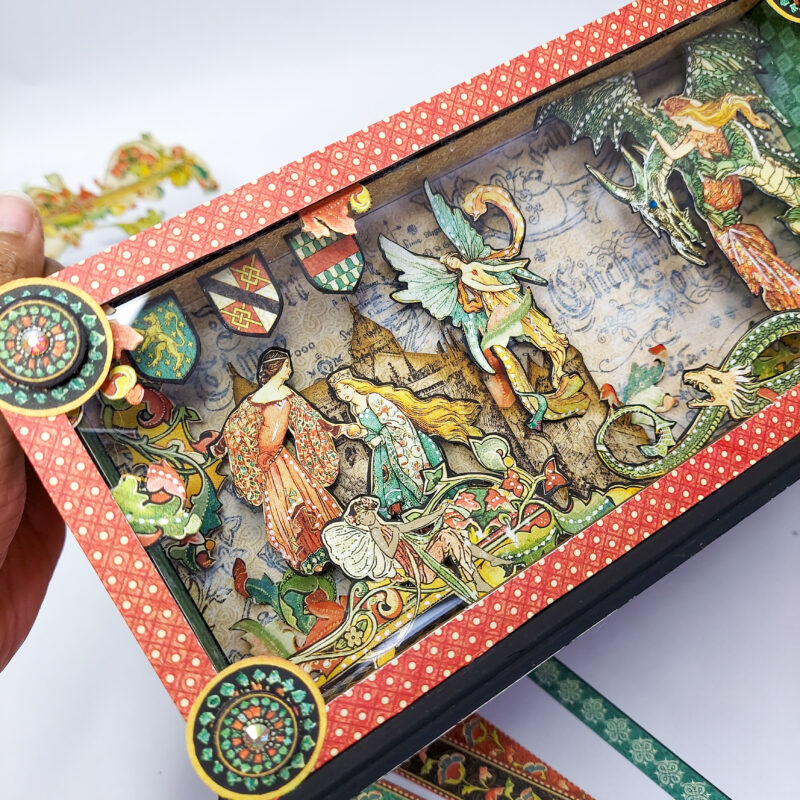
Now I started adding the fussy cut out characters one by one using double sided foam tape. This will give dimension in characters.
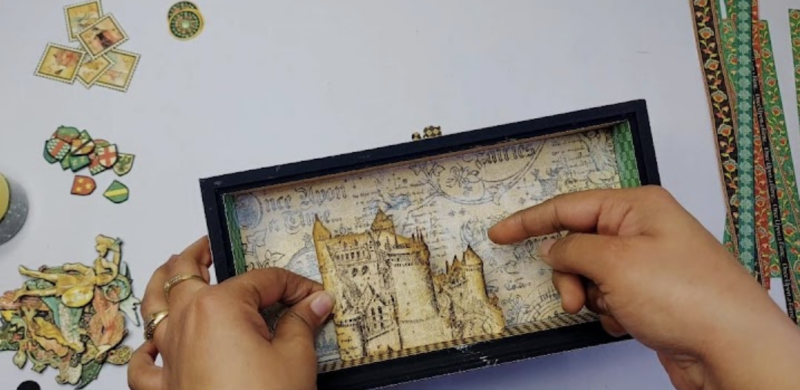

Once the set up was complete, I have secured my work using acrylic cover (you can also use thick acetate sheet)
And this is how my project is fully complete. And here are the final results.
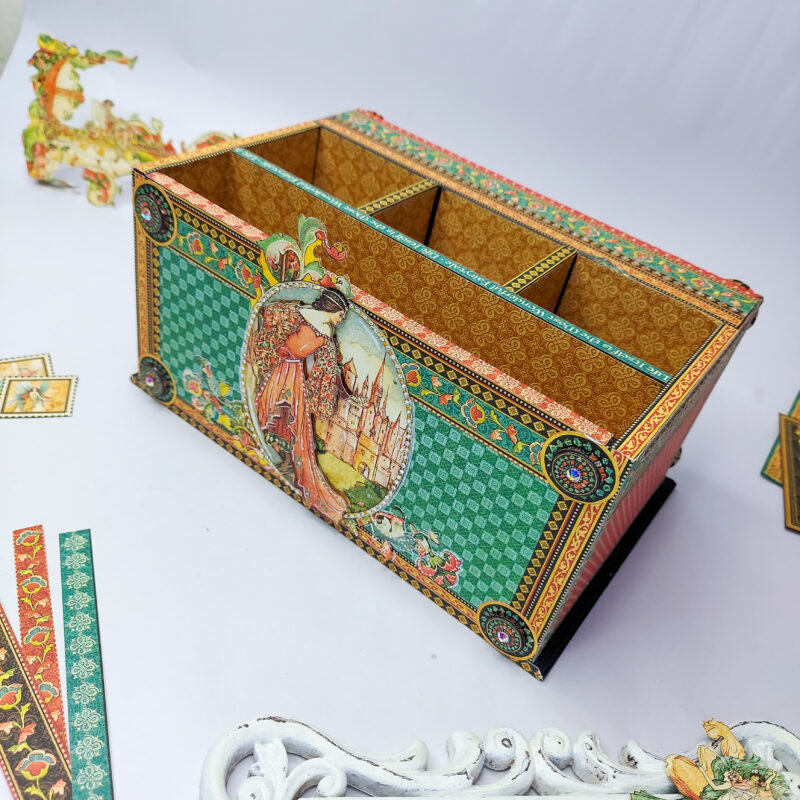
I really hope you all will love this project. I would love to know your reviews in comments below.
I have made a detailed video to cover the step-by-step process.
Desk Organizer Tutorial by Sabaa Hassan
Do create this exciting project and make sure to tag your creations to Graphic 45, so that we can find them on social media.”
Thank you for stopping by.
Lots of Love, Sabaa

2 Responses
This is ABSOLUTELY gorgeous!!! However, I have looked extensively online and cannot find this type of plain wooden cutlery box ANYWHERE. Can you please let us know where you purchased this item? Thanks so much!
Hello Kelly, Thank you for taking a look at Sabaa’s desk organizer. Here is the link that Sabaa used to purchase this item: https://handilane.com/products/shadow-box-organizer-2?_pos=17&_sid=5d84e8585&_ss=r
I am not sure if they ship internationally, but hopefully this info will help. Happy Papercrafting!