Hello, G45ers!
In celebration of the final days of our #G45TravelJournal – August Challenge we have a Pop-up Travel Journal and tutorial to share with you. This summer fun album was created with Graphic 45's new Lost in Paradise paper collection, by Brand Ambassador, Vera Shelemekh. This step by step tutorial is great for any mini album or card and can be used over and over. So pull out your paper and let's have some fun!
Pop-Up Travel Journal Tutorial
“Add a pop up element to your travel album to make it unusual and exciting. Lost in Paradise collection has everything to create a detailed pop up with a WOW effect.
I’ll show some tips and tricks on how to make a chubby tropic bush with flying birds and butterflies. Just get ready your travel album, make sure it has a spare page with a crease in the middle and let’s start.
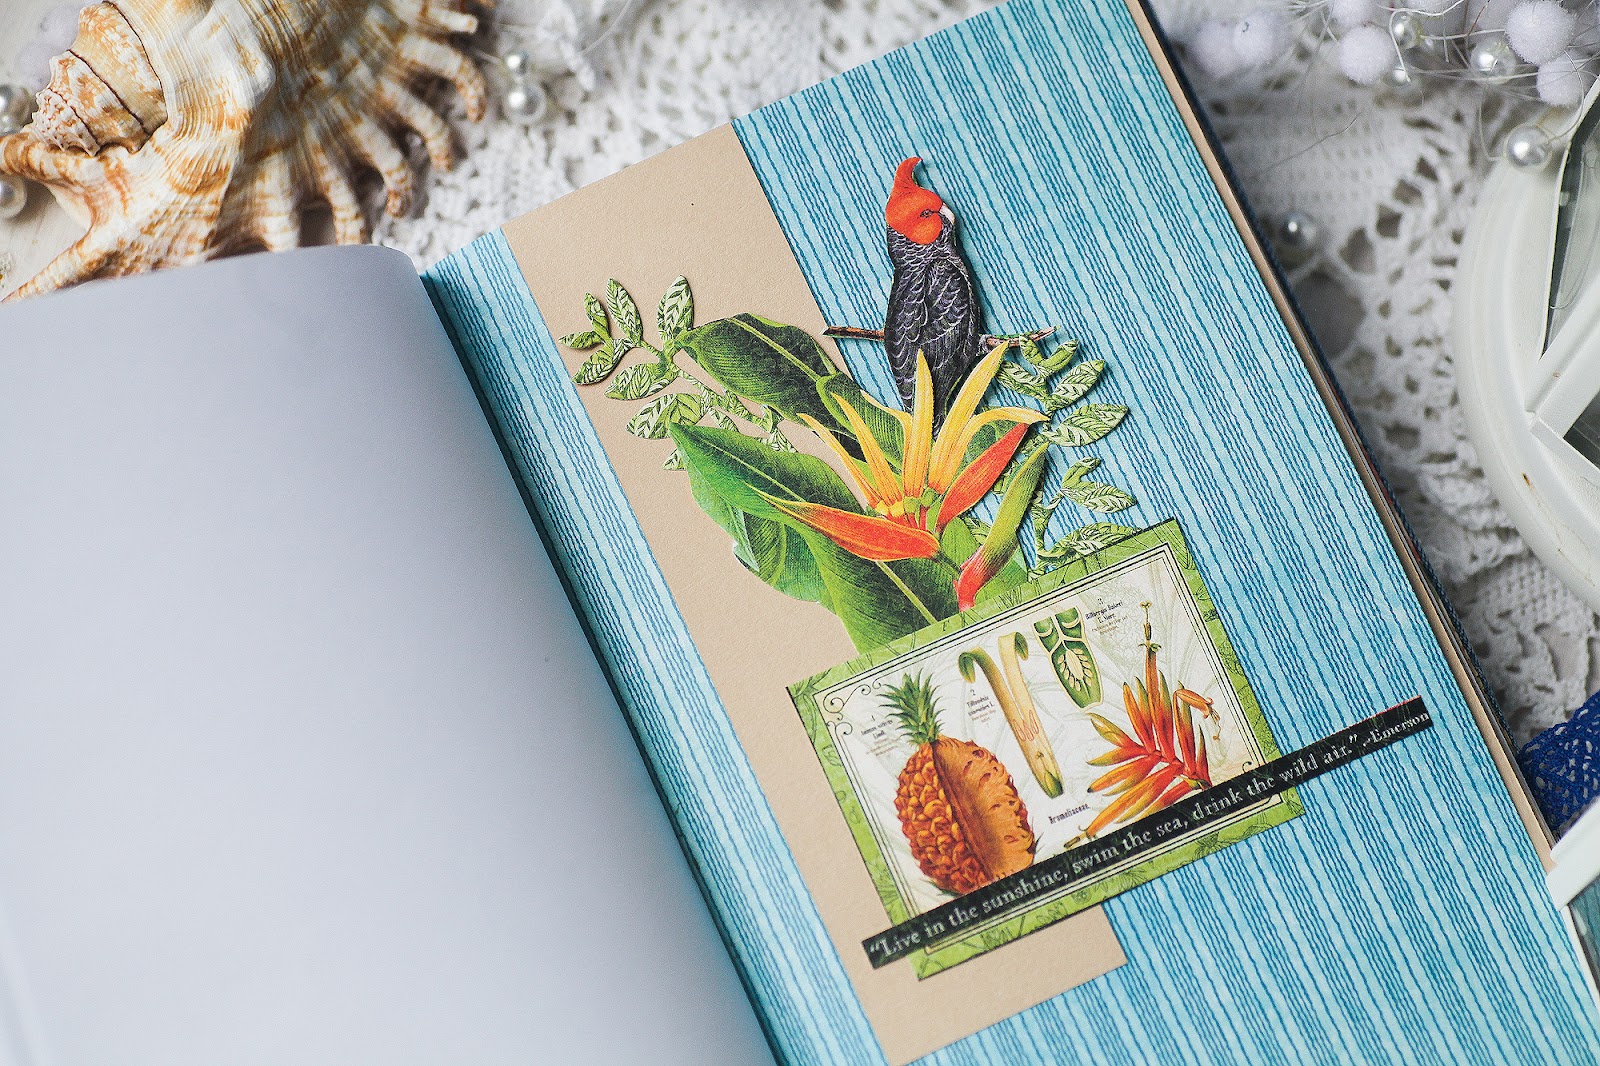
This is my travel. It has jeans cover, it’s 8×5 In and it’s decorated with Lost in Paradise chipboards and fussy cuts.
And this is the Pop up spread.
Step by Step Tutorial
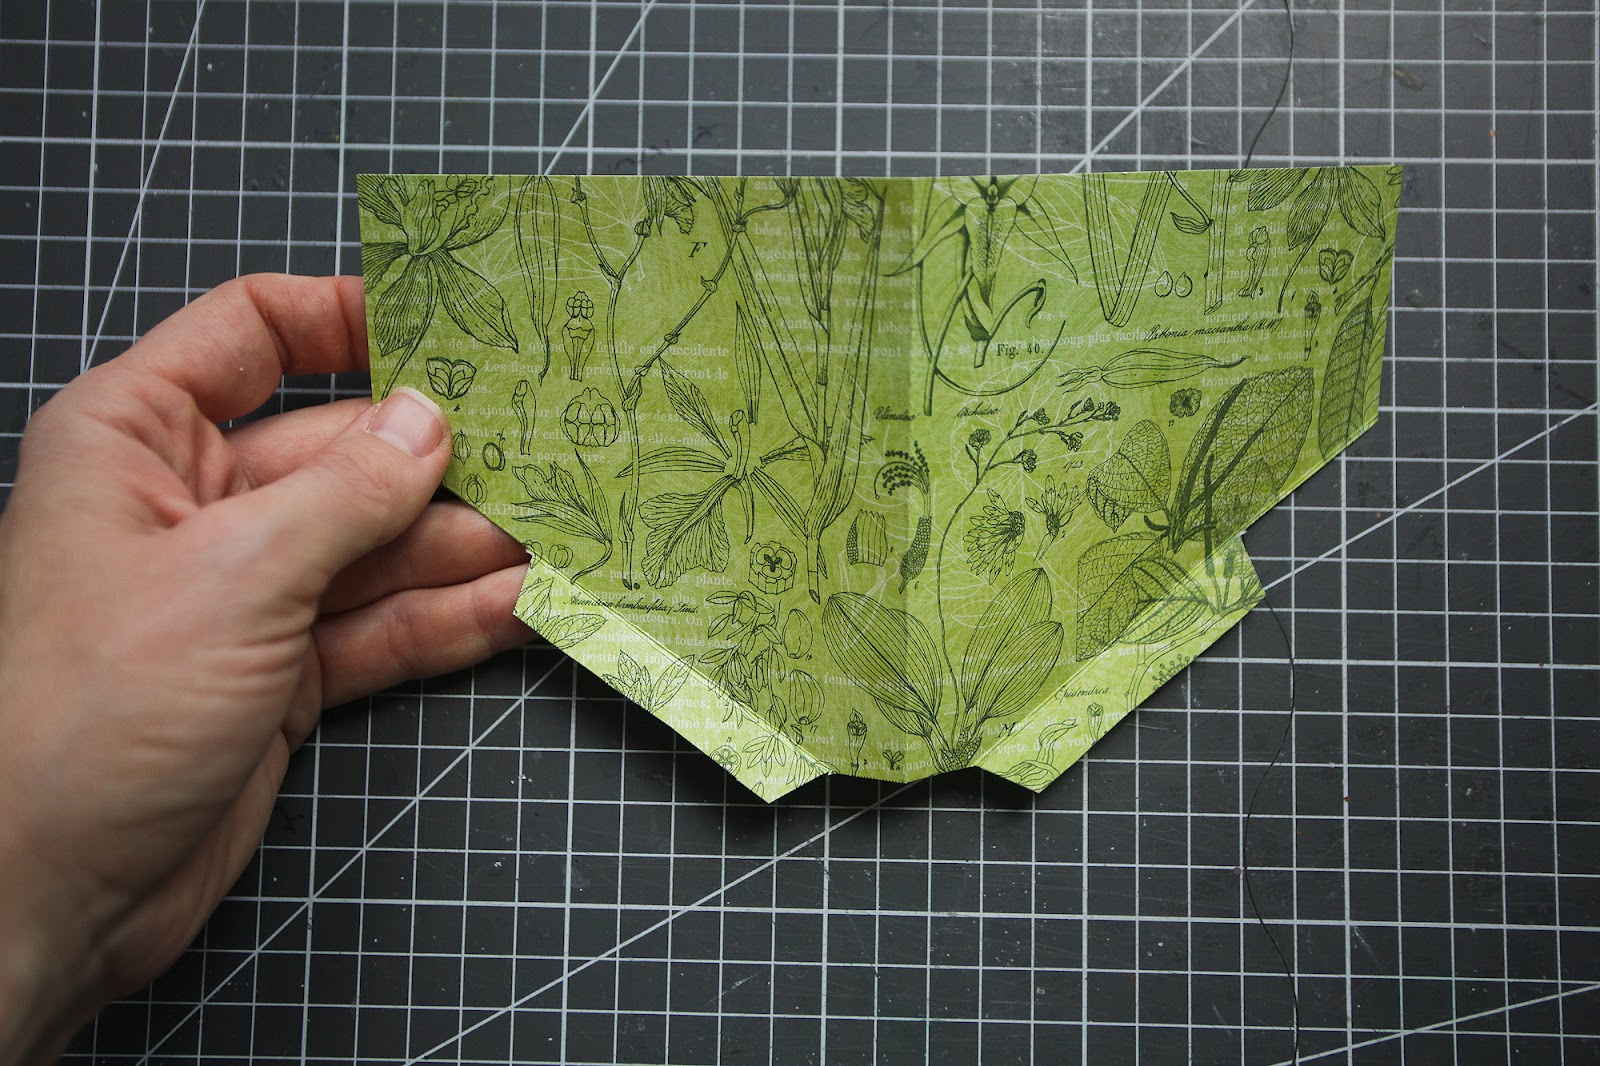
1) You will need a spare page inside the travel album with a crease in the middle. Also, take a piece of paper about 4×8 Inches and fold it in half.
2) Fold the diagonal crease from the middle to the edges making an angle of about 35-40 degrees.
3) Cut the bottom edge (below the angled crease) into gluing tabs.
4) Also cut the edges of the gluing tabs as shown on the picture
5) Unfold the piece of paper
6) Put the glue on the left tab and adhere it to the page. The Pop up’s central crease should be matching the central gully of the page in Travel book.
7) Fold the pop-up element into its closed position. Put glue on the right gluing tab.
8) Close the page and press firmly. While pressing cut the protruding parts if necessary.
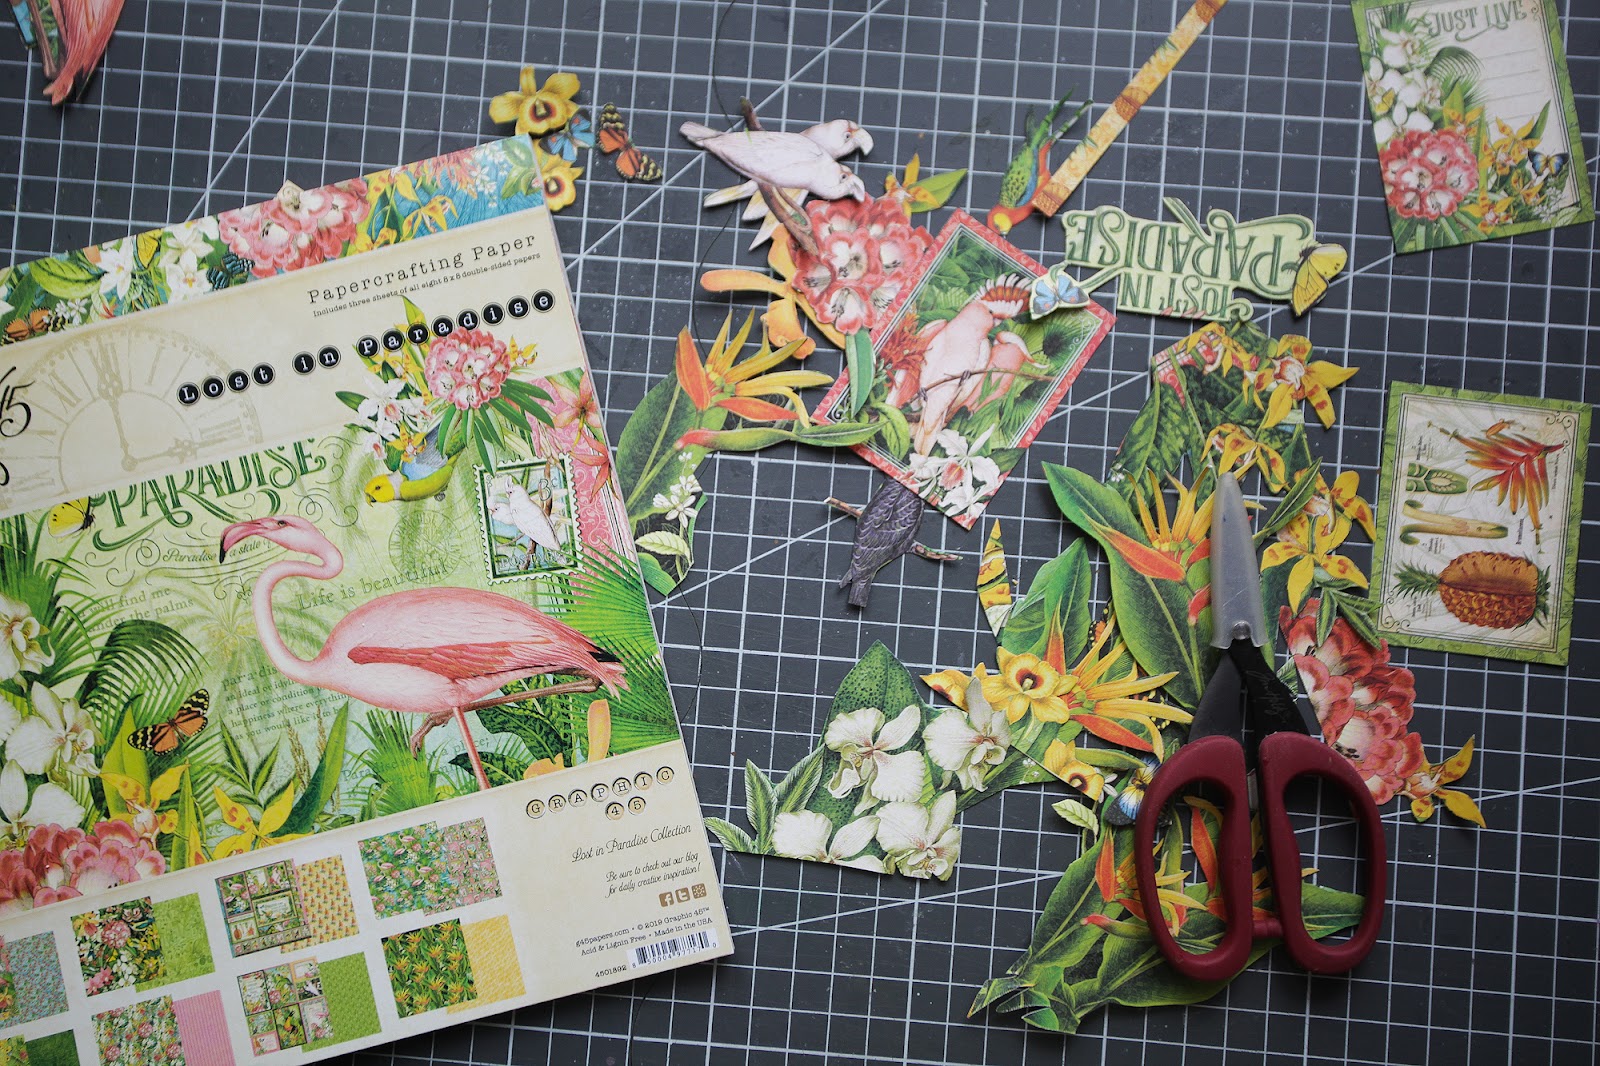
9) Cut flowers, birds and butterflies from Lost in Paradise 8×8 set.
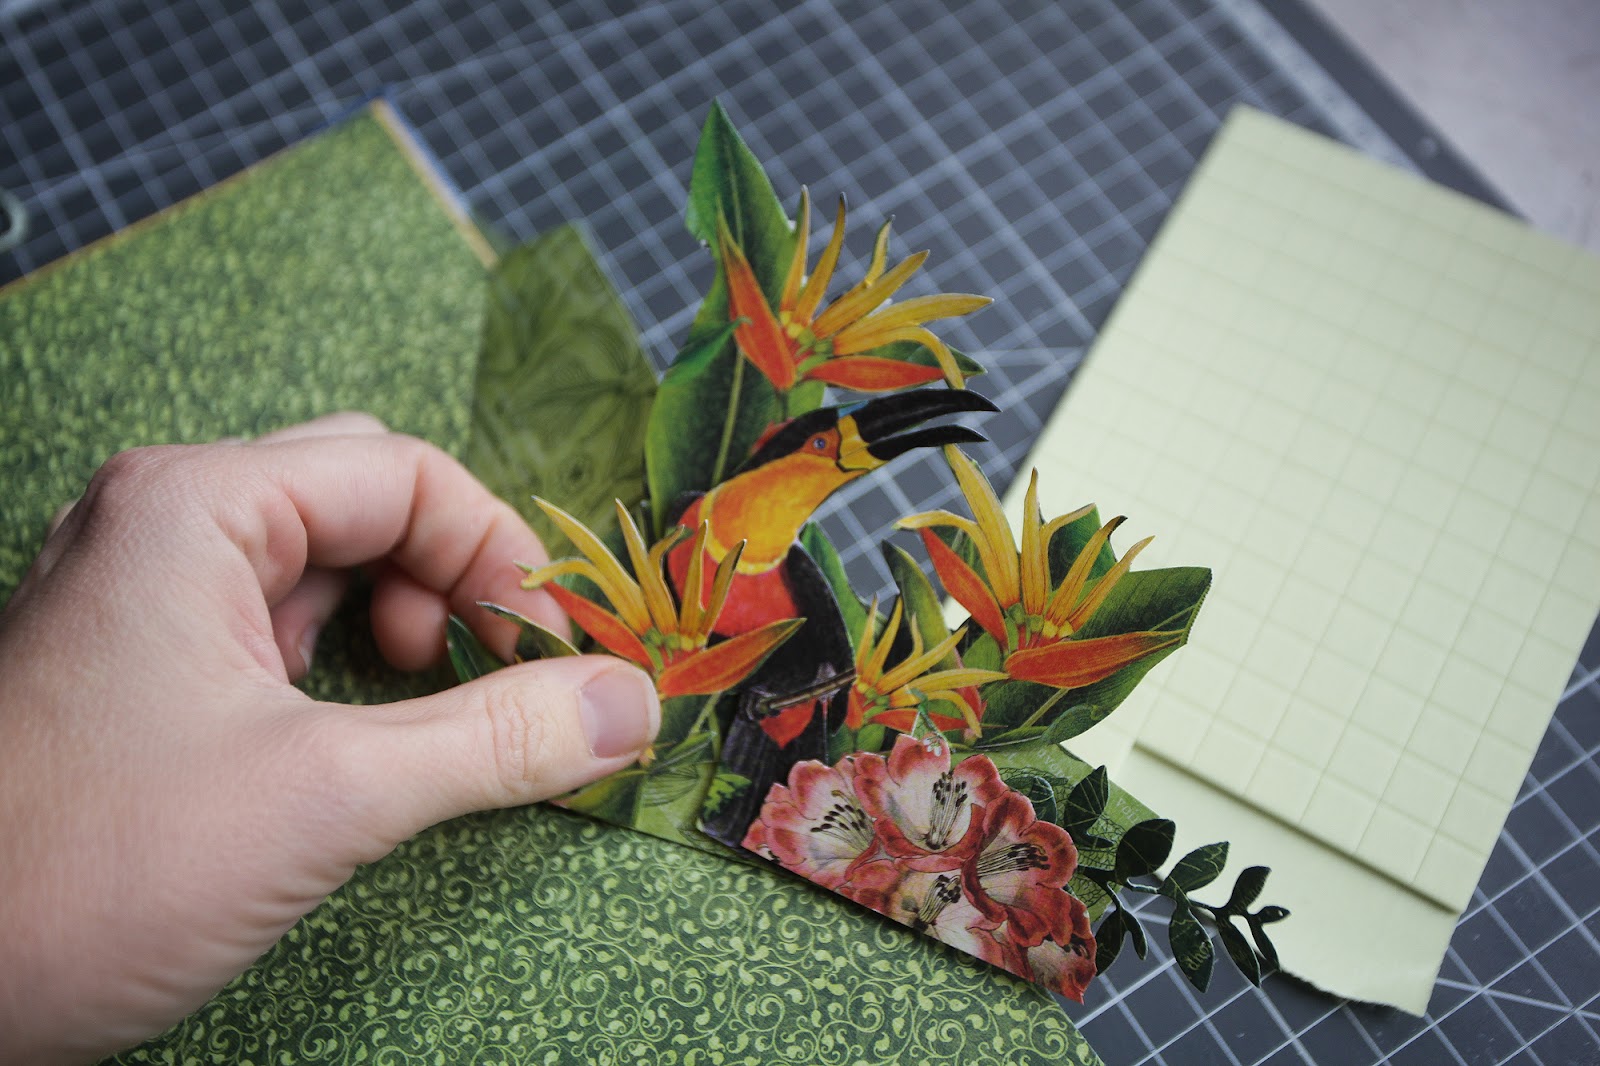
10) Adhere the elements one by one to the pop up using glue and adhesive pads.
11) Every time you adhere a new element, close the page and make sure nothing is sticking out.
12) Take some thin plastic stripes.
13) Glue them to the backside of the elements on the base. Don’t forget to check the stripes are not sticking out when the page is closed. If they do, move them to the opposite direction.
14) Adhere fussy cut butterflies and birds to the plastic stripes.
15) Use your Die cut machine and Graphic45 dies to cut more floral elements.
16) Add the die cut elements and a title to the composition.
Tips:
You can make the pop up (the tropic chubby bush) wide or narrow by moving the gluing tabs up and down the page but the crease should be always in the middle.
Use plastic details to make constructions invisible.
Every time you adhere a new element to a pop up construction, close the page and make sure nothing is sticking out.”
Graphic 45 Supply List:
|
|
|
|
|
Other Supplies:
Happy Papercrafting!