Hello, G45ers!
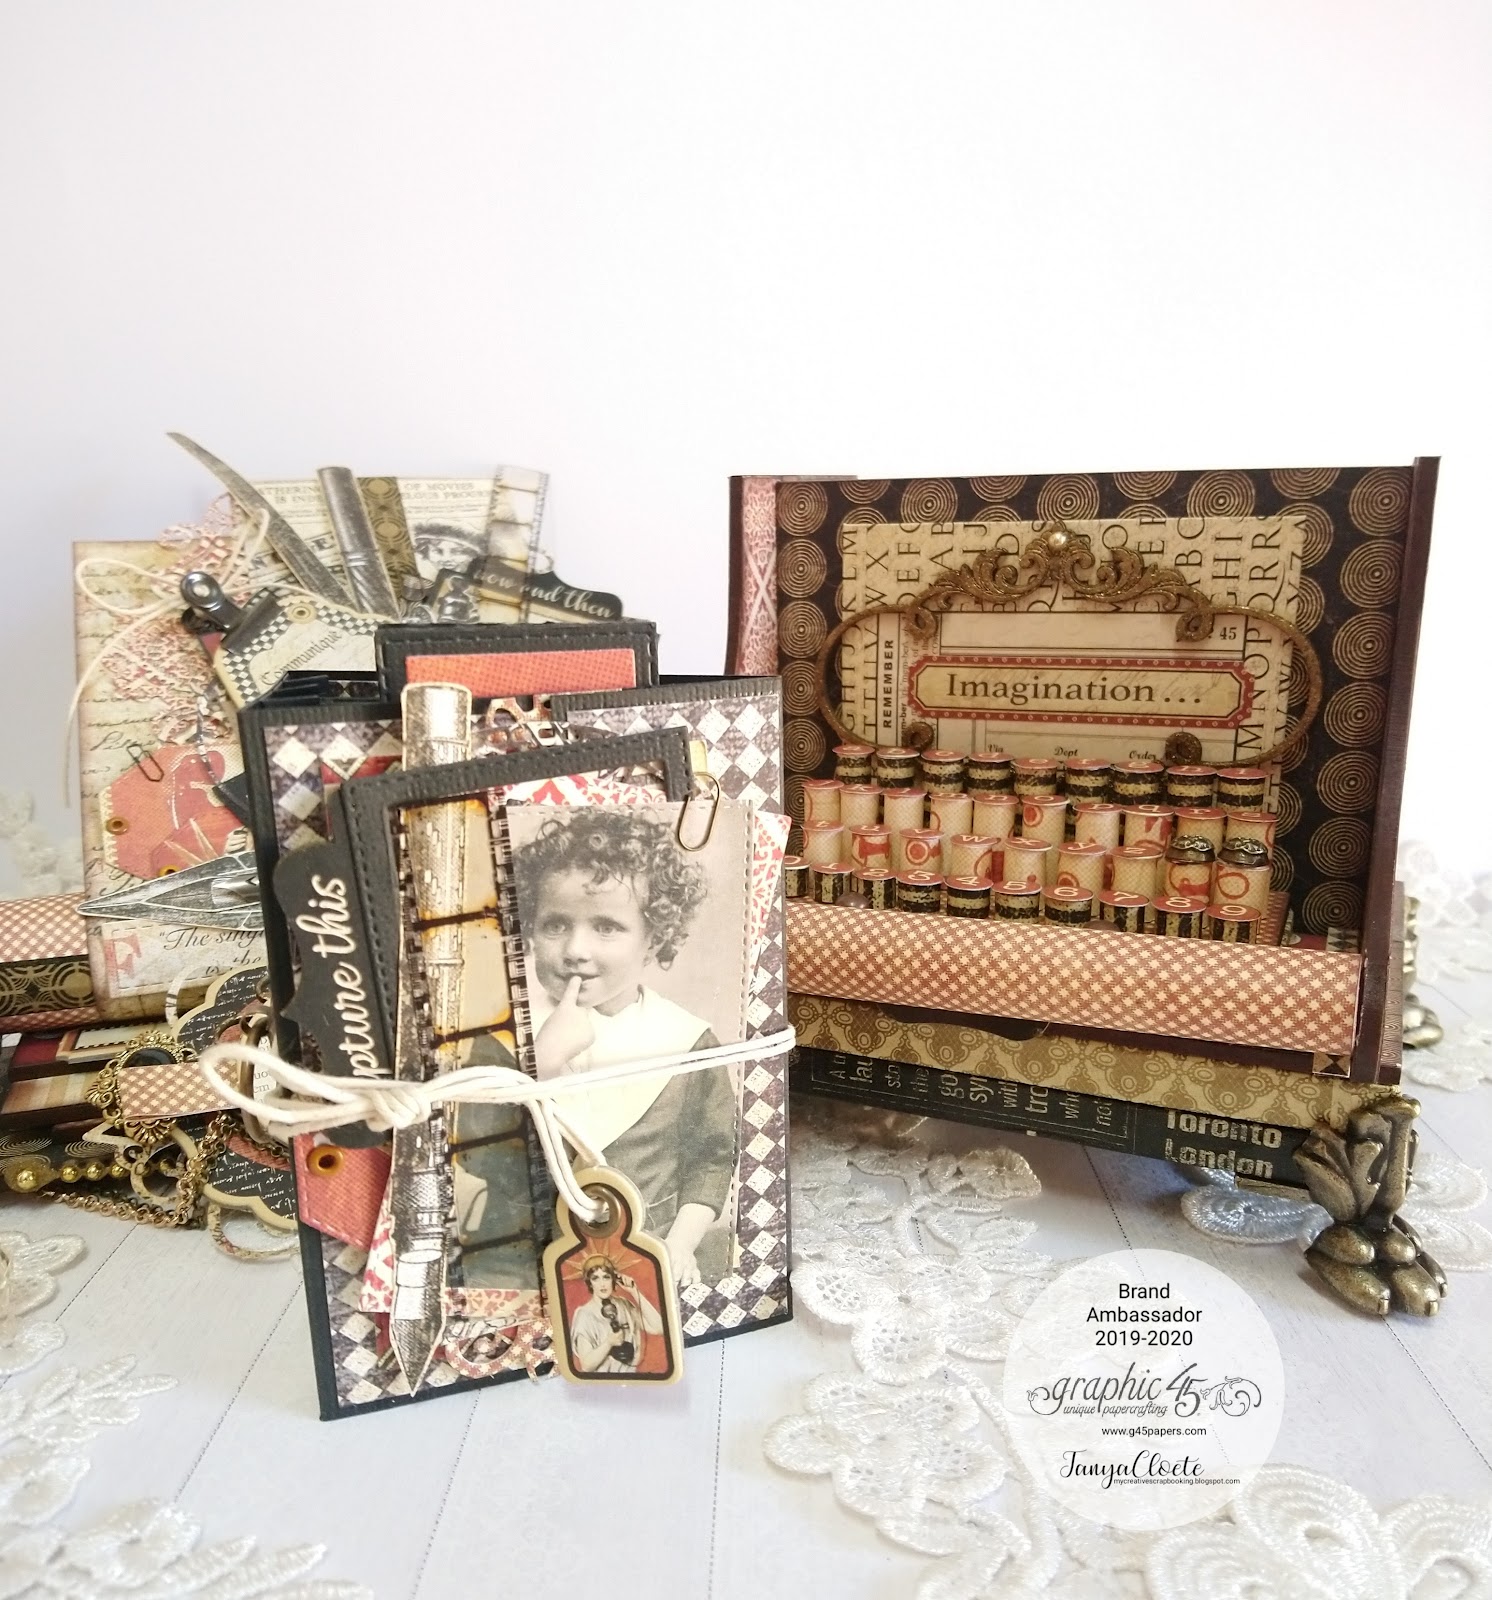
We have a grandiose off the page project to share with you today! Today's blog features a DIY Typewriter and Waterfall Mini Album starring our Communique – Deluxe Collector’s Edition. Both of these projects have been created by the Altered Art Champion, Tanya Scrap. We encourage you to grab a cup of tea and take in all the beauty, tips, and step by step photos.
#G45Technique Communique Typewriter with hidden Waterfall Mini Album
By Tanya Scrap
“Hello dear G45ers!
Happy to share with you my #G45Techinque project this month featuring the fabulous Communique Deluxe Collector's Edition. I created this Typewriter box with one of my favorite lines and it suits this project so well! I have created this piece using the template credit to Tara's Craft Studio. You can find the template here if you wish to make your own. I have also created a cute little Waterfall Mini Album that is hidden on the inside of the Typewriter box.
Herewith the Supplies and Instructions you may use to recreate such a project:
G45 Supplies used:
|
|
|
|
|
|
|
|
|
|
Communique Deluxe Collector's Edition
Antique Brass Metal Clock Keys
Antique Brass Metal Door Plates and Knobs
Antique Brass Stamped Metal Brads
Clearsnap Decades Dye Pad Dark Cashmere
Other Supplies used:
Various Cutting Dies
Tonic Studios Keepsake Book Maker Simple Spines Die
Silhouette (optional)
Red Double Sided Tape
Double Sided Tape
Black Cardstock
Vellum Paper
Foam Board
Metal Embellishments
Metal Chain
Chipboard Frame
Embossing Powder
Soft Gloss Gel
Masking Tape
String
Eyelets
Mini Paper Clips
Film Strip Ribbon
Flat Back Pearls
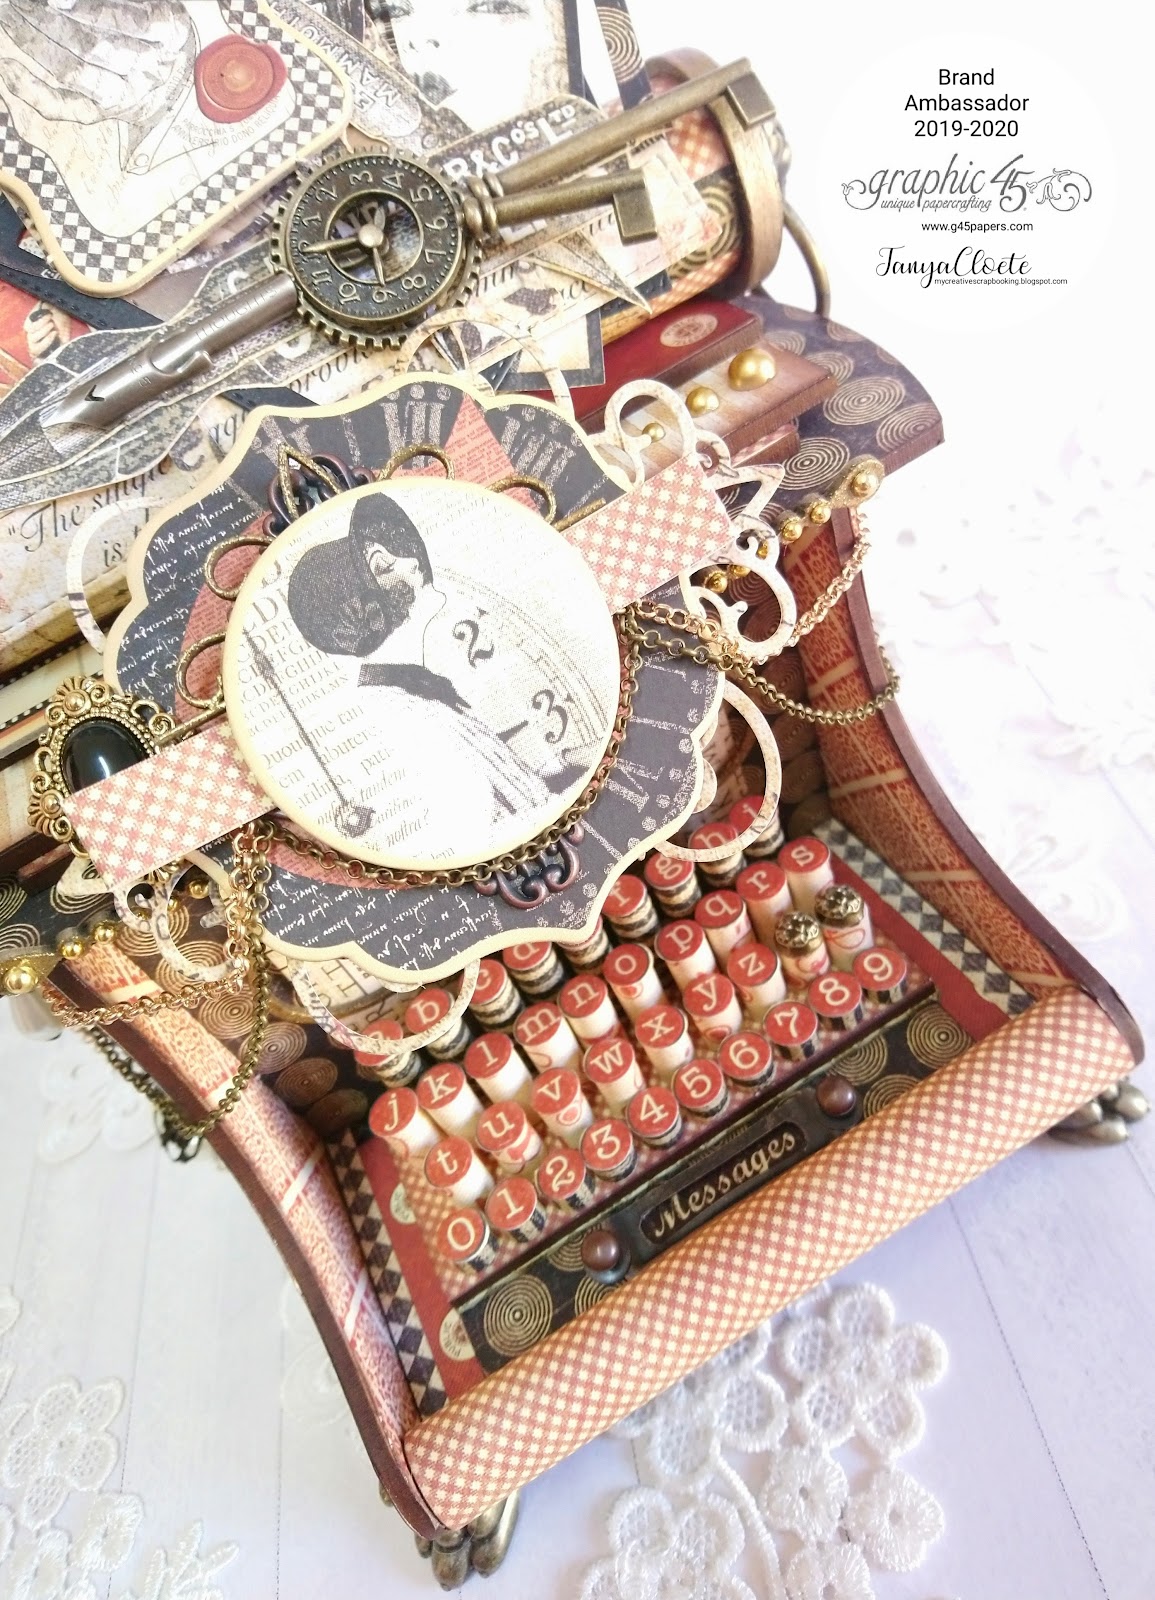
I had the base pieces of the typewriter laser cut from wood but generally, you could use foam board too. Cut the number in shapes as per the link above.
Tip: Number each piece lightly with a pencil so that you do not get confused which piece goes where.
I cut the same shapes from my Silhouette (optional) using the pattern sheets from the collection to be adhered on top of the wood pieces. Ink the edges of each with the dark cashmere ink pad.
Tip: Remember to cut extra shapes of some pieces because they will have to go on opposite sides.
Cut the tube pieces from the pattern sheets (red paper) as well as the 'typewriter sheet' (paper with writing) that goes on top measuring 13.5 cm x 17 cm. Cut 2 extra foam board pieces measuring 15 cm x 12 cm. Cover the foam board pieces with washi tape.
Tip: These 2 extra foam board pieces will be adhered to the bottom of the typewriter. This is optional, I only did this so that the claw feet will fit when attached.
Cut the typewriter keys from the pattern sheets, roll tightly between your fingers and glue.
Tip: Use a quiling tool to start the process it just makes it easier to roll. Adhere these pieces with a soft gloss gel thus ensuring that the paper won't come loose.
Use a die with lots of little circles if you have (optional) to cut the letters and numbers from the collection sticker sheet.
Tip: Adhere them with masking tape making sure they do not move from the position you want it. You could use the stickers as is but I did it this way because they did not fit completely onto the keys.
Assemble the Typewriter accordingly. Note do not seal the lid of the box, this is where the Mini Album will go in.
The Mini Album
Cut a spine from black cardstock using the Tonic Studios Keepsake Book Maker Simple Spines Die. When cutting the spine measures 88mm x 203 mm. I cut mine in about half because I wanted it to be really small.
The measurements are as follows:
– Mini Album = 23 cm x 11 cm.
– Spine = 11 cm x 4 cm.
– Score at 7.5 cm for the front, 4 cm for the spine and again 7.5 cm for the back.
– Score the flap at 3.5 cm.
Adhere the spine in the 4 cm score gap.
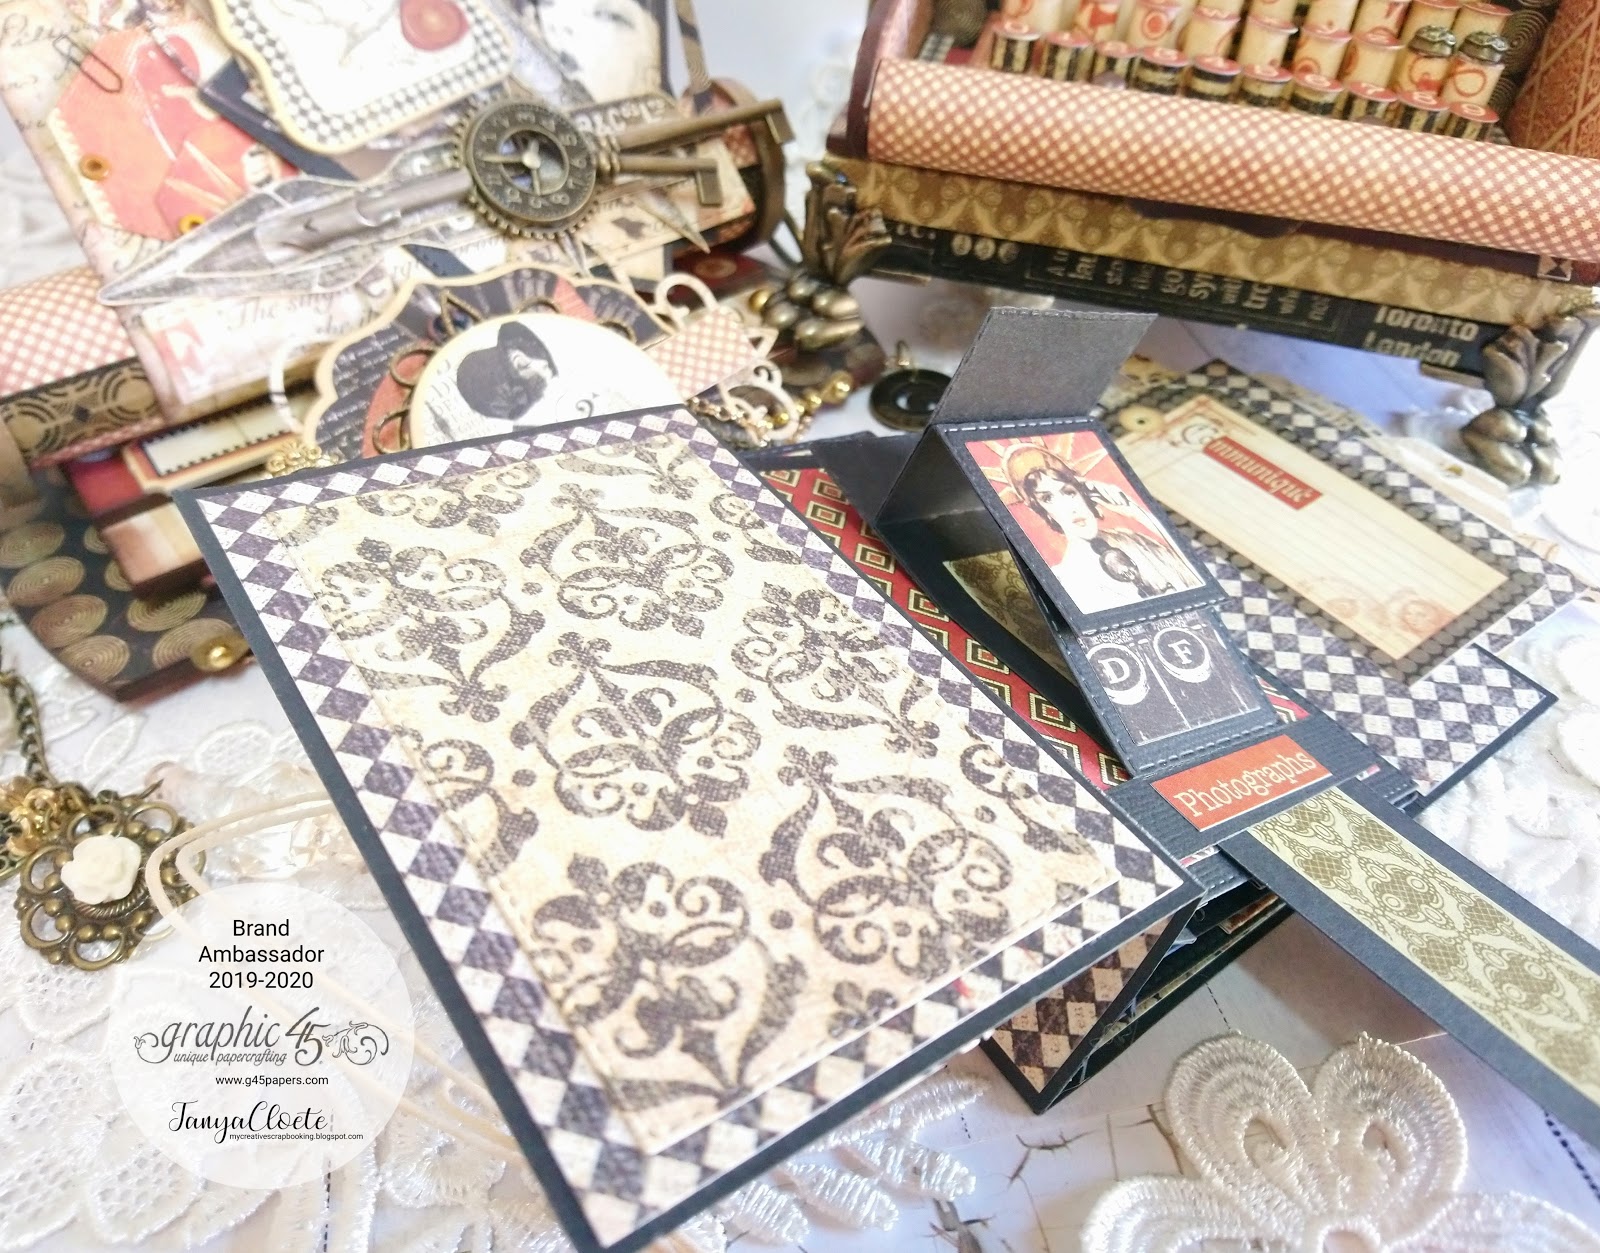
Inner pages and frames:
Cut three inner pages for the booklet from black cardstock. These pages should measure slightly smaller than the book 10.5 cm x 7 cm. Remember to cut an extra three strips measuring 10.5 cm x 1.5 cm, these will be adhered to the inner page and spine to make the pages flap easily. Mat the inner pages from the pattern sheets using a rectangle nesting die. Cut three frames from these dies too and add vellum behind them to add a photo.
Tip: Do not glue the frame completely, leave one side loose to be able to slide in a photo.
The Waterfall Cards:
Cut a strip (x3) from black cardstock measuring 22 cm x 4 cm, remember to include the strip piece at the end which should measure 6 cm x 1 cm.
– Score in half and fold.
– Score the strip again at 2 cm repeat three times – this is where you will add the square pieces.
– The square pieces should measure 4×4 cm, cut 4 of these.
– The mat pieces should measure 3×3 cm.
– The small handle should measure 2.5 cm x 1 cm, fold in half, this will be used to pull the card so it forms a waterfall.
Cut some shapes using cutting dies and fussy-cut a few elements for decoration.
Emboss the chipboard frame with gold embossing powder. Place the sticker word 'imagination' in the center.
Add another sticker behind the metal pull embellishment and place at the bottom of the typewriter keys. This will be used as the 'space bar'.
Adhere the claw feet on the bottom and add the metal door plate on the side, adorn with a metal key.
Add two of the stamped metal brads to the typewriter keys.
Place a chipboard embellishment in the center of the lid.
Decorate the sheet on top with some die-cut pieces and metal embellishments.
Add some matte pearl gems on the lid.
Add some flat back pearls to the brass door knockers eyes and adorn the handle with some metal and
chipboard embellishments, let them hang from a piece of metal chain.
Add a ring fastener brad to the spine of the album, to be used as a 'handle' to move the album in and out from the box.
Decorate the front cover of the album with die-cuts and a photo.
Add a tag sticker on the side of the flap of the album.
Tip: This is to cover up the die-cut pieces shown at the back.
Add a sticker sentiment to the waterfall card on the small strip section.
You could add photos to the waterfall squares instead of the matted pieces from the collection.
Thanks for stopping by!
Happy Papercrafting!”
Happy Papercrafting!
Want even more Graphic 45? Sign up for our newsletter here!